Main Control Panel
Monitor Kontakt's resource usage, access files and preferences, and change how the Kontakt window is displayed in the Main Control Panel.
The Main Control Panel is the topmost row of elements in the Kontakt window. Here you can select which parts of the user interface will be displayed, access various global menus, and view statistics about Kontakt's overall resource usage.
The Main Control Panel contains the following key features:

File: Opens the File menu, which provides options that relate to saving, loading, and creating new instruments and banks. Refer to File Menu. The Options menu is also found here. Refer to Options Dialog.
Library: Opens the Library Browser, which provides access to all your Kontakt Factory Libraries, Instruments, Snapshots and Multis, as well as your own User content. Refer to Browser and Presets.
View: Determines if key elements of the interface will be displayed. This menu allows you to customize the Kontakt workspace to display the tools that you need. Refer to View Menu.
Shop: The shop links to the Native Instruments web shop where you can find new instruments to extend your library.
System Performance Meters: Displays a number of system meters that are continuously updated during operation. Refer to System Performance Meters.
File Menu
This drop-down menu is the first element in the Main Control Panel. The File menu contains the following functions:
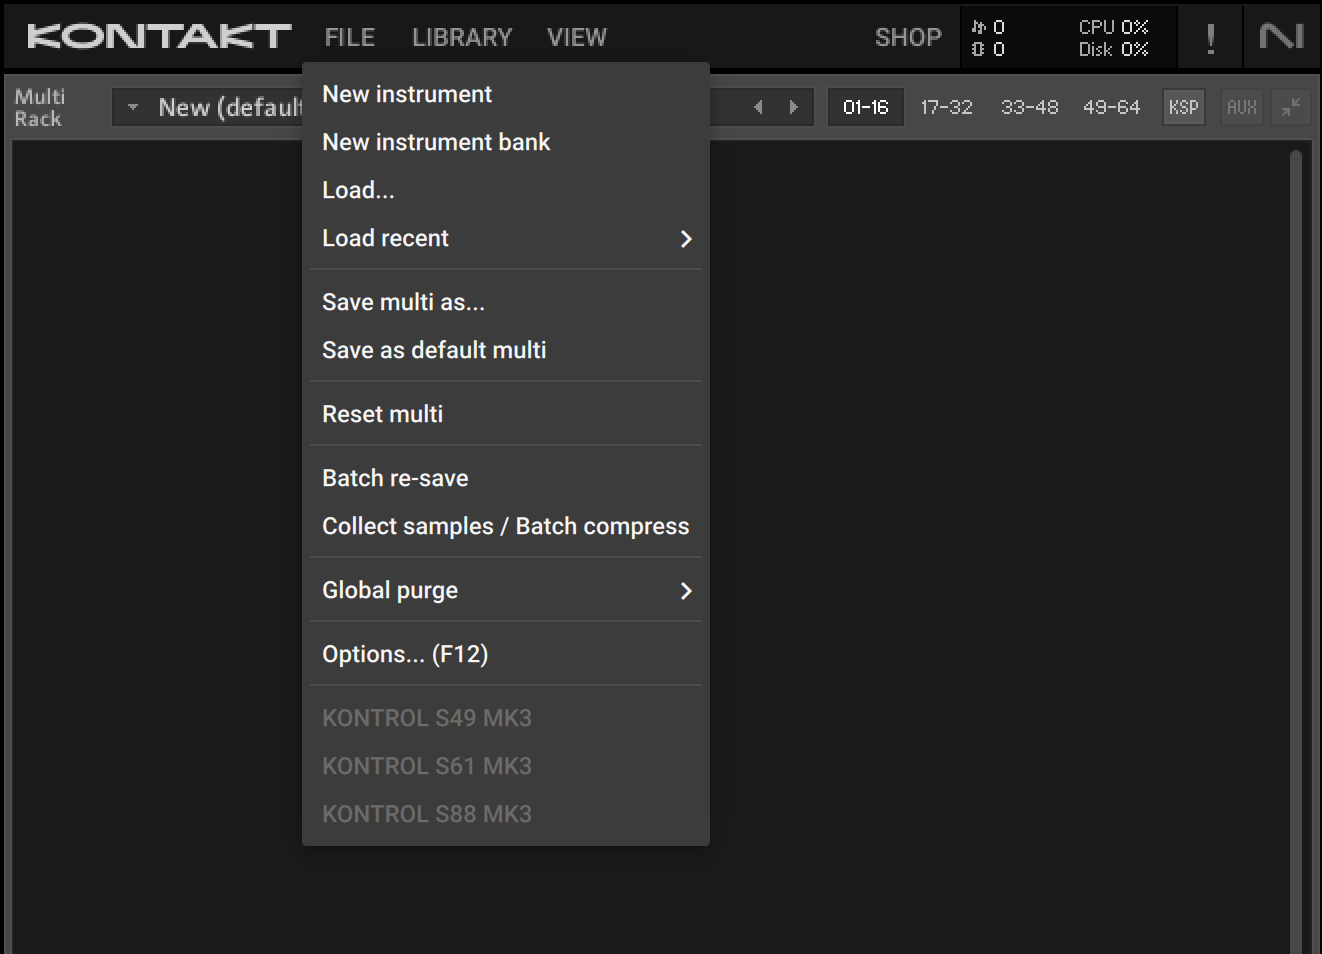
New instrument: Adds a new Instrument to your Multi. Whenever you create a new Instrument, Kontakt will use a default Instrument file as a template, which is usually empty. Overwriting this file with your own version allows you to define your own default settings. For example, you might want new Instruments to contain a Send Levels module in their Instrument Insert Effects chain by default. To set this up, create a new Instrument, insert the module into its chain, and select Save as default instrument from the Save menu while the Instrument is open for editing.
New instrument bank: Adds an empty Instrument Bank to your Multi. Instrument Banks are described in detail in section Loading and Creating Instrument Banks.
Load…: Opens a file selector dialog, asking you to locate and load any object that Kontakt can handle, whether it’s an Instrument (.nki), a Multi (.nkm), or an Instrument Bank (.nkb).
Load recent: Contains an up-to-date list of files that have recently been opened in Kontakt. Select a file from this sub-menu to load it.
Save as: Allows you to save any Instrument in your Multi to an .nki file for later reuse. When you select this entry, a sub-menu will open that contains a list of all Instruments in your current Multi. Selecting one of them opens a Save dialog that allows you to choose a location and change the name of the Instrument. Note that the file name, without the .nki extension, will be used as the Instrument name that is displayed in the Instrument Header.
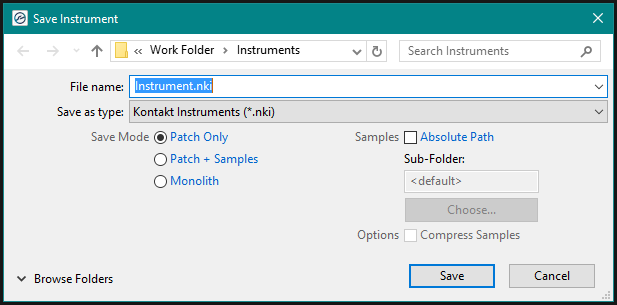
Below the file selector, the dialog lets you choose how Kontakt should handle the Samples that are being referenced by the Instrument. When you have added these Samples to your Instrument during your current session, they’re still in their original location, and the Zones in your Instrument reference them via their full paths; the various options in the save dialog allow you to fine-tune this behavior before your Instrument is written to disk:Referenced SamplesInstrument
Patch Only keeps the Samples in their original locations and leaves the file references in their current state. This creates very small files, as only the Instrument parameters are saved. Note, this can leave the relation between the Instrument and its Samples in a fragile state. If the Samples are moved to different location or deleted, Kontakt will not be able to find them the next time you attempt to load the respective Instrument. In such cases, a Samples Missing dialog will appear, asking where Kontakt should search for the Samples. The Samples Missing dialog and its options are explained in section Loading and Creating Instruments.
If you enable the Absolute Sample Paths checkbox below the Patch Only option, the Sample files will be referenced by the Instrument with their absolute paths; this has the benefit that Kontakt will still be able to find them when you move the Instrument file to a different location. However, if you know that the Samples already reside in a folder that will always be moved and backed up along with the destination folder of your Instrument, you can keep the saved file reference relative to the Instrument location by disabling the Absolute Sample Paths option.
Patch + Samples will save the .nki file and copy the contained Samples to a new location, changing the file references within the Instrument to the copies in the process. If you leave the Sample Sub-Folder option below set to its Use Default value, Kontakt will save the Sample files to a Samples folder inside the destination location of your Instrument file; this folder will be created if it doesn’t exist yet. That way, the Samples will be kept close to the Instrument, which helps you keeping track of them when doing backups or moving directories. You can also specify a different Sample location, though; for example, you might want to use a common Samples folder that resides in the directory of your project.
Monolith will combine the Instrument and its referenced Samples into a single, large file. This is the safest option to choose in terms of keeping Sample references intact, as the Samples cannot accidentally get separated from the Instrument later. This is also a good way to create Instruments that should be distributed to other users of Kontakt.
Should you choose to save the referenced Samples along with your Instrument data by selecting either Patch + Samples or Monolith, you further have the choice to save them in a Below the file selector, the dialog lets you choose how Kontakt should handle the compressed format by checking the box below the sub-folder field. In this case, Kontakt will write the Samples using a proprietary, lossless audio codec that typically yields compression rates between 30% and 50%. This will not only improve access performance when streaming the Instrument from disk, but will also reduce its memory footprint, as Kontakt will decompress the Samples on-the-fly from memory with very little CPU overhead. The downside of using compressed Samples, however, is that you cannot use external wave editors to access them directly anymore.
It’s important to keep track of the ways the Sample and Instrument files on your hard disk relate to each other; this protects you from unpleasant surprises when you move files around, delete them, or recover Kontakt data from a backup.
Tip
When you are using Kontakt as a plug-in inside your host program and save your session, all Multi and Instrument data will be included in this session file. Sample references will be saved in an absolute fashion, so you may get a Samples Missing dialog when you open the session after you have moved your Samples. In the Loading tab of the Options dialog, you can specify a base path for your Non-Player content, and also choose if you want to store referenced paths relative to the base path. When a host project is saved with this option selected, Non-Player content will be able to resolve without the Missing Content dialog, if the libraries are located on the computer’s path as defined in the base path field. This makes it easy to share session files with Kontakt instances across platforms. For more information, refer to Loading Tab.
Save multi as…: This saves your current multi to an .nkm file on your hard disk. While the resulting Multi file will contain all Instrument data, Kontakt will still need to take care of the Samples that are referenced by the Instruments. Thus, the save dialog offers the same Sample management options as described in the Save as… paragraph above. Saving a multi will also save the output routing options.
Save as default instrument: This command is only viewable when you are editing an instrument. It saves the selected Instrument as your default one so whenever you create a new Instrument, either via the New Instrument command of the Files menu, or by dragging Samples from the Side pane into the Rack, Kontakt will use this Instrument as a template.
Save as default multi: This command will save your current Multi as a default template that Kontakt will load at startup or when you choose the Reset Multi command.
Reset multi: This will restore the default Multi that’s loaded at start-up, removing all Instruments from your current Multi in the process.
Batch re-save: As explained in the paragraph about the Save function, Kontakt Instruments that include references to external Sample files can cause problems if either the Instrument or the Sample files are being moved to a different location. In such cases, you will be presented with a Samples Missing dialog that asks you in which places Kontakt should look for the missing files (refer to Loading and Creating Instruments). While it’s not a big problem to let Kontakt locate the Samples of one or two Instruments via this dialog, and then re-save them afterwards in order to make the changes permanent, the described effect will be worsened by an order of magnitude if it occurs with a whole library. This can happen if you move the library folder or its contained sub-folders around, and makes it very tiresome to access the library, as every attempt of loading an Instrument will be answered with a Samples Missing dialog.
To fix the problem manually, you would have to load each Instrument, locate the missing Sample files via the Samples Missing dialog, and re-save the Instrument to its original location within the library folder. For large libraries, this is unfeasible. The Batch Re-save function automates this process; when you select it, a selection dialog will appear, asking you to choose a folder. After clicking Choose, all Instrument, Multi, and Bank files in this folder and its sub-folders will automatically be scanned for unresolved Sample references; if any are found, the Samples Missing dialog will appear once, allowing you to specify which places should be searched to resolve the references. Once Kontakt has successfully located the Samples, the affected Instrument, Multi or Bank files will be re-saved with corrected references, so afterwards, you’ll have a consistent library again.
Notice
As the Batch Re-save process will overwrite the Instrument, Multi, and Bank files within your selected folder, it’s recommended to make a backup of this folder before you execute the command.
Collect samples/Batch compress: If you are working with a library of NKIs that are referencing samples in multiple locations, or you wish to compress (or even de-compress) the samples of a library, this function allows you to compile samples, instruments, banks and multis into a single location.
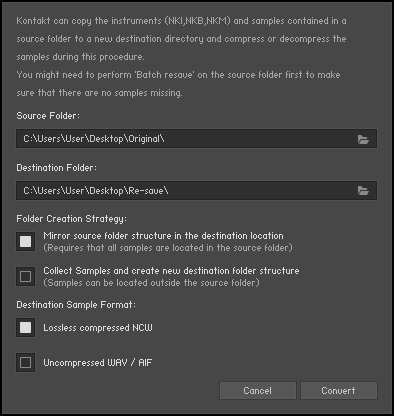
When you select this option, a dialog box will appear. Here you must select a source folder (where your nki, nkb and nkm files are currently located) and a destination to which you wish to have these files compiled and copied to.
There are two different folder creation strategies:
Mirror source folder structure in the destination location: This mode keeps the folder structure of the source folder when generating the destination folder structure, so there are no explicit "Instruments" and "Collected Samples" subfolders in the destination folder when using this mode.
Notice
One exception: When batch-compressing a source/library folder, if there is an Instrument in the library folder that references a sample outside the source/library folder (and its subfolders), a "Collected Samples" subfolder will be generated in the destination folder and this sample will be saved there.
Collect Samples and create new destination folder structure: In this mode the folder substructure of the target folder will be different from the source folder’s structure: Instrument files will be saved in an "Instruments" subfolder, while all samples are saved in "Collected Samples". This prevents having to resave the same sample more than once (if it was referenced by more than one Instrument in the source folder for instance).
Tip
Whichever strategy you choose, samples and Instruments in the source folder will neither be deleted nor updated. Impulse Response samples and wallpapers of the source Instruments will be re-saved as well, but without compression.
For converting uncompressed samples to lossless compressed .ncw-files select Lossless compressed NCW.
For converting compressed .ncw-files back to an uncompressed format select Uncompressed WAV / AIF.
Notice
Note that Batch Compress does not work for copy-protected libraries.
Global purge: The purge mechanism in Kontakt keeps track of which samples in an instance have been actually triggered in a session, and gives you the option of removing all other samples from the Instrument. This way, you can reduce the number of samples that are being kept in memory to the subset that you have actually used in your arrangement. Place your mouse over this entry in the Files menu to open a submenu with options for sample purging and loading. The Global purge sub-menu contains four entries:
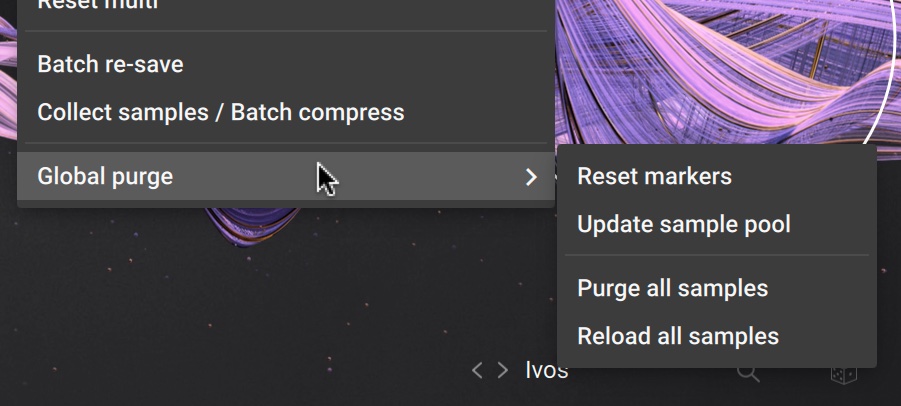
Reset markers: Whenever Kontakt plays a sample in any of your Instruments, it will flag the respective sample as being used. Using this function, you can delete all of these flags, thereby resetting all data that Kontakt has gathered about sample usage so far. After you have finished your work on a part, you should select this function once and then play your part; this way, only the notes that have actually made it into the final part will be flagged as used. Afterwards, you can proceed by choosing the Update sample pool function described below.
Update sample pool: This function removes all samples that are not currently flagged as being used from memory, and reloads any currently purged samples that have been triggered since the last purge operation. In other words, it brings the sample pool in sync with the sample usage flags it has gathered since the last purge operation.
Purge all samples: Unloads all samples from RAM. This allows you to reverse the usual purge process: you can play your arrangement in a “silent run”, and then load only the Samples that are actually being used via the Update sample pool command afterwards.
Reload all samples: Reloads all Samples, reverting any previous purge actions.
Tip
You can also purge samples per Instrument using the Purge menu in the Instrument Header. See Purge Menu for more information.
Purge this instance/Purge all instances: These options replace Global purge when Kontakt is hosted in a DAW. It allows applying the above purge options to one or all instances of Kontakt loaded in a session.
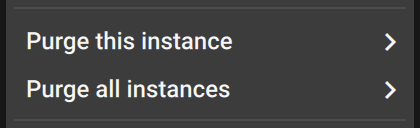
Note
Purge all instances will only work if all Kontakt instances are within the same process.
Options... (F12) : Opens the options dialog. Refer to Options Dialog.
Komplete Kontrol Keyboard: Shows the connected Komplete Kontrol keyboard. When a model is recognized its entry lights up and receives a checkmark.
View Menu
The View menu allows you to choose which key elements of the Kontakt interface will be displayed.
The View Menu contains the following options:
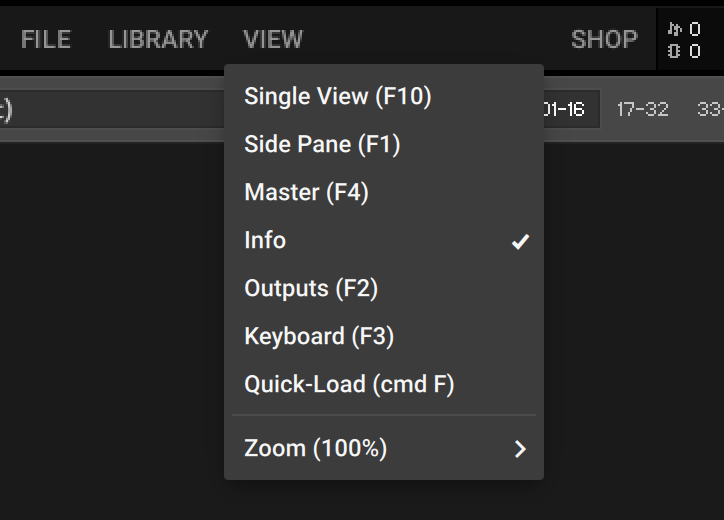
Single View / Rack View: Switches between Single View and Rack View.
Side Pane: Displays the Side Pane on the left side of the Kontakt window. See Side Pane.
Master: Displays the Master Editor panel, which contains a number of global parameters and common utility functions. See The Master Editor.
Info: Displays the Info Pane, which contains information about the currently selected control. See Info Pane.
Outputs: Displays the Outputs section at the bottom of the Rack area. See The Outputs Section.
Keyboard: Displays the virtual On-Screen Keyboard, which allows you to generate note and controller events. See The On-Screen Keyboard.
Quickload: Displays the Quick-Load Catalog, which is a user-defined browser for quick access to your favorite Kontakt files. See The Quick-Load Catalog.
Zoom: Sets the zoom scaling of the Kontakt window and allows switching between three performance modes for the user interface: Best quality, Balanced, and Best performance.
System Performance Meters
In the upper right section of the Main Control Panel, a number of system meters are being continually updated during operation.

Voice count, memory, CPU, and disk meters
The value next to the notes icon indicates the total number of voices that are currently being played (this is also known as the Voice Count).
Below, the total amount of allocated Sample memory is displayed; this figure will be much smaller when you’re using DFD Instruments.
The values to the right show the current CPU and disk load as percentage values. These provide immediate visual feedback on whether you’re close to maxing out your computer’s capabilities.
The exclamation point (!) is the Restart button and can be used if Kontakt is suffering from hanging voices (i.e. stuck notes) or persistent CPU overloads. Clicking this button will re-initialize Kontakt ’s audio engine, including all the instruments that are currently loaded. Essentially this button is a soft reset, returning all values to their starting positions, but without closing and reloading everything.
Options Dialog
The Options dialog is where you can configure Kontakt’s global program preferences, such as interface behavior, audio engine parameters, and MIDI options. Preferences are divided into several categories, which you can access via the tabs on the left side.
To open the Options dialog, click File and than Options... (F12) in the Main Control Panel.
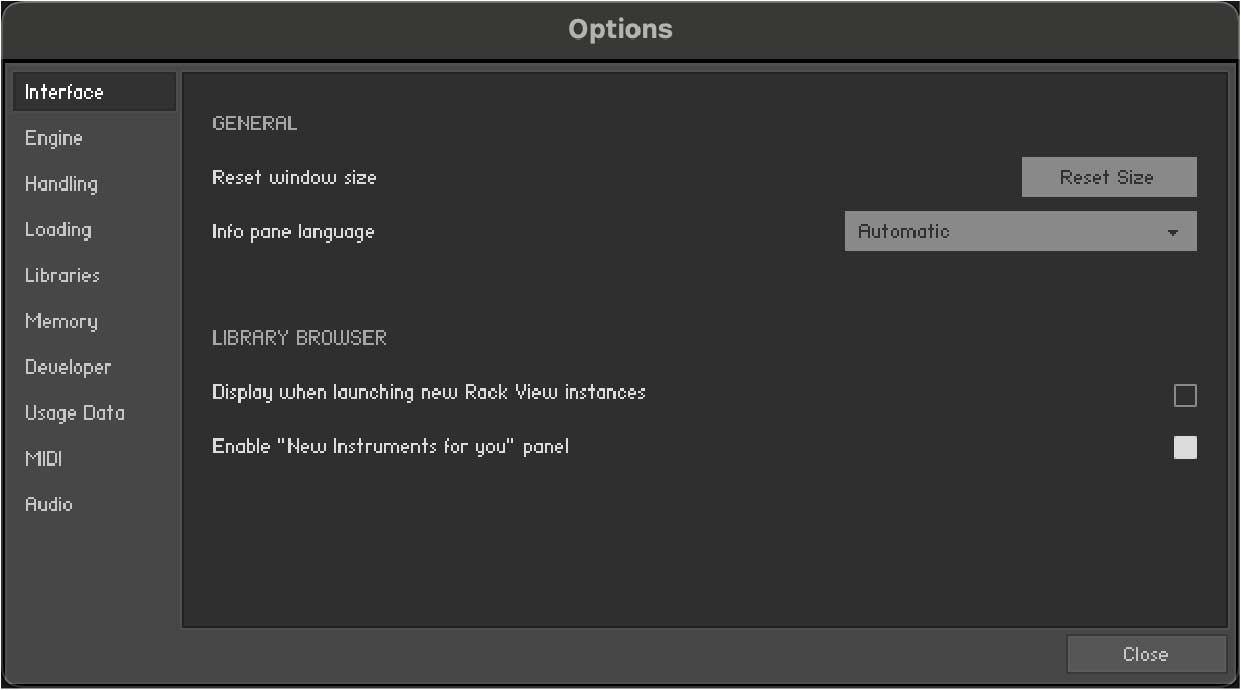
Interface Tab
The Interface tab contains options that change the look and behavior of Kontakt’s user interface.
Reset window size: If Kontakt’s interface becomes too large and you can no longer access the resizing handle to the bottom right of the window, you can use this button to reset Kontakt’s window size.
Info Pane Language: Select a language from the drop-down list. If you select Automatic, Kontakt will use your operating system’s language settings, unless it is unsupported, in which case Kontakt will use English.
Display when launching new Rack View instances: When this setting is enabled, creating a new Rack View instance will launch with the Library Browser as first screen.
Enable "New Instruments for you" panel: Hide the "New Instruments for you" panel by unsetting this box.
Engine Tab
The Engine tab contains options relating to the behavior of Kontakt's engine.
 |
Default Volume for new instrument and volume reset: This value will be used as a default output volume for new and imported Instruments. Also, it’s the value to which the output volume slider will snap when you [Ctrl]/[Cmd] + click it.
CPU overload protection: High voice counts can make the audio engine overload your CPU during operation; in such cases, the engine can choke and be rendered unusable until you restart it manually via the Restart Engine button in the Engine sub-tab of the Monitor tab in the Side pane. This scenario can be avoided with the overload protection mechanism, which allows Kontakt to kill voices when the CPU load gets critical. The Relaxed, Medium, and Strict settings affect how cautious Kontakt will be about this. Relaxed will not start killing voices until the CPU is very close to overloading, and thus will give you the highest voice count while still providing some protection against overloading; if the CPU load is still too high, try one of the stricter settings.
Multiprocessor support: Kontakt can make use of multiple CPUs or multi-core processors. To switch multi-processor support on and off and to set the number of processors / cores you want to use for Kontakt, select the corresponding entry from the Multiprocessor support menu. Multi-processor settings are saved independently for a) the stand-alone and b) all plug-in versions. On multi-processor or multi-core systems, many factors influence the system’s behavior. When running Kontakt as a plug-in, multi-processor mode can sometimes cause crackles and drop-outs. Whether or not these noises occur during playback strongly depends on your individual software and hardware setup. Therefore, the only option is to test which multi-processor setting works best for you when using the Kontakt plug-in. Note that multi-processor support is deactivated for the Kontakt plug-in per default (off entry in the Multiprocessor Support menu).
For stand-alone usage, we generally recommend turning multi-processor support on. Use the above setting in the Engine tab of the Options dialog to enable multi-processor support according to the number of processors or cores installed.
Send MIDI to outside world: This drop-down menu allows you to choose which classes of MIDI events will be sent to Kontakt’s MIDI output port. Click a menu entry to toggle between on (indicated with a small diamond next to the entry) and off state. The available event classes are:
GUI keyboard: MIDI events that are generated when you click on Kontakt’s virtual On-Screen Keyboard.
script generated CC’s: MIDI controller events that originate from running Scripts.
script generated notes: Note-on and note-off events that originate from running Scripts.
incoming CC’s: This will mirror incoming MIDI controller events at the MIDI output.
incoming notes: Mirrors incoming MIDI note events at the MIDI output.
Offline Interpolation Quality: This option allows you to specify an interpolation quality setting for offline bouncing and freezing that’s different from the one specified in the Source Modules of your Instruments. For instance, you might want to keep your Source Modules set to standard in order to save CPU resources during arrangement, but switch to perfect for bounces to get the best possible quality during mixdown. The default setting is like realtime, which will use each Source Module’s HQI setting during offline operation.
Handling Tab
The Handling tab contains options that relate to the way Kontakt handles external keyboards, MIDI, and Undo commands.
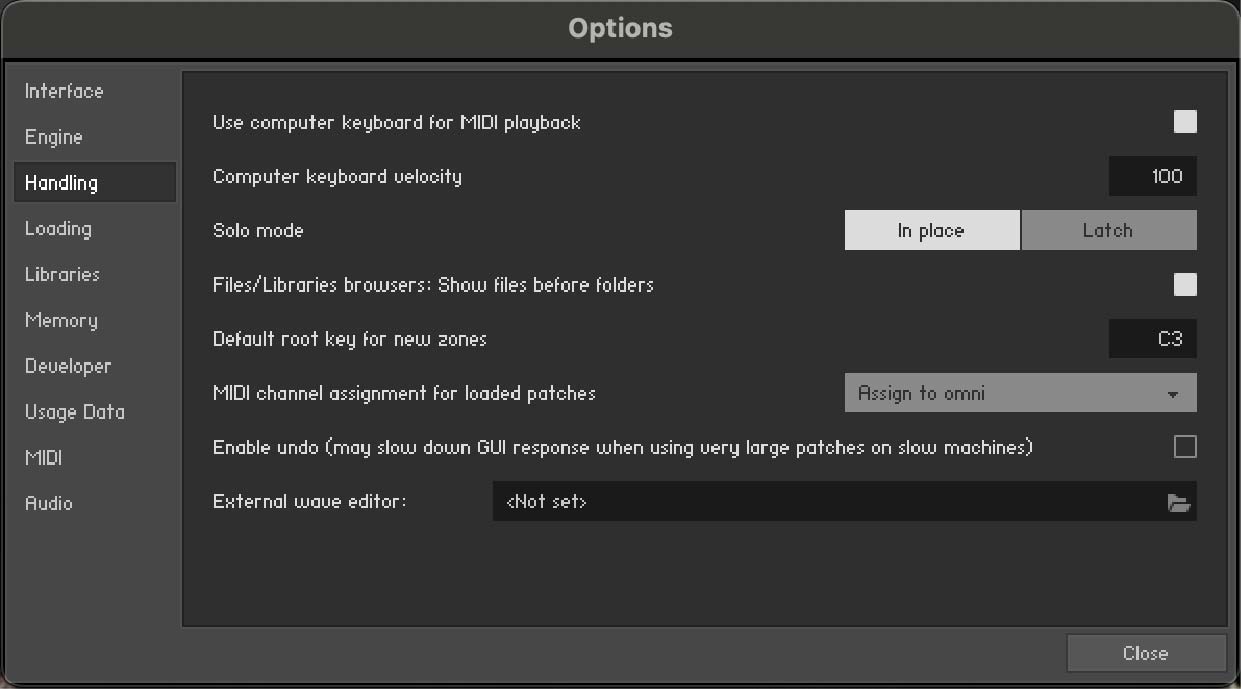
Use computer keyboard for MIDI playback: Allows you to use your computer keyboard to trigger MIDI notes for the currently selected Instrument. When activated, the QWERTZ/QWERTY row of letters will play the middle octave.
Keyboard Velocity: Adjusts the velocity of notes that are triggered via your computer keyboard.
Solo Mode: Determines what Kontakt will do when you attempt to activate the Solo button on more than one Instrument. In Place will only allow one solo Instrument at any time, so any other one will be muted; Latch will let you switch more than one Instrument into solo mode.
Files/Libraries browser: Show files before folders: Determines the order in which files and folders will be listed in the lower section of the Side pane.
Default root-key for new zones: Specifies the root key for new Zones, if they are created from Samples with no embedded pitch information. The Zones will be generated with the root key specified here.
MIDI channel assignment for loaded patches: Opens a drop-down menu that allows you to switch between two different modes that determine the way in which Kontakt will assign MIDI channels to newly added Instruments:
Assign 1st Free assigns the first available MIDI channel.
Assign to Omni is the default and will always assign loaded Instruments to Omni, thus making them respond to all input ports.
Keep Channels from K1.x Patches is an additional toggle option that allows you to specify whether Kontakt should use the MIDI channel embedded in Kontakt 1 patches. Later versions do not save MIDI assignments in Instrument files, only in Multi files.
Enable undo: Enables the ability to undo actions, when the checkbox is selected. However, this can be quite resource intensive, especially with larger instruments, so by default this setting is unselected.
External wave editor: Allows you to specify your own preferred sample editor. When you click the Ext. Editor button in the Wave Editor, Kontakt will start the specified editor with the current sample, and automatically pick up the changes when you save the Sample within that editor.
Loading Tab
The Loading tab contains options related to loading samples and Kontakt files.
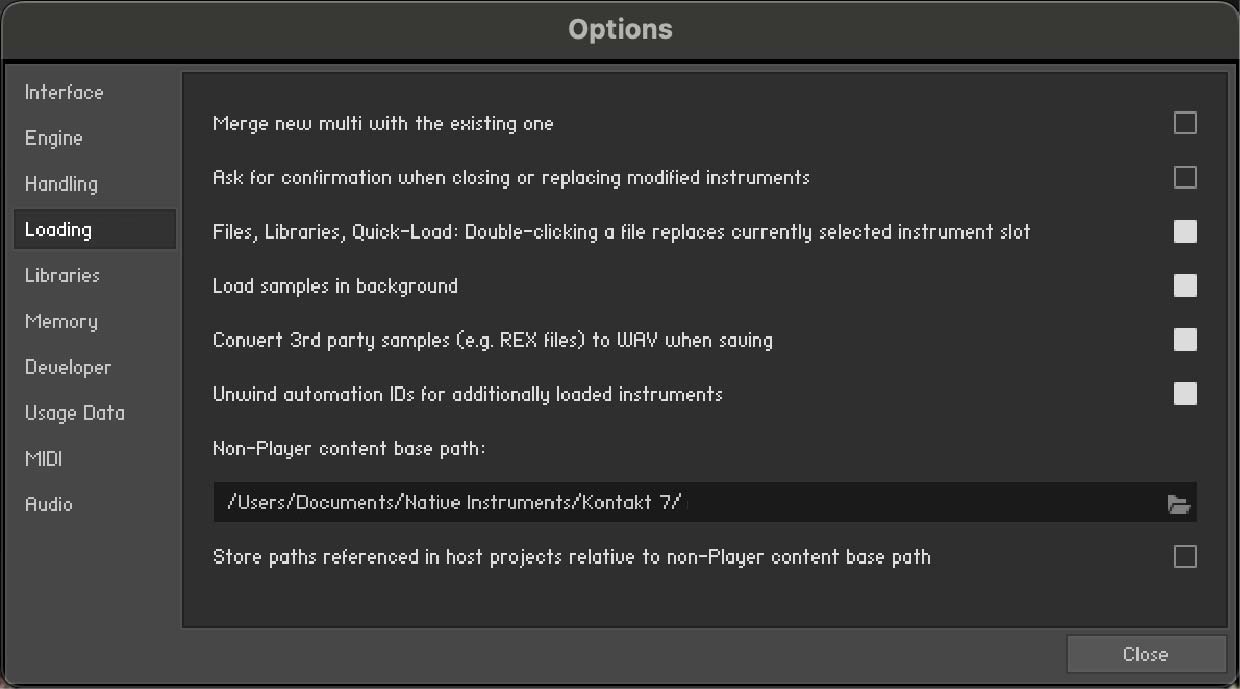
Merge new Multi with the existing one: Enables a new Multi to be merged with the current Multi when loaded. If unselected, the current Multi will be discarded when a new Multi is loaded. Kontakt will not make a check and the current Multi will be replaced instantly.
Ask for confirmation when closing or replacing modified instruments: Enables a confirmation dialog that pops up when closing or replacing a modified instrument. This is turned off by default.
Files, Libraries, Quick-Load: Double-clicking a file replaces currently selected instrument slot: When enabled, loading any file or library by double clicking will replace the currently loaded file or instrument in the selected instrument slot. When disabled, files or instruments loaded this way will automatically create a new instrument slot.
Load samples in background: Enables Kontakt to load instruments created in Kontakt 4.1 or later in the background. This feature is useful for instruments that use a large amount of samples and take a long time to load. With background loading active, Kontakt will display the instrument’s interface and become playable as soon as possible. Certain keys may not sound immediately if the samples have yet to be loaded into memory.
Convert 3rd party samples to WAV when saving: Enables Kontakt to save REX Samples used by third-party Instruments in WAV format. When unselected they will be saved in their native format.
Unwind automation IDs for additionally loaded patches: Enables Kontakt to re-assign automation IDs of newly loaded Instruments if there is already an Instrument in your Multi that uses the same IDs. As an example, if would like to add an Instrument twice to your Multi, which uses automation IDs 0 through 9; if this option is activated, Kontakt will change the assigned IDs of the second Instrument to 10-19 on load, provided that these IDs have not been used by other Instruments in your Multi yet.
Non-Player content base path: Allows you to specify a base path for your Non-Player content. The option to store referenced paths relative to the base path is provided in the checkbox below. An option to use the path on Save is available and deactivated by default.
Store paths referenced in host projects relative to Non-Player content base path: Determines if referenced paths are stored relative to the base path, or as subpaths. When selected, this option minimizes the occurrence of missing content when using Kontakt as a plug-in in a host DAW. When a host project is saved, Non-Player content will be able to resolve without the Missing Content dialog, if the libraries are located on the computer’s path as defined in the base path field.
Libraries Tab
The Libraries dialog allows you to define which of your libraries appear in the Libraries tab of the Side pane. For more information, refer to Side Pane.
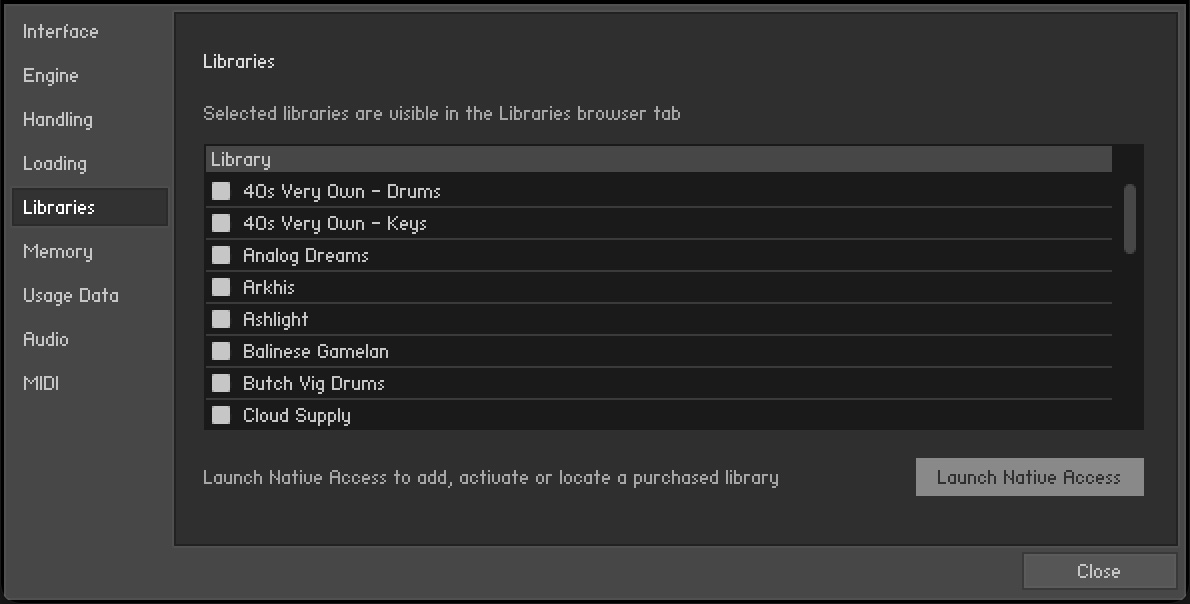 |
Hide Library: Uncheck the entry in the list to hide a library from the Libraries tab of the Side pane without uninstalling it from your computer,
Show Library: Check an entry in the list to show a library in the Libraries tab of the Side pane.
Tip
You can also open NATIVE ACCESS from the Libraries tab by clicking on the Launch Native Access button. For more information, visit Native Access.
Memory Tab
On the Memory tab, you can optimize Kontakt’s memory usage settings for your specific computer configuration.
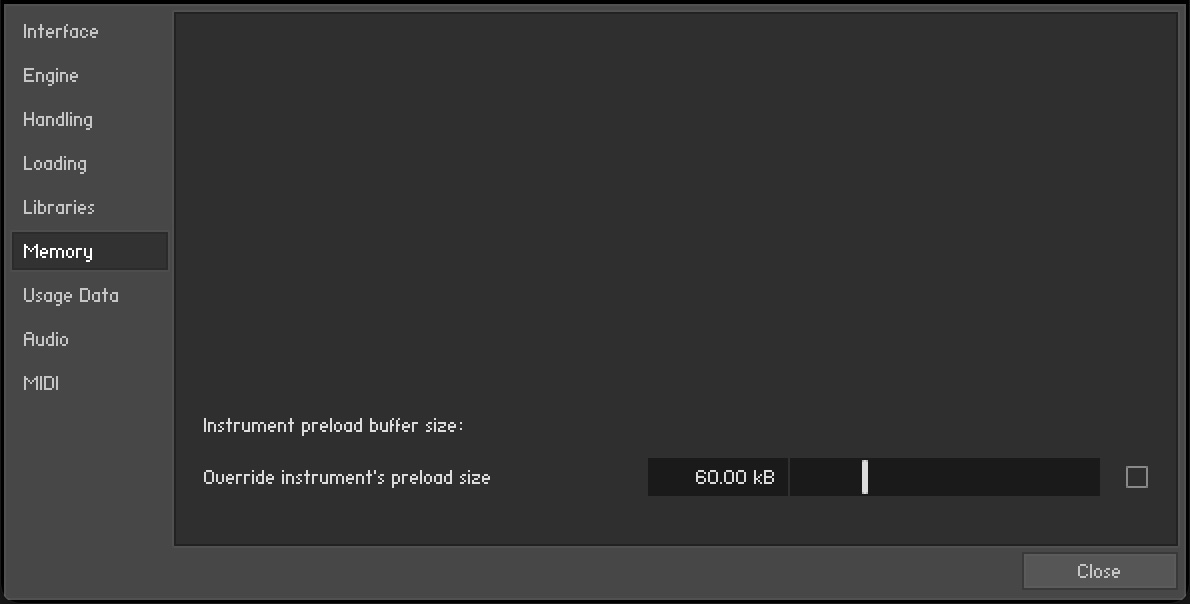 |
Override Instrument’s preload size: If activated, Kontakt will ignore the preload buffer size that’s embedded in Instrument files since Kontakt 2, and use the specified buffer size instead. We recommend leaving the preload buffer size on default value. Memory improvements might be possible by moving the slider to the lowest setting possible without experiencing playback errors.
Kontakt Memory Server Options (Mac OS X only)
Notice
Using KMS is only recommended when working with very large numbers of samples which require more physical memory than one Kontakt instance can access. Do not enable Kontakt Memory Server if it is not absolutely necessary.
In order to use KMS on your computer, Mac OS X needs to be installed, and at least 4 GB of physical RAM must be available. Using KMS also requires administrator privileges, so make sure you are logged in as an administrator. Kontakt will detect the Mac OS X version and the amount of RAM present on your computer automatically. Subsequently, it will display an option to enable advanced memory access.
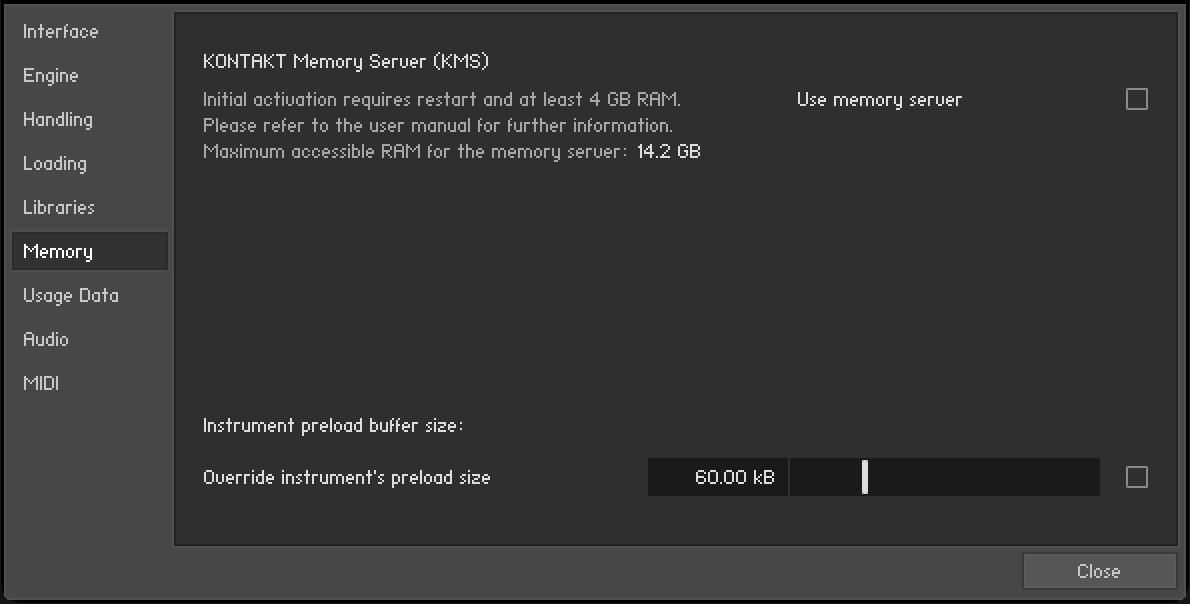 |
The Memory tab on OS X
After activating KMS you need to restart Kontakt for the changes to take effect.
Kontakt will automatically set the size of accessible RAM to a value suitable for most cases. You can find the amount of determined accessible RAM in the KMS Options dialog.
Kontakt Memory Server is a separate application running in background. Kontakt no longer loads samples itself as long as the KMS option is activated. All running Kontakt instances share the Kontakt Memory Server and can access the samples loaded. The Kontakt Memory Server will boot automatically as soon as you start a Kontakt instance.
The KMS utility appears in the Mac OS X system bar, so you can monitor the amount of RAM used by the server process. CPU and RAM requirements of KMS utility itself are negligible. Note that there is no option to shut down the KMS utility in Manual mode.
Memory Server Modes
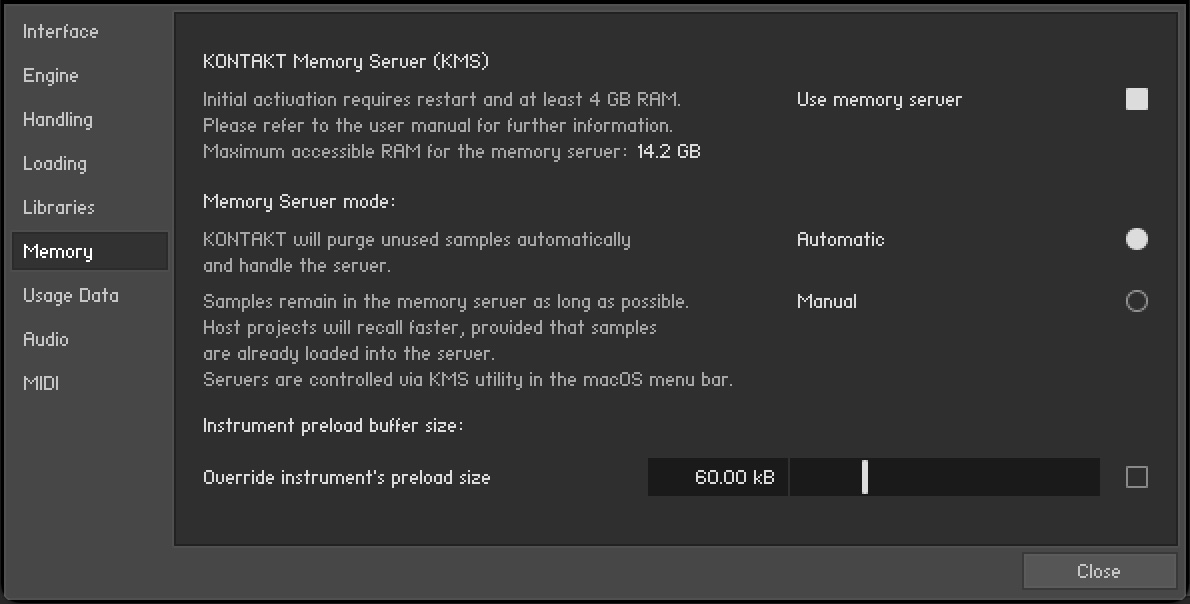 |
The Memory tab with Memory Server mode options
Automatic: In Automatic mode the KMS will keep all samples currently used by Kontakt instances stored. If an Instrument is removed from Kontakt’s rack, samples that are no longer needed will be also removed from the Memory Server’s sample pool. The KMS will automatically shut down when all Kontakt instances are closed.
Manual: In Manual mode the Kontakt Memory Server does not remove samples from the server when an instrument is removed from Kontakt’s rack or when all Kontakt instances are closed. All samples stay in the memory as long as it is running. This can be helpful, e.g. when re-opening a project in your host sequencer which is using Kontakt as plug-in and when working with extensive templates of numerous instruments. Loading times are significantly shorter, since the samples are already stored in RAM and do not need to be loaded again.
Managing the Kontakt Memory Server
The Kontakt Memory Server is managed via the KMS utility, which allows you to manually purge unused samples if you want to free memory. If you are running out of memory when loading additional Instruments, the server will automatically start to purge samples that are not referenced by any loaded Instrument.
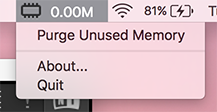 |
The KMS Utility in the Mac OS X system menu bar
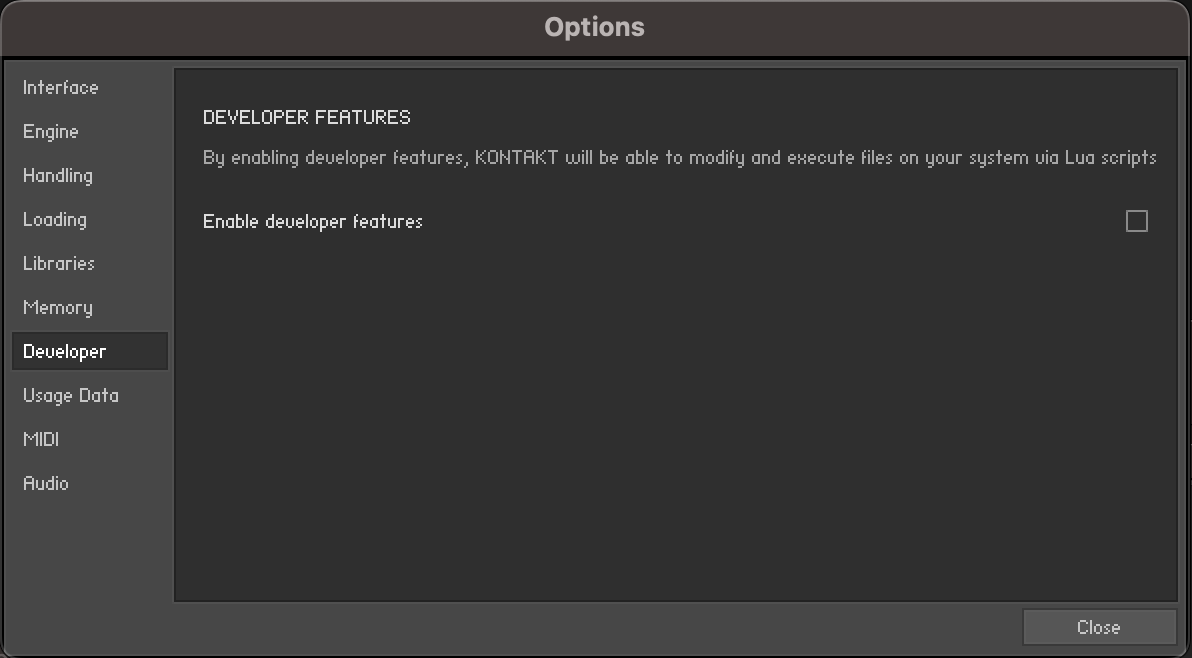
Developer Tab
The Developer Tab includes a toggle for enabling development features. This allows you to use the Kontakt Lua API to modify files on your system via Lua scripts. For more information refer to the Lua API reference manual.
Usage Data
Kontakt collects data regarding your usage of the software in order to better inform future updates. Sending this data to Native Instruments will help make future versions of Kontakt better, but the choice of whether or not you want to share this information with Native Instruments is yours.
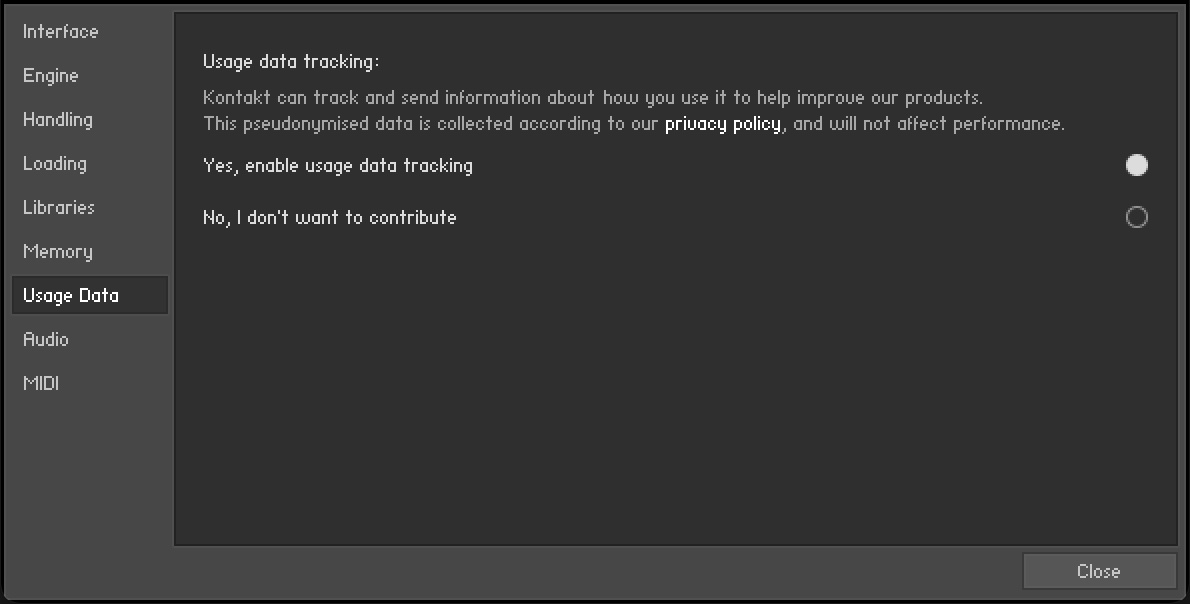 |
Yes, enable usage data tracking: Selects the option to track and send usage data.
No, I don’t want to contribute: Selects the option to turn off data tracking.
Notice
Refer to our Privacy Policy for more information on Usage Data Tracking.
Audio Tab
The contents of the Audio Tab are documented here: Audio Configuration.
MIDI Tab
The contents of the MIDI Tab are documented here: MIDI Configuration
Stand-alone Menu
In addition to the contents of the main window, the stand-alone version of Kontakt provides a system drop-down menu labeled Help. It is located at the top of the desktop on Mac OS X, or at the top of the Kontakt window on Windows. Use the Help menu to launch Native Instruments’ Native Access application, and access online documentation resources and knowledge base support.
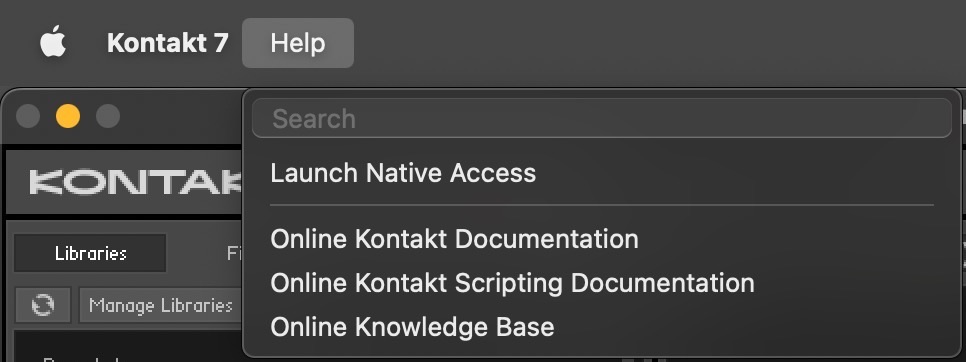
The Stand-alone Help menu