HYBRID KEYS Overview
The HYBRID KEYS synth engine contains the following key features: Snapshots, Browser, Sound Editor, FX Editor, Sequencer, Macros Editor, and Settings.
HYBRID KEYS offers a simple but powerful interface built around two sound source layers and six macro controls. Five additional views—Sound, FX, Sequencer, Macros and Settings—provide further controls and editing options for different parts of the synth engine. The six macros can be assigned to various dedicated sound parameters for instant sound sculpting from any view.
The Sound Editor covers all sound generating features, including traditional subtractive synthesizer controls and lo-fi sound-shaping tools. In the FX Editor, you can create custom effects chains for further tonal control and expression. In the Macro Editor, you can assign and manage the six macros to suit your needs. In the Settings view, you can tweak how the synthesizer reacts to your playing style and how notes are prioritized for each layer. Using the sequencer, you can create a 16-step melodic phrase, with velocity modulation for control over dynamics. Six additional sequencing lanes provide further control over the six macros, allowing for precise and nuanced sound design, as well as dramatic and unexpected discoveries.
HYBRID KEYS contains the following main elements and controls:
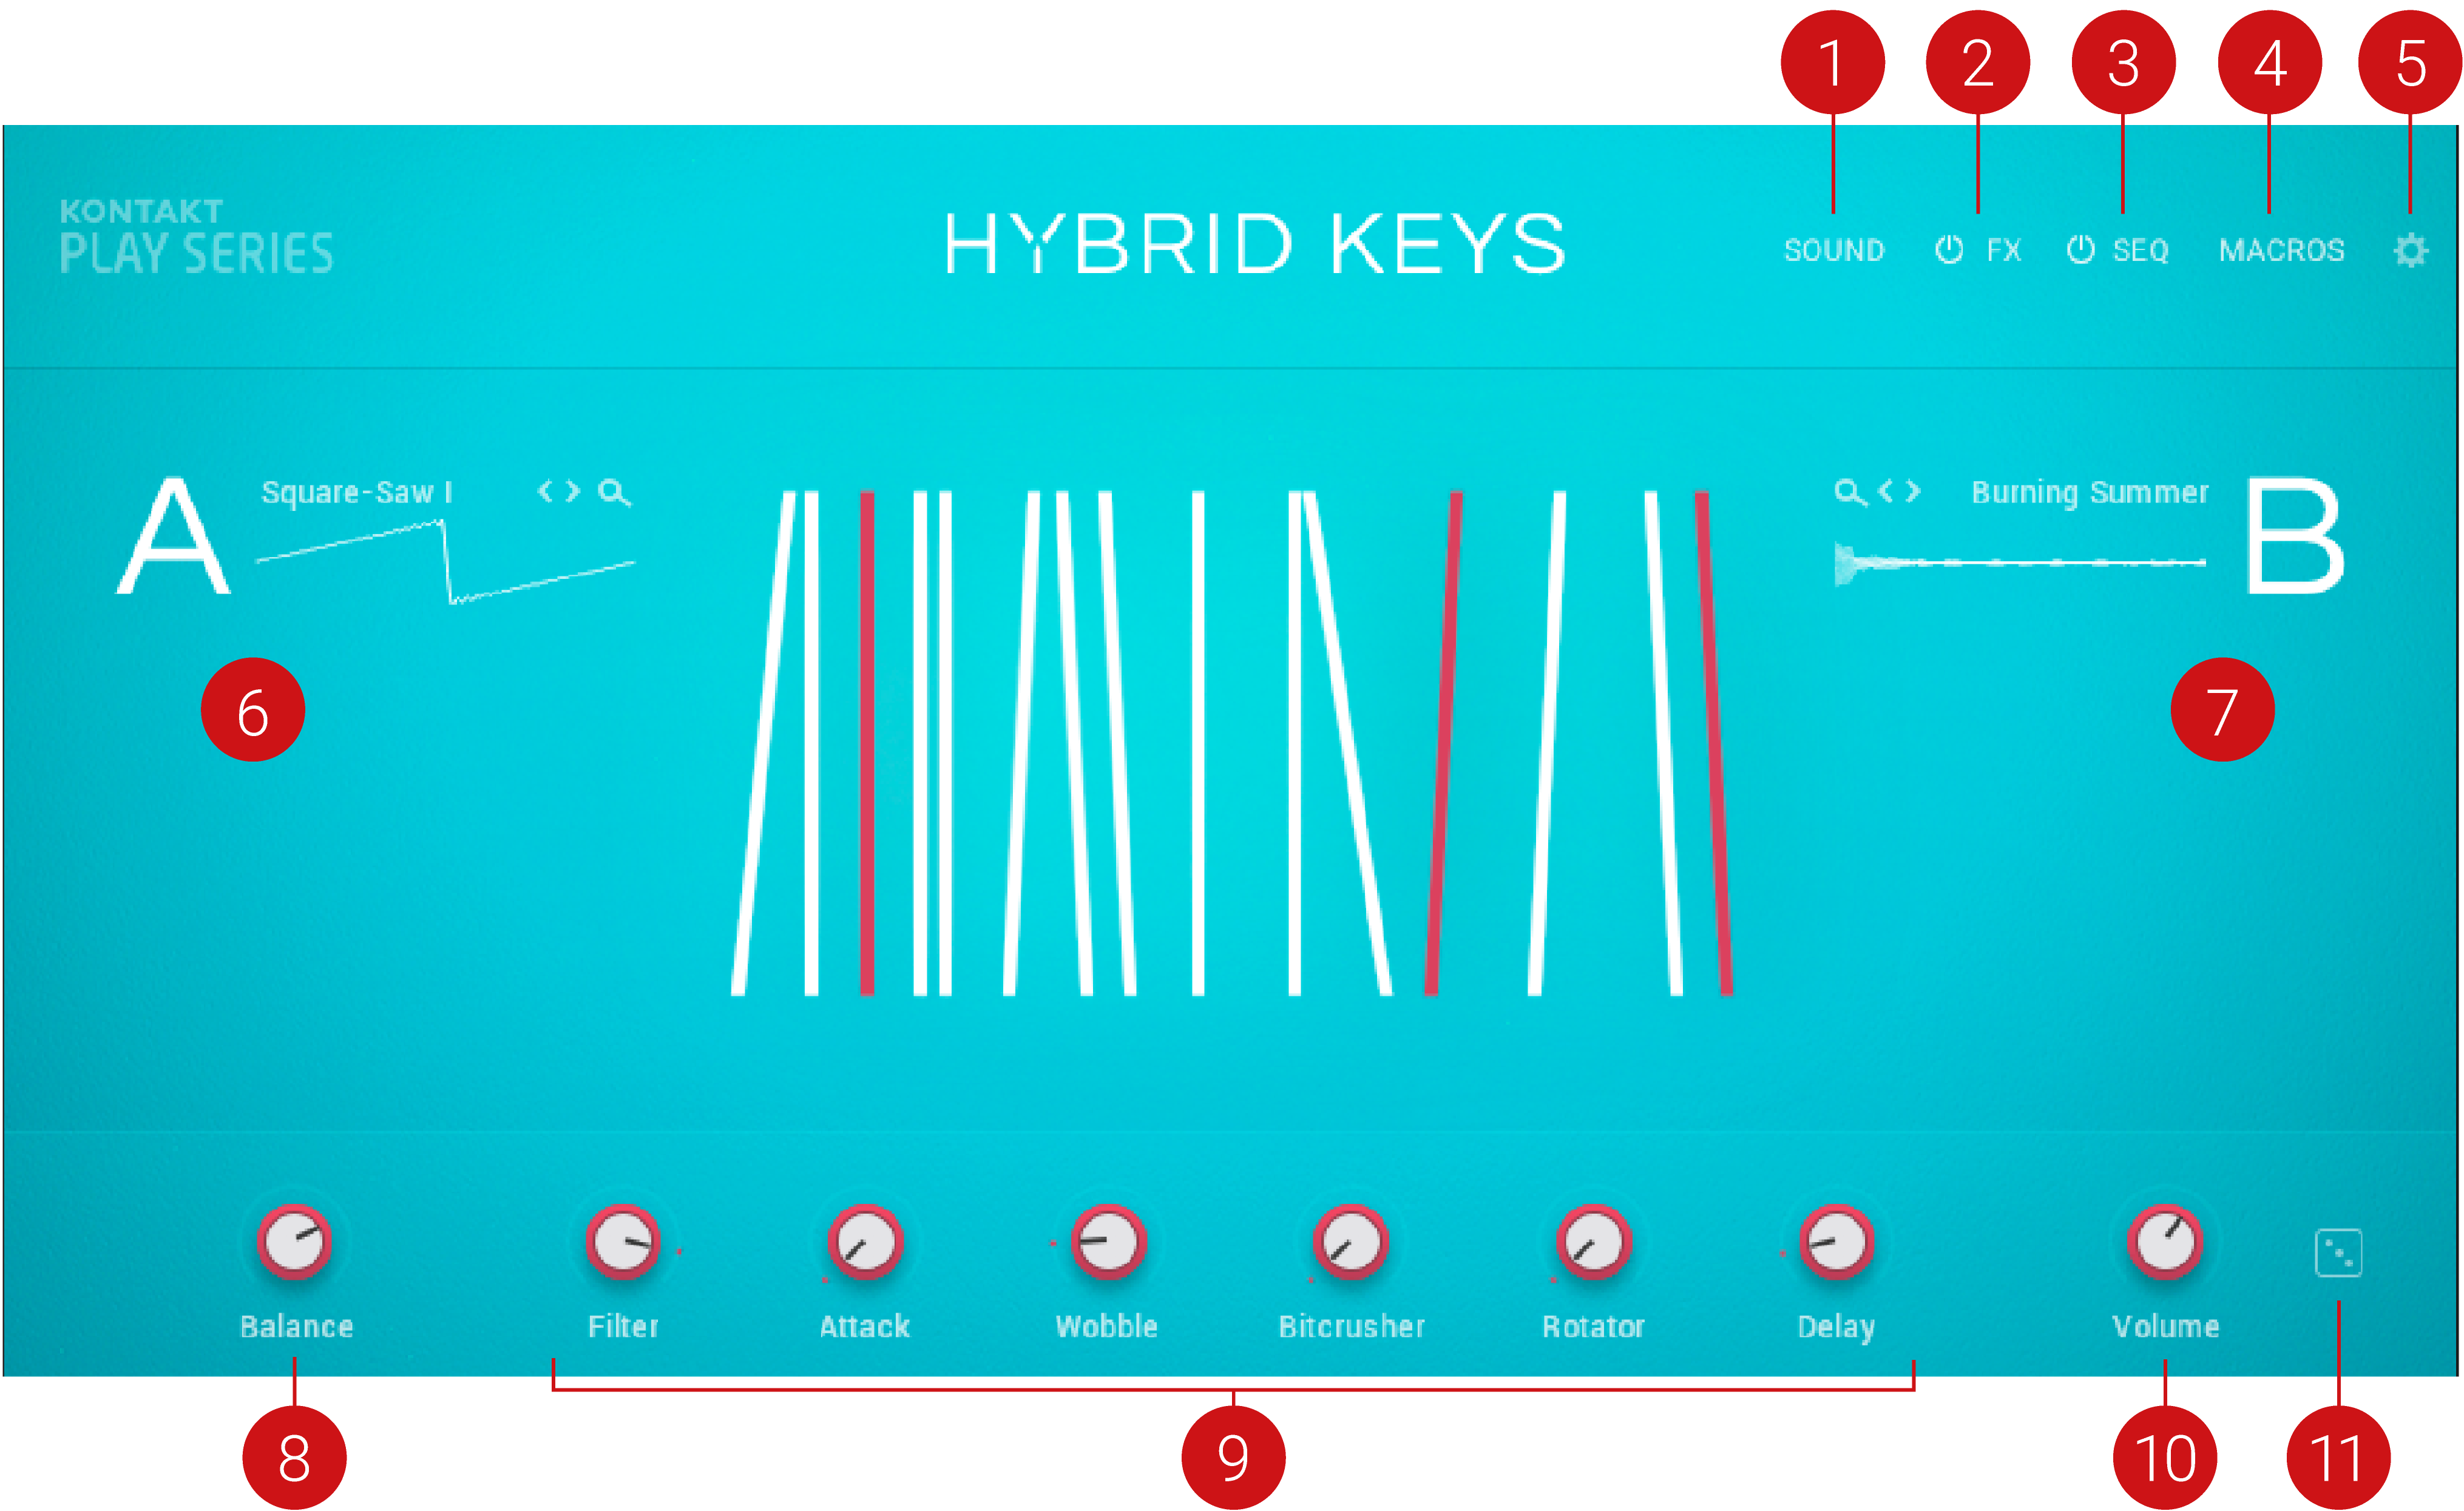
The Main view of HYBRID KEYS
SOUND: Opens and closes the Sound Editor. Here you can edit the individual sound sources (A/B) and access parameters for tuning, filters, effects, envelopes, and modulation. For more information, refer to Sound Editor.
FX: Opens and closes the FX Editor. Here you can edit effects parameters and the effects chain. Click the power icon next to FX to switch all FX on or off. For more information, refer to FX Editor.
SEQ: Opens and closes the Sequencer. Use the Sequencer to create a melodic sequence of up to sixteen steps, and use the additional six lanes to modulate each of the macro assignments. For more information, refer to Sequencer.
MACROS: Opens and closes the Macro Editor. Here you can assign macros, set minimum and maximum macro values, adjust the Macro Shaper Curve and change the order of the macro controls. For more information, refer to Macro Editor and Macro Assignments.
SETTINGS (cog icon): Opens and closes the Settings view. Here you can set Note Priority, Key Range, Glide, Velocity Curve, Voice Preserve, and Bend Range. For more information, refer to Settings.
Layer A: Contains the sound source for layer A. Click the letter A to turn the layer on or off. Turning the layer off will purge all samples from memory and reduce CPU usage. Click the waveform display to open the Browser and search for a new sound source for layer A. For more information, refer to Browser.
Layer B: Contains the sound source for layer B. Click the letter B to turn the layer on or off. Turning the layer off will purge all samples from memory and reduce CPU usage. Click the waveform display to open the Browser and search for a new sound source for layer B. For more information, refer to Browser.
Balance: Adjusts the volume level of layer A and layer B by blending between them. Turning the knob left increases the Volume level of layer A, and turning it right increases the level of layer B. The Balance control knob is available in all Snapshots.
Macros 1-6: Six control knobs are preassigned to the most important parameters, and can be accessed at all times from the bottom panel. Each Snapshot provides a different set of macro assignments that help to define that sound. You can edit different macro assignments in the Macros view. The macro control knobs are available in all Snapshots, however, their labels reflect the individual macro assignment of the Snapshot. For more information, refer to Macro Editor and Macro Assignments.
Volume: Adjusts the main volume level. The Volume control is available in all Snapshots.
Randomize (icon): Applies random changes to the parameters and settings of the current Snapshot. This includes the layers' sound sources, the Balance control, and all macros. Pressing [Ctrl] / [Cmd] + clicking randomizes only the sound sources. Pressing [Shift] + click randomizes only the Balance control and all macros. The Randomize button is available in all Snapshots.