Macro Editor
The six macro controls are a core element of the Play Series performance workflow. The macro controls, alongside the Balance and Volume knobs, are the only parameters that remain accessible from any view within DUETS. You can assign up to 12 parameters to each macro, with individually adjustable min/max range for each assignment, and a Shaper Curve that governs how the macro behaves within the defined min/max range. The Shaper Curve is also available for each assigned parameter.
The Snapshots that were created for DUETS each come with their own distinct macro assignments and implementations. In the Macro Editor, you can edit the assigned macro controls of existing snapshots and their parameter ranges, or create your own macro assignments. Toggle between the six macros by clicking the colored buttons displayed horizontally across the top. Clicking any of the buttons allows you to see the list of parameters assigned to them. At the top-right of the Shaper Curve is the Macro Shaper Options menu, which provides various processing and editing options, an additional ways to manage your preset shapes.
Macro Editor Overview
The Macro Editor contains the following elements and controls:
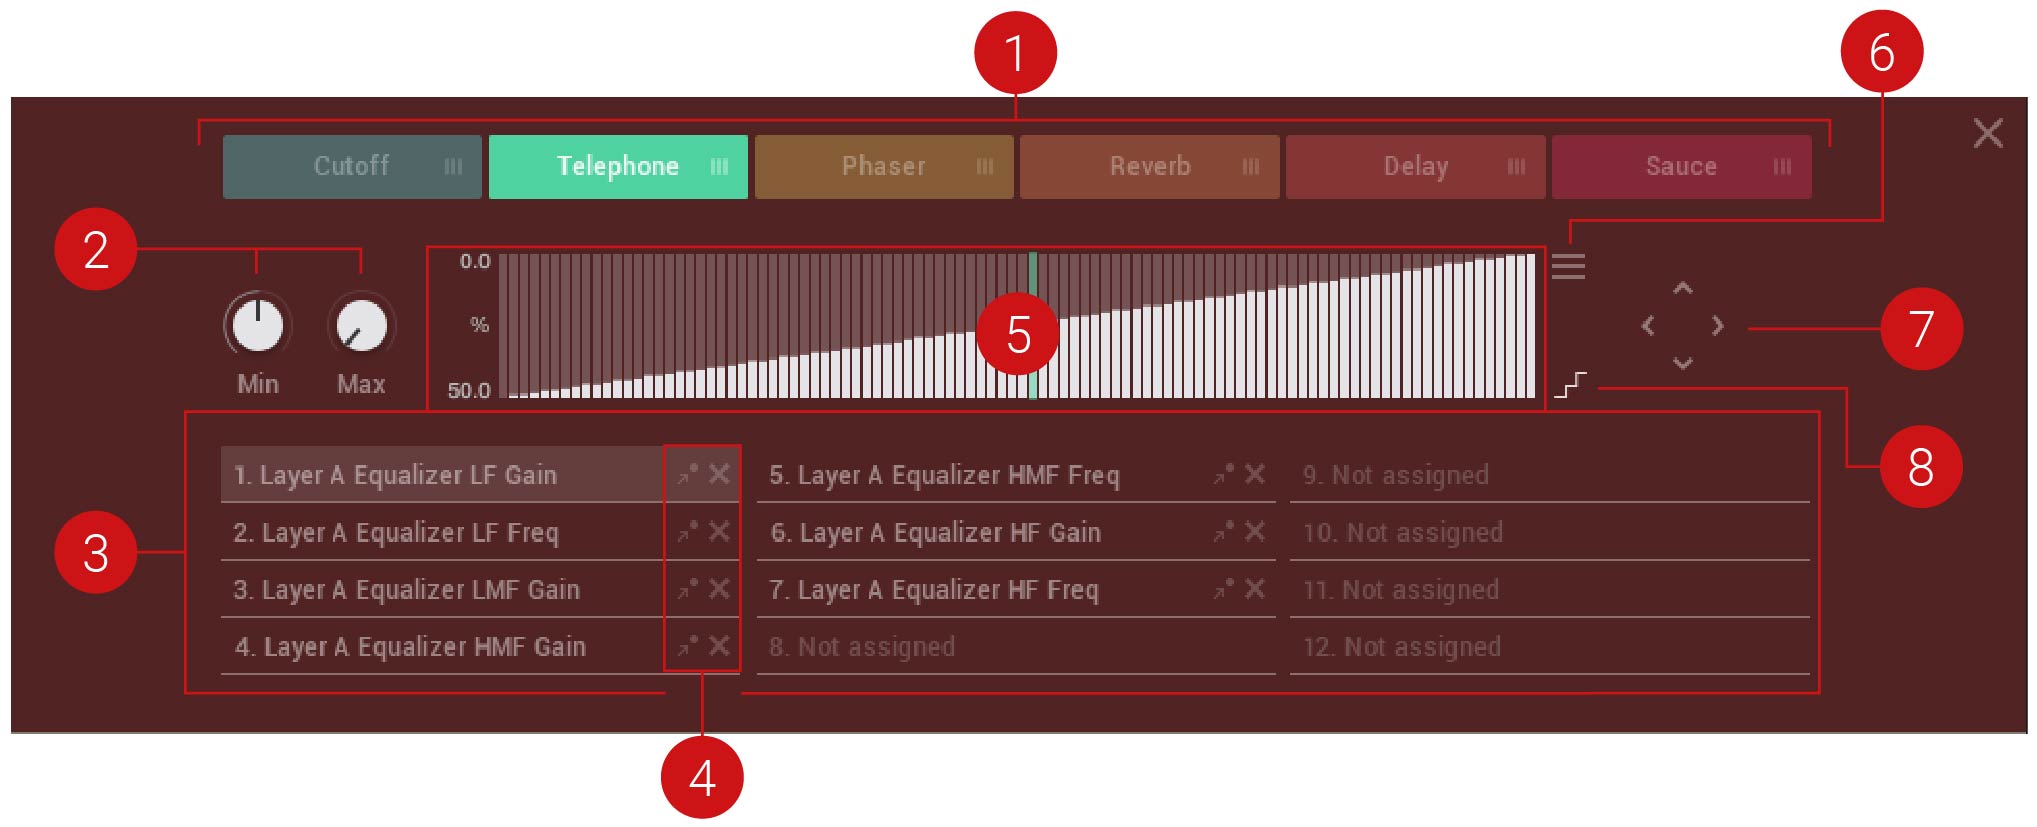
The Macro Editor
Macro Controls: Each colored block represents a macro control. Click on a macro to display the group of parameters assigned to it and access the parameters' editing tools. Click + drag a colored block left or right to rearrange the order of the six macro controls. For more information, refer to Macro Assignments.
Macro Range: Sets the minimum and maximum range for the parameter selected in the Macro Slot list.
Macro Slot List: Displays all parameters assigned to the selected macro control. Each macro has 12 macro slots, facilitating up to 12 different parameter assignments per macro. Click on a macro slot to access the editing options for that assignment, including the Macro Shaper Curve and Range controls.
Macro Assignment (icons): The arrow dot icon jumps directly to the page containing the parameter assigned to the macro slot. The dot next to the parameter will blink to draw attention and indicate the assignment. The X icon deletes the assigned parameter from the selected macro.
Macro Shaper Curve: Sets the shape of the curve for the selected parameter in the Macro Slot list.
Macro Options Menu: Provides options to manage your Macro Shaper presets, and contains predefined curve shapes which you can quickly recall for convenience or inspiration. For more information, refer to Macro Shaper Options Menu.
Macro Shaper Shift (arrow icons): Click the arrow icons to shift the values in the Macro Shaper Curve left, right, up or down. Press [Shift] + click the left or right arrows to move the values in the specified direction, but to retain the first or last value in the table. This creates a limiter-style effect, whereby the first value is repeated as you press [Shift] + click the right arrow. Holding [Shift] + clicking the up or down arrows will create expansion or compression. Pressing [Ctrl] / [Cmd] + clicking will repeat the process ten times.
Macro Shaper Smoothing: Switches the interpolation for the Macro Shaper Curve on or off. As the Macro Shaper contains only 100 values and macro knobs have a much higher resolution of 1,000,000 values, the shaper curve needs to be mapped to the larger range. When Macro Shaper Smoothing is turned off, transitions between curve steps are strictly quantized. This is useful in certain use cases, for example, a macro assigned to the Tune parameter, and a quantized Curve Shaper to hit various pitches of a scale. When Macro Shaper Smoothing is turned on, transitions between curve steps are linearly interpolated, which provides more fluid behavior. This is especially useful when assigning macros to a filter Cutoff or various effects parameters.
Macro Assignments
Assigning macros in DUETS is intuitive and easy. Not all parameters are available for assignment, including buttons, menus, Transpose, and Envelope Attack Curve. Valid parameters are found only in the Sound and FX Editors.
Macros are also a quick and useful way to navigate around the synth engine, allowing you to move between the Macro Editor and the assigned parameters with a mouse click. The following workflows demonstrate how to assign, remove, rename and rearrange your macro assignments.
Assigning a Macro
To assign a parameter to a macro:
From any view in DUETS, select the macro you want to assign.
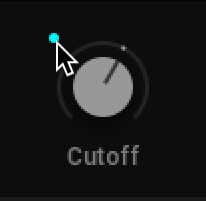
Click the colored dot in the top-left corner of a macro knob. It will start blinking to show you that it's in Learn mode.
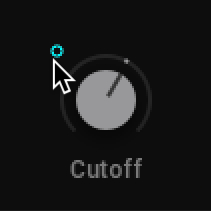
While the dot is blinking, click on the parameter you want to assign to the macro. Valid parameters are found only in the Sound and FX Editors.
The parameter is assigned to the macro, represented by it matching colored dot,
Note
If you no longer want to make an assignment, or you selected the wrong macro, you can exit Learn mode by clicking the same colored macro dot again.
Setting the Macro Range
When a macro is assigned to a parameter, a popup will appear. Here you can set the parameter range within which the macro will operate.
To set the Macro Range:
Drag the arrows left or right to adjust the parameter range.
Drag the bar in the middle to shift the whole range left or right
[Ctrl] / [Cmd] + click this bar to restore the range to the default value (full parameter range).
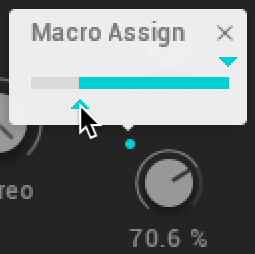
The range is set. When you have finished, click the X to exit the Macro Range popup.
Removing a Single Macro Assignment
In the Macro Editor, you can delete a parameter assignment from the Macro Slot list, using the X icon. Alternatively, you can delete an assignment from the parameters.
To remove a macro assignment from a parameter:
Locate the parameter in the Sound or FX Editor.
Press [Ctrl] / [Cmd] + click the dot next to the assigned parameter.
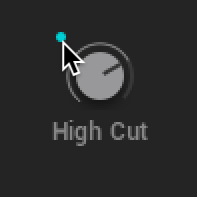
The assignment is removed from the macro.
Note
Press [Shift] + click the colored dot next to a parameter to instantly jumps to the Macro Editor where the assignment is listed. This provides a nice workflow if you often have to jump between pages.
Removing All Macros Assignments
To remove all macro assignments from a macro control at once:
From any view in DUETS, select the macro you want to remove all assignments.
Press [Ctrl] / [Cmd] + click the colored dot next to a macro control.
All assignments are removed from the selected macro.
Renaming a Macro
Renaming a macro can be used to help you remember what the assigned parameters do.
To rename a macro:
Click on the text below the macro knob to edit the current name. Double-click the text to enter a new name.
Type in your new macro name.
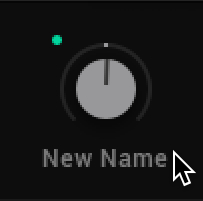
The macro now displays the new name.
Note
Note that text input is not possible when the sequencer is running.
Rearranging the Macros
Once you have set up all your macro controls, you might want to rearrange the order in which they appear. This is useful for keeping related controls close to each other and can be tailored to suit your performance needs or playing style.
To change the order of the macros:
Click MACROS to enter the Macro Editor.
Click a colored macro button.

Drag the macro button left or right and drop at a new position.

The order of the macros controls is changed.
Macro Shaper Options Menu
The Macro Shaper Options menu provides a range of tools for editing the Macro Shaper Curve and managing your Macro Shaper presets. Tools dedicated to editing the shape of your curve include options for copying, mirroring, inverting, and straightening. Additionally, the initialization function enables you to reset the Macro Shaper Curve to its default values.
The Macro Shaper Options menu also offers options for saving and recalling Macro Shaper presets, as well as pre-defined curves to help you get started. There are also a number of quantization options provided to suit your various needs; from smooth and free-running, to grid-snapped blocks, these additional editing options provide flexibility and inspiration for utilizing the full potential of the Macro controls.
The Macro Shaper Options menu contains the following elements:
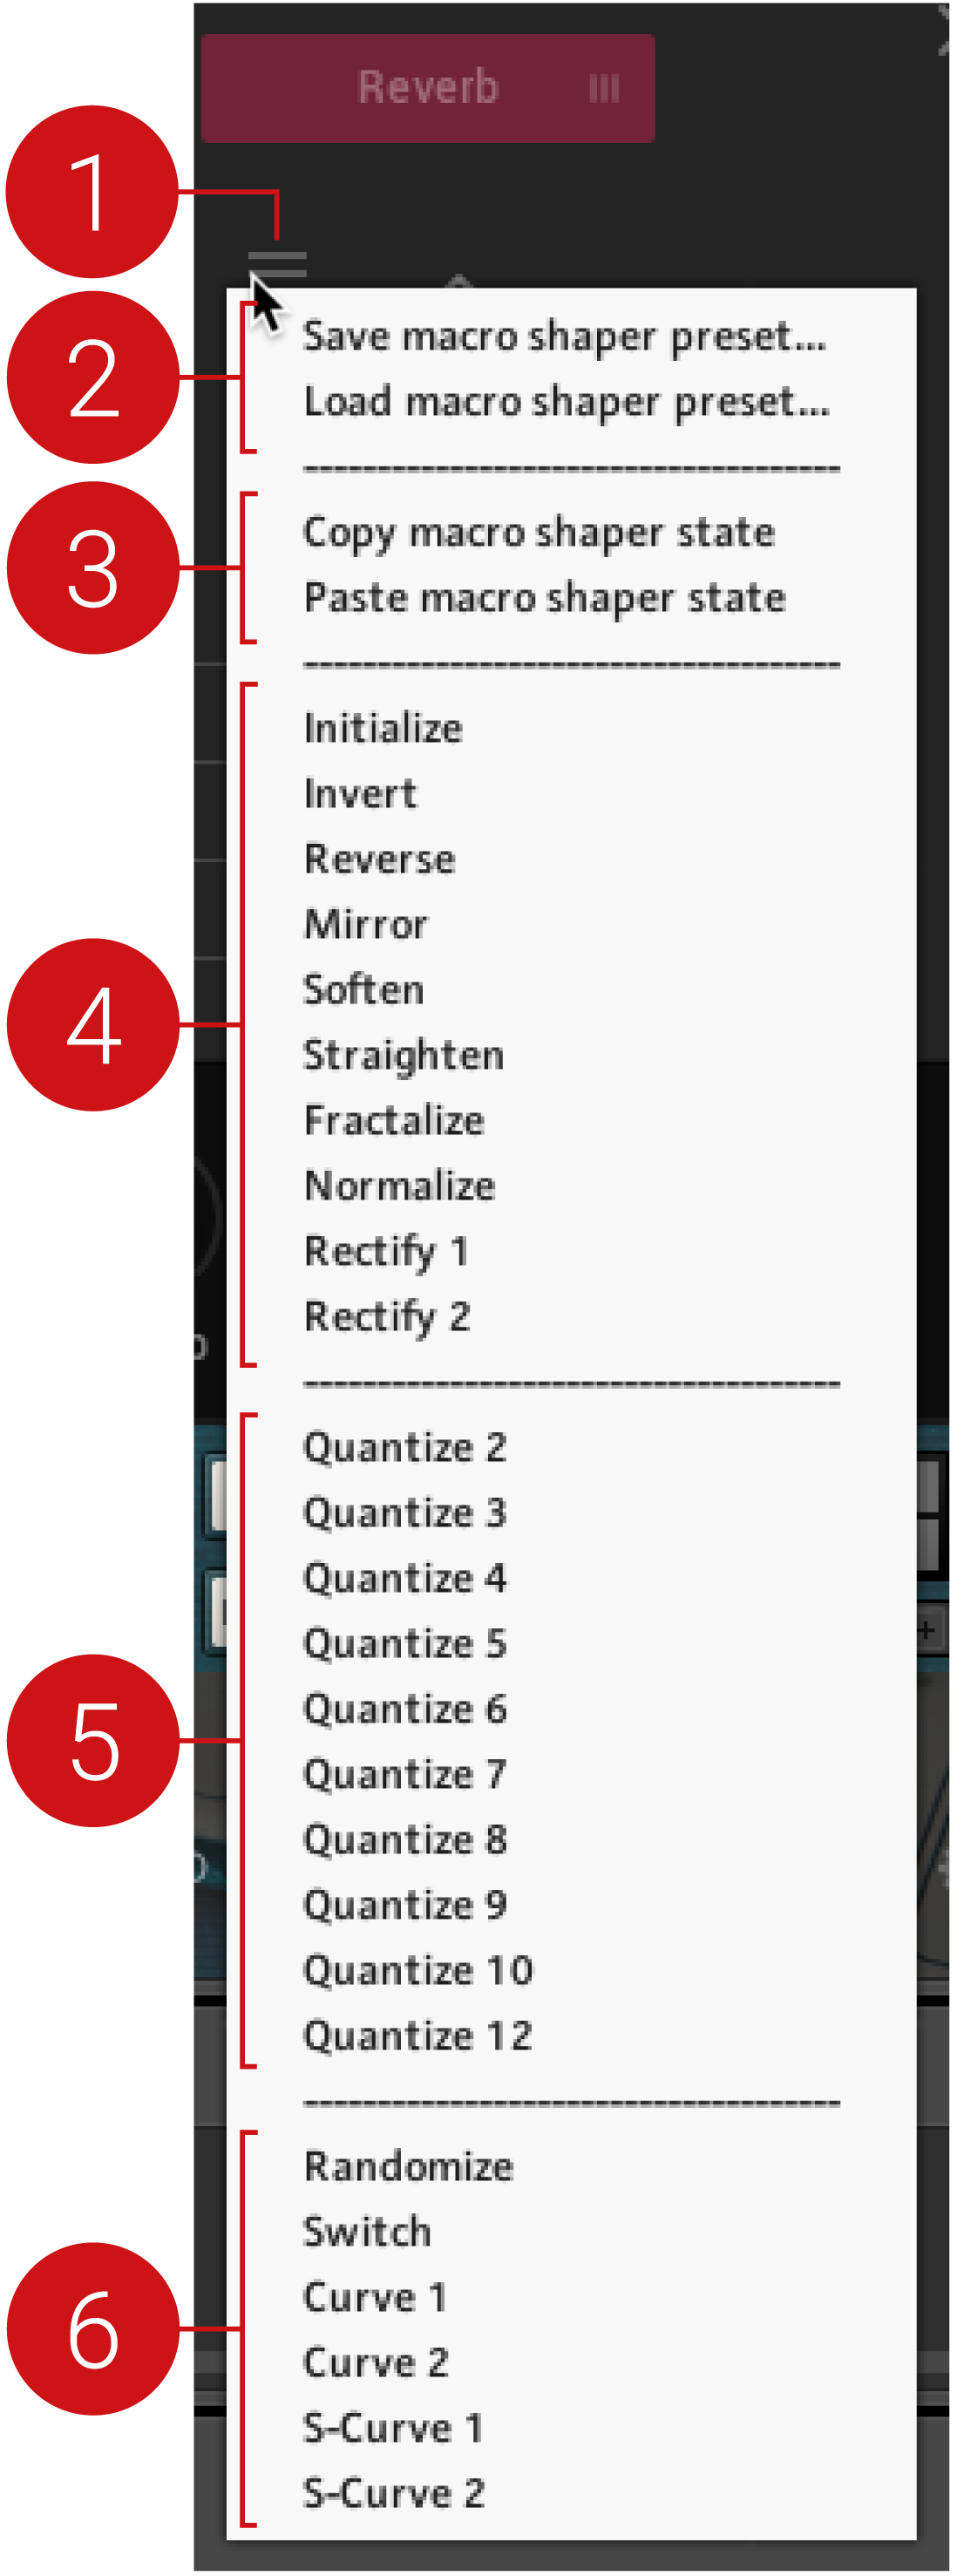 |
Macro Shaper Options Menu: Opens the Macro Options menu, which provides a range of tools and options for editing the Macro Curve Shaper and managing your Macro Shaper presets. This menu also contains predefined curve shapes, which you can conveniently recall when needed.
Managing Macro Shaper Presets: Options for saving and loading your Macro Shaper presets. For more information, refer to Managing Macro Shaper Presets
Copy and Paste: Options that allow you to copy the Macro Shaper Curve of the currently selected parameter, and paste it onto other parameters. This is useful for testing Shaper Curves on various parameters, without having to save them as presets.
Shaper Editing Tools: A range of tools that provide various editing functions for creating shapes with the Macro Shaper Curve. Tools include Normalize, Rectify, Fractalize, Soften, and Straighten. Editing tools like Invert, Reverse, and Mirror, allow you to reflect states in the Macro Shaper, providing inspiration and further control over your shapes. Initialize allows you to reset the Macro Shaper Curve to its default state.
Quantize: Provides 10 options for quantizing values of the Macro Shaper Curve. The Quantize value (2, 3, 4, 5, 6, 7, 8, 9, 10, 12) indicates the numeric division that will be applied to your curve. For example, if Quantize 4 is selected, your curve values will be quantized to 0, 250, 500, 750 and 1000.
Predefined Shapes: Provides six options for predefined curve shapes that can be quickly implemented in the Macro Shaper Curve.
Managing Macro Shaper Presets
While macros are automatically saved with each Snapshot, the Macro Shaper Options menu allows you to save Macro Shaper presets separately and load them onto other sounds.
 |
The following workflows demonstrate how to save and load your Macro Shaper presets from the Macro Editor:
Saving a Macro Shaper Preset
To save a Macro Shaper preset:
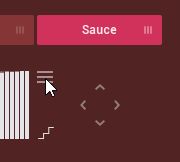
Click the MACROS tab to enter the Macro Editor.
Click the Macro Shaper Options menu icon.
Select Save macro shaper preset....
Enter a name for your preset.
Click Save.
The macro shaper preset is saved as an .nka file.
Loading a Macro Shaper Preset
To load a Macro Shaper preset:
Click the MACROS tab to enter the Macro Editor.
Click the Macro Options menu icon.
Select Load macro shaper preset....
Select a preset file.
Click Load.
The selected macro shaper preset is loaded into the Macro Shaper.