Installation and setup
Learn how to download and install the necessary software using Native Access and get started making music with Kontakt Player.
Learn how to download and install Kontakt Player using Native Access and get started making music.
Installation using Native Access
Native Access is your go-to app for downloading, activating, and updating all your NI music creation tools including Kontakt Player and its libraries. If you are new to Native Instruments, you will first have to create your Native ID user account. To learn more about Native Access, visit our support page.
Download and install Native Access here.
Open the Native Access application.
Create a Native ID, if you do not have one already.
Login to Native Access using your Native ID.
Click Library on the left side of Native Access.
Click Available at the top of Native Access.
Click the Kontakt category to only show products related to Kontakt.
Click Install for Kontakt 8 Player.
The software is installed automatically.
Tip
If you are new to Kontakt Player, get Komplete Start and add exciting content to your library. Our free music production bundle includes Kontakt instruments, synths, effects, and hundreds of sounds. For information about how to add it to your account, to to Komplete Start.
Using Kontakt Player as a plugin in your DAW
The plugin version of Kontakt Player lets you use it as an instrument inside your DAW. You can run multiple instances of Kontakt Player alongside other instrument and effect plugins. When used as a plugin, Kontakt Player relies on your DAW to receive MIDI. Kontakt Player's audio output is directly sent to your DAW's mixer.
Kontakt Player is available in VST3, Audio Units (AU), and AAX plug-in formats. Once installed, Kontakt Player will appear in the plugin lists of any compatible DAW you have installed on your system. If Kontakt Player does not show up, refer to this article in our Knowledge Base for help.
If you want to learn more about how to load and play instrument plugins like Kontakt Player in your DAW, please refer to the documentation provided by the manufacturer.
Note
Kontakt 7 and 8 feature plugin migration that will help you load DAW projects containing older versions of Kontakt. Learn more in the following Knowledge Base article: Notes about Auto-Migration of Kontakt Versions in DAW Projects
Using Kontakt Player as standalone application
When you open Kontakt Player from your system's application folder, it will launch as standalone application independently of a DAW or another plugin host. The Kontakt Player standalone application receives MIDI from one or more ports of a MIDI interface and sends audio signals directly to your audio interface.
This enables you to use Kontakt Player as a live performance instrument or as a sampling host on a dedicated computer. If you are creating your own instruments using Kontakt Player, the standalone application can offer a more focused workflow.
When you open the Kontakt Player standalone application for the first time, you will need to configure the audio and MIDI settings in the Options dialog to connect Kontakt Player to your audio interface and MIDI controller.
To open the Options dialog, click the File menu in the Kontakt Player Header and select Options. Alternatively, you can press F12 on your computer keyboard.
Audio configuration
In the Audio tab of the Options dialog, you can specify which audio device Kontakt Player should use for playback and adjust global playback parameters.
The Audio tab provides the following options:
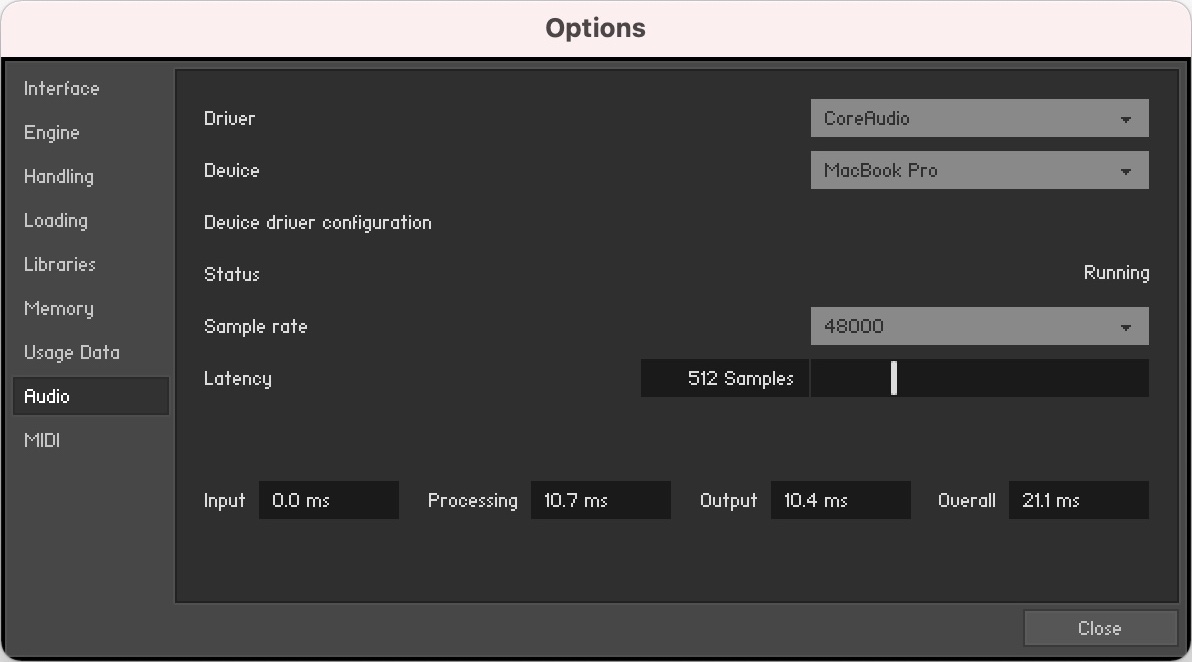 |
Driver: With this drop-down menu, you can select which of your operating system’s device driver architectures Kontakt Player should use. Most professional audio devices provide ASIO, CoreAudio (Mac) or WASAPI (Windows) drivers.
Device: This menu lists all connected audio interfaces that match the driver architecture chosen above. Use this to select the audio interface that you would like to use for playback.
Sample rate: This drop-down menu allows you to set the global playback sample rate at which Kontakt Player will operate. Common values are 44100 Hz for music and 48000 Hz for film production. Note that this does not have anything to do with the sampling rate at which your samples have been recorded — if the playback rate does not match a sample’s recording rate, Kontakt Player will handle all necessary conversion steps transparently for you.
Latency: The size of the audio playback buffer in samples. Small values will shorten the delay between pressing a key and hearing the resulting sound (this is called “latency”), but may cause drop-outs and stuttering when playing a lot of voices at the same time. Conversely, setting this to a higher value will make playback more reliable at the cost of more latency. Note that this control is not always available, as sometimes the latency is handled by your hardware drivers.
Tip
Learn more about latency and how to optimize your audio settings and system configuration for best performance, refer to this article in our Knowledge Base.
MIDI configuration
The MIDI tab of the Options dialog provides a list of all MIDI inputs and outputs that have been found on your system. These are ports of physical MIDI interfaces connected to your computer, but also any virtual MIDI ports that may be provided by drivers or other applications to facilitate inter-application MIDI usage.
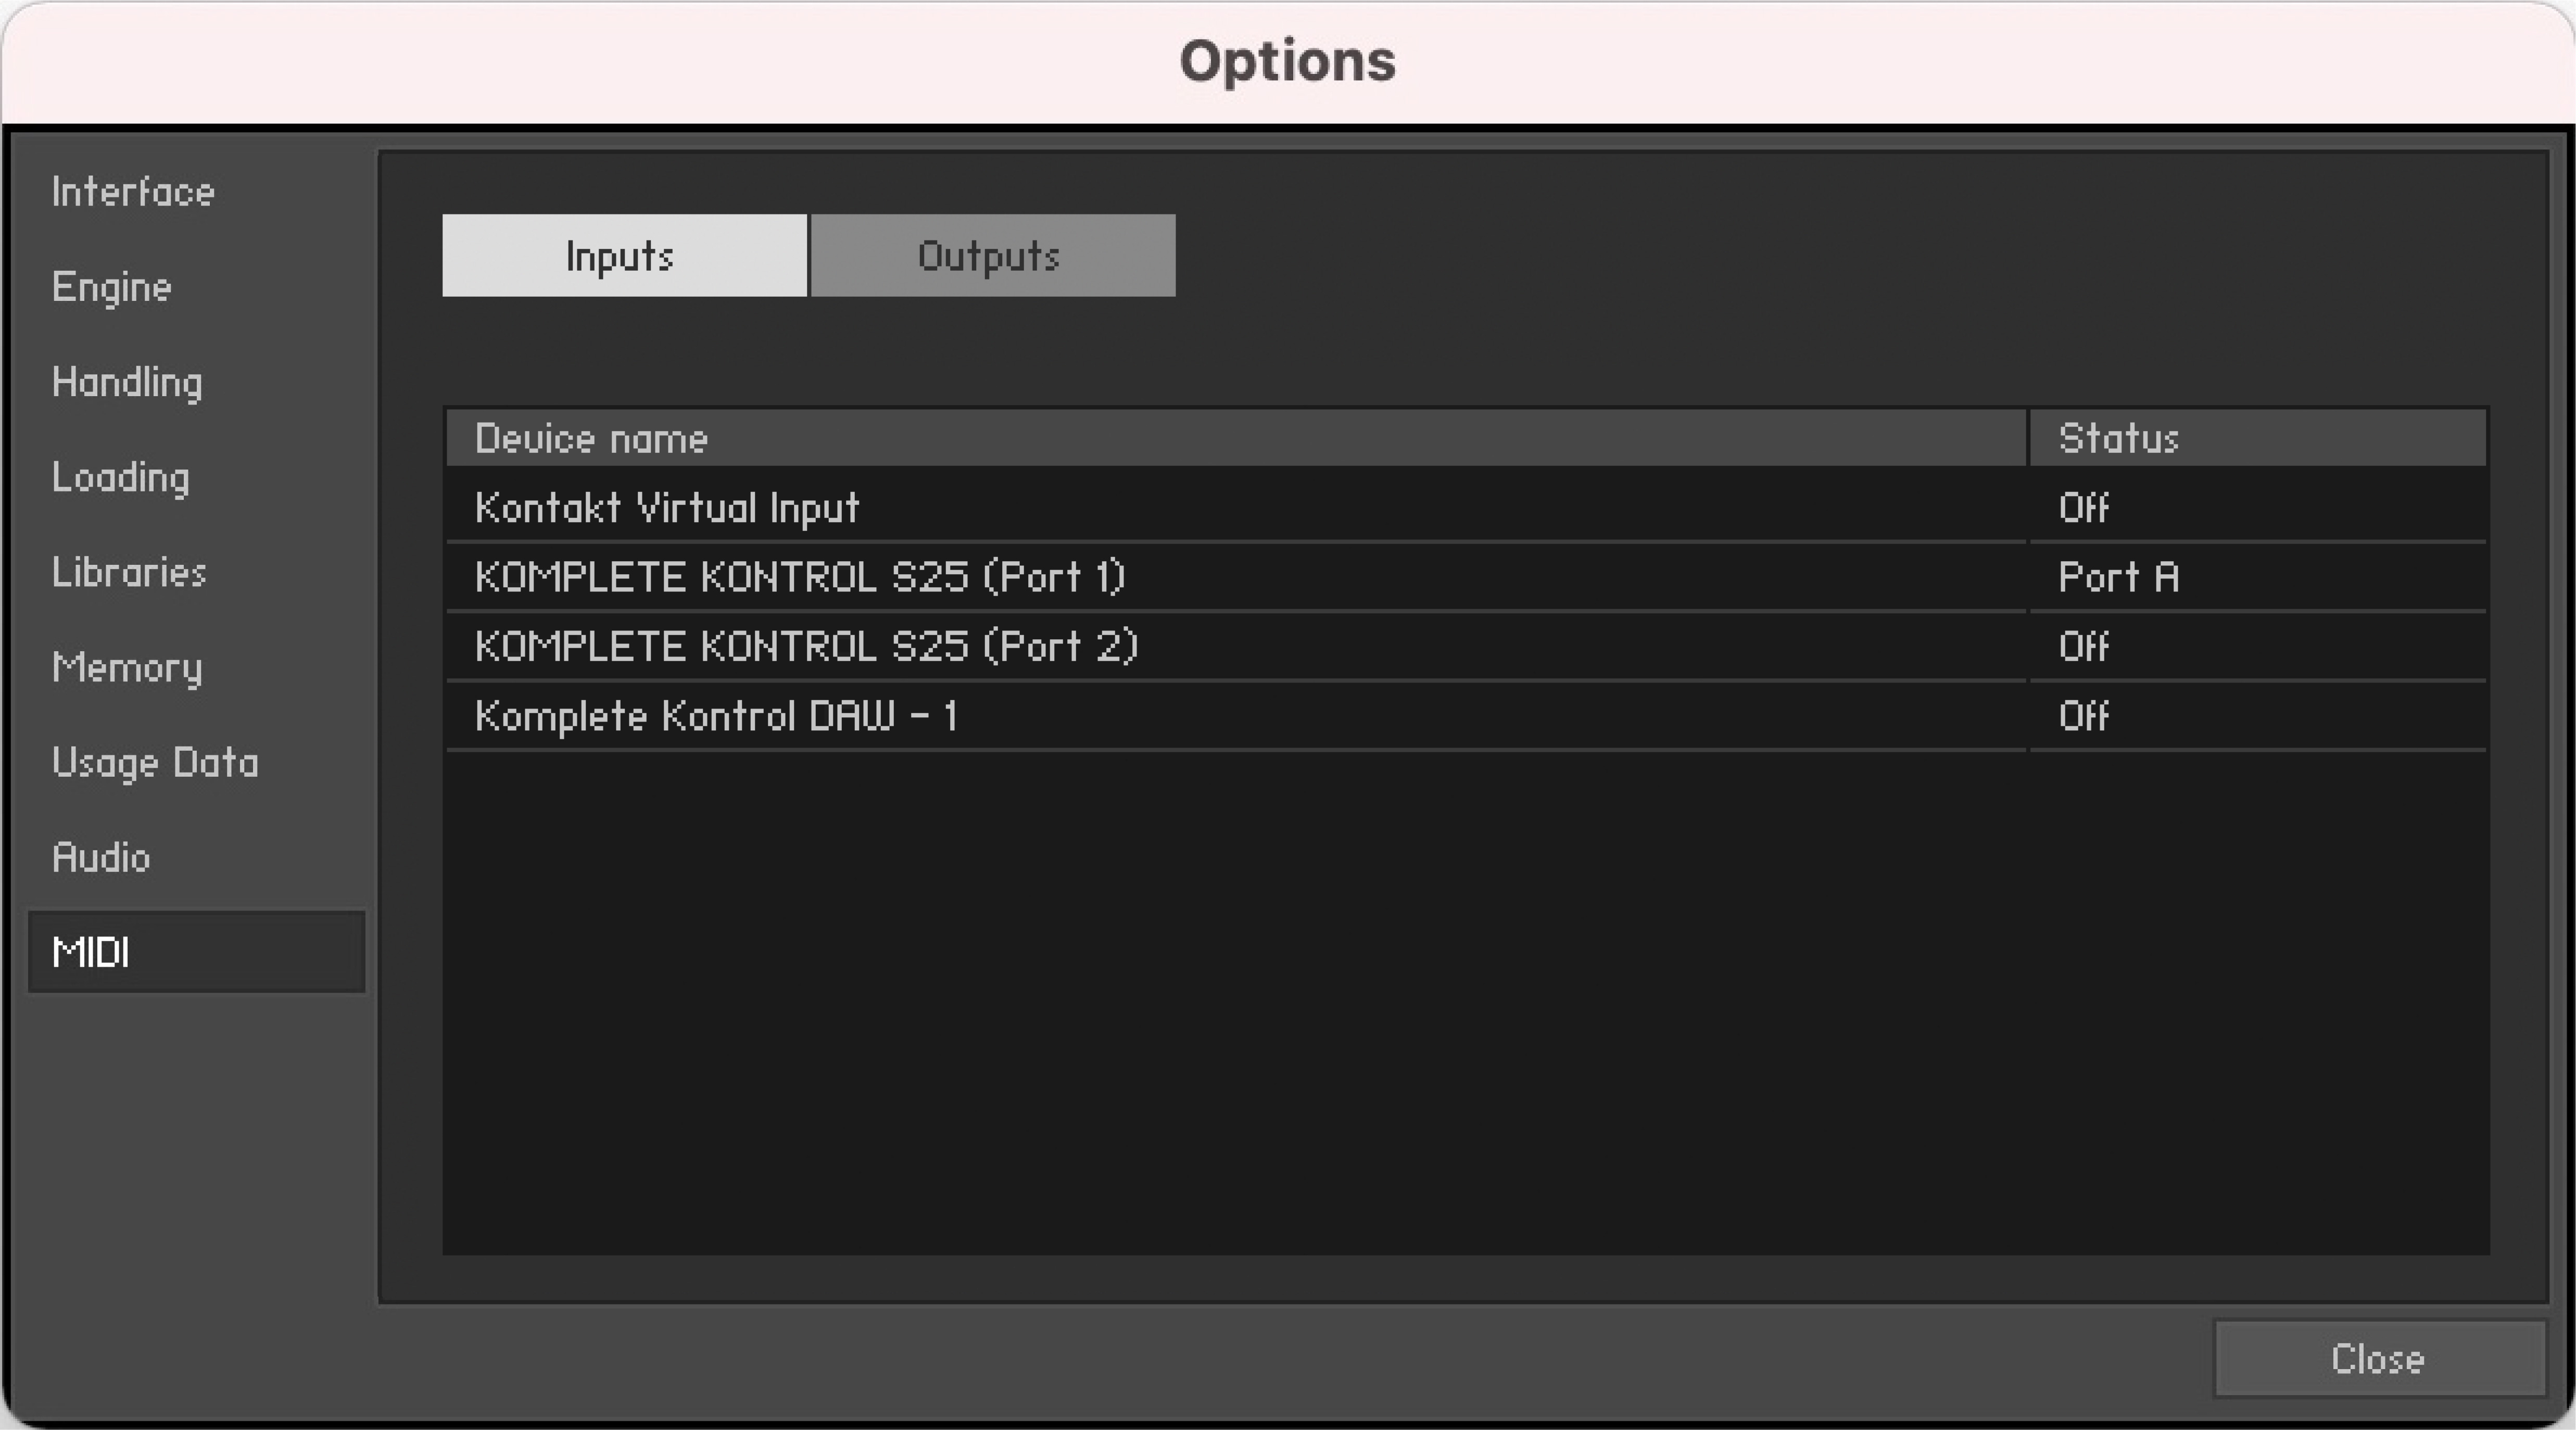 |
In order to make Kontakt Player respond to MIDI data from the outside, you have to enable one or more ports that appear in the inputs list of the MIDI tab. Make sure the Inputs button is highlighted and identify the port(s) that you intend to use for MIDI input in the list. If the Status field on the right side of an entry reads Off, click that value and assign one of the MIDI port identifiers (A-D). This enables the respective port, which will later be identified by the selected letter throughout the user interface.