Hardware Overview
This section provides a general overview of the Traktor X1 MK3 hardware. While it is primarily designed for unlocking the creative potential of Traktor Pro's effects, it also enables browsing and mixing tracks, using Hotcues, the Pattern Player, and more.
The Top Panel
The top panel of the X1 MK3 can be divided into four main sections, grouping the available functions in an intuitive way. All sections comprise two identical sides on the left and right, enabling direct access to two decks or FX units.
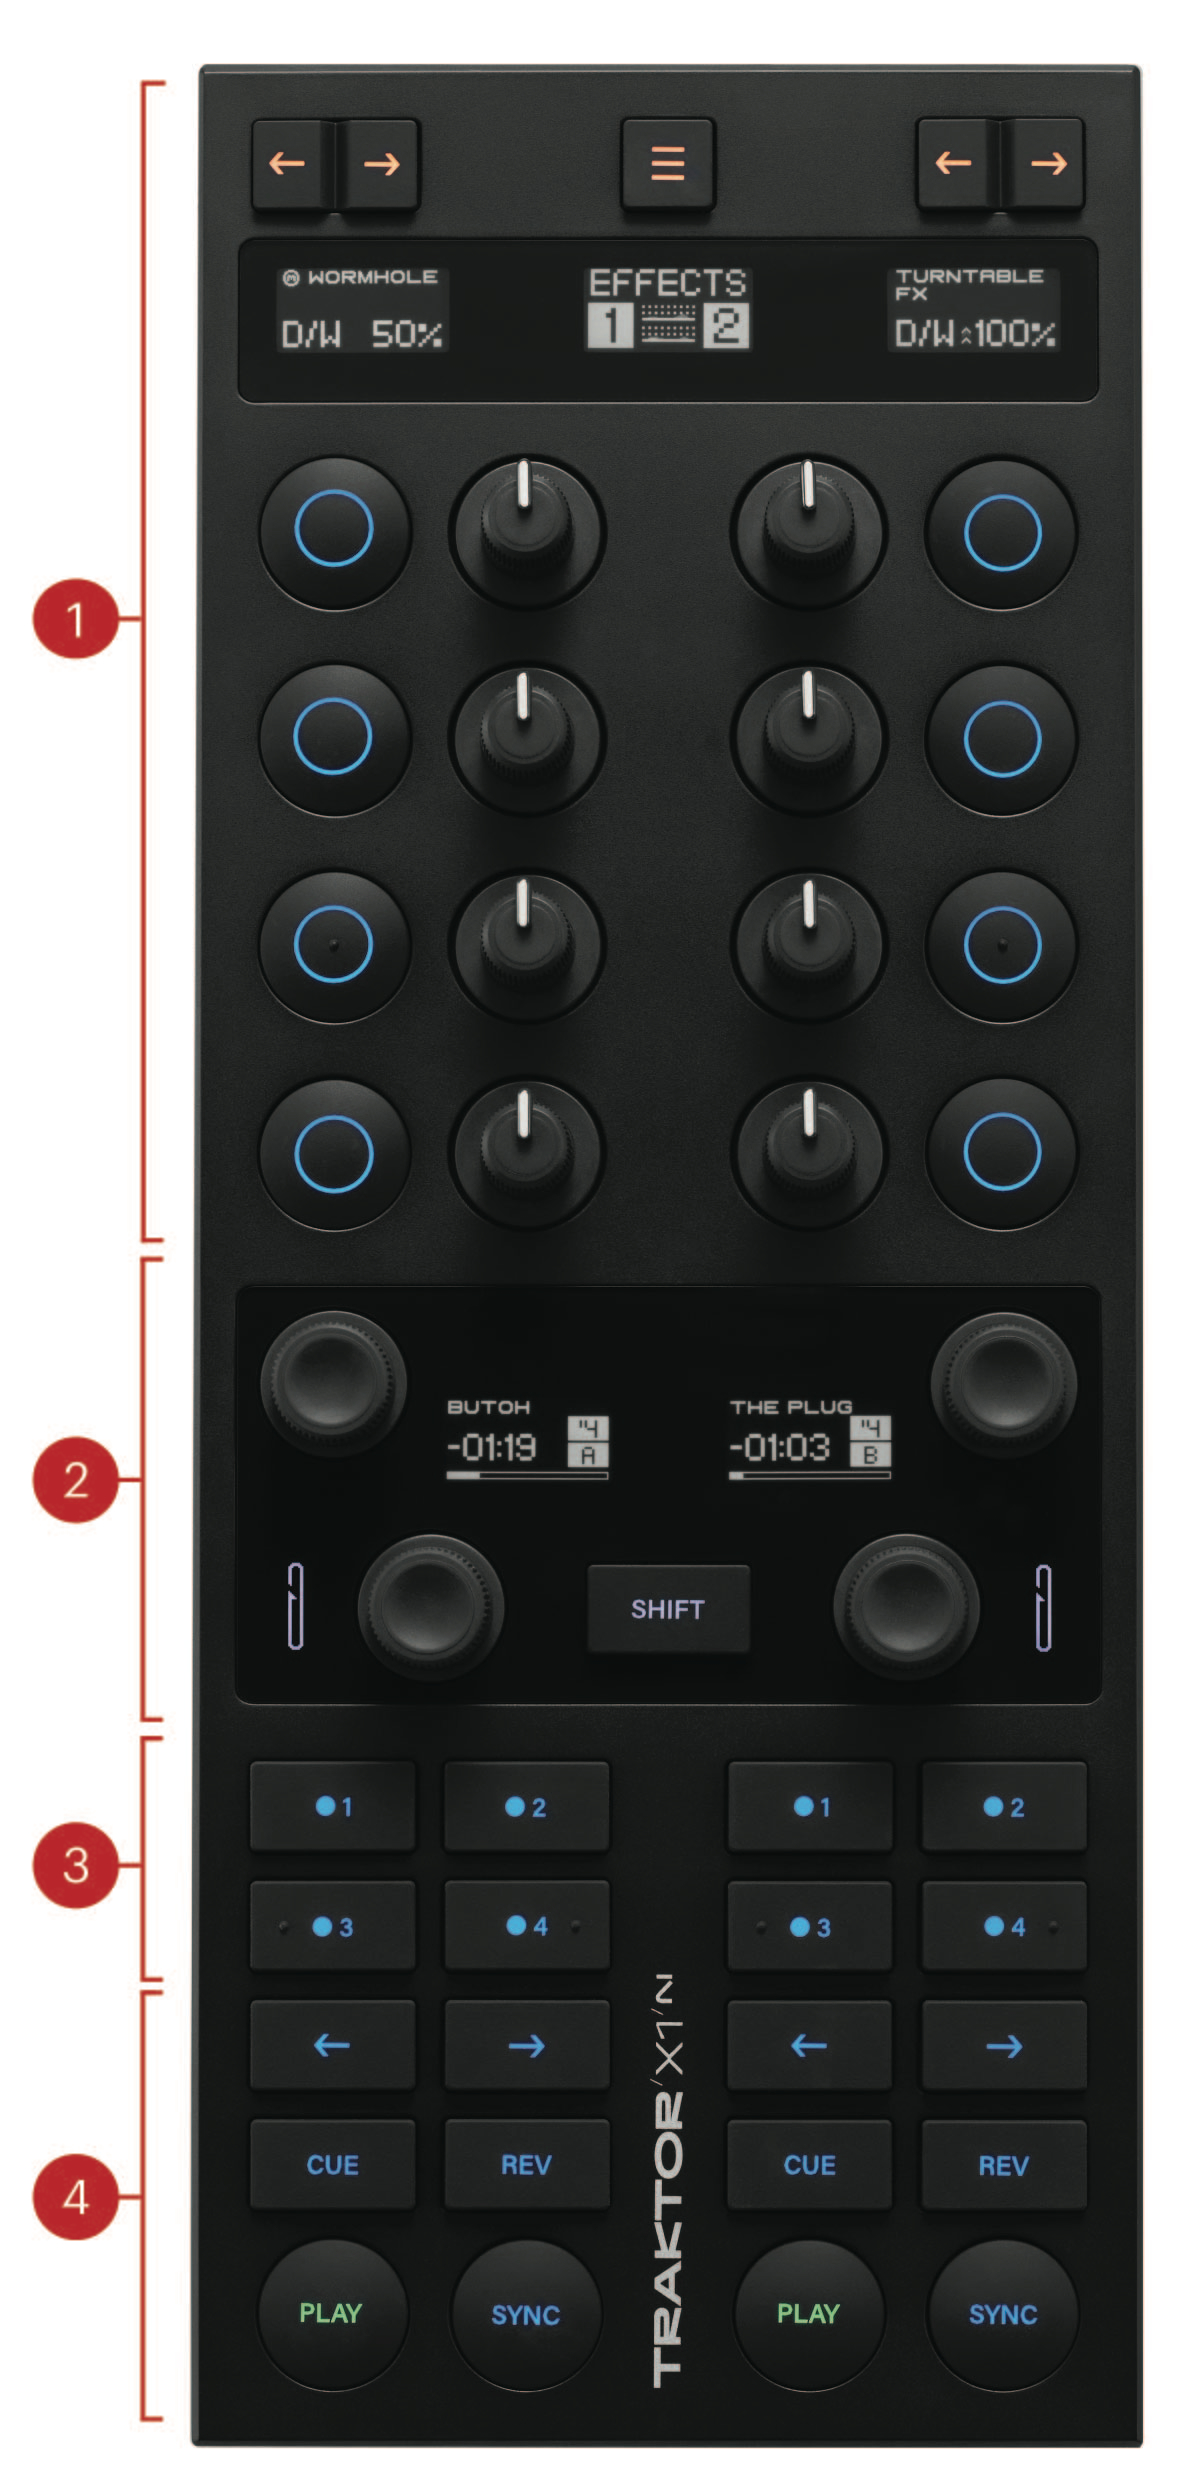 |
Effects and Mixer Section: This part of the controller enables direct control of two FX units on the left and right side. Each side has a dedicated FX display for direct visual feedback, assign buttons to assign effects to decks, as well as four buttons and knobs for effect manipulation. The Mode display at the center represents information on the current mode, and the button above switches between them. In mixer mode, this section turns into a dedicated mixer with EQ and volume control. You can also use this section to control the Pattern Player. For more information refer to Effect Control, Using the Pattern Player, and Mixer Control.
Loop and Browse Section: This section enables setting loops, changing their length and position, and browsing Traktor's track collection. A dedicated display for each deck shows important information including loop status and remaining track time. The SHIFT button combines with many controls to access secondary functions across the device. For more information refer to Loop and Browse Section.
Hotcue Buttons: Four versatile buttons by default enable setting and jumping to Hotcues. These buttons can be customized for various functions in the Preferences of the Traktor Pro software. For more information refer to Hotcues and Customizing the Controller.
Transport Section: Dedicated Cue, Start, Stop, and Sync buttons are found in the lowest part of the device. For more information refer to Transport Control.
The Rear Panel
The rear panel connects the controller to the computer and includes a powered USB hub.
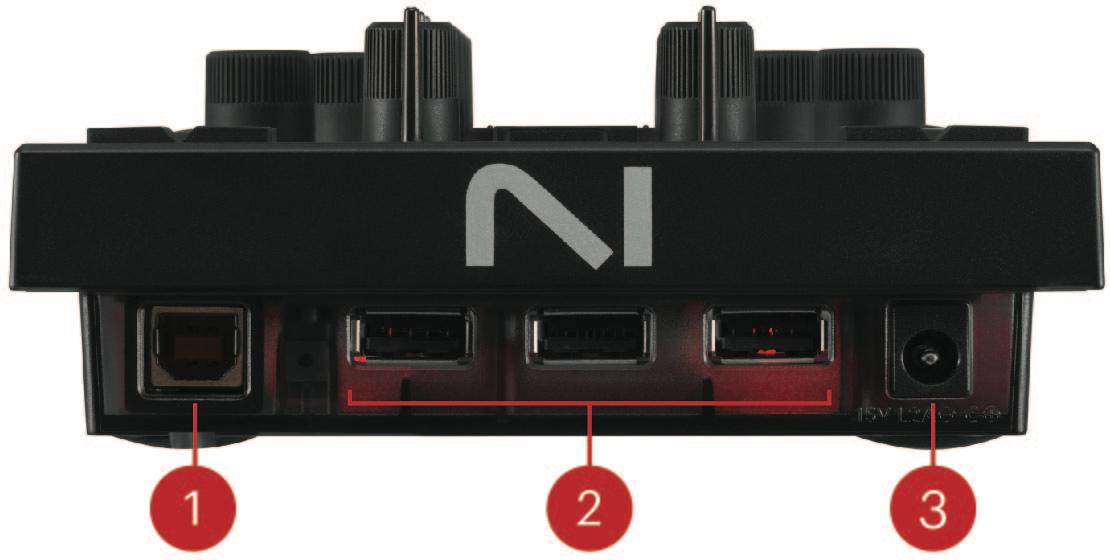 |
USB Host Connector: Connect the controller to the computer via this socket using the included USB cable. The controller itself is USB powered and will work with only this connection.
USB Hub Inputs: Connect other USB devices. Note that the hub will only function correctly when the included power supply is connected.
Power Supply Input: Connect the included power supply to this socket. This enables the USB hub and allows for brighter lit controls.
The Bottom Panel
The bottom panel of the controller features independent LED lights on both the left and right side, providing further visual feedback for each deck. By default, a green light is activated if a loop is active. A blinking red light indicates a track is nearing its end. This can be turned on or off in the Preferences of the Traktor Pro software. For more information refer to Customizing the Controller.