Customizing the Controller
The X1 MK3 can be customized directly in the Preferences of the Traktor Pro software. Two pages are available for customization of the X1 MK3, Color and Main. Traktor X1 MK3 Color lets you assign one of 16 colors to various control elements. Traktor X1 MK3 Main changes the functionality of certain controls.
The default functionality of each button on the X1 MK3 can be overwritten via the Controller Manager. For more information and available mapping options refer to the Traktor Pro Software Manual.
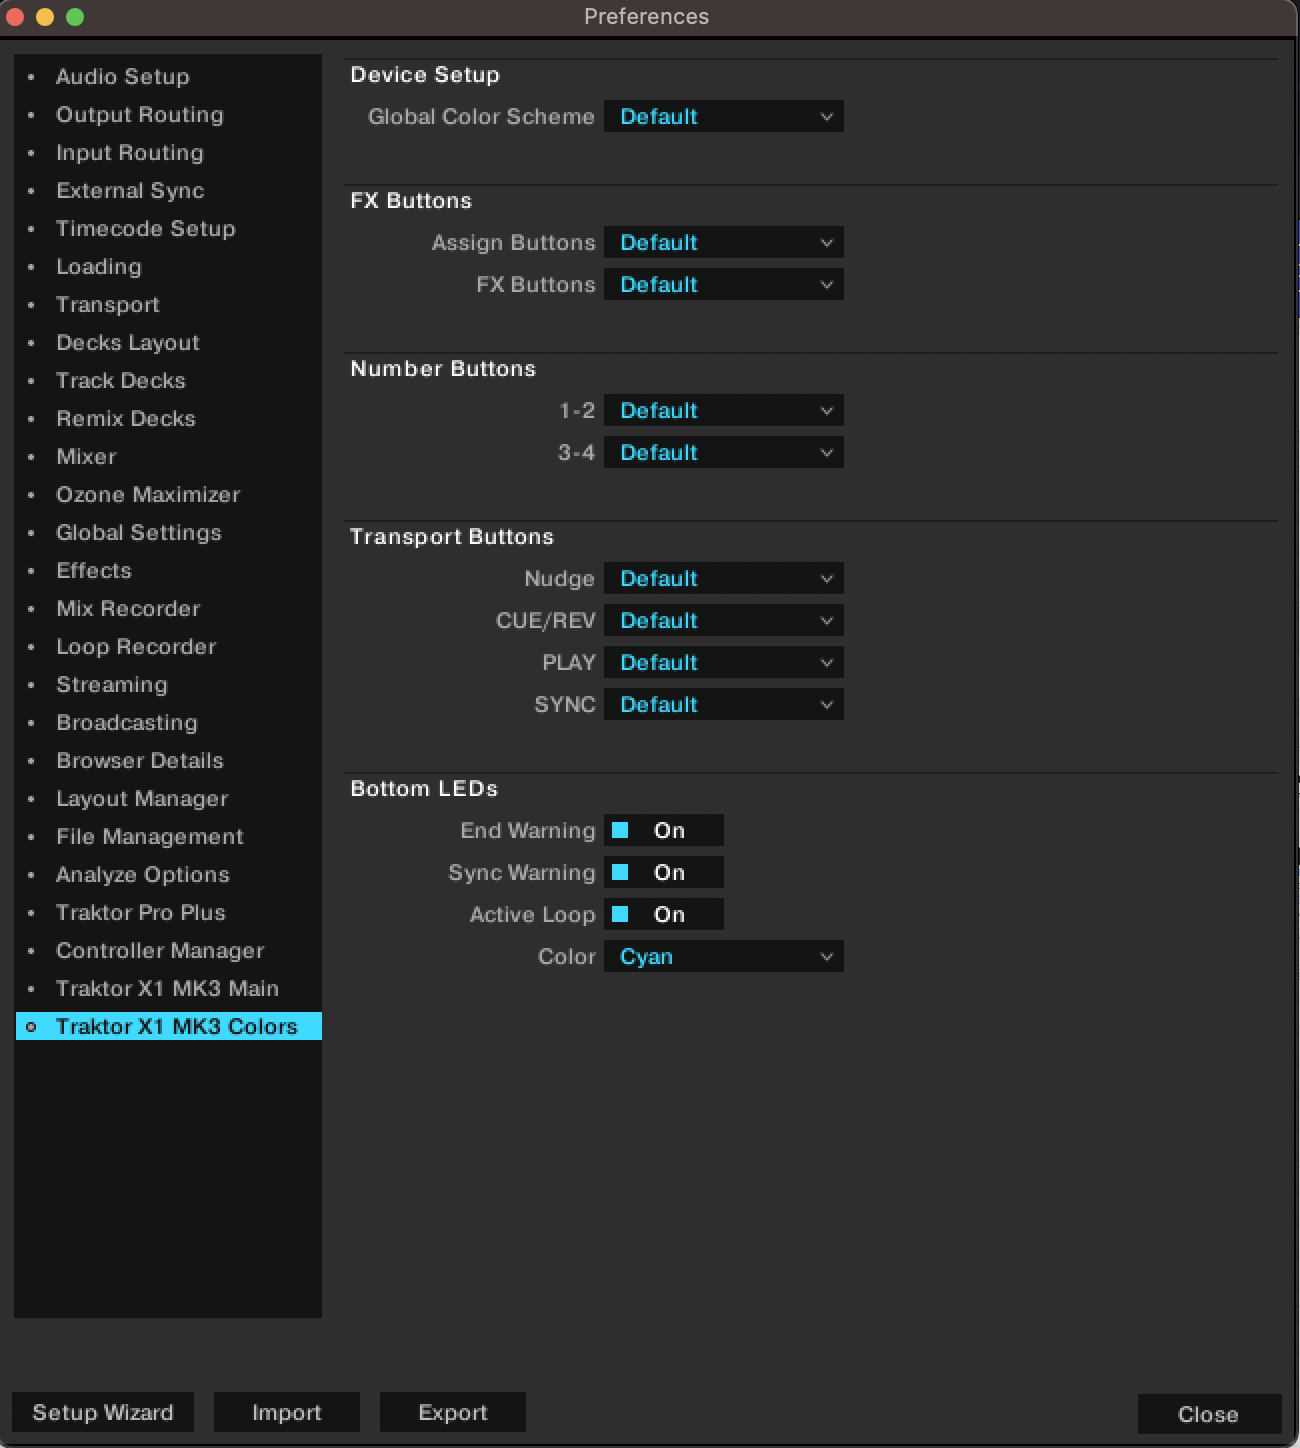
The Traktor X1 MK3 Colors page allows customization of the FX Buttons, Number Buttons, Transport Buttons, and the Bottom LEDs. The Global Color Scheme at the top assigns one color to all subsequent settings.
 |
The Traktor X1 MK3 Main page include options for changing the functionality of controls.
The following controls are customizable:
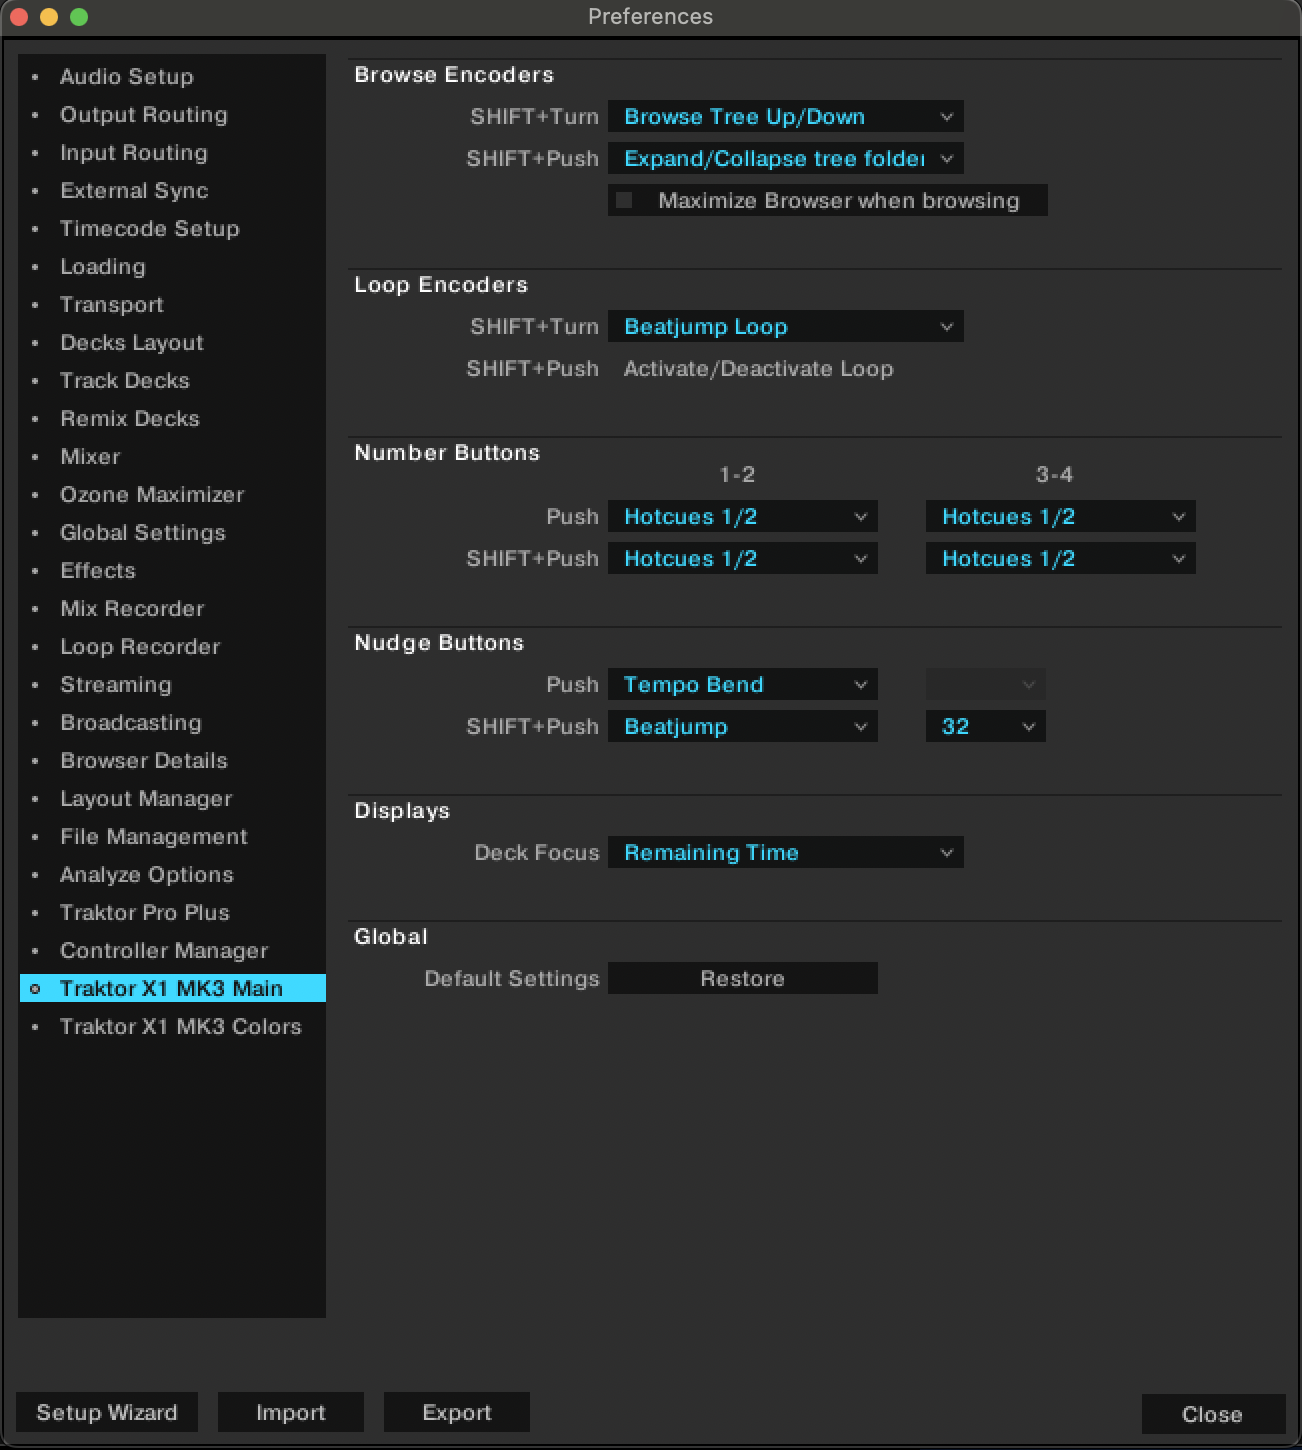 |
Browse Encoders: Changes the secondary behavior of the Browse encoders when SHIFT is held down and the encoder is turned. By default this interaction navigates the file tree but can be changed to navigate favorite folders instead. Holding down SHIFT and pressing the encoder can be set to collapsing/expanding folders in the browser or maximizing the browser. A toggle below this setting allows for automatically maximizing the browser when turning the Browse encoder.
Loop Encoders: Changes the secondary behavior of the Loop encoders when SHIFT is held down and the encoder is turned. It can be set to change the key of the track in semitones. By default, pressing the encoder while SHIFT is held activates the loop. If the turn interaction is set to key change instead, pressing the encoder while holding SHIFT results in activating/deactivating key lock.
Number Buttons: These buttons are highly flexible and can be mapped to many different interactions. By default they control Hotcues 1 and 2. Other options include up to 8 additional Hotcues, Loop In/Out, Stutter in various beat divisions, Abs/Rel which toggles absolute or relative mode for timecode vinyls or CDs, and Tempo Bend for nudging tracks. These options are also available for the secondary function when holding SHIFT and pressing a button. Additionally, you can set the secondary function to deleting Hotcues.
1-2 and 3-4 are grouped together, but their function can differ. This is indicated by a slash (/) in the drop-down menu. For example, setting 1-2 to Loop In/Out configures button 1 as loop start and button 2 as loop end.
Nudge Buttons: Both the primary and secondary behavior of these buttons can be customized to either nudge tracks or jump through them. When set to jump you can also set a fixed jump interval or tie it to loop length. Additionally, these buttons can be set to Hotcue 5/6 to gain access to two additional Hotcues. Deleting these hotcues can be mapped to the secondary behavior of the Nudge Buttons when SHIFT is held down.
Displays: Changes which information about the track is shown on the deck displays. Options include remaining time, elapsed time, and loop length.
Global: Restore the default settings of the controller here. Pressing this will require you to select a deck and effects layout again.