Editor page
The Editor page allows you to customize the different Phrases used for playing Action Strings 2.
The Editor page is the heart of Action Strings 2. Every Phrase you find on the Main page can be modified here. You can freely combine multiple recorded modules to build Phrases with a maximum length of two bars of the current time signature. You can also adjust the time signature and the loop range of the Phrase.
The Editor page contains the following features and controls:
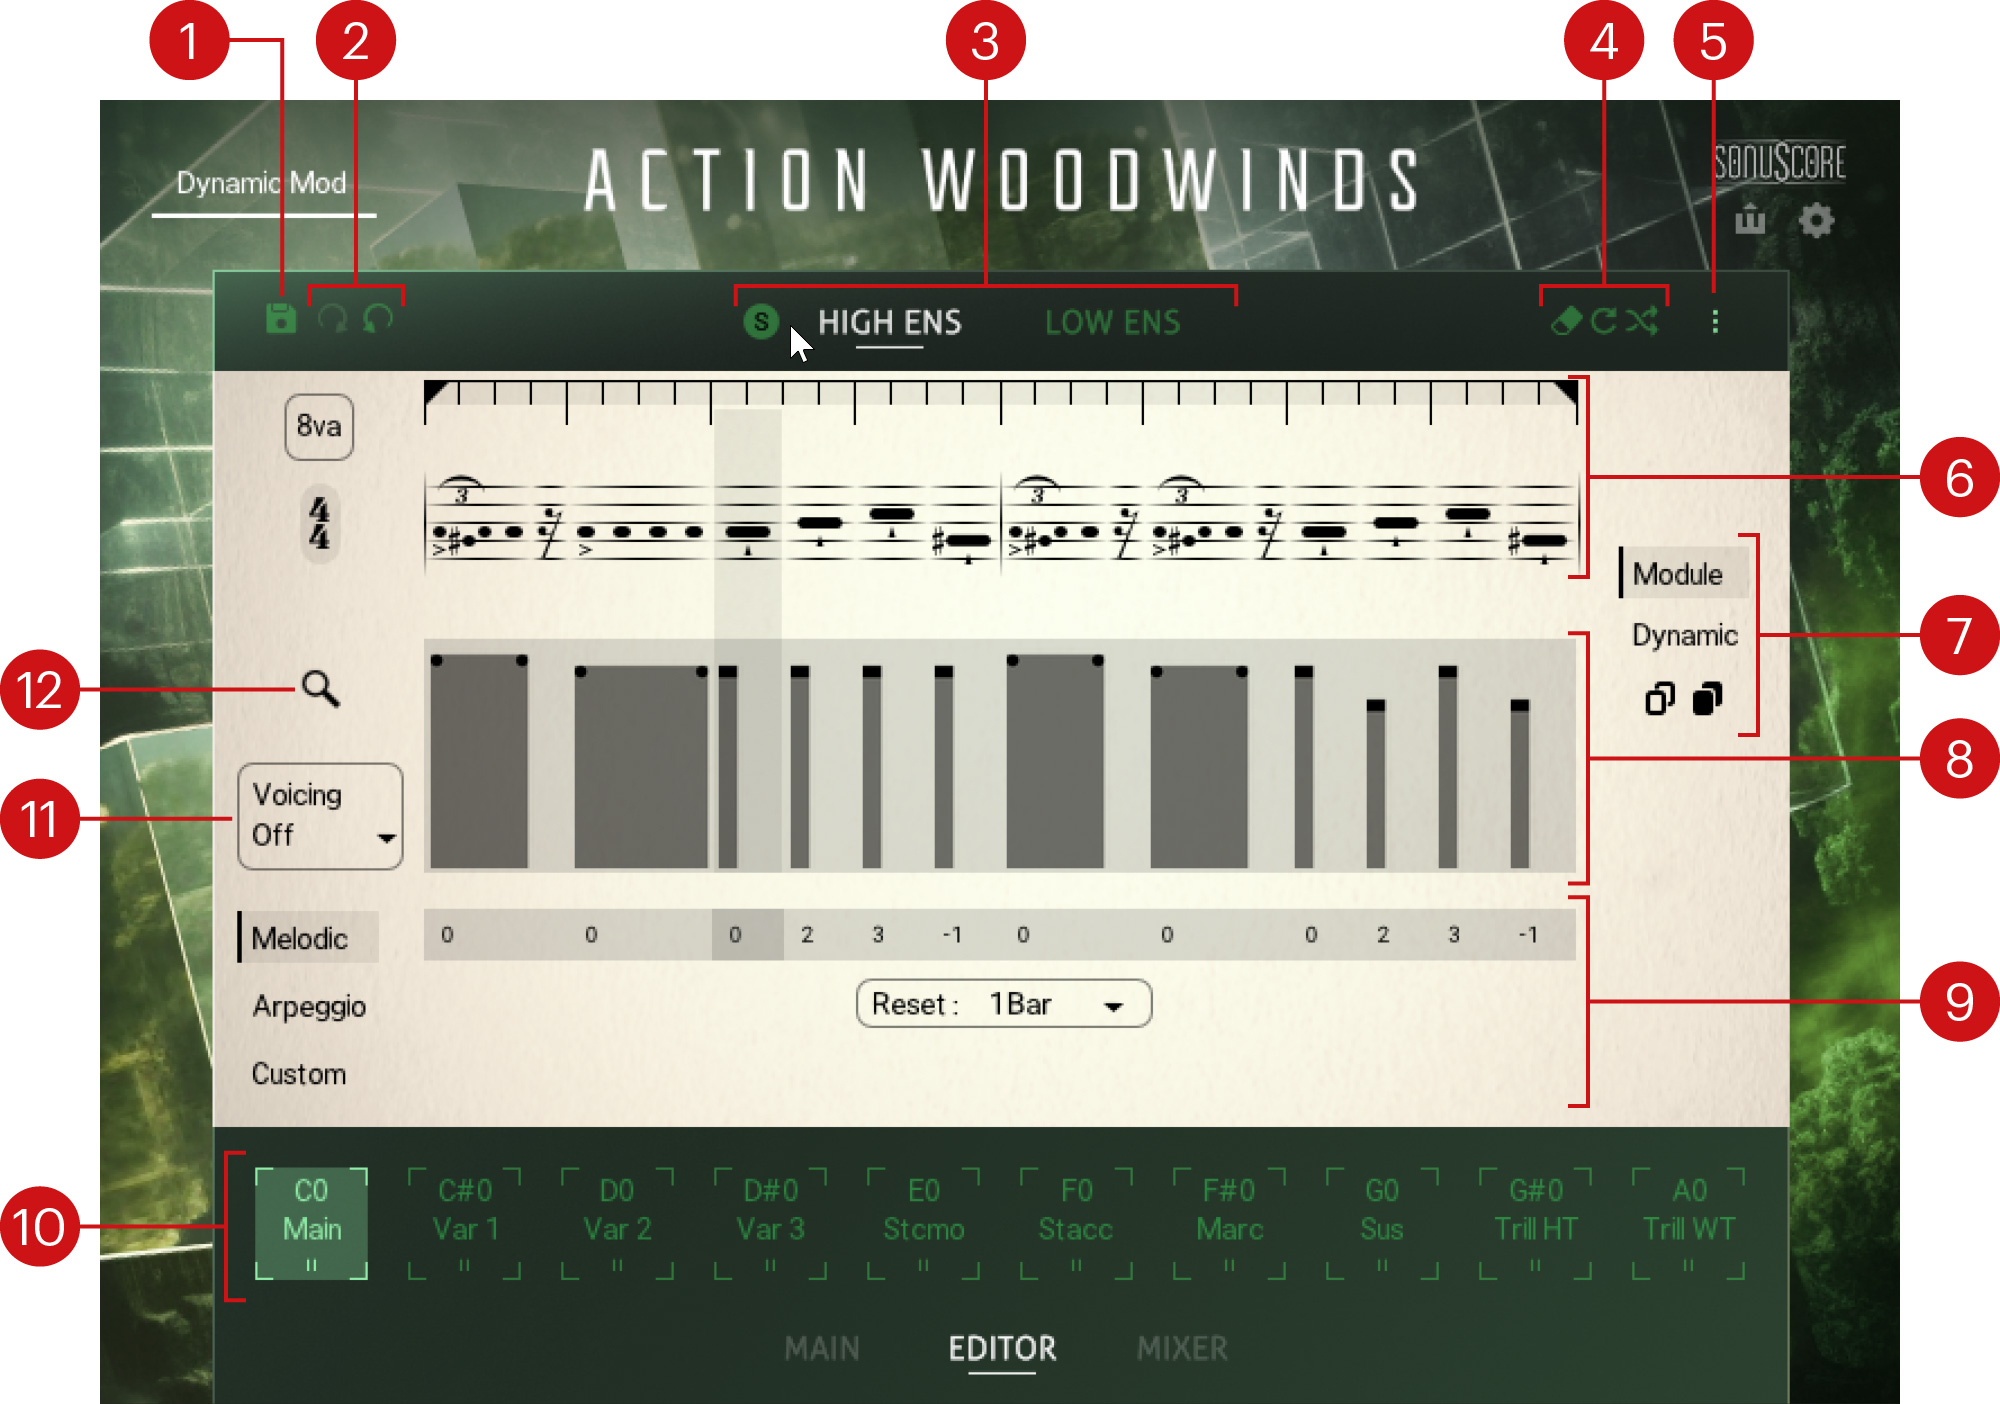
Save (disk icon): Saves the current Phrase as User Phrase. For more information, refer to Saving a User Phrase.
Undo/Redo: Let you undo/redo your last edits on the Phrase:
Undo (arrow turning to the left): Cancels your last action in the Editor. The Phrase returns to its previous state. You can click Undo repeatedly to cancel several actions in a row.
Redo (arrow turning to the right): Performs the last canceled action in the Editor again. After you have canceled an action, the Redo button is available until you perform any new action in the Editor. If you canceled multiple actions, you can click Redo repeatedly to perform some (or all) of them again.
Ensemble selector: Switches the Editor between the High and Low Ensembles and let you solo the desired Ensemble. For more information, refer to Ensemble selector.
Step Edit tools: Let you apply various edits to the selected Module or to the loop range. For more information, refer to Step Edit tools.
Sequencer menu: Allows you to copy/paste the sequencer settings between Ensembles, including the Envelope, Voicing, and Play mode settings. For example, this can be useful to copy arpeggiator settings from one Ensemble to the other, even if they play different Modules.
Phrase Notation: Adjusts the sequence of Modules included in the Phrase, the Loop Range, and other Phrase settings. For more information, refer to Phrase Notation.
Step Copy tools: Lets you copy/paste the selected Module or loop in various manners. For more information, refer to Step Copy tools.
Envelope: Adjusts the dynamic shape of the modules in your sequence. For more information, refer to Envelope.
Play modes: Switch the engine between different play modes (Melodic, Arpeggio or Custom). Melodic mode is optimized for playing melodies with single keys. In Arpeggio mode, the engine behaves like a step arpeggiator. Custom mode allows you to program the note played by each Module in your sequence. For more information, refer to Play modes.
Keyswitches: Indicate the active keyswitch and let you select another one to display and edit its Phrases in the Editor page. For more information, refer to Keyswitches.
Voicing: Determines which notes of your chord will be taken into account by the engine. For example, when you play a three-note chord, if Top is selected the engine will only play the highest note, and if Lowest 2 is selected the engine will only play the lowest two notes.
Browse (magnifying glass icon): Opens the Module Browser, where you can browse the available Modules for replacing the selected Module.
Ensemble selector
The Ensemble selector lets you switch the Editor between the High Ensemble and the Low Ensemble. Additionally, you can solo each Ensemble.
 |
Solo (S): Solos the High Ensemble or Low Ensemble, respectively. When a Solo button is inactive, it only appears when hovering the mouse over the HIGH ENS or LOW ENS selector. When a Solo button is active, it stays visible. Both Solo buttons are mutually exclusive: Activating either button automatically deactivates the other one.
HIGH ENS: Switches the Editor to the High Ensemble. The selected Ensemble is highlighted and underlined. When selected, adjustments in the Editor only apply to the High Ensemble.
LOW ENS: Switches the Editor to the Low Ensemble. The selected Ensemble is highlighted and underlined. When selected, adjustments in the Editor only apply to the Low Ensemble.
Phrase Notation
For the notation of the Phrases and Single Articulations, Action Strings 2 provides a hybrid approach. The note’s vertical position is displayed within a conventional staff, and its musical length is demonstrated by its horizontal length, similar to a MIDI editor. In addition, breaks and Articulations are displayed with their conventional symbol as well as its expansion. This technique allows for better visualization of the modular approach of Phrases but retains the clarity of traditional notation.
A Phrase is a sequence of Modules. The Phrase Notation shows this Module sequence and lets you change it to your needs.
The Phrase Notation contains the following features:

Phrase display: Displays the sequence of Modules included in the Phrase. The Phrases are notated in treble and bass clefs for the High and Low Ensembles, respectively, and are depicted using A as the root note. The actual sounding pitch will be based on whatever notes you play on your keyboard. You can click any Module to select it, which is indicated by a darker column background. You can use the Step Copy and Step Edit tools on the selected Module, or double-click the Module to open the Module Browser and replace it with another Module.
Loop Range: Defines the length of your Phrase. You can modify the Phrase’s start and end points by dragging the two loop handles. Everything within the Loop Range will loop when triggered. Regions outside the Loop Range are grayed out. You can click anywhere on the darker bar within the Loop Range to select it (any Module gets deselected) and use the Step Copy and Step Edit tools on the entire Loop Range.
8va: Activates or deactivates the Octaver. When the Octaver is active, all notes played by the Ensemble are doubled an octave higher.
Time Signature: Adjusts the time signature of the Phrase. You can click the value to select another time signature. When selecting a shorter signature than the current setting, the content of the exceeding beats will be cleared.
Note
To improve readability in the Phrase display, very fast Phrases will leave out accidentals. Here, the tonal context is displayed by a small label above (for example, chrom, min or maj).
Step Edit tools
The available Step Edit tools depend on whether you have selected a Module or the Loop Range in the Phrase Notation.
If a Module is selected in the Phrase Notation, the following Step Edit tools are available:
 |
Delete: Clears the selected Module.
Repeat: Duplicates the selected Module into the following slot. This is very handy for single notes or short Modules.
Variate: Inserts a similar Module of the same category. This only works with modules that have variations.
If the Loop Range is selected in the Phrase Notation, the following Step Edit tools are available:
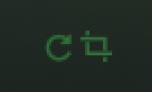 |
Repeat Range: Repeats the loop content directly after the loop end marker.
Crop Loop: Brings the loop content to the beginning of the Phrase and deletes everything outside of the loop.
Step Copy tools
The Step Copy tools allow you to copy the selected Module or the selected loop, and paste it to another position within the current Phrase or into the Phrase on another keyswitch for the same Ensemble. The Module / Phrase and Dynamic buttons let you choose what should be included in the copy/paste process.
|
|
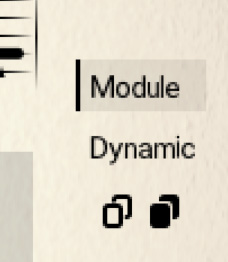

Copy (transparent icon): Copies the selected Module or loop.
Paste (black icon): Pastes the copied Module or loop.
Module (Module selected) or Phrase (loop selected): If activated, the copy will include the particular Module(s) of the source, as set in the Phrase Notation.
Dynamic: If activated, the copy will include the dynamic shape of the source, as set in the Envelope.
Module Browser
Within the Module Browser, you can navigate through all recorded Modules and place them to the currently selected slot in the Phrase Notation by double-clicking them.
To open the Module Browser, double-click the Module you want to change in the Phrase Notation or click the magnifying glass on the left side of the Editor page.
The Module Browser opens and highlights the selected Module and its category.
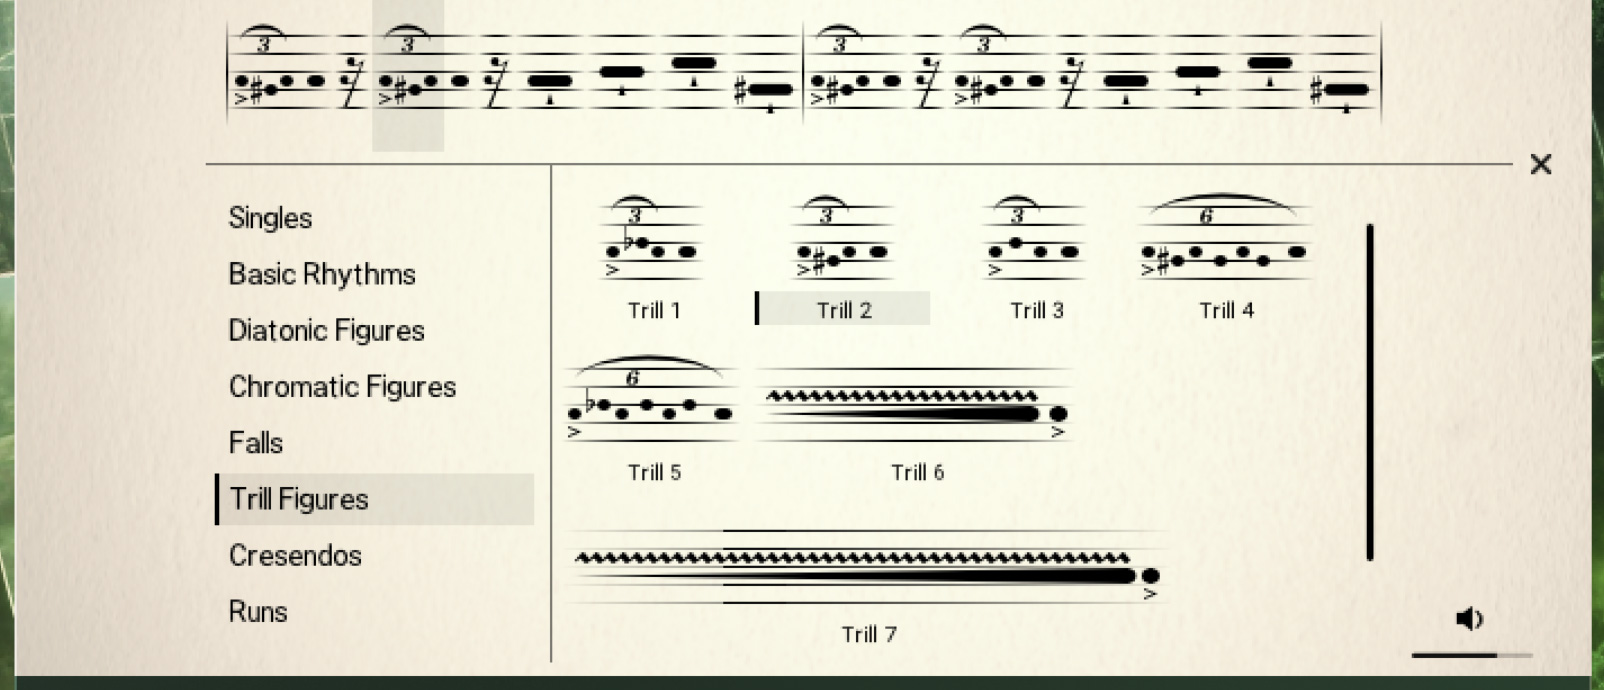
The Module Browser
Tip
While the Module Browser is open, you can select another slot in the Phrase Notation or switch to the other Ensemble: The Module Browser will automatically switch to the category and Module corresponding to the newly selected slot.
Selecting and pre-listening Modules
You can select and pre-listen Modules in the Module Browser by simply clicking them. To optimize your pre-listening experience, use the pre-listening tools bottom right of the Module Browser.
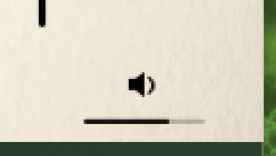 |
Click the loudspeaker to activate/deactivate pre-listening.
Click + drag the slider horizontally to adjust the pre-listening volume.
Loading Modules
Double-click a Module to load it into the selected slot in the Phrase.
The Module is loaded into the Phrase. The Module Browser stays open and the selection in the Phrase Notation automatically moves to the next slot, allowing you to quickly load a series of Modules.
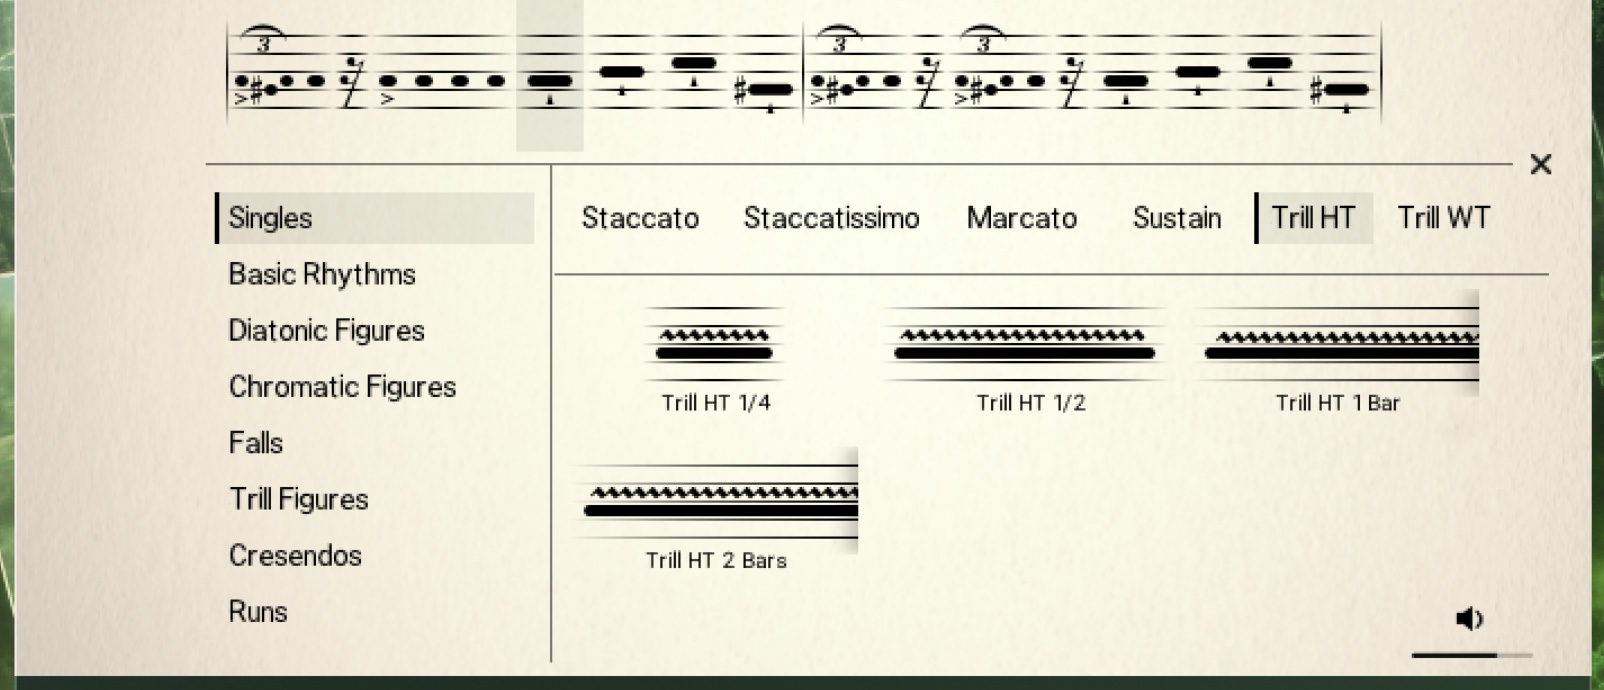
Module categories
In the left part of the Browser, you can click the desired Module category to display its Modules on the right. The different Module categories include:
Module category | Description |
|---|---|
Singles | Single notes of different playing styles |
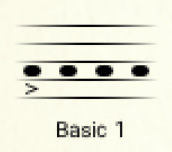
Basic Rhythms | Repeated notes on the same pitch |
Diatonic Figures | Note sequences based on diatonic scales |
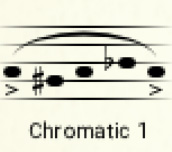
Chromatic Figures | Note sequences based on chromatic movement |
Falls | Sequences starting on a specific pitch and moving fluently to the root note |
Trill Figures | Sequences involving fast trills |
Runs | Major or minor runs up and down |
Crescendos (Low Ensemble only) | Crescendos and glissandos in various styles |
Module types
Generally, there are three types of Modules:
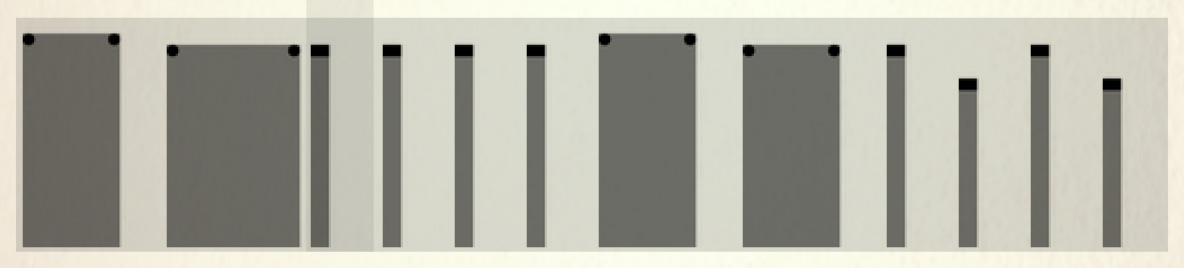
| Modules without an emphasized ending note. Mostly with 2/16 or 4/16 length. These Modules can be stringed together without overlapping. | |
| Modules with an emphasized ending note. Mostly in a length of 5/16. These Modules are suitable to serve as the ending of a Phrase on a beat. You can also select the ending note and insert another Module, which allows you to string together Modules with ending notes as well. | |
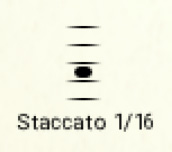
| Basic single-note Articulations to insert into the Phrase like staccatos and long notes. |
For single-note Modules (Singles category), the Browser has a slightly different layout. In the upper line, you can choose the specific Articulation, and then you can select a specific length to insert it into the Phrase. Long notes that offer the duration of 1 or 2 bars will adjust their length to the current time signature.
Closing the Module Browser
Click the cross on the right side of the Browser to close the Module Browser without loading anything.
Envelope
The Envelope allows you to set a dynamic shape to Modules. Short single notes like staccatos only have a single handle that can be adjusted, while longer Modules like sustained notes have multiple handles to allow you to give dynamic shapes to these Modules.
Click + drag the mouse up or down to adjust the shapes in the Envelope.
The Envelope in the Editor page
Play modes
Action Strings 2 provides three different Play modes: Melodic, Arpeggio, and Custom. Melodic mode is optimized for playing melodies with single keys, Arpeggio mode behaves like a step arpeggiator with multiple notes played at a time, and Custom mode lets you choose for each step which of the depressed keys should be played.
Melodic mode
Melodic mode is optimized for playing melodies with single keys. The pitch of every Module can be adjusted chromatically by clicking + dragging the respective box up and down. The number displayed in the box shows the difference to the root pitch of the Phrase. Drag the numbers up or down to change the melody. The corresponding module will move up and down in the Phrase Notation.

Reset: Determines the duration after which the engine will reset its pattern.
Arpeggio mode
In Arpeggio mode, Action Strings 2 behaves like a step arpeggiator, with each Module acting as a step. The Arpeggio mode is built to play multiple notes at the same time.

Pattern: Determines the order in which the Modules will be arpeggiated. All (Chord) will trigger all played notes in the respective rhythm.
Reset: Determines the duration after which the engine will reset its pattern.
Skip: Determines whether steps within a rest will be ignored for the note order and the respective pitch will sound at the next active Module.
Repeat: Repeats every note one or multiple times before moving to the next note.
Custom mode
In Custom mode, you can decide which of the depressed keys will be played by each Module by clicking the corresponding dots in the grid. The dots on the 0 row represent the root note. The rows with positive numbers represent the upper depressed keys followed by their equivalents in the upper octave(s), while the rows with negative numbers represent their inverted equivalents in the lower octave(s).

By clicking the numbers in the left column, you can activate or deactivate the corresponding notes for all steps at once.