Mixer page
Adjust the overall sound of the Ensemble by mixing signals from different microphone positions and applying effects on the Mixer page in Action Strings 2.
On the Mixer page, you can adjust the overall sound of the Ensembles by mixing signals from different microphone positions and apply effects. Additionally, you can route the signals to individual outputs in Kontakt.
The Mixer page contains the following areas:
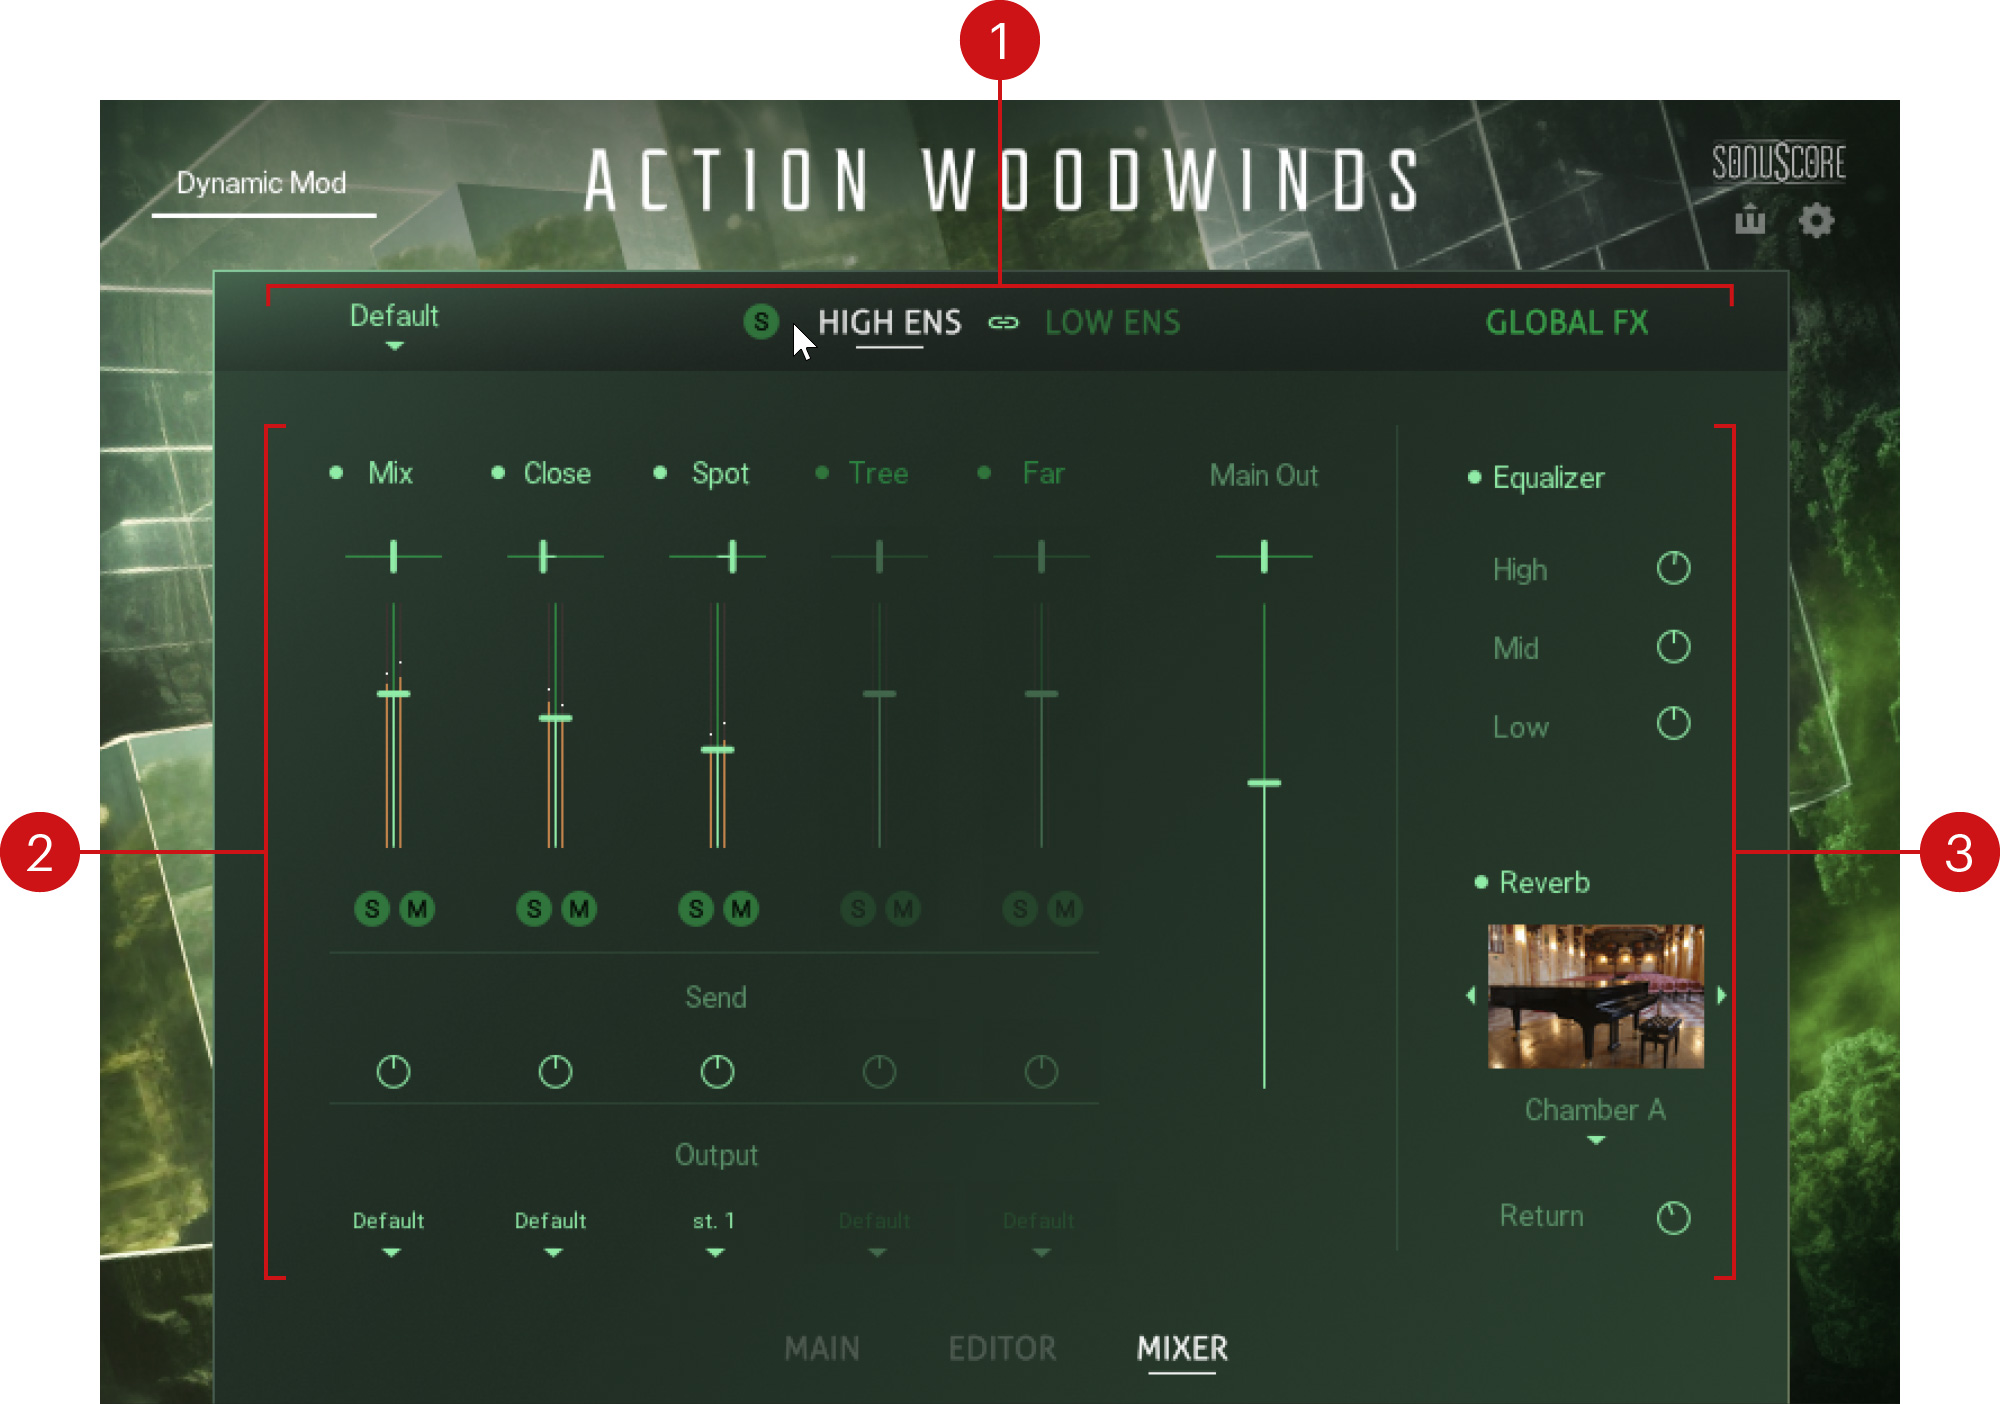
Ensemble selector: Lets you switch the Mixer between the High Ensemble and the Low Ensemble, and select from a number of Mixer presets. For more information, refer to Ensemble selector.
Mixer: Lets you mix signals from different microphone positions, and route the signals to individual outputs in Kontakt. For more information, refer to Mixer.
Global effects: Let you apply the Equalizer to the main output, and select from a number of different spaces for the Reverb effect. For more information, refer to Global Effects.
Ensemble selector
The Ensemble selector enables you to switch the Mixer between the High Ensemble and the Low Ensemble and select from a number of Mixer presets. Additionally, you can solo each Ensemble and activate the Link function that applies edits to both Ensembles.
The Ensemble selector includes the following controls:

Mixer presets: Selects from a number of Mixer presets that give you quick access to a variety of different mixes, from close and intimate to wide and open.
Solo (S): Solos the High Ensemble or Low Ensemble, respectively. The Solo button (S) only appears when hovering the mouse over the HIGH ENS or LOW ENS label.
HIGH ENS: Switches the Mixer to the High Ensemble. When selected, adjustments in the Mixer only apply to the High Ensemble, unless the Link button is activated.
Link (chain link icon): Links the Mixer controls for the High and the Low Ensemble. When activated, adjustments in the Mixer apply to both the High and Low Ensembles. Previously adjusted controls are not affected by the Link function.
LOW ENS: Switches the Mixer to the Low Ensemble. When selected, adjustments in the Mixer only apply to the Low Ensemble, unless the Link button is activated.
Mixer
The Mixer enables you to mix signals from different microphone positions and route the signals to individual outputs in Kontakt. Each microphone position has a dedicated microphone channel in the mixer. From each channel, you can also adjust the send level to the Reverb effect in the global effects.
Tip
You can reset mixer controls to their default value by holding [command] (macOS) or [Ctrl] (Windows) and clicking them.
The Mixer includes the following controls:
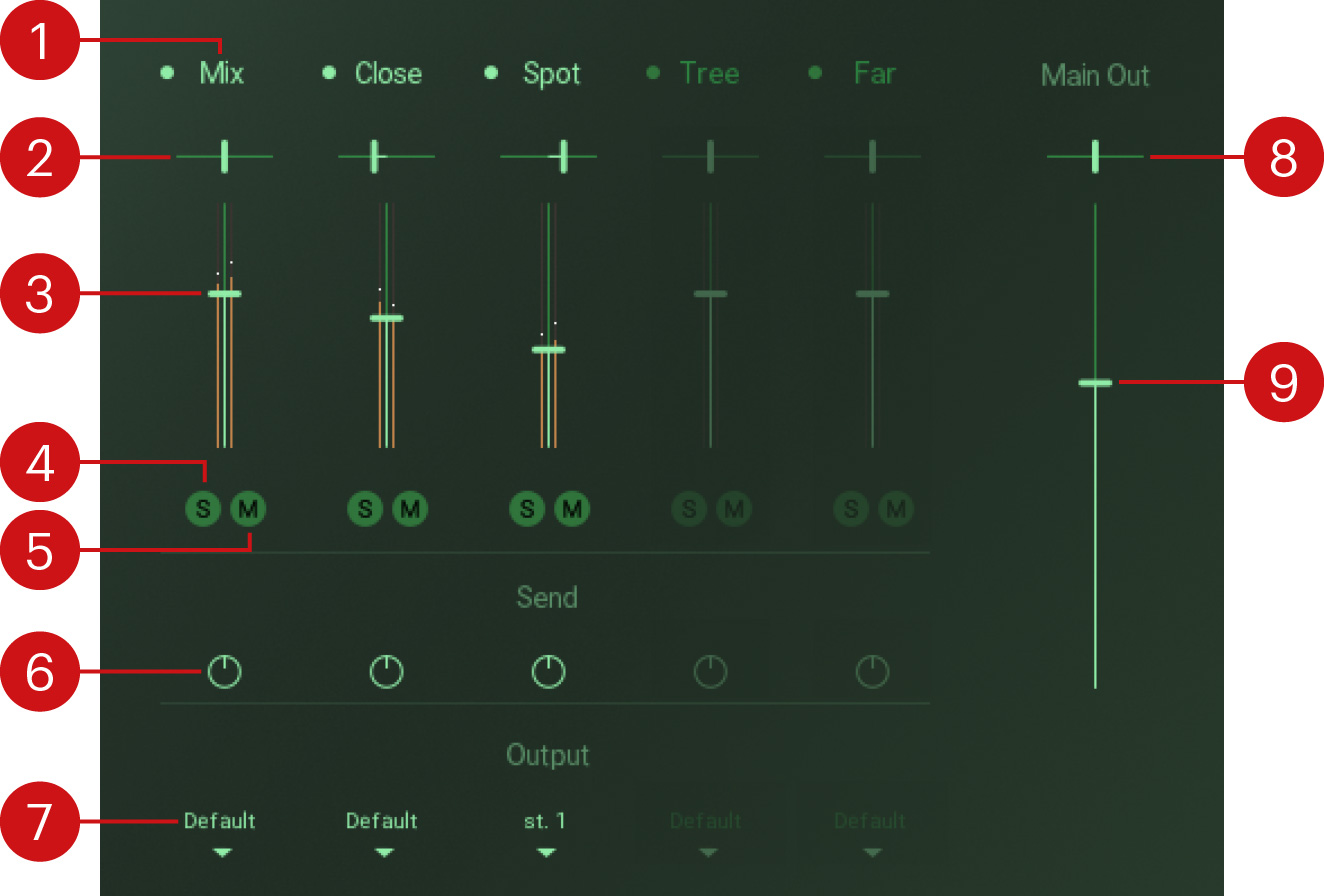 |
Channel switch: Activates or deactivates the microphone channel. When activated, the corresponding samples are loaded into the memory. When deactivated, the samples are purged. Deactivated microphone channels are grayed out, however, their controls can still be adjusted.
Pan: Adjusts the position of the microphone channel in the stereo image.
Note
Setting all Pan controls to center preserves the traditional positioning of instruments in the Ensemble as present in the original recording.
Level: Adjusts the level of the microphone channel.
Solo (S): Solos the microphone channel. All other channels are muted. The corresponding samples remain loaded in the memory.
Mute (M): Mutes the microphone channel. The corresponding samples remain loaded in the memory.
Send: Adjusts the level of the signal sent from the channel to the Reverb effect in the Global effects. The intensity of the reverb also depends on the Return control in the GLOBAL FX area. For more information, refer to Global Effects.
Output: Routes the microphone channel to a specific output in Kontakt. When set to Default, the channel is routed to the Mixer’s main output, which is the instrument’s main output (as defined in the Instrument header in Kontakt). Selecting another entry from the drop-down menu routes the channel directly to the respective output, bypassing the Mixer’s main output. You can use this to assign individual outputs to each microphone channel.
Note
If the drop-down menu does not include any additional entries, you can create and assign new outputs in Kontakt's Outputs section. For more information on the Outputs section, refer to the Kontakt manual.
Tip
Since the Reverb in the Global effects is always routed to the Mixer’s main output (Default), it is recommended to apply reverb in the DAW when using individual outputs for the microphone channels.
Main Out Pan: Controls the panning for the main output. In the left position, the main output is panned left, and when in the right position the main output is panned right.
Main Out Level: Controls the main output level of the instrument.
Global Effects
The Global effects enable you to apply the Equalizer to the main output and select from a number of different spaces for the Reverb effect. The Equalizer and the Reverb apply to both the High and Low Ensembles.
The Global effects include the following controls:
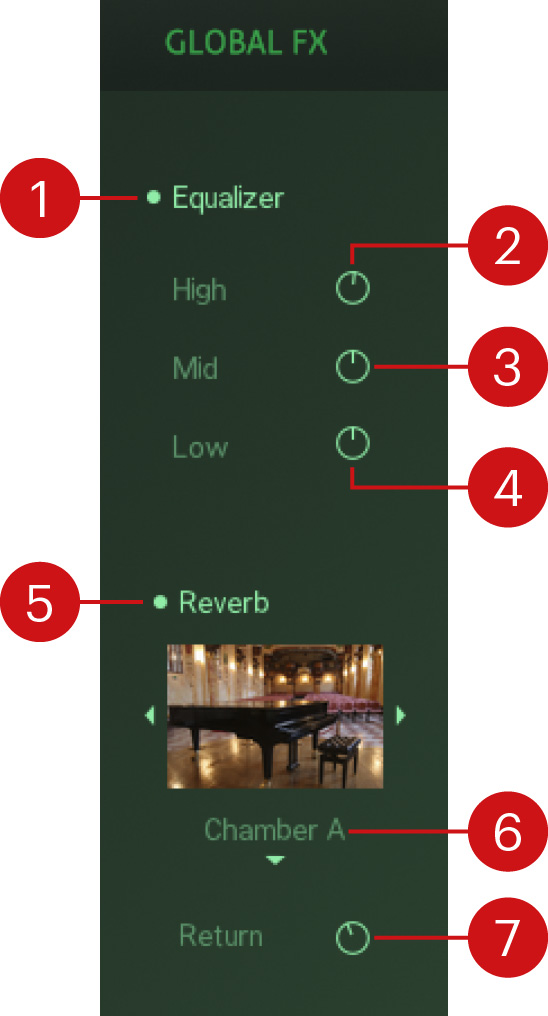 |
Equalizer: Activates or deactivates the Equalizer. The Equalizer features three bands High, Mid, and Low that can be adjusted independently.
High: Adjusts the high-frequency response of the Equalizer. Turning the control to the left attenuates high-frequency content. Turning the control to the right boosts high-frequency content.
Mid: Adjusts the high-frequency response of the Equalizer. Turning the control to the left attenuates mid-frequency content. Turning the control to the right boosts mid-frequency content.
Low: Adjusts the high-frequency response of the Equalizer. Turning the control to the left attenuates low-frequency content. Turning the control to the right boosts low-frequency content.
Reverb: Activates or deactivates the Reverb. The Reverb is based on convolution of impulse responses recorded in real spaces.
Reverb selector: Selects from a number of differently sized spaces for the Reverb, including rooms, chambers, concert halls, and cathedrals. The image shows a photo of the selected space. You can directly select entries from the drop-down menu, or use the arrow icons next to the image to step through the available entries.
Return: Adjusts the amount of reverb added to the main output. The intensity of the reverb also depends on the Send controls in the mixer. For more information, refer to Mixer.