Settings page
The Settings page in Electric Keys lets you adjust tuning, response, and MIDI control settings for your instrument.
The Settings page lets you adjust tuning, response, and MIDI control settings for your instrument.
Click the nut icon at the top right of the instrument to open the Settings page.

The Settings page includes various panels, which you can select by clicking the Tuning, Response, and MIDI / Macro tabs on the left:
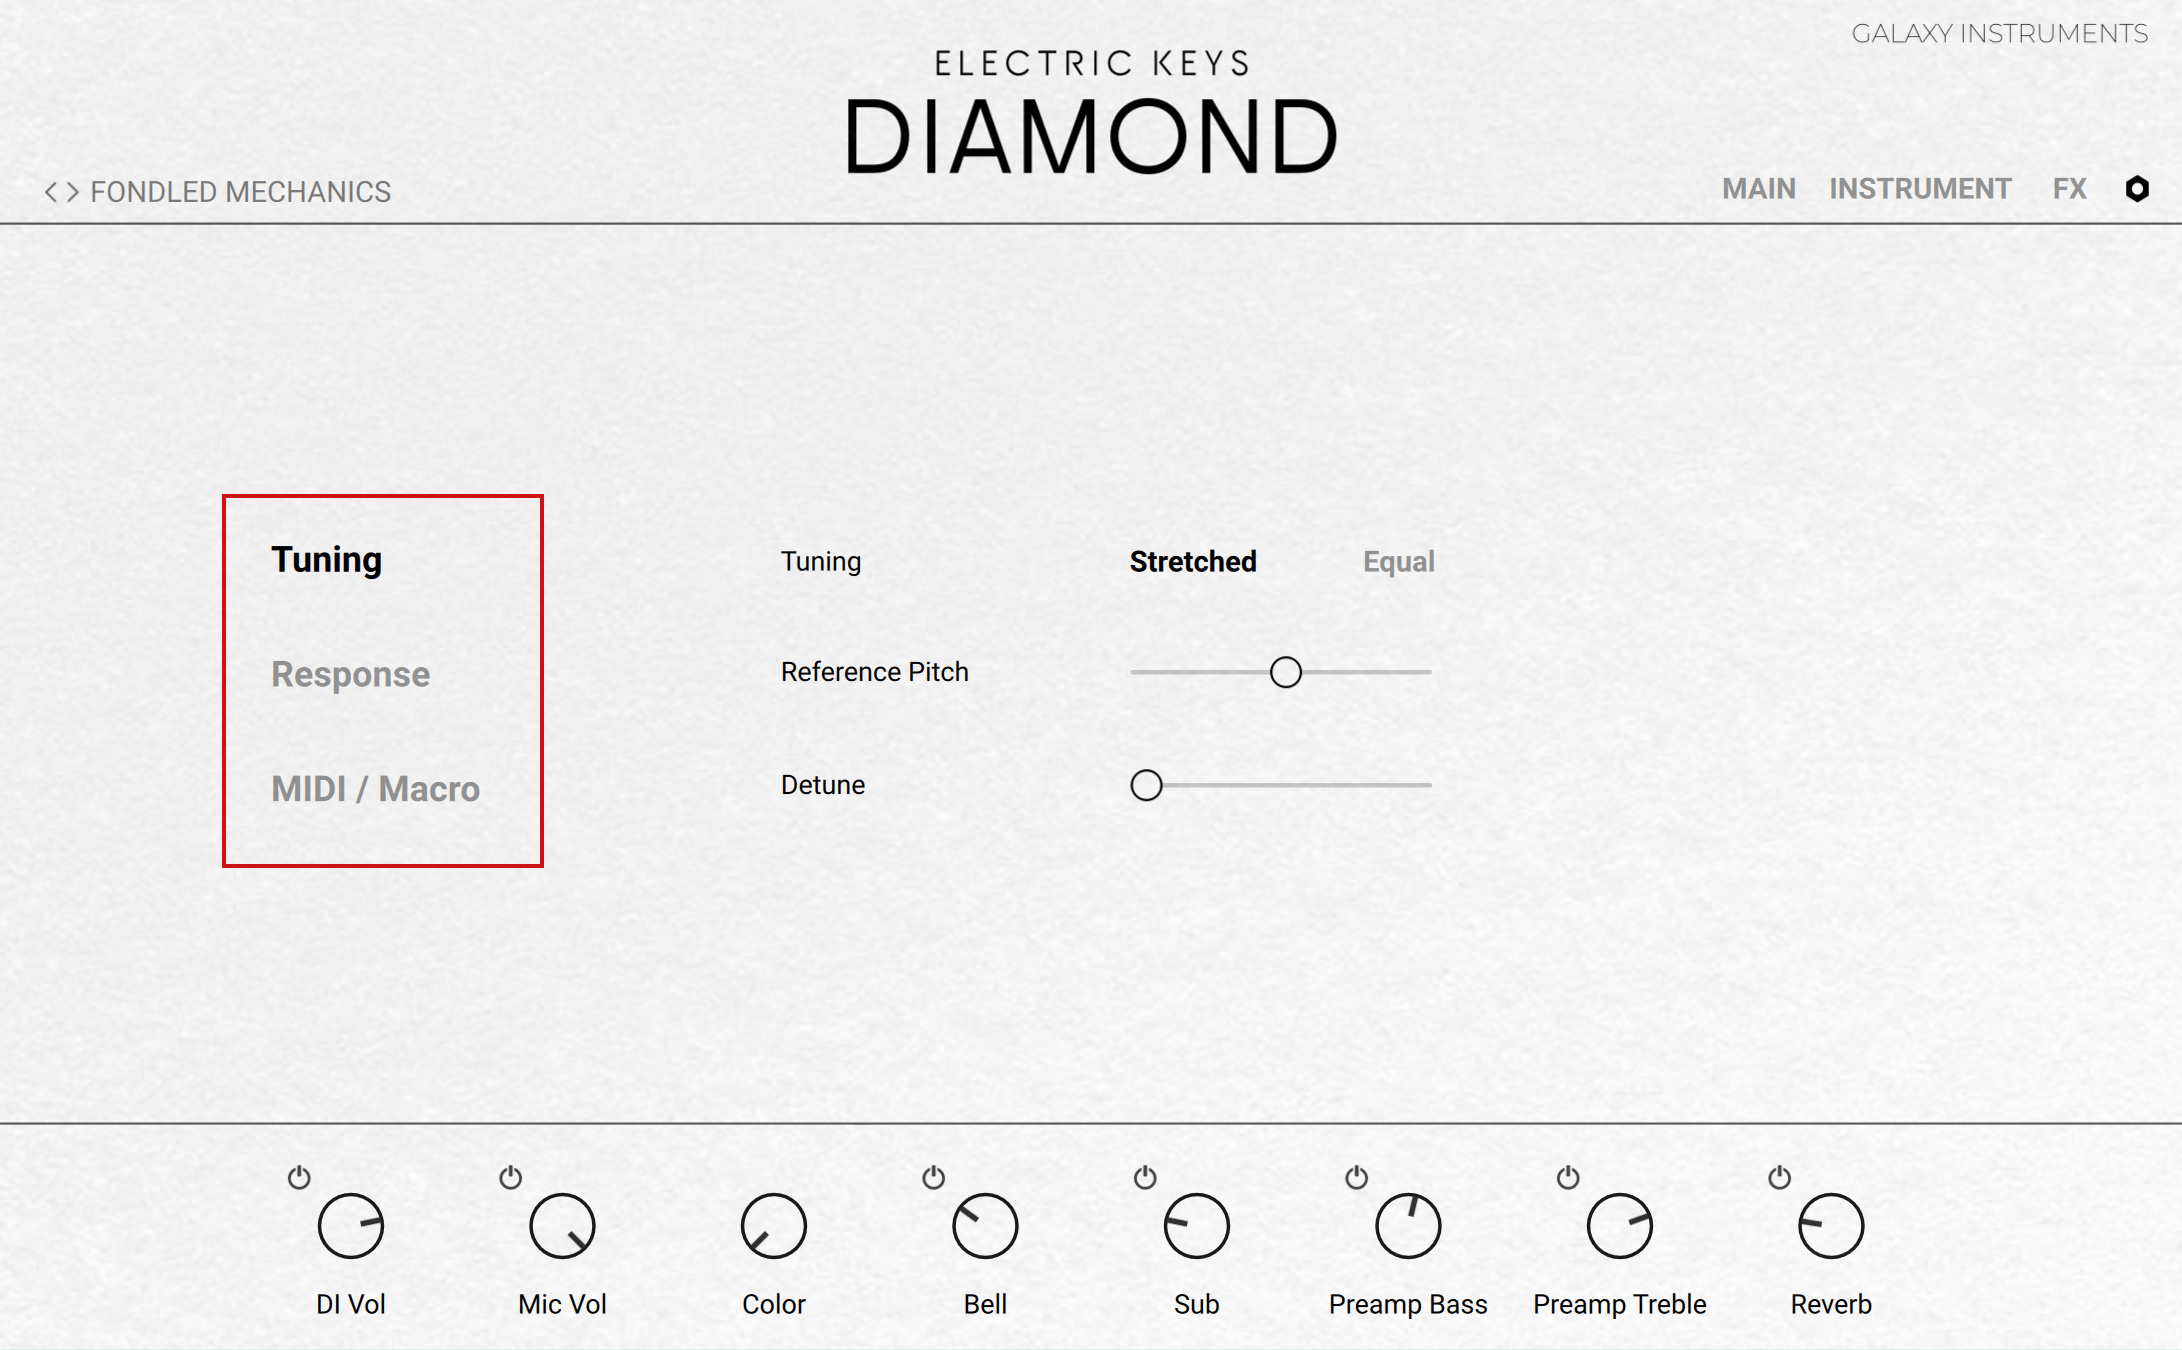
The following sections describe the controls found on each of these panels.
Tuning panel
The Tuning panel of the Settings page provides the following controls:
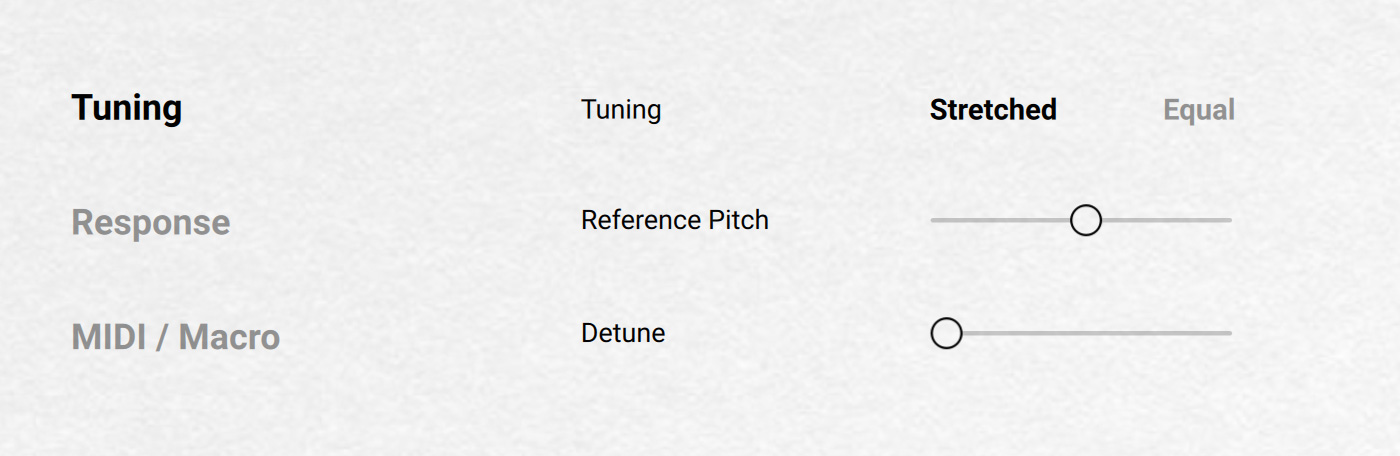 |
Tuning: Switches the tuning system (or temperament) of the instrument between Stretched (default setting) and Equal. Stretched tuning accommodates the natural “inharmonicity” of metal strings, which stretch harmonics beyond the tone generators’ ideal frequencies. Therefore, to make the instrument sound more harmonically pleasing (or “musical“), higher notes are stretched upwards. You can otherwise switch to Equal temperament, which is the most common tuning system used in Western music.
Reference Pitch: Adjusts the instrument’s basic pitch, from 436 Hz to 444 Hz.
Detune: Slightly detunes each key differently. At full left, the keyboard is perfectly tuned. The further you drag the slider to the right, the more the keys will go out of tune.
Poly AT Pitchbend (only available in Electric Keys – Ember): Simulates the behavior of the original instrument, enabling you to slightly bend the pitch of a note by pressing the key harder while it is playing.
Response panel
The Response panel of the Settings page provides the following controls:
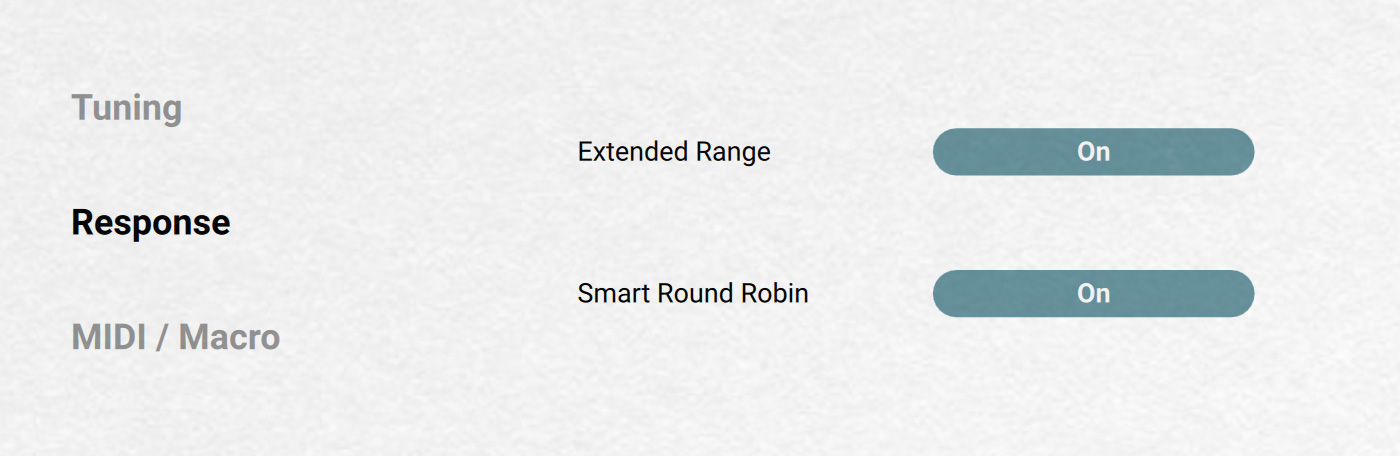 |
Extended Range: Extends the key range to 88 keys. Activating the Extended Range button adds keys in the lower and upper ends so that you can play your instrument with every key of a full-size keyboard. When deactivated, the key range of the original instrument is used.
Smart Round Robin: Activates or deactivates Smart Round Robin. The Smart Round Robin feature keeps track of which sample was played, and when. If the same sample is triggered twice in a short time, another sample will be used instead to give the notes realistic variations and avoid unpleasant “machine-like” note repetitions.
Purge Pickups (only available in Electric Keys – Ember): Purges unused pickup groups in Electric Keys – Ember, reducing memory usage when the instrument's separate pickup recordings cause a memory bottleneck. When enabled, Purge Pickups can result in audio dropouts if the pickup controls are used in real-time during performance.
Note
In contrast to the common round robin function found in other instruments, the Smart Round Robin feature delivers the exact same performance when played back from a recording and does not alternate between samples with every note-on event: It only comes into effect when repetitions are actually played.
MIDI / Macro panel
The MIDI / Macro panel of the Settings page provides the following controls:
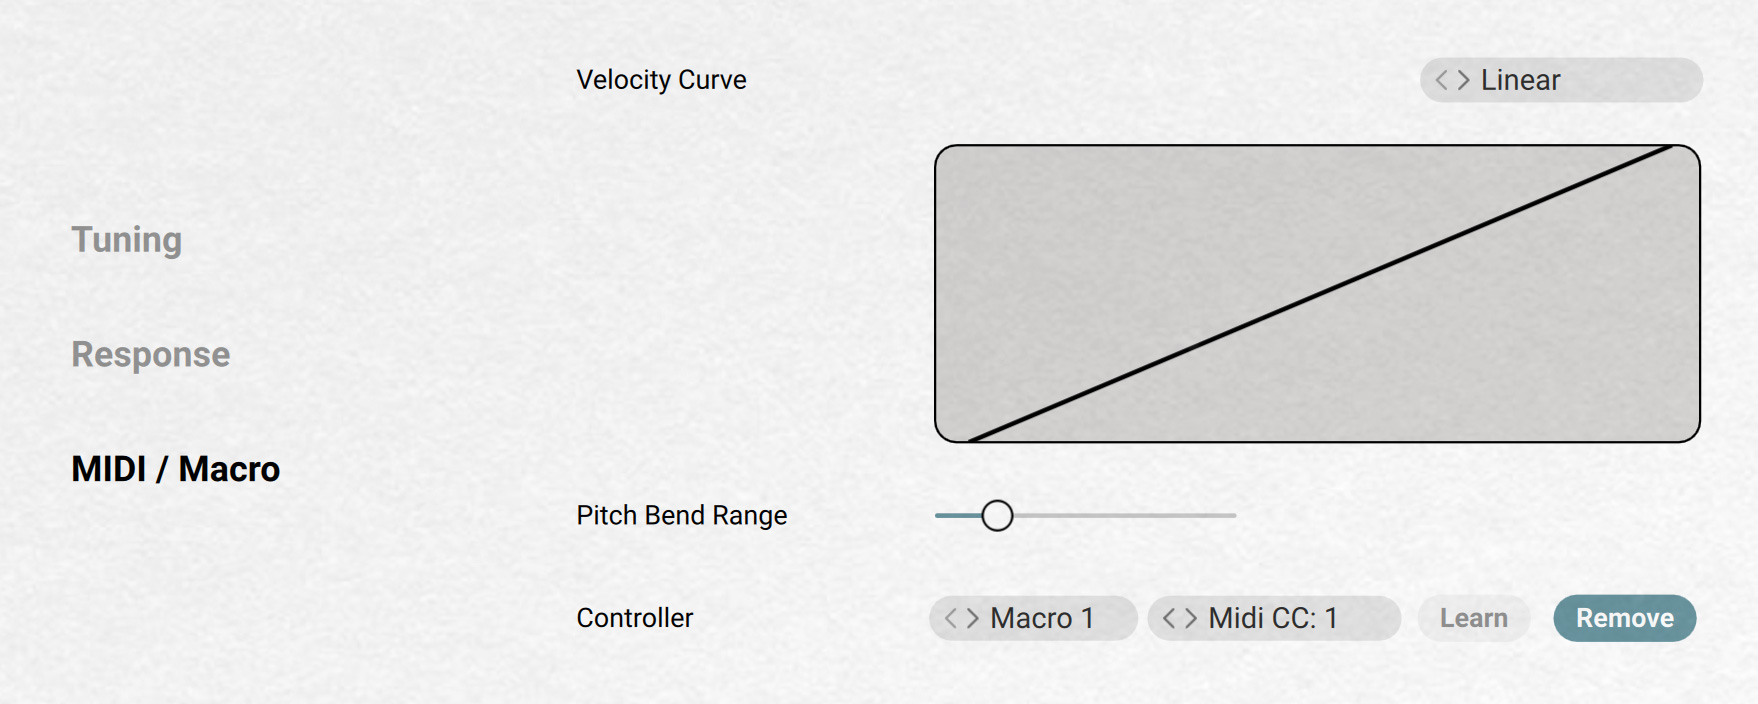 |
Velocity Curve selector: Selects from a list of velocity curves in order to customize the instrument’s velocity response to your keyboard and your way of playing. The graph below the menu illustrates the selected curve: the horizontal axis represents how hard you hit the keys, the vertical axis represents the resulting velocities on the instrument. By clicking and dragging the points in the graph you can create custom velocity curves.
Pitch Bend Range: Selects the pitch range available on the Pitchbend wheel, in semitones.
Controller controls: Let you configure MIDI remote control for the Macros.
Target menu: Selects the Macro 1–8 for which you want to create, modify or remove the MIDI assignment. The closed menu shows the selected Macro. You can click the menu and select another Macro from the list, or click the little left/right arrows to select the previous/next Macro.
Source menu: Selects the MIDI CC number that you want to use for the Macro displayed in the Target menu on the left. The closed menu shows the selected MIDI CC number. You can click the menu and select another MIDI CC number from the list, or click the little left/right arrows to select the previous/next MIDI CC number. Selecting Unassigned (topmost entry, selected by default) removes the MIDI assignment: this is the same as clicking the Remove button on the right.
Learn: Activates or deactivates MIDI Learn: Instead of using the Source menu on the left, you can click Learn and quickly select a MIDI CC number by touching/moving the desired control element on your MIDI device. Upon your action, the Source menu on the left is automatically updated to show the new MIDI CC number, and the Learn button turns back off.
Remove: Removes the MIDI assignment for the Macro displayed in the Target menu at the far left. The Source menu on the left automatically switches to Unassigned.
Note
You can also assign MIDI controls to instrument parameters by using MIDI Learn from the Automation tab in Kontakt’s side pane.