Fragments page
The Fragments page lets you adjust the additional Fragments layer of Kithara in detail.
The Fragments page lets you configure the Fragments layer. The Fragments layer generates a cloud of ghost notes (the “fragments”) acting almost like an granular fluttering effect over the top of the four main layers. It triggers random complex sequences of notes that subtly alter the range of the instrument being played.
To display the Fragments page, do the following:
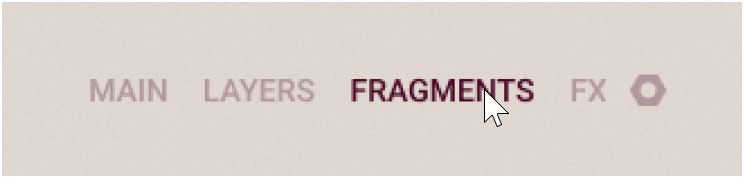
Click FRAGMENTS at the top right of the instrument to display the Fragments page.
The Fragments page includes three panels controlling different aspects of the fragment generation. You can open either panel by clicking the VARIATION SLOTS, VOICES, or HARMONY button at the top of the page:
 |
VARIATION SLOTS: Opens the Variation Slots panel, which lets you select the samples used for the fragments and configure the velocities and effects in the fragment cloud.
VOICES: Opens the Voices panel, where you can define the key range and voice assignment logic used for generating new fragments.
HARMONY: Opens the Harmony panel, where you can specify the pitches of the generated fragments in relation to the keys played on the keyboard.
Alternatively you can create a new random fragment cloud in one go.
Quickly randomizing the fragments
You can quickly generate a new, random cloud of fragments by clicking the big dice icon left of the panel tabs:
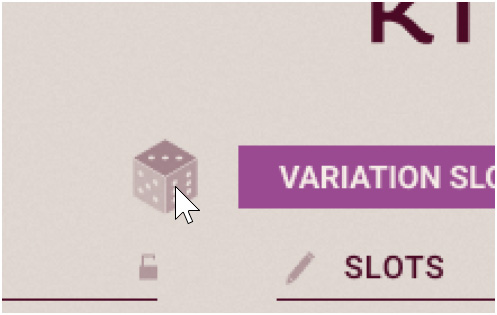 |
Click the Randomize Fragments button (showing a big dice icon) to set random values for the parameters on all panels of the Fragments page at once.
A completely new fragment cloud is created.
Tip
When randomizing the fragment cloud, the parameters located in a section with an active lock will be kept untouched. For example, you could compare different random clouds of the current source by activating the lock on the Source section of the Variation Slots panel before clicking the Randomize Fragments button.
Note
You can also randomize specific aspects of the fragment cloud in the Variation Slots panel.
Variation Slots panel
In the Variation Slots panel you can select the samples used for the fragments, adjust the overall shape of the fragment cloud, and configure the eight variations that will be randomly triggered as fragments.
To display the Variation Slots panel, do the following:
Click VARIATION SLOTS at the top of the Fragments page to display the Variation Slots panel.
The Variation Slots panel appears and you can adjust its parameters.
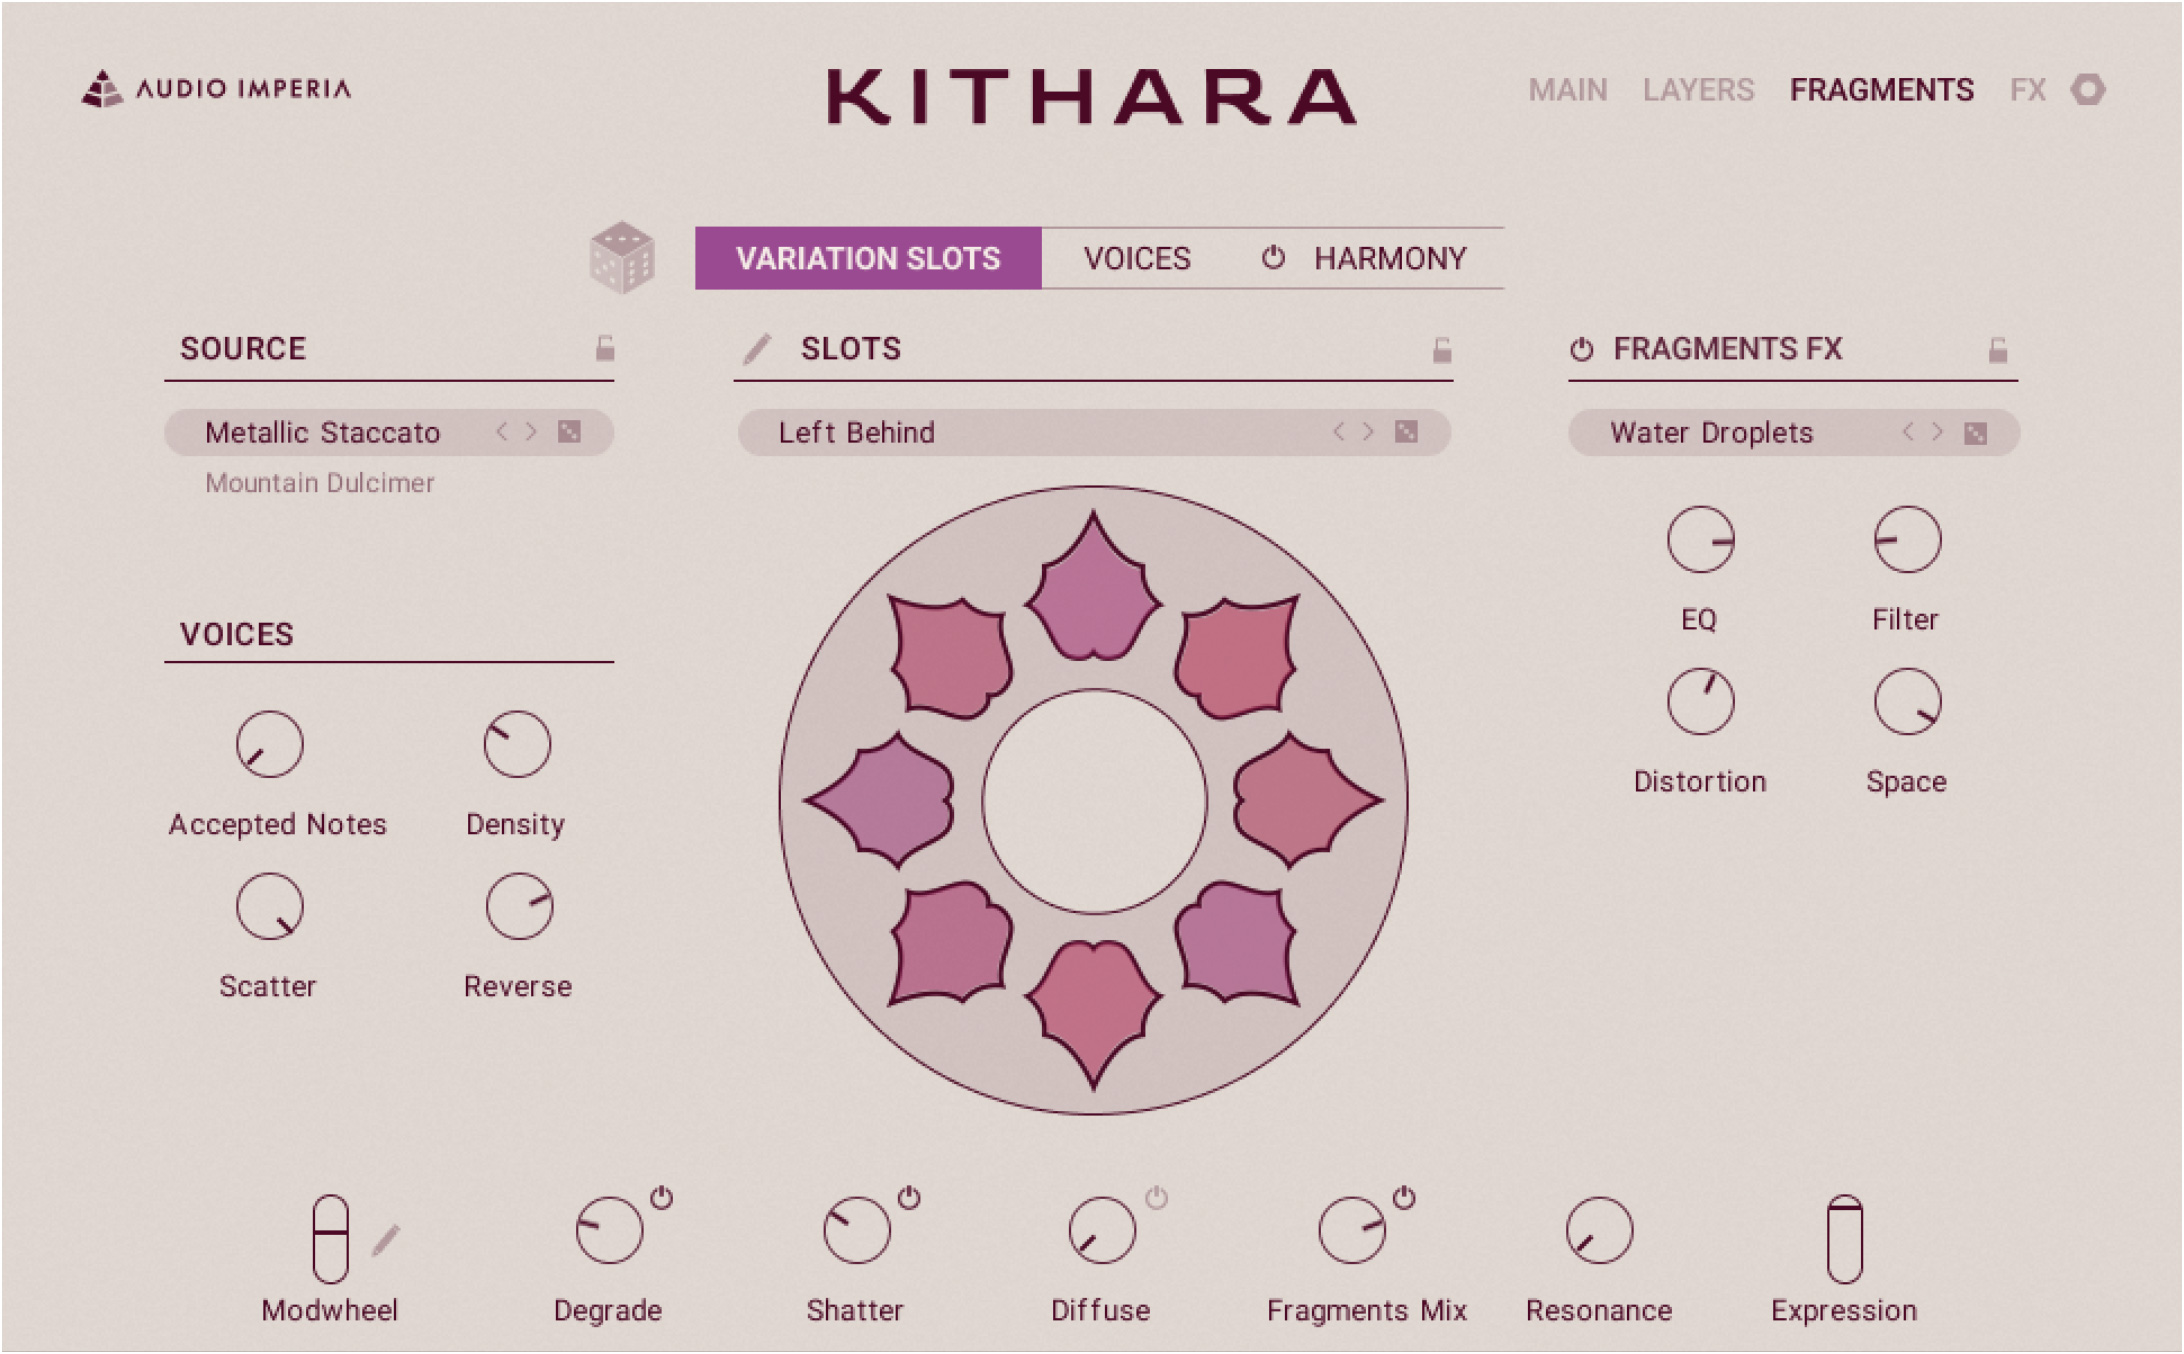
The Variation Slots panel includes the following sections: Source, Voices, Slots, and Fragments Effects.
Source
The Source section lets you select the samples used as source to generate the fragments.
The section contains the following controls:
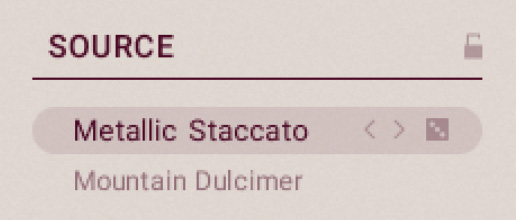 |
Fragment Source selector: Displays the name of the source used to generate the fragments. You can click the source name to open the layer’s Source browser and select another source for the Fragments layer. Alternatively, you can click the left and right arrows to quickly load the previous or next source from the browser’s result list without opening the browser. You can also click the little dice icon on the right to randomly select a source from the browser’s result list. Below the selector, a lighter label indicates the instrument from which the source is originating in the Source browser.
Lock: If you activate the lock, the selected source will be preserved when you randomize the fragment cloud or when you load another Snapshot.
Note
The Source browser in the Fragments layer provides the same sources as in the Attack layer. However, these are used in a completely different way.
Voices
The Voices section lets you adjust a few key settings that will affect the overall shape of the fragment cloud.
The section contains the following controls:
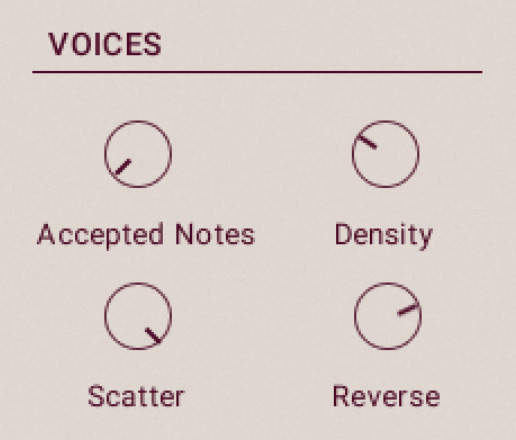 |
Accepted Notes: Sets the maximum number of held keys that will generate fragments. The available values range from 1 (only one held key will be used to generate fragments) to 8 (default value). If you hold more keys than the number set here, some of them will not generate any fragments. The choice of the keys used for generating fragments depends on the rule selected in the Voice Assignment section of the Voices panel.
Density: Adjusts the maximum delay between two successive fragments. The actual delays between fragments will be randomly generated below this value. At lower values, the delays between fragments can get longer, resulting in a sparser cloud. At higher values, the delays are kept shorter, resulting in a denser cloud.
Scatter: Adjusts the maximum spread of the fragments in the stereo field. The actual stereo position of each fragment will be randomly generated below this limit. At full left, all the fragments will be set to the center. At full right, the fragments will spread across the entire stereo field.
Reverse: Adjusts the probability that a fragment is played reversed. At full left, all the fragments are played forward. As you raise the value, more fragments are played reversed. At full right, all the fragments are played reversed.
Tip
All the parameters in this panel can be modulated using the Modwheel slider. For more information on how to assign parameters to the Modwheel slider, refer to Modulating your sound.
Slots
The Slots section lets you configure in detail the pool of eight variations from which the generated fragments will take their characteristics.
The section contains the following controls:
 |
Slot Edit button (pen icon): Activates or deactivates the Slot Edit mode, which lets you adjust the settings of each variation slot individually.
Lock: If you activate the lock, the variation slots will be preserved when you randomize the fragment cloud or load another Snapshot.
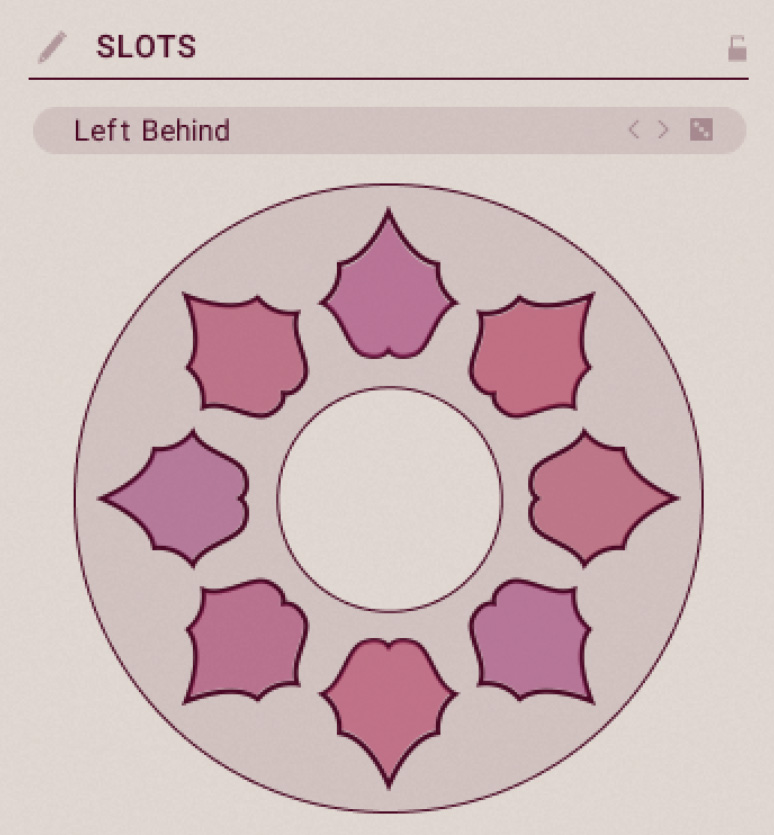
Pool Preset selector: Selects from a list of presets for the entire pool of variations. Each preset includes a set of eight variations with individual velocities and effect settings. You can also click the left and right arrows to switch to the previous or next pool preset, or click the little dice icon on the right to randomly select a preset from the list.
Variation Pool: The picture represents the current variation pool and its eight variation slots. Each slot contains a variation with specific values for five different settings: the velocity and the four effect amounts (EQ, Filter, Distortion, and Space). Each new fragment being generated will take the velocity and effect amounts of one random variation from the pool. In the picture, each setting is represented by a distinct color, while the color transparency indicates the setting value: Lower values have fainted, transparent colors, and higher values have plain, bright colors.
Editing the variation slots
Instead of selecting ready-made presets from the Pool Preset selector that will replace the entire pool of variations, you can also adjust the settings of each variation slot manually. For this task, the Variation Slots panel provides the Slot Edit mode:
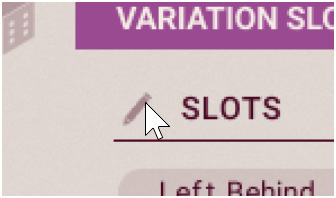
To activate or deactivate the Slot Edit mode, click the Slot Edit button showing a pen icon at the top left of the Slots section.
When the Slot Edit mode is on, the Variation Slots panel provides a set of additional editing tools:
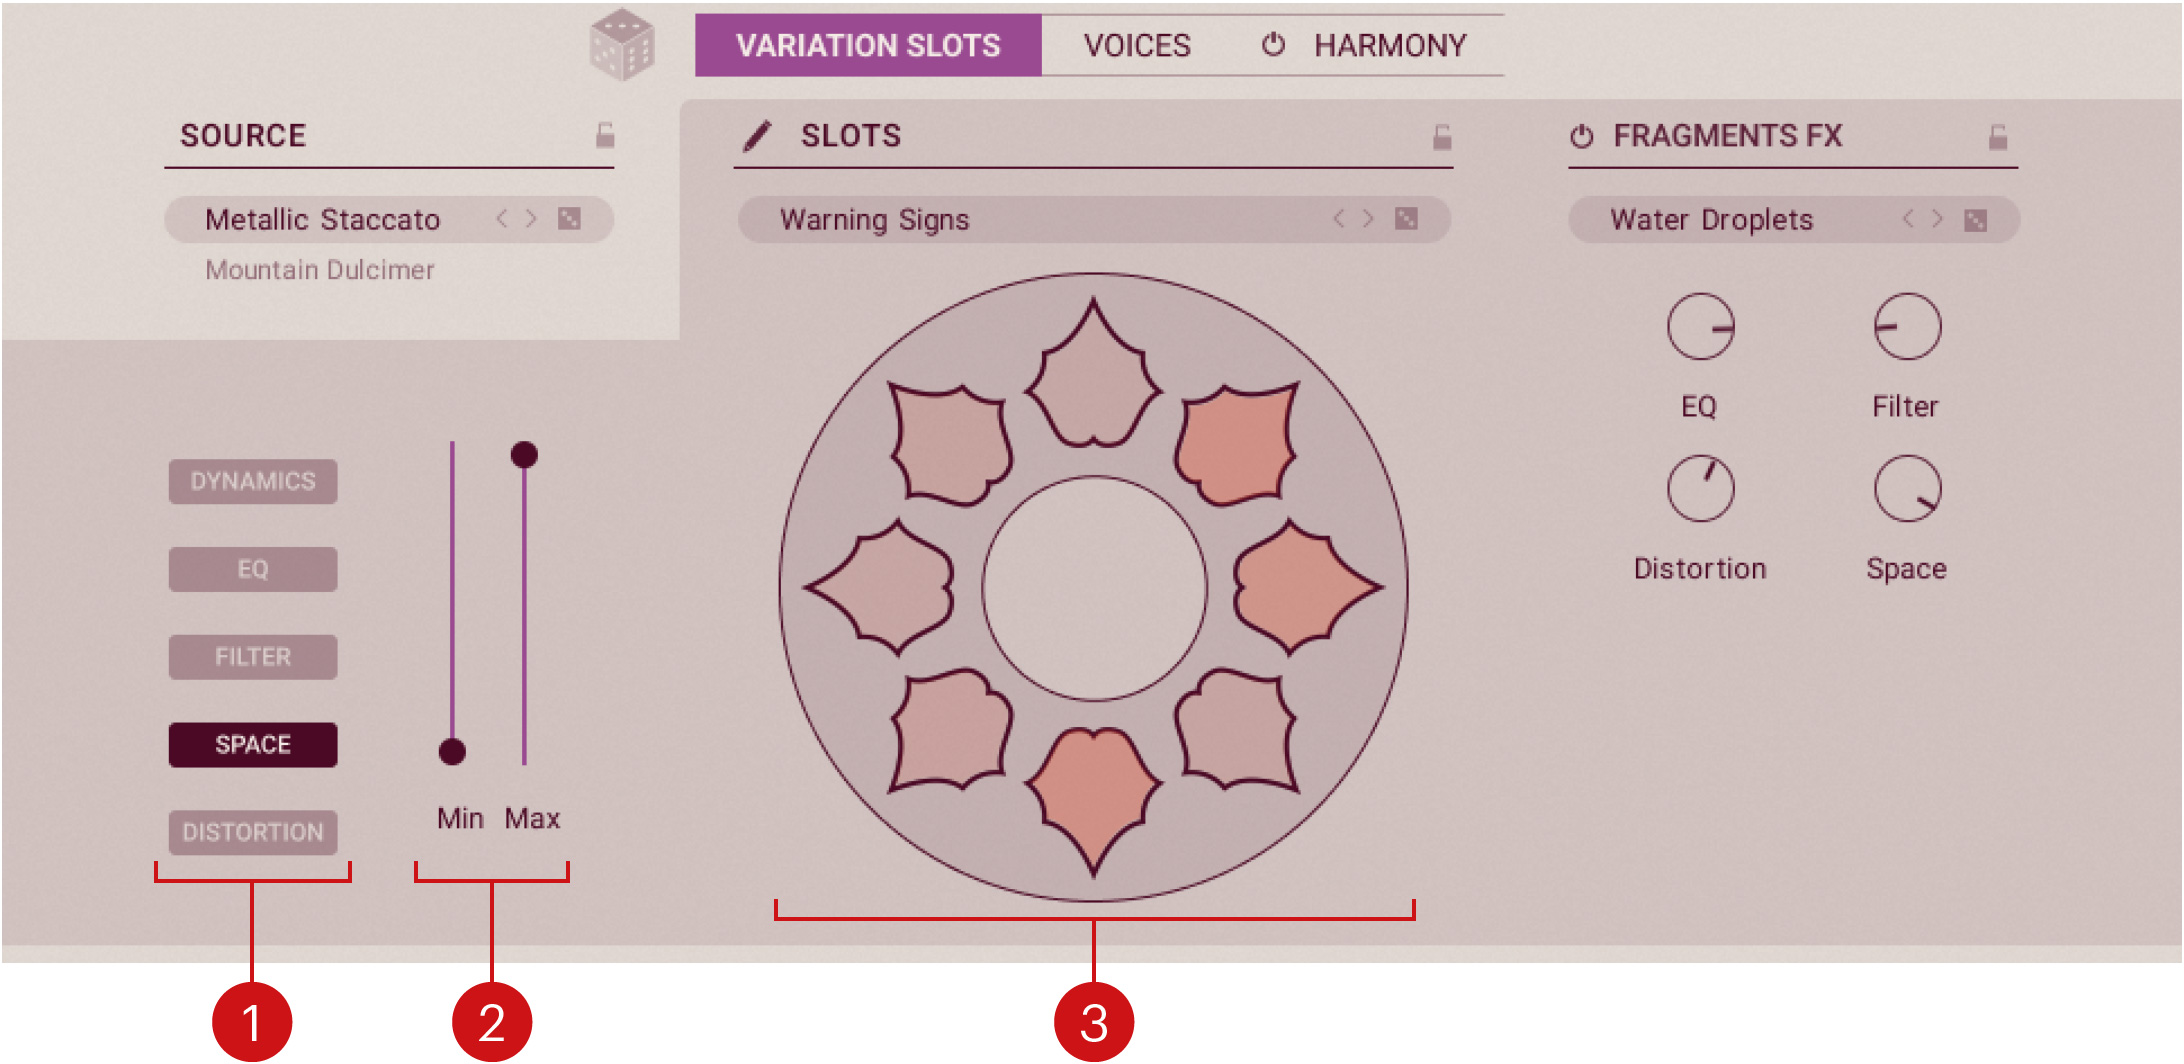
Setting selector: Selects a setting for editing. The selected setting is highlighted and the remaining editing tools let you modify the values for this particular setting on each variation slot. The following settings are available in the variation slots: DYNAMICS (velocity), EQ, FILTER, SPACE, and DISTORTION.
Min and Max sliders: Respectively adjust the minimum and maximum possible values for the selected setting on all variation slots. As you move either slider, the values of all variation slots are adjusted proportionally, which is mirrored in the Variation Pool colors.
Variation Pool: In Slot Edit mode the Variation Pool shows only the color of the setting selected on the left. You can adjust the value stored in each slot for that particular setting by clicking the slot and dragging your mouse vertically. As you adjust the value, the color intensity of the slot changes (fainted colors for lower values, brighter colors for higher values).
Note
For the four effect amount settings (EQ, FILTER, SPACE, and DISTORTION), the values that you set in the slots will be taken relatively to the maximum value specified for that effect in the Fragments Effects section.
Tip
The Min and Max sliders for each setting can be modulated using the Modwheel slider. For more information on how to assign parameters to the Modwheel slider, refer to Modulating your sound.
Fragments effects
The Fragments Effects section lets you configure a collection of effects applied to the fragments.
The section contains the following controls:
 |
Fragments Effects On/Off: Turns the effects on or off.
Lock: If you activate the lock, the effect settings will be preserved when you randomize the fragment cloud or when you load another Snapshot.
Effect Preset selector: Selects a preset from a list of predefined multi-effect combinations. Each multi-effect includes an equalization, a filter, a distortion, and a reverb, although their type might differ between presets. You can also click the left and right arrows to switch to the previous or next multi-effect preset, or click the little dice icon on the right to randomly select a preset from the list.
EQ, Filter, Distortion, and Space: Respectively adjust the maximum amount of equalization, filtering, distortion, and reverberation that can be applied to the fragments. The actual amount of either effect will differ with each variation slot according to the settings in the Slots section.
Note
Regardless of these fragment-specific effects, the Fragments layer is also processed together with the other layers by the Character and Mix effects available in the Effects page.
Tip
The four effect amount knobs (EQ, Filter, Distortion, and Space) can be modulated using the Modwheel slider. For more information on how to assign parameters to the Modwheel slider, refer to Modulating your sound.
Voices panel
In the Voices panel you can define the key ranges and the voice assignment logic used for generating new fragments.
To display the Voices panel, do the following:
Click VOICES at the top of the Fragments page to display the Voices panel.
The Voices panel appears and you can adjust its parameters.
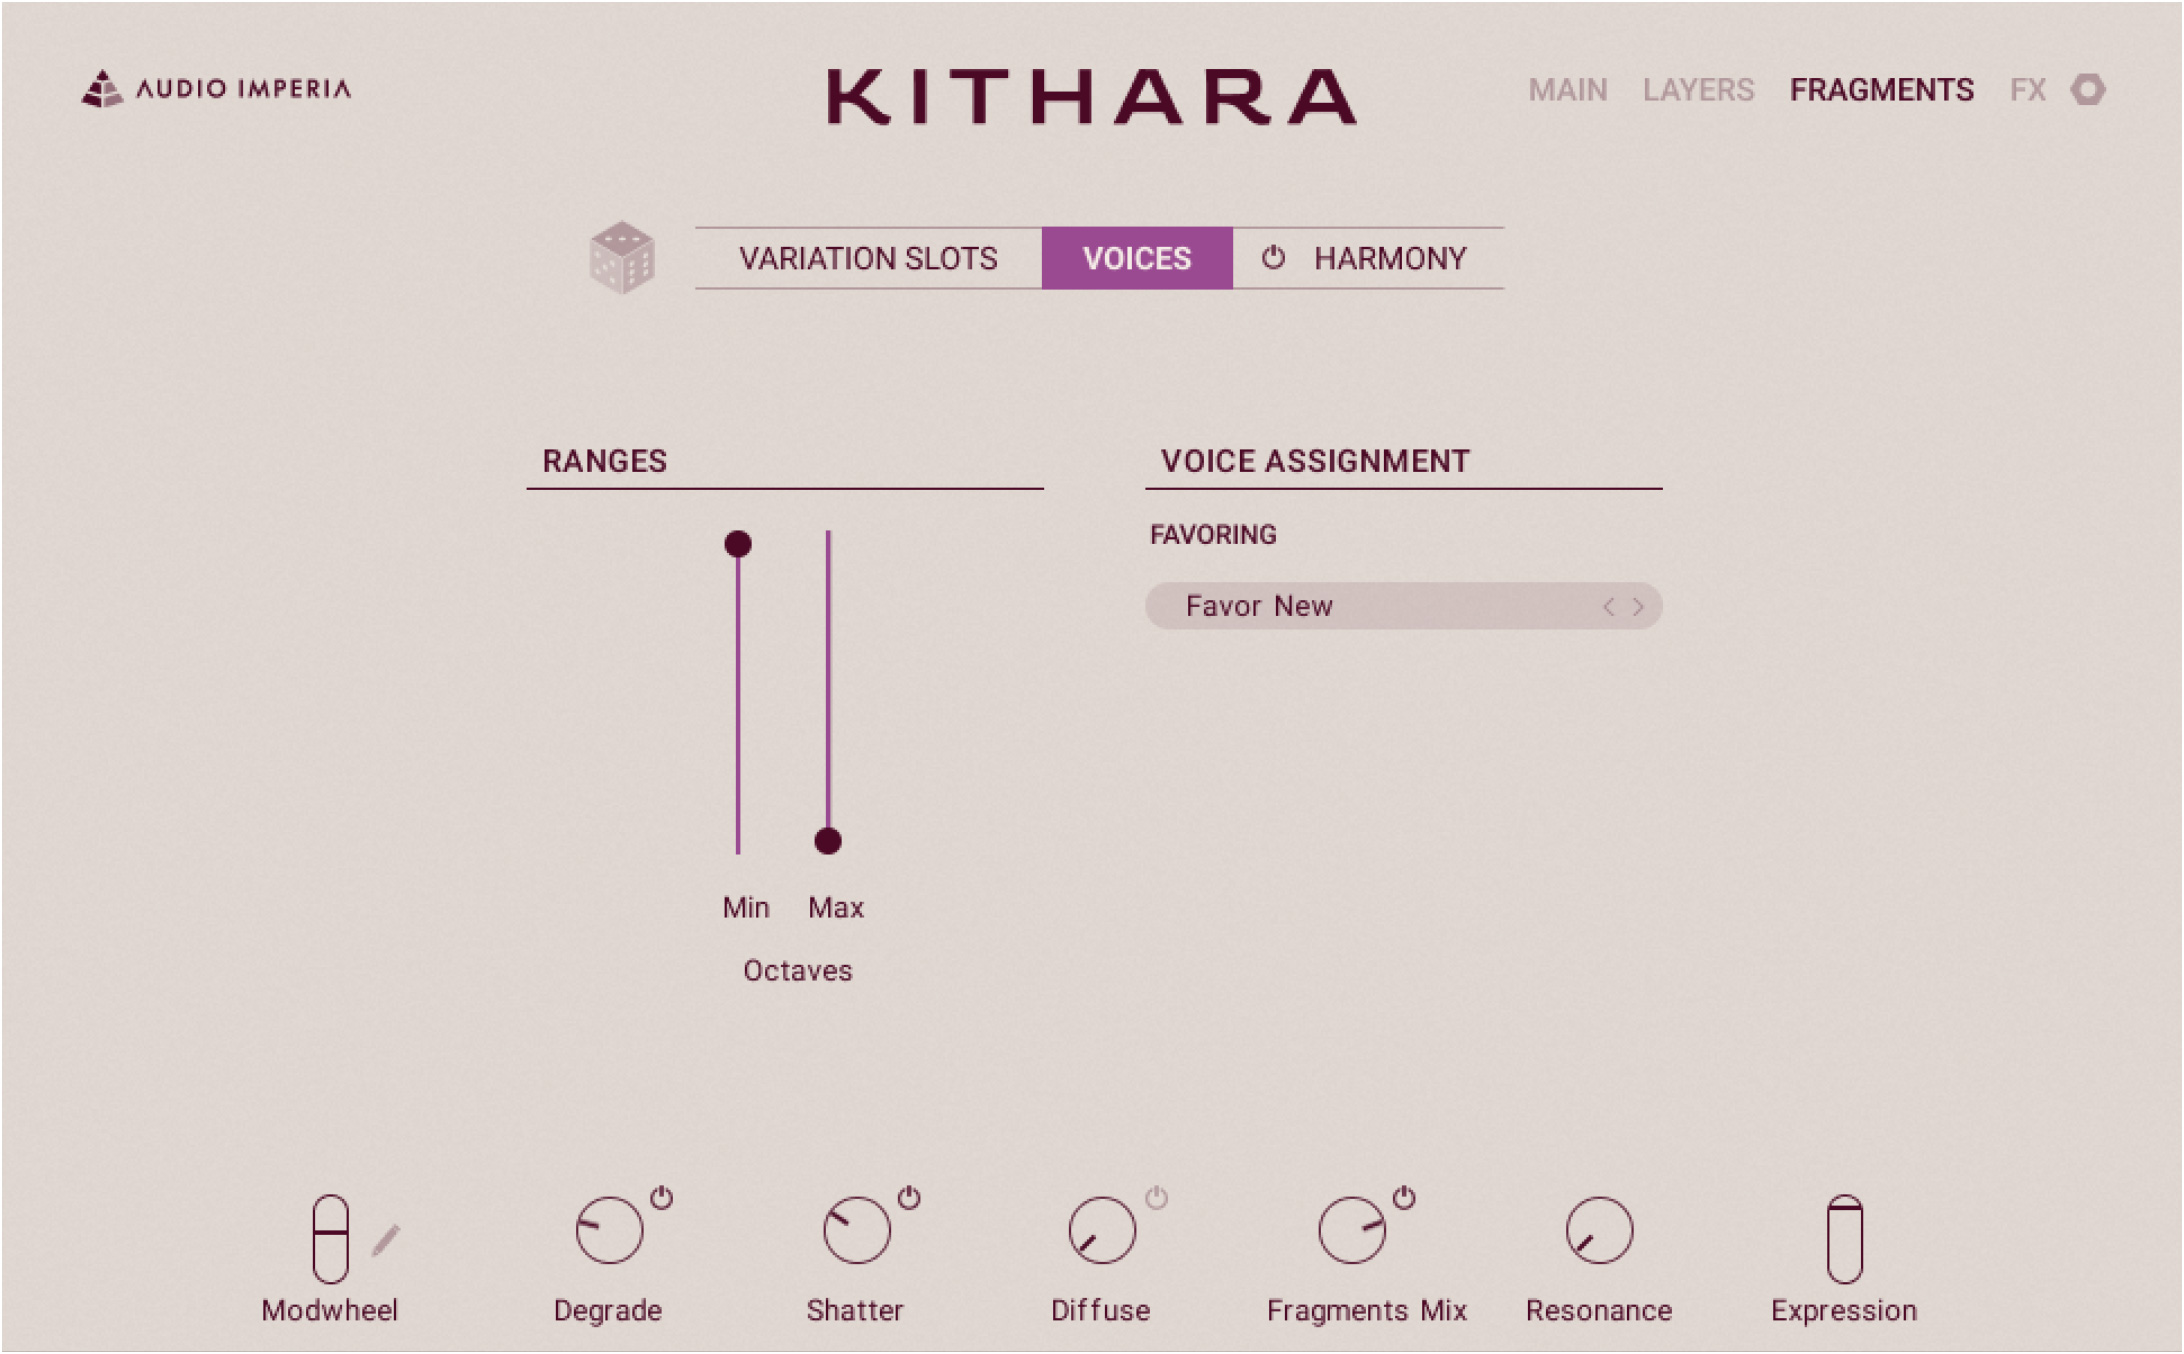
The Voices panel includes two sections: Ranges and Voice Assignment.
The Ranges section lets you choose how far the fragment pitches can get in comparison to the original played key. The following controls are available:
Octaves Min: Sets how many octaves below the played key are available for generating fragments. The values range from 0 octave (slider at the top, default value) to -3 octaves (slider at the bottom).
Octaves Max: Sets how many octaves above the played key are available for generating fragments. The values range from 0 octave (slider at the bottom, default value) to +3 octaves (slider at the top).
The Voice Assignment section lets you specify the logic in use when assigning voices for the new fragments. The following control is available:
Favoring selector: In case you are holding more keys than the Accepted Notes value set in the Voices section of the Variation Slots panel, you can choose here the rule defining which of the held keys should be used to generate fragments. The following rules are available:
Favor New: Prioritizes the last played keys over the previous ones.
Favor Old: Prioritizes the oldest played keys over the newer ones.
Low: Prioritizes the lowest keys over the higher ones.
High: Prioritizes the highest keys over the lower ones.
Random: Randomly selects the keys.
Harmony panel
In the Harmony panel you can specify the pitches of the generated fragments in relation to the notes that you play on the keyboard.
To display the Harmony panel, do the following:
Click HARMONY at the top of the Fragments page to display the Harmony panel.
The Harmony panel appears and you can adjust its parameters.
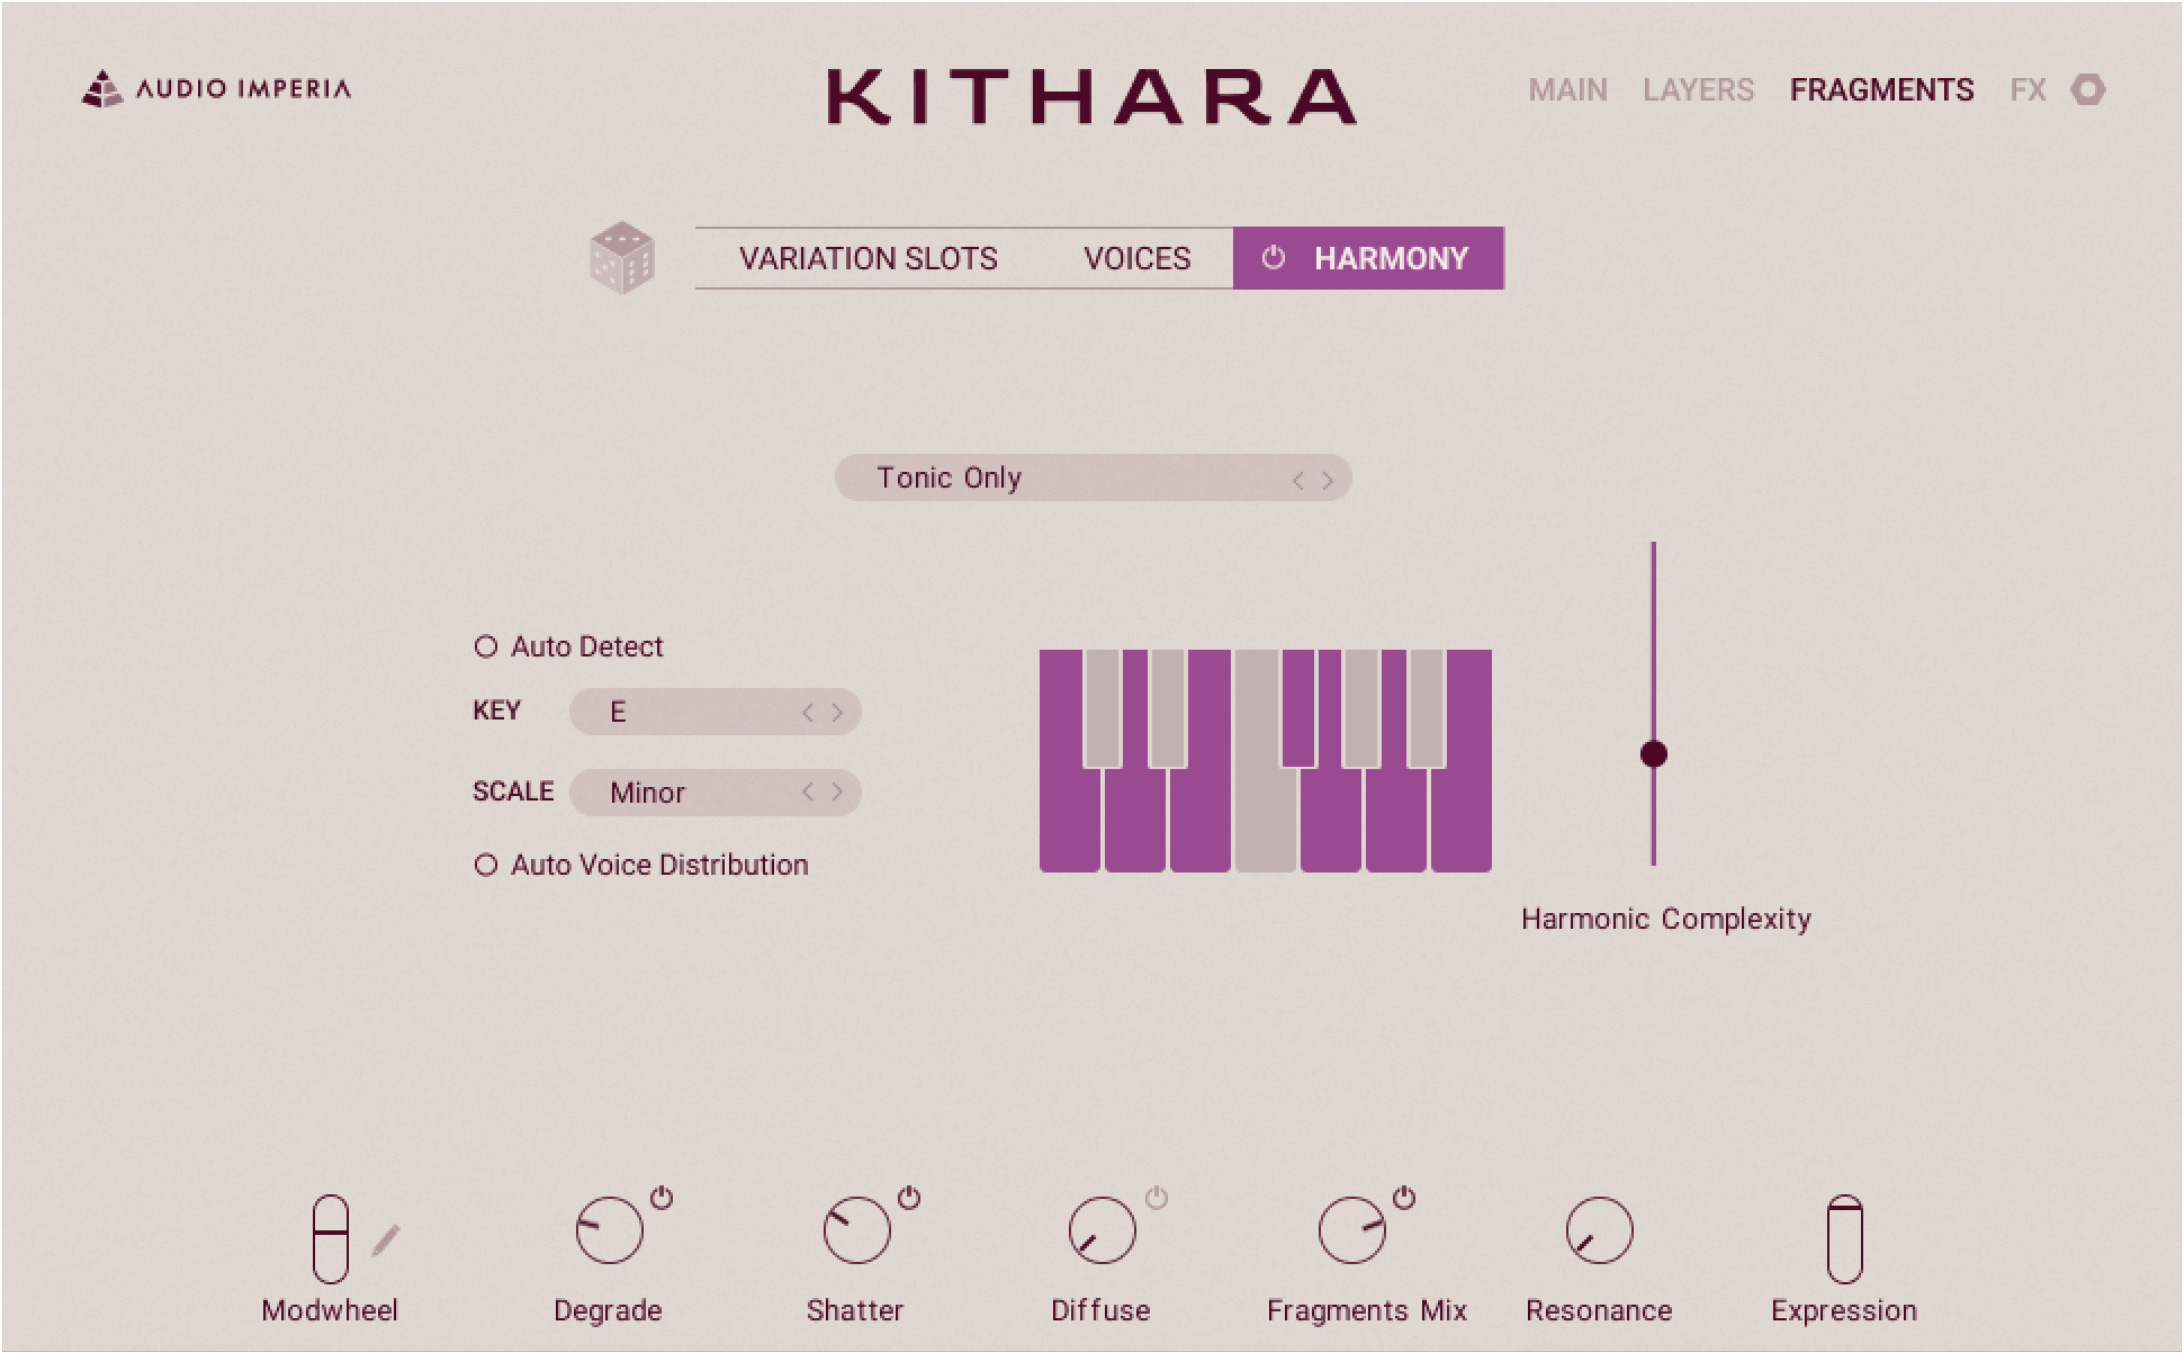
The Harmony panel contains the following controls:
Harmony On/Off: Turns the Harmony feature on or off.
Harmony Preset selector: Selects a preset from a list of custom harmonic modes, which also modify the default Harmonic Complexity level.
Keys: Represent the twelve keys in a keyboard octave and highlights the keys that can be used for the fragment pitches, according to the current settings in the panel. You can click individual keys to add them to, or remove them from the set of pitches available for the fragments.
Auto Detect: Activates or deactivates the automatic detection of the scale based on the notes that you play. When Auto Detect is on, the KEY and SCALE values are ignored.
KEY selector: Sets the root note for the chosen scale. Click the displayed value to open a menu and select another key as root note, or click the little arrows on the right to select the previous/next key.
SCALE selector: Selects the scale that should be used for the fragment pitches. Click the scale name to open a menu and select another scale, or click the little arrows on the right to select the previous/next scale from the menu.
Auto Voice Distribution: When this control is active, the harmonic complexities are spread across the keyboard. Playing lower keys will tend to generate fragments with a lower harmonic complexity, that is, with pitches closer to the original keys. On the contrary, playing higher keys will allow fragments with a higher harmonic complexity, that is, with pitches further away from the played keys.
Harmonic Complexity slider: Adjusts how far from the original key the fragments’ pitches can go. With the slider at the bottom, the fragments will only use the pitches of the notes that you play (or of the root note). As you raise the slider, the fragments will progressively use the next pitches from the scale. With the slider at the top, all the pitches available in the scale will be used.
Tip
The Harmonic Complexity slider can be modulated using the Modwheel slider. For more information on how to assign parameters to the Modwheel slider, refer to Modulating your sound.