Kithara overview
Learn the main concepts and interface elements of Kithara.
Kithara lets you construct your sound using multiple, time-evolving layers that trigger samples of plucked string instruments. The Attack, Sustain 1, Sustain 2, and Release layers form the main parts of the sound: Each layer triggers its own samples, which you can choose from a dedicated set of sources. You can configure the sound of each layer independently. On top of them, the Fragments layer adds a cloud of short ghost notes (the “fragments”). While the Fragments layer uses the same set of sources as the Attack layer, it manipulate the samples in a totally different way, using your settings to generate random series of notes that can extend over the entire duration of the sound. Finally, you can process these five layers with a custom selection of effects.
Once you have completed the installation and loaded Kithara in Kontakt, you can start playing the Instrument. Kithara opens with the Main page. The Instrument provides the following key elements and global controls:
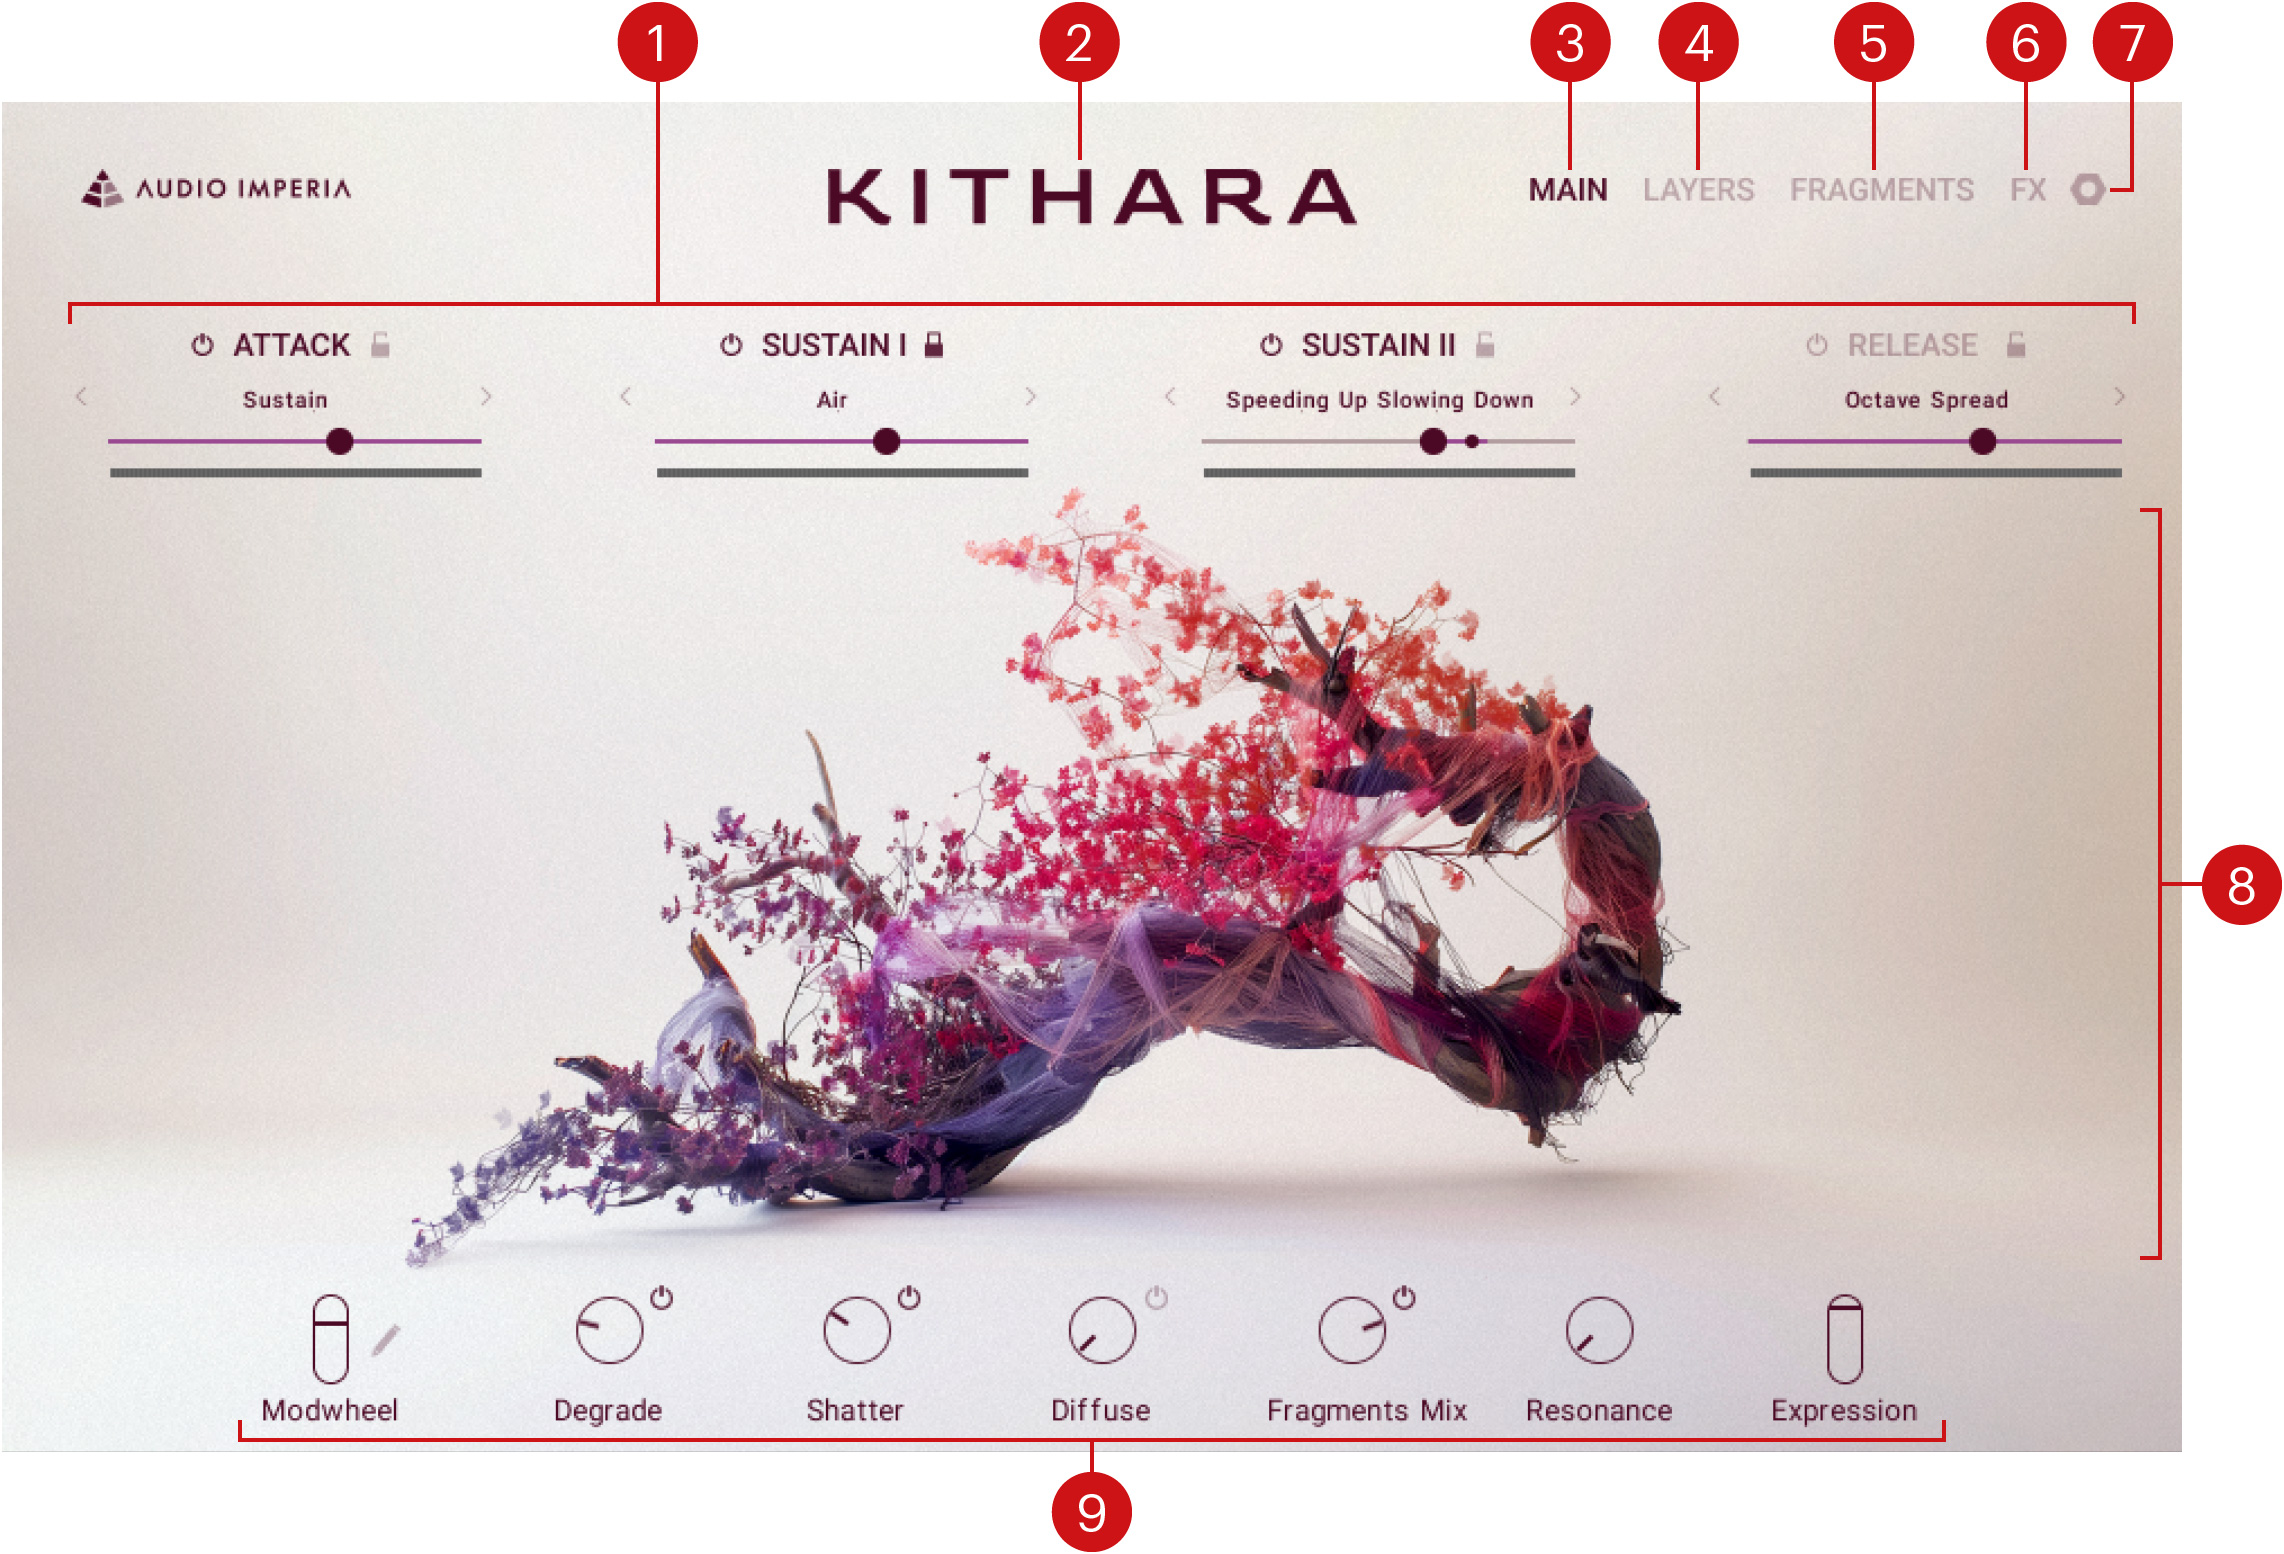
Layer Inspector: Contains basic controls for the Attack, Sustain 1, Sustain 2, and Release layers. For each layer, you can switch it on and off, see the source currently in use, switch to another source by clicking the next and previous buttons, browse all available sources by clicking the source name, adjust the layer volume, and lock this layer to keep it untouched as you switch to another Snapshot. The Layer Inspector is visible on the Main and Layers pages. Refer to Layer Inspector.
About: Click the instrument name to open the About screen, which displays the credits for this instrument.
MAIN: Opens the Main page, which shows the artwork depicted above. This is the default page that appears when you load the Instrument in Kontakt.
LAYERS: Opens the Layers page, where you can adjust the settings of the Attack, Sustain 1, Sustain 2, and Release layers, which make up the main sound components of Kithara. Refer to Layers page.
FRAGMENTS: Opens the Fragments page, which lets you set up an additional Fragments layer. The Fragments layer uses its own source samples, parameters, and effects to create a cloud of ghost notes that adds subtle sonic details to your sound textures. Refer to Fragments page.
FX: Opens the Effect page, where you can configure various effects that will process the sound of your instrument. Refer to Effects page.
Settings (nut icon): Opens the Settings page, which provides global parameters adjusting the transposition and the keyboard response. Refer to Settings page.
Central area: This is the biggest part of the instrument and it shows the various pages and Browsers.
Performance controls: Provide a set of controls and shortcuts directly available while playing the Instrument. The Performance controls are always visible except on the Settings page. Refer to Performance controls.
Layer Inspector
The Layer Inspector contains a basic set of controls for each of the four main layers: Attack, Sustain 1, Sustain 2, and Release. It is visible on the Main page (the default page) and on the Layers page.
For each layer, the Layer Inspector contains the following elements:
 |
Layer On/Off: Activates or deactivates the layer. Deactivating a layer will deactivate any new notes in that layer while leaving the sound of existing notes untouched.
Lock: Prevents the layer from being changed. When Lock is activated, the layer settings stay untouched when loading other Snapshots.
Layer Source selector: Displays the name of the source sample used in the layer. You can click the source name to open the layer’s Source browser and select another source for that layer. Alternatively, you can click the left and right arrows to quickly load the previous or next source from the browser’s result list without opening the browser.
Layer Volume slider: Adjusts the volume level of the layer. As you play, the horizontal meter below shows the layer’s current level.
Tip
The four Layer Volume sliders can be modulated using the Modwheel slider. For more information on how to assign parameters to the Modwheel slider, refer to Modulating your sound.
Performance controls
The Performance controls contain five knobs and one slider that are preassigned to the most useful parameters when playing live, and a modulation slider that you can freely assign to the parameters of your choice. The Performance controls are available at the bottom of all pages except the Settings page. You can adjust them in real-time or automate them in your DAW to add more expression to your music.
The Performance controls contain the following elements:

Modwheel: You can assign any number of parameters to the Modwheel slider, which allows you to control them all at once from this slider, from your MIDI keyboard, or from your DAW. Click the little pen icon next to the Modwheel control to change your parameter assignments.
Degrade: Adjusts the amount of Degrade effect applied to the sound. The on/off switch at the top right turns the effect on or off.
Shatter: Adjusts the amount of Shatter effect applied to the sound. The on/off switch at the top right turns the effect on or off.
Diffuse: Adjusts the amount of Diffuse effect applied to the sound. The on/off switch at the top right turns the effect on or off.
Fragments Mix: Adjusts the volume of the Fragments layer. The on/off switch at the top right turns the Fragments layer on or off completely. Note that the switch affects only the next played notes, leaving any already sounding notes untouched.
Resonance: Adjusts the amount of sympathetic resonances between the strings. Increasing these resonances creates a fuller and deeper sound.
Expression: Adjusts the overall volume of the instrument.
Note
The Resonance control is equivalent to the Resonance control in the Settings page.
Tip
Except for the Expression slider, the Performance controls can be modulated using the Modwheel slider on the left. For more information on how to assign parameters to the Modwheel slider, refer to Modulating your sound.