Layer Editor
The Layer Editor in Lores lets you edit Layers, access editing controls, and open the Layer browser. Use the Layer Editor to tweak presets or create them from scratch.
The Layer Editor contains three switchable tabs: Layer Controls, Mapping, and Motion where you can edit each Layer and customize each sound. By selecting a Layer from the Layer Grid on the left, you can tweak the sound using the Layer Controls, map it to the keyboard for velocity or expression switching using Mapping, and add expression using LFOs in Motion. The Layer Grid also provides access to the Layer browser enabling you to add or swap layers and change their priority.
To open the Layer Editor and select a Layer for editing:
Double-click the Instrument Stage area to open the Layer Editor.
Select Layer Controls, Mapping, or Motion editors from the navigation at the top of the Layer Editor.
Select the Layer you want to edit from the Layer Grid on the left.
You can now adjust parameters to change the sound. When you have finished editing the selected Layer, you can choose another Layer or click Exit (x) to return to the Main page.
The Layer Editor contains the following key elements and controls:

Layer Grid: Enables you to select layers and provides access to the editing controls and Layer browser. Refer to Layer Grid.
Navigation: Provides access to the Layer editors. Refer to Layer Controls, Mapping, and Motion.
Erase: Clears all settings for the selected Layer.
Exit (x): Exits the Layer Editor and returns to the Main view.
Controls: Displays the elements and controls for the selected editor.
Layer Grid
The Layer Grid is situated on the left-hand side of the Layer Editor. It lets you select Layers for editing and drag them to set their priority. By clicking the magnifying glass icon, you can open the Layer browser.
Once a layer is selected, you can edit it using the Layer Controls, Mapping, and Motion editors. The Layer Grid remains available even when switching editors.
The Layer Grid contains the following key elements and controls:
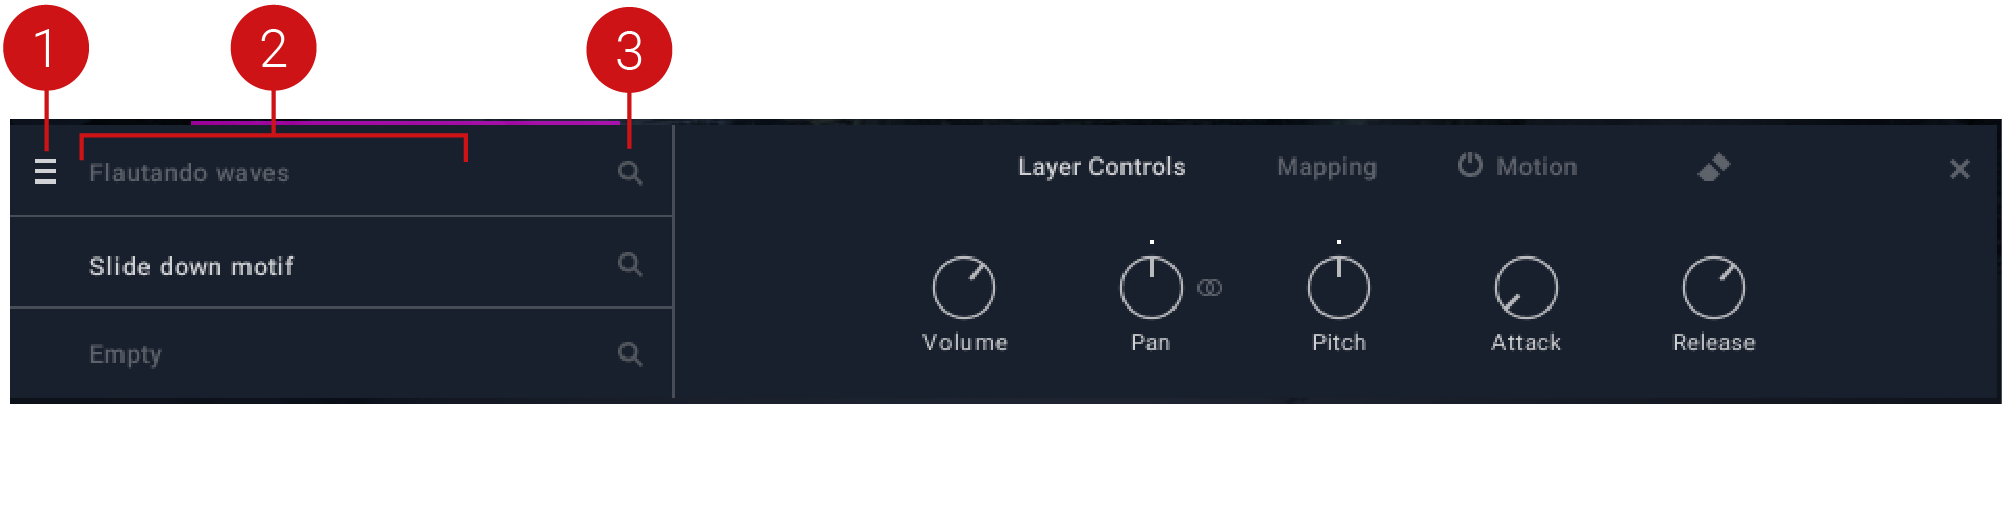
Drag and Drop: Allows you to drag and drop a Layer into a new slot to adjust its priority.
Layer Selector: Selects a Layer for editing.
Search: Provides access to the Layer browser. Refer to Layer Browser.
Layer Controls
The Layer Controls contain parameters for editing the sound of each Layer. Parameters include volume, pan, pitch, and the attack and release of the amplitude envelope. Use the Layer Grid to select the Layer you want to edit.
The Mapping area contains the following key elements and controls:
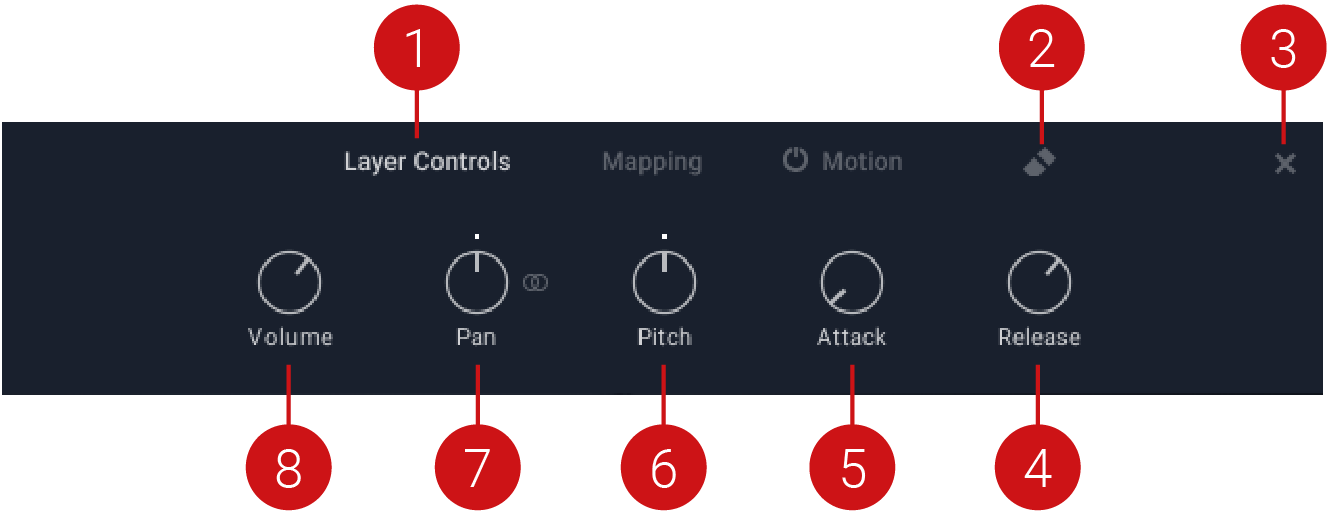 |
Navigation: Selects the Layer Controls editor.
Erase: Clears all settings for the selected Layer.
Exit (x): Exits the Mapping controls and returns to the Main view.
Release: Adjusts the release time of the Layer.
Attack: Adjusts the attack time of the Layer.
Pitch: Adjusts the coarse pitch of the Layer. Press [Shift] + click to fine-tune in small increments.
Pan: Adjusts the Layer pan. When the stereo symbol is activated (to the right), the stereo spread of the Layer is adjusted.
Volume: Adjusts the Layer volume.
Mapping
The Mapping controls allow you to set the keyboard range and trigger options for each Layer of an instrument, meaning Layers can be triggered using different expression or velocity values. For example, using different expression values, you can introduce layers using the Expression control via the Performance Controls or a foot pedal. You can also manipulate the Layers with varying velocity values based on how hard or soft you play the keyboard or trigger notes in your DAW. For more information on Performance Controls, refer to Performance Controls. To learn how to select Layers in the Mapping editor, refer to Layer Grid.
The Mapping area contains the following key elements and controls:
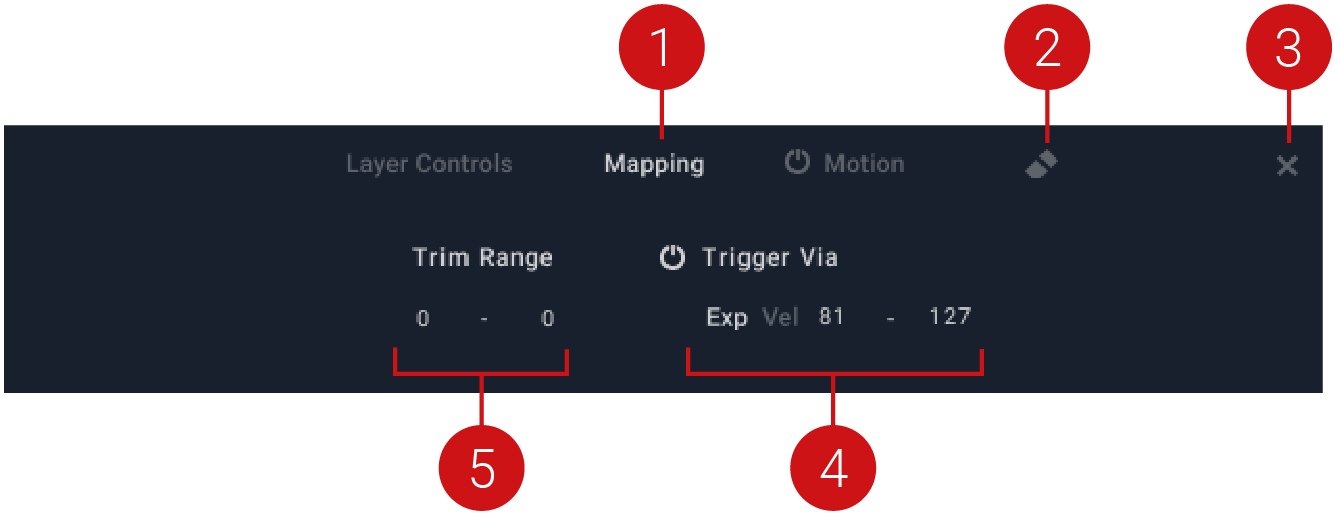 |
Navigation: Selects the Mapping editor.
Erase: Clears all settings for the selected Layer.
Exit (x): Exits the Mapping controls and returns to the Main view.
Trigger Via: Activates Layer triggering via velocity or expression. Ensure the Layer trigger functionality is active by clicking the on/off switch.
Trim Range: Adjusts the key span of the selected Layer.
Motion
The Motion layer controls allow you to add dynamic realism and movement to your sounds through the use of a low-frequency oscillator (LFO). LFOs are special-purpose oscillators that produce frequencies below the range of human hearing. They are typically used for periodic modulation to produce changes in sound. In Lores, each of the three layers within an Instrument contains an LFO that can be assigned to either volume, pitch, or pan, making this a very powerful and expressive feature. In addition to setting the depth of the LFO's modulation, you can also synchronize the rate of the LFO to the tempo of your DAW for tempo-synced movement of your sound.
The Motion area contains the following key elements and controls:
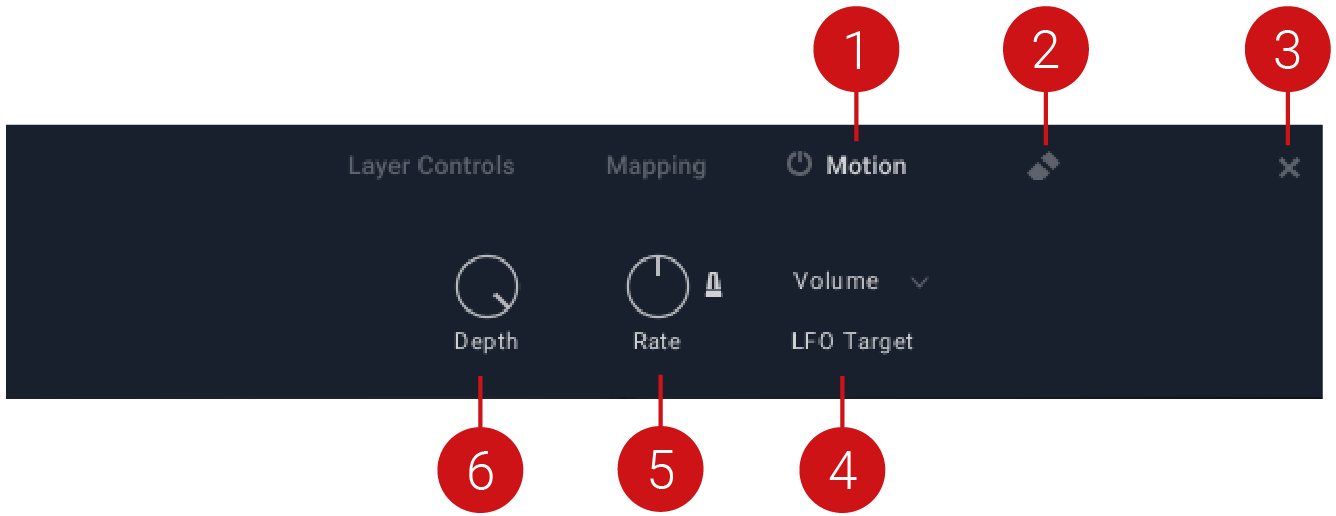 |
Navigation: Selects the Motion layer editor. To the left, the On/Off button activates the LFO for the selected Layer.
Erase: Clears all settings for the selected Layer.
Exit (X): Exits the Layer Controls and returns to the Main view.
LFO Target: Sets the LFO target to Volume, Pitch, or Pan.
Rate: Adjusts the frequency of the modulation. The metronome icon to the right synchronizes the LFO Rate to the tempo of your DAW.
Depth: Adjusts the depth of the LFO.