SCHEMA: DARK Overview
SCHEMA: DARK's Main page consists of key controls that allow you to tweak your sound, and provides access to a number of specialized editing pages.
SCHEMA: DARK is a multi-layer loop player. In each of the four independent tempo-synced layers, a different loop is chopped into 16 slices. These slices can be played back in any order according to the chosen pattern, with individual fine-tuning for each step in the pattern. All four layers are stacked and played together in loop.
Once you have completed the installation and loaded SCHEMA: DARK in KONTAKT, you can start playing the instrument. SCHEMA: DARK opens with the Main page, which shows an animated view of the instrument. The instrument also provides performance controls that enable you to quickly play and tweak presets in an intuitive way, along with dedicated access to additional pages for in-depth editing.

Main page: The Main page is the default page displayed when other pages are closed. It shows a visual representation of the instrument:
In the 4x4 grid, each circle represents one of the 16 steps of the sequencer.
Within each circle, the colored quarters represent slices played on that step in the various layers. Each color represents one layer. If a layer doesn't play any slice on that step, its quarter is off.
The colored quarters light up when played. Since the four layers can play different patterns with different lengths and at different rates, this gives you a quick overview of the play position in each layer, and how the various layers combine.
Macros and performance controls: The Macros and performance controls are always visible at the bottom of the instrument. These controls adjust key loop or effect parameters for immediate tweaking of sounds. For more information, refer to Macros and Performance Controls.
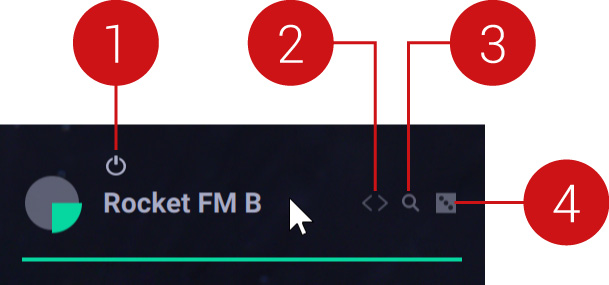
Layer tabs: The four colored layer tabs are always visible. They let you to tweak each individual layer. For more information, refer to Layer Tabs.
MAIN, MIXER, FX, and Keyboard buttons: These buttons are always visible in the top right corner of the instrument:
The MAIN button returns to the Main page.
The MIXER button opens the Mixer page, which lets you adjust the mix between the four layers. For more information, refer to Mixer Page.
The FX button opens the FX page, where you can configure two send effects for your layers. For more information, refer to FX Page.
The Keyboard button opens the Key Mapping page, which shows you how to control SCHEMA: DARK from your MIDI keyboard. For more information, refer to Key Mapping Page.
Layer Tabs
The four colored layer tabs are always visible. They detail settings for each individual layer.

By default, each layer tab contains the following elements:
On the left, the layer icon (little quarter) indicates the color and position of the layer. Clicking the layer icon opens the Layer Edit page, which lets you precisely adjust all parameters for that layer. For more information, refer to Layer Edit Pages.
On the right, the tab displays the name of the loop loaded in that layer. Clicking the loop name opens the Browser, which allows you to load other loops and settings into this layer. For more information, refer to Browser.
Furthermore, when you hover a layer tab with your mouse, additional controls appear for that layer:
 |
Layer On/Off: Activates or deactivates the layer. When you deactivate a layer, its audio turns off and all its controls are grayed out and inactive. This button is equivalent to the Channel On/Off button available on the Mixer page.
Previous/Next Loop: Loads the previous or next loop from the SCHEMA: DARK library into this layer.
Browse: Opens the Browser for that layer. This is equivalent to clicking the loop name.
Random Loop: Loads a random loop from the SCHEMA: DARK library into this layer.
Macros and Performance Controls
The Macros and performance controls enable you to play and tweak key parameters in an intuitive way. No matter which page is displayed in SCHEMA: DARK, the Macros and performance controls are always visible at the bottom of the instrument. The following Macros and performance controls are available:

Layers: Adjusts the stacking of the active layers. You can control this parameter from the modulation wheel on your MIDI keyboard or using your mouse in the user interface. With the control fully down, only the first active layer can be heard. As you move the control upwards, the other active layers are progressively blended in, one after another. With the wheel fully up, all active layers are fully audible. The control element shows little colored dots that represent the active layers and in which order they are stacked up.
Macros: Each Macro affects a key parameter in the four layers and provides global control over a specific sonic aspect of your sound. You can finely adjust the influence of the Macros over each layer, and even over each single step of the pattern playing in that layer. For more information about adjusting Macros, refer to Adjusting Macros.
Effect Return controls: Adjust the intensity of both send effects in the overall sound. Each control displays the name of the effect selected in the corresponding effect unit of the FX page. A click on the little on/off button next to a control turns that effect on or off. When an effect is off, it cannot be heard and its control is grayed out and inactive. For more information about how to select and configure send effects in SCHEMA: DARK, refer to FX Page.
Volume: Adjusts the main output level of the instrument.