Getting started with Traktor Play
This section introduces you to the basics of importing, browsing, loading, and mixing tracks in Traktor Play.
This section introduces you to the basics of importing, browsing, loading, and mixing tracks in Traktor Play. The tutorials also guide you through the fundamentals of mixing your tracks, using equalization, Hotcues, Mixer FX, and Key Lock.
The Traktor Play workflow
The Traktor Play workflow consists of a number of steps from importing your music to playing and remixing tracks using Traktor Play’s advanced functionality.
The following steps outline the key workflow of using Traktor Play. Each step is briefly introduced and provides links with further information:
Importing your music: When you import your music, all music files get stored in the Track Collection. The Track Collection uses track-specific metadata to categorize the tracks by certain criteria. For more information, refer to Importing music into the Track Collection.
Browsing for music: Once your music is imported in Traktor, you can use the Browser to find tracks by using the text search or navigating the Browser Tree. The Track List shows all tracks contained in the selected folder. For more information, refer to Browsing for music.
Loading a track into a Deck: When loading a track from the Track List, Traktor analyzes its exact tempo and key information, creating the Beatgrid and the Waveform. This information is stored for each track in the Track Collection. For more information, refer to Loading tracks into Decks.
Start playback of a Deck: To hear music from a Deck you need to adjust the Mixer controls of the respective Mixer channel and set the crossfader accordingly. Then you can start playback and the Waveform will start moving. For more information, refer to Mixing your first two tracks.
Cueing using Hotcue buttons: You can create Cue points and store them on Hotcue buttons. When triggering Hotcues the playback will instantly jump to the stored cue point position. For more information, refer to Working with Hotcue buttons and Flux mode, Working with Cue Points.
Looping: Traktor provides you with Loop controls for playing loops at pre-defined lengths. As with Cue points, Loops can be stored on Hotcue buttons and triggered at a later time. For more information, refer to Working with Hotcue buttons and Flux mode, Working with Loops.
Finding and loading another track: While the first track is playing you can browse for the next track in your Track Collection and load it into another Deck. For more information, refer to Mixing your first two tracks.
Syncing the tracks: Since Traktor has analyzed the tempo and the Beatgrid for both tracks, you can sync them by using the SYNC button on the second Deck. Once you start playback on that deck, the beats of both tracks will perfectly match. You can also sync the tracks manually by using the tempo and synchronization controls. For more information, refer to Mixing your first two tracks.
Previewing the transition: The Mixer lets you preview the next track when preparing the transition using headphones. This allows you to find the right position for starting playback before using the crossfader to create a blend. For more information, refer to Using the Cue channel for mixing.
Using the equalizer and adding effects: To make transitions more flawless, the Mixer offers equalizer controls for sculpting the frequencies in your tracks. Additionally, Traktor features FX Units and Mixer FX for adding effects and creating interesting transitions. For more information, refer to Using the equalizer, Working with Mixer FX.
Remixing: With the built-in Stem separation, you can transform your music by muting the drums part in your tracks. For more information, refer to Working with Stems.
Displaying tooltips
In Traktor, you can activate tooltips, which give you instant information about the control element that you currently hover with the mouse. Tooltips are available for control elements, for areas on the user interface, and for the settings in the Preferences dialog. You can activate the tooltips in the header.
To activate the tooltips:
Click the Tooltips button in the header.

The Tooltips button lights up to indicate that the tooltips are activated. When you now hover a control element, you are presented with the corresponding tooltip.

Importing music into the Track Collection
You can import your music into Tractor’s Track Collection in several ways. You can drag and drop your music files from your computer into the Track Collection, you can use the context menu in the Browser Tree to import the music from your local music folders, and you can use the context menu to import Remix Sets.
Importing music using drag and drop
To import your music files into your Track Collection using drag and drop:
Drag the music files from the location on your computer and drop them in the Track Collection folder in Traktor’s Browser tree.
Traktor now analyzes the music files and imports the metadata into the Track Collection.
Browsing for music
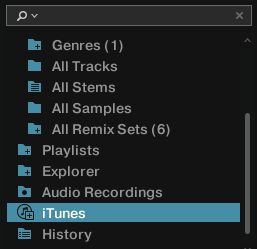
The Browser lets you conveniently find the tracks you are looking for. You can navigate along the subfolders of the Track Collection in the Browser Tree or you can perform a text search in the Search field.
Navigating through folders in the Browser Tree
To navigate the Browser Tree :
In the Browser Tree, expand the Track Collection folder to show the subfolders.
Expand the subfolder of the metadata category by which you want to search a track, i.e. Artists.

Select the subfolder named by the artist to your liking, for example, Native Instruments.
The Track List now shows all the music according to the selected artist.
In the Track List, browse for a track to your liking.
Load the track into Deck A by using drag and drop.
Traktor now analyzes the entire track for calculating the tempo (BPM) to create the Beatgrid and the Waveform.
Performing a text search
You can perform a text search in the current playlist or in the Track Collection :
Click in the Search field.
Start typing the characters in relation to the track you are looking for. This can either be the track name, the artist, or another category.
Upon typing, the Track List instantly filters the selected playlist.

Press [Enter] on your computer keyboard.
The Track list now provides you with all the music in the Track Collection matching your search query.
You can refine your search by clicking the magnifying icon on the left to open the Search in: menu, and selecting the desired property from the menu.
The results are narrowed down to the tracks containing the search string in the selected property.
Loading tracks into Decks
To load a track or a Stem file into a Deck, you can use drag and drop or the context menu.
Loading music via drag and drop
Drag the selected music from the Track List and drop it into the Deck to your liking.
Traktor now analyzes the track for its tempo (BPM) to create the Beatgrid and the Waveform. Depending on the selected track, the Deck Type switches to a Stem Deck. The track information are visible in the Deck header.
Loading music via the Browser context menu
Right-click the track in the Track list to open the context menu.
Select the entry for the Deck you want to load the track in to,, for example, Load into Track Deck A.
Traktor now analyzes the track for calculating its tempo (BPM) to create the Beatgrid and the Waveform.
Loading tracks from your iTunes Library
You can load tracks from your iTunes Library and Playlists directly from within Traktor. The iTunes folder in the Browser Tree directly accesses your iTunes Library and its Playlists. Editing functions are not available.
To load a track from your iTunes Library:
Select the iTunes folder in the Browser Tree to display its content in the Track List. A double-click expands the iTunes folder.
Browse for a track in the Track List or in the Playlists.
Drag the track and drop it into a Deck to load it.
Mixing your first two tracks
In this section you will learn to mix your first two tracks using Deck A and Deck B. At first, prepare the Mixer by adjusting the control elements for mixing from Deck A to B. Then load the first track into Deck A, and begin to perform step by step.
Prerequisites
Set the crossfader to the left-most position.

Set Channel fader A to maximum position.
Set Channel fader B to maximum position.
Double-click the MAIN knob to reset to 0.0 dB.
Set the volume of your audio system or active speakers to minimum level.
Loading the first track into Deck A
Browse for a track to your liking in the Track Collection, for example, the demo track Berlin Hauptbahnhof by Native Instruments.
Drag and drop the track into Deck A to load it.
Traktor now analyzes the track for its tempo and to create the Beatgrid and the Waveform.
Starting playback of Deck A
To start playback on Deck A:
Click the Play button.
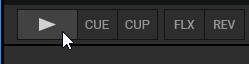
The waveform starts moving and the Channel Volume meter LEDs and the MAIN level meter LEDs start to illuminate.
Slowly increase the volume of your audio system or active speakers to a moderate listening level.
You now hear the audio of the track in your speakers.
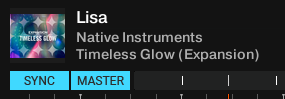
Loading the second track into Deck B
Browse for a track with a similar tempo to your liking in the Track Collection, for example, Lisa.
Drag and drop the track into Deck B to load it.
Traktor now analyzes the Track for its tempo and to create the Beatgrid and the Waveform.
Syncing the track tempos
In order to sync the tempos both tracks:
Click the SYNC button on Deck B.
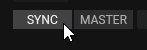
The tempos of both tracks are now in sync, indicated by the equal tempo value in the Deck Header. The Tempo fader on Deck B has also moved accordingly and the SYNC button lights up.

Starting playback of the second track
When the playback time of the Track in Deck A is almost over you can start the playback of Deck B:
Click the Play button on Deck B.
The waveform starts moving and the Channel Volume meter LEDs in Mixer channel B illuminate. The tracks in Deck A and Deck B play beat-accurate in sync.
Mixing in the audio signal
You can now mix in the audio signal of Mixer channel B into the main signal:
Drag the crossfader and slowly move it towards center position, then hold it for a moment.

The audio signal of the track in Mixer channel B is fading into the main signal.
While the track in Deck A reaches its end, slowly move the crossfader to the rightmost position.

The audio signal of Mixer channel A slowly fades out of the main signal. Only Mixer Channel B is now audible. Alternatively to the crossfader, you can also use the Fade left and Fade right buttons to move the crossfader step-wise, or you can even use the Autofade buttons to let the crossfader automatically move to the opposite side. You have now mixed your first two tracks.
With the end of the playback of Deck A, Deck B automatically becomes the new Tempo Master and is ready for the next transition to another Deck.
To mix another track, repeat the aforementioned steps.
Using the Cue channel for mixing
Each Mixer channel provides a Cue button that sends the audio signal to the Headphones Cue channel. This way you can prepare the transition to the next track, preview tracks, or preview an effect behavior in a live situation.
To cue the next track in the Headphones Cue channel:
Click the Cue button (headphones icon) on the Mixer channel with the audio signal that you want to mix next.
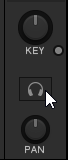
The button lights up, indicating that the audio signal of the Mixer channel is sent to the Headphone Cue channel, which you will hear in your headphones.
Turn the VOL knob to adjust the volume of the Headphones Cue channel to a moderate listening level.
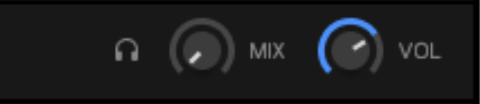
Turn the MIX knob to adjust the balance between the cued track and the main mix in your headphones. Turn it counter-clockwise when you want to concentrate on the cued track, and clockwise when you want to hear more of the main mix.
Optimizing the gain and the output levels
In this section you learn more about a few audio concepts and the importance of adjusting the Mixer’s gain settings and main output volume. Adjusting the levels at these different stages supports the audio quality of the mix and ensures the best possible dynamic range. It also protects the audience from potential ear damage and preserves the audio equipment, for example, power amplifiers and speakers.
Dynamic range
The dynamic range of a track is the difference of level between its loudest and quietest parts. In other terms, it describes how much the volume level varies within the track. Besides the different average audio levels, the dynamic ranges between tracks can also differ. That is why it is important to align the levels of the incoming audio signals to prevent them from clipping.
Clipping
If an audio signal clips, the gain of the audio signal is too high. An audio signal clips if it exceeds the nominal level and also the headroom (normally at +6 dB). Then the audio signal starts to distort and looses dynamics and punch. Although the audio signal then seems louder, the entire audio quality decreases significantly. This critical audio signal can damage ears and audio equipment. That is why it is important to adjust the gain levels to protect ears and electronics.
To protect the audio equipment connected to the main output stage, Traktor uses an integrated Limiter. The purpose of the Limiter is to prevent the signal from clipping by reducing the dynamic range.
However, the Limiter in Traktor can be switched off.
Note
We do not recommend to switch off the Limiter.
Headroom
Before an audio signal starts to clip there is still a reserve to buffer transient audio peaks, the so-called headroom. The headroom starts where where nominal level ends, at 0 db. It normally ends before + 6 dB.
Auto Gain
During the track analysis, Traktor calculates its ideal gain value, called Auto Gain. Each time you load the track into a Deck, the track’s Auto Gain is added to the channel’s input gain. This way, balancing your track levels and making sure that none of them dominate over the others should only need tiny adjustments of the GAIN knob in the Mixer channel, if at all.
Note
For tracks that have not been analyzed, the Auto Gain value is set to zero.
If needed, you can manually adjust the Auto Gain value for a track by loading the track into a Deck, switching the GAIN knob’s mode to Auto Gain (the switch turns orange) on the corresponding Mixer channel, and turning the GAIN knob to change the Auto Gain value. The value that you have dialed will be recalled each time you will load the track again.
Using the equalizer
The EQ knobs and EQ Kill buttons of the Mixer are used for making sound adjustments to tracks while cueing and mixing.
The EQ knobs adjust the high, middle, or low frequencies in the audio signal.
The Kill buttons completely remove high, middle, or low frequencies from the audio signal.
Using the EQs can make transitions more flawless. The following example outlines a procedure on how to use the Equalizer during a transition.
EQing the bass frequencies of the tracks during transition
The most common EQing technique is to take out the bass of the next track before the transition and to gradually bring it back in during the transition.
Assuming you want to transition tracks from Deck A to Deck B:
Before starting the transition, turn the LOW knob on Mixer channel B to minimum position for taking out the bass frequencies of the track in Deck B.
Progressively mix in Mixer channel B by gradually moving the crossfader from the left to the center position.
Both tracks are audible in the main signal but the track on Deck B has no bass.
When you want to bring the bass back in, gradually increase the bass amount of Mixer channel B while simultaneously decreasing that of Mixer channel A using the LOW knobs on both Mixer channels.
Both tracks are still audible in the main signal but the track on Deck A has no bass.
Complete the transition by gradually moving the crossfader all the way to the right.
You mixed two tracks in conjunction with the equalizer.
Tip
Alternatively to the EQ knobs, you can also use the EQ Kill buttons. These buttons are used for immediately removing the respective frequency band from the audio signals during transitions as well as for performances.
Tip
Using the EQs during a transition to take out frequencies can avoid clipping that could easily occur when two tracks play together with full volume.
Working with Mixer FX
In this section you learn how to apply Mixer FX to your mix.
About Mixer FX
A Mixer FX is a grouped effect which can be applied to the audio signal in the Mixer channel using the Mixer FX Amount knob. You can click the Mixer FX menu below the Mixer FX Amount knob to select from the two available Mixer FX: Filter (selected by default) and Dual Delay. The Amount knob’s value ring and the Mixer FX On switch show a different color based on the selected effect to remind you which effect is currently active: They are orange for the Filter, and red for the Dual Delay.
Activating Mixer FX
To activate the Mixer FX for the Mixer channel:
Click the Mixer FX On button.
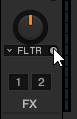
The button lights up with the color of the selected Mixer FX, indicating that the Mixer FX is activated.
Applying Mixer FX
You can apply the Mixer FX by turning the Mixer FX Amount knob when Mixer FX is activated for the Mixer channel:
Apply a low-pass Filter FX by turning the Mixer FX Amount knob counter-clockwise.

The higher and middle frequencies get progressively filtered out from the audio signal and you noticeably hear the low-pass Filter FX.
Apply a high-pass Filter FX by turning the Mixer FX Amount knob clockwise.

The middle and lower frequencies get progressively filtered out from the audio signal and you noticeably hear the high-pass Filter FX.
Working with Hotcue buttons and Flux mode
In Traktor, you can assign Cue Points and Loops to the eight Hotcue buttons (Hotcues) on the CUE page of the Advanced panel. This allows instant access to your most important Cue Points and Loops.
Accessing the CUE Page in the Advanced panel
To manage the Cue Points in a track, you need to open the CUE page in the Advanced panel:
Click the Advanced Panel button (downward arrow) to display the Advanced panel of the Decks.
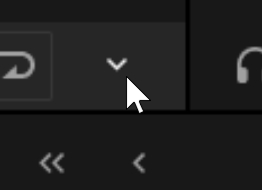
In the Advanced panel, select CUE on the right to show the CUE page.
Play back the track or scroll to the position in the track where you want to set a Cue Point.
Click an empty (unlit) Hotcue button to set a Cue Point at the current playback position and map it to this Hotcue button.

The Cue Point is stored and mapped to the Hotcue button. The Hotcue button lights up blue.
You can also store Cue Points using the Store button available on the CUE page of the Advanced panel.
Play back the track or scroll to the position in the track where you want to activate a Loop.
Activate a Loop with a size of your liking using the Loop controls.
Click an empty (unlit) Hotcue button to store the Loop to this Hotcue button.
The Loop is stored to the Hotcue button. The Hotcue button lights up green.
You can also store Loops using the Store button available on the CUE page of the Advanced panel.
Triggering Hotcues
The behavior of a Hotcue button depends on the playback status of the track.
When the Deck is playing:
During playback, click a Hotcue button to jump to the stored Cue Point or Loop and continue playback from there.
When the Deck is stopped, the Hotcue buttons behave like the CUE button in the transport controls:
On a stopped Deck, click and hold a Hotcue button to jump to the stored Cue Point or Loop and start playback from there.
Holding the Hotcue button continues playback until it is released. Upon release the playback position will jump back to the Cue Point or Loop and remain paused.
The MAP button allows you to remap stored Cue Points and Loops to other Hotcue buttons:
Click the Hotcue button with the Cue Point or Loop you want to remap.
Click the MAP button to activate Map mode.
The MAP button stays lit as long as Map mode is active.
Click the Hotcue button to which you want to assign the Cue Point or Loop.
The Cue Point or Loop is mapped to the new Hotcue button. The original Hotcue button is now empty.
Using Flux mode and Reverse mode
Flux mode lets you jump to Cue Points and Loops without loosing the phrasing of your tracks. It is a timeline-based transport technique that lets you interact with Traktor’s transport controls and then immediately jump back to the position of the timeline where the track would have been if the transport action had not been used in the first place. In other words, it is as if a second, virtual playhead would continue forward in your track while Traktor loops or jumps to a Cue Point.
When you release the Loop or Cue Point by releasing the relevant Hotcue button, the playback resumes at this playhead position. The longer you loop, the farther ahead the playhead position will move and therefore the farther ahead the playback will jump to when you release the Hotcue button. The virtual Flux mode timeline is represented by a green playhead in the Waveform view.
Activating Flux mode
To activate Flux mode for the Deck:
Click the Flux mode button.

Using Reverse mode
When the Deck is in Flux mode, you can also activate the Reverse mode, which temporarily plays the track reversely from the current playhead position until you release the button.
Click and hold the Reverse mode button.
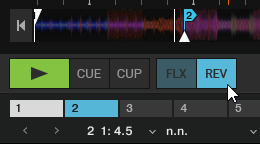
The track plays back reversely.
Release the Reverse mode button to resume to normal playback.
Working with Key Lock
The Key Lock feature helps you mix your tracks harmonically. By locking the key of a track, you can change the track’s tempo without affecting its original key. When the key is locked, the key value appears on the Key Lock button in the Stripe and it is highlighted in a different color for each key value. This information can help you select the next track to make it match the key of the track currently playing. Furthermore, when you lock the key of the track in the Master Deck, the Browser highlights the matching tracks using the same color-coding.
To lock the original key of a track:
Load a track into any deck.
Click the Key Lock button in the Stripe.

The original key is locked. The Key Lock button now displays the original key value and highlights it in a color specific to that key.

The Browser now offers tracks that match the track playing by highlighting their values in color in the Key column.

Note
In Traktor Pro you can transpose the locked key to your liking, which allows you to harmonically match any tracks.
Using Cruise mode
With Cruise mode you can let Traktor automatically mix the tracks of the selected Playlist or the Track Collection folder one after the other.
Activating Cruise mode
Select any Playlist or the Track Collection folder in the Browser Tree.
Load a track from the Track List into a Deck.
Click the Play button on that Deck to start playback.
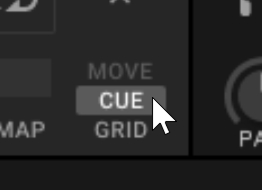
Click the Cruise mode button in the Traktor Header to activate Cruise mode.
Cruise mode is activated. Traktor now mixes the tracks contained in the Track List one by one.
Cruise mode behavior
Once Cruise mode has been activated, Traktor does the following:
The playing track continues to play.
The channel fader for the playing track is completely raised, whereas the channel fader for the next track is set to its minimum.
The crossfader is set to center position and remains.
The next track in the Playlist is loaded into the opposite Deck.
The next track will automatically start playback a few seconds before the current track reaches its end.
Tips for using Cruise mode
At least one track has to be playing when engaging Cruise mode.
Use a Playlist to create an order for the tracks to be played automatically.
You can manually trigger the transition to the next track at any moment by pulling down the channel fader of the playing track.
Controlling knobs and faders in the software
The most common method to adjust the position of knobs and faders with your mouse is using click and drag:
To adjust the position of a knob or fader element, click the element and drag your mouse.
You can make finer adjustments as follows:
To adjust the position of a knob or fader in finer increments, hold [Shift] on your computer keyboard and drag your mouse.
Tip
While dragging your mouse, you can press or release [Shift] at any time to switch between coarse and fine adjustment.
Traktor Play provides some additional mouse controls for knobs and faders, described in the following sections.
Using the Plus and Minus buttons
When hovering the mouse over the Tempo fader or a knob, small + and - buttons appear next to it. These buttons allow for steady value changes and are better suited to set a knob to a specific value:
Hover the mouse over a control element to display its + and - buttons.
Click the + and - buttons to move the Tempo fader or turn the knob stepwise into the respective direction.
Jumping to another knob value
With the mouse you can also jump from the current knob value to any other value immediately.
Right-click and hold any knob to display another knob pointer in gray.
While holding the right mouse button, drag the mouse to turn the gray knob pointer to the position to your liking.
While still holding the right mouse button, click and hold the left mouse button.
The main knob pointer jumps to the gray pointer’s position immediately, as does the parameter value.
While still holding both mouse buttons, you can choose which of the new or original parameter value you want to keep:
If you release the right button before releasing the left button, the parameter stays at its new position.
If you release the left button before releasing the right button, the parameter returns to its original value.