Working with Stems
In this section you learn how to use Stem files in Traktor Play.
In this section you learn how to load and play back Stem files in the Stem Decks.
Stem files allow you to interact with four different musical elements of a track independently while DJing. The four Stems in a Stem file can be modified individually to create spontaneous instrumentals, remixes, or mashups. You can create transitions between elements Stem by Stem, or apply effects and EQ to just to a specific Stem instead of the entire track. To get really creative, you could mix musical elements across multiple Stem Decks, for example, by taking the vocals from one track and mixing it with the beat from another.
About Stem files
A Stem file is a track in a custom format with the file extension “.stem.mp4” that contains four audio tracks (the Stems). Each Stem represents one of the key elements of the track, for example, drums, bass, synths, and vocals. By default, when a Stem file is played back in Traktor all Stems are audible and summarize to the entire track.
Stem files can be of two sorts:
Generated Stem files: Traktor can separate your tracks into three instrumental Stems and one vocal Stem: drums and percussion, bass, other, and vocals. The third Stem (“other”) is the instrumental remainder after removing drums and bass, and can vary from track to track. You can generate Stem files from all tracks that you own. Generated Stem files are linked to their original tracks in your Track Collection and are stored locally on your computer or external hard drive. For more information on how to generate Stem files, refer to Generating and deleting Stem files.
Studio Stem files: You can purchase ready-made, studio-quality Stem files. A Studio Stem file can include Stems specific to that track, for example, “drums,” “808,” “chords,” and “pads.”
Studio Stem files have to be analyzed before they can be loaded
Due to the large amount of data that must be read from a Stem file, Studio Stem files must be analyzed before loading them into a Stem Deck. You cannot load nor play Stem files before they have been analyzed.
For more information on how to analyze tracks and Studio Stem files, refer to Analyzing tracks manually.
Stem files in the Track Collection
In your Track Collection, all Stem files are indicated by a Stem symbol showing three little layers in the status column:
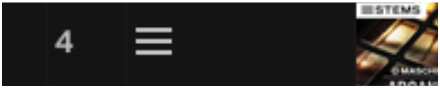 |
In addition, generating a Stem file from a track does not create any new entry in your Track Collection: Instead, the resulting Stem file is linked to its original track and both share the same entry in the list. The availability of a Stem version for a track is indicated by the Stem Link symbol in the status column:
 |
Note
When loading a track with an available Stem file, you can choose whether to load the Stem version into a Stem Deck or the original track into a Track Deck. For more information, refer to Loading Stem files.
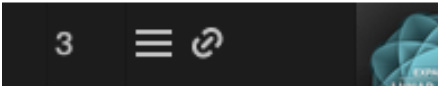
If the Stem version of a track has been generated but is missing or unavailable (for example, if it is stored on an external drive currently disconnected from your computer), the Stem Link symbol turns red:
 |
In that case the Stem file cannot be loaded, only the original track.
Generating and deleting Stem files
To generate a Stem version of a track, do the following:
Right-click (Windows) or [ctrl]-click (Mac) the desired track in the Track Collection and select Generate Stems from the context menu.
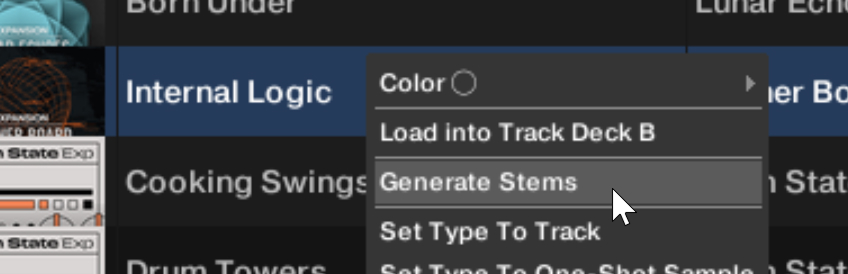
The status bar at the bottom of the Browser shows the progress of the ongoing stem separation. After completion, the stem link symbol appears in the icon column to indicate that a Stem version is available.
Note
Depending on your CPU, the separation into Stems takes between one and two thirds of the track’s playing time.
At any time you can cancel an ongoing Stem separation by right-clicking (Windows) or [ctrl]-clicking (Mac) the status bar and selecting Remove analysis/download/stem separation jobs….
You can trigger the Stem separation even while the track is playing.
Deleting a Stem version
To delete the Stem version of a track, do the following:
Right-click (Windows) or [ctrl]-click (Mac) the desired track in the Track Collection and select Delete Associated Stems from the context menu.
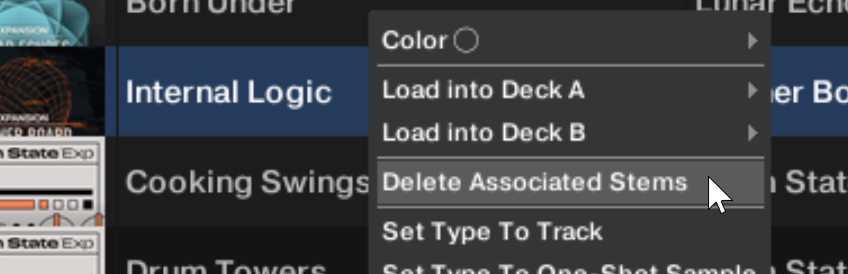
The Stem file for that track is deleted. The Stem (three-layer) and Stem Link symbols disappear from the icon column.
Note
If the associated Stem file cannot be found (for example, if it is stored on an external hard drive currently disconnected from your computer), it cannot be removed from your disk. In this case only the link between the original track and its Stem version is removed.
Loading Stem files
Loading a Generated Stem file
In the Track List, Generated Stem files share their entry with their original track. You have the choice between loading the original track and its Stem version.
By default, you can load the Stem version of a track using a simple drag-and-drop:
Click the desired track from the Track Collection or from a Playlist. You can recognize tracks with a Stem version by looking at the icon column in the Track List: All tracks with an available Stem version show both a three-layer symbol and a Stem Link symbol. If the desired track has no Stem version available, you can generate it now.
Drag and drop the track onto the desired Deck.
By default, the Deck Type automatically switches to Stem Deck and the Stem version of the track is loaded. The Multi-Track Waveform shows the four waveforms of the individual Stems. The Stripe view shows the global waveform of the entire track.
Alternatively, you can load the original track instead of its Stem version by holding [Shift] on your computer keyboard while dragging and dropping the track.
Note
You can switch these default and alternative loading behaviors by opening the Loading page of the Preferences and adjusting the Load as Stem / Load as Track settings in the Loading to Deck section.
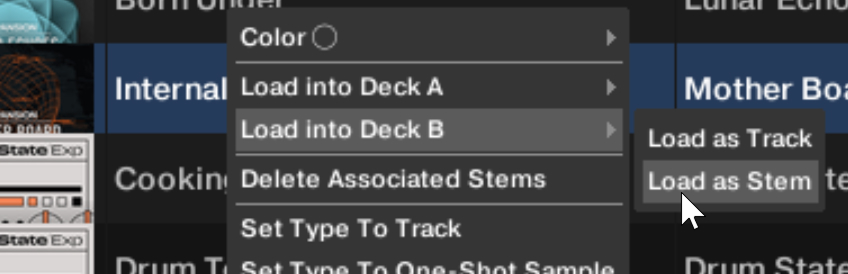
Independently of the behavior set as default, you can always specify which version to load by right-clicking (Windows) or [ctrl]-clicking (Mac) the track from the Track List and selecting the Load as Track or Load as Stem command for the desired Deck.
 |
Loading a Studio Stem file
To load a Studio Stem file:
Click the desired Studio Stem file from the Track Collection. You can recognize Studio Stem files by looking at the icon column in the Track List: While all Stem files show a three-layer symbol, Studio Stem files do not show the additional Stem Link symbol next to it.
Drag and drop the Studio Stem file onto the desired Deck.
The Deck Type automatically switches to Stem Deck. The Multi-Track Waveform shows the four waveforms of the individual Stems. The Stripe view shows the global waveform of the entire Stem file.
Playing back Stem files
In order to play back a Stem file:
Click the Play button on the Stem Deck.
The Stem Deck plays back the Stem file similar to a track. The individual waveforms start moving.
The Multi-Track Waveform shows the waveforms of the individual Stems in different colors. On the left, the four icons indicate you the instrument of each Stem part, from top to bottom: drums, bass, other, and vocals. You can click the drums icon to mute or unmute the drums part.
During playback, you can mute or unmute the drums part by clicking the drums icon af the left of the Multi-Track Waveform. You can find more information about the Stem Deck controls in Stem Deck.