Working with Loops
In this section you learn how to work with Loops using Traktor Play’s dedicated loop controls.
In this section you will learn how to work with Loops using Traktor Play’s dedicated loop controls.
About looping
A Loop is a snippet of audio that repeats (loops). Loops can be used, for example, as a tool for remixing parts of tracks, building up tension in the music, or extend track transitions. The length or size of Loops differ but are always beat-accurate. This means Loops always stick to the beat.
Available predefined Loop sizes
In Traktor you can trigger a loop using one of the following predefined loop sizes:
1/32 of a beat
1/16 of a beat
1/8 of a beat
1/4 of a beat
1/2 of a beat
1 beat
2 beats
4 beats
8 beats
16 beats
32 beats
You can also define the loop start and loop end manually with the help of dedicated Loop IN and OUT buttons.
Activating a Loop with a predefined size
To activate looping on a playing track:
Click one of the Loop Size buttons at the bottom of the Deck.

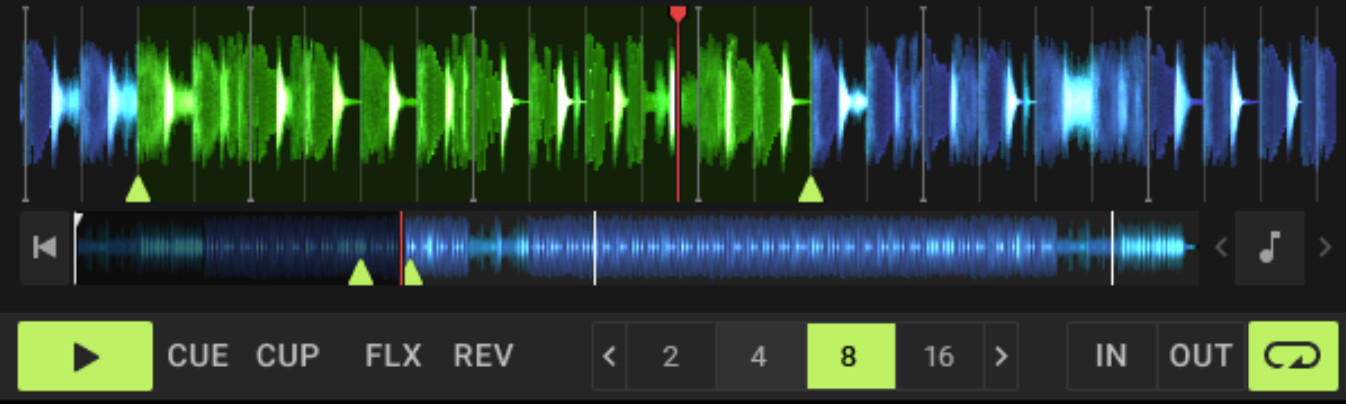
This automatically enables looping at the current playback position in the track. The Loop is highlighted in green in the Waveform display. The clicked loop size as well as the Loop button on the right light up green.
Note
Clicking the Loop button when no Loop is active activates the next Loop stored in the track (if any).
Activating a Loop with a custom size
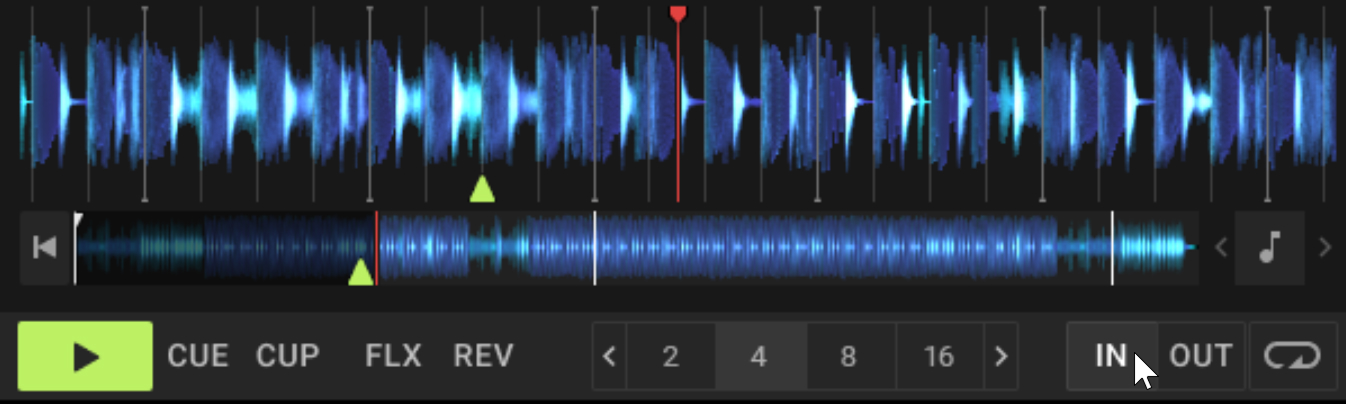
You can also activate a Loop with a custom sizeby using the IN and OUT buttons.
On a playing Deck, do the following:
Click the IN button when you want the Loop to start.

This sets a Loop In Point at the current position, indicated by the green triangle below the Waveform and the Stripe.
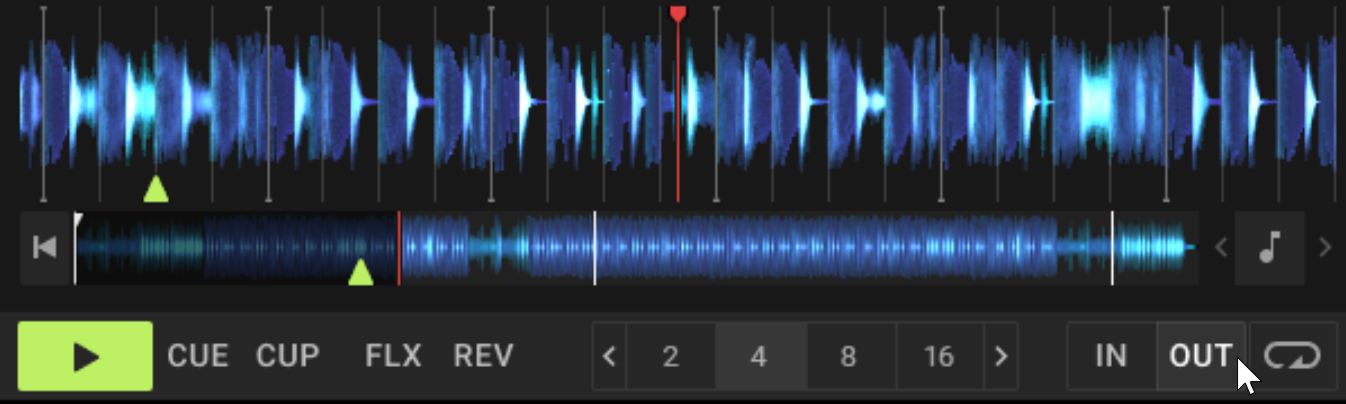
Wait as long as you want the loop size to be, then click the OUT button to set the Loop Out Point.
Looping is activated using your custom start and end points.
Deactivating the Loop
Click the lit Loop button to deactivate the current Loop.
The Loop button turns off, looping stops and the playback continues as normal. The Loop In and Out markers remain at their positions so that you can reuse your last Loop even if you haven’t stored it (yet). The Loop In and Out markers will be removed as soon as you set a new Floating Cue Point or Loop In Point.
Tip
Once you have deactivated the Loop, as the track goes on playing, you can directly click the Loop Out button again to set a longer Loop that reuses the same Loop In Point as before.
Storing Loops
As with Cue Points, you can also store Loops for later use. Stored Loops appear in the Cue List. They are saved with the track metadata and will be recalled every time you load the track.
To store the active Loop:
Open the CUE page of the Advanced panel.
Click the Store button to store the Loop.
The Loop is stored and appears in the Cue List. If a Hotcue button is available, it is assigned to this Loop.
Tip
You can also quickly store the active Loop by clicking an empty (unlit) Hotcue button. If all Hotcue buttons are already taken, you can always use the method above.