Modulating your sound
Learn how to modulate layers and effects in Circular.
Circular makes an extensive use of parameter modulation. It lets you build advanced modulating schemes in an intuitive way and generate sounds that are continuously evolving and can be played dynamically.
Assigning and editing modulations
In Circular you can use the same simple workflow to modulate most continuous parameter in the form of a rotary knob or a slider in the Sequencer, FX, or Mixer page, as well as specific sequence controls in the Sequencer page.
Note
In the FX page, only the main parameters of the effects can be modulated. The effects’ advanced parameters (visible when expanding the effect slots) cannot be modulated.
To create or edit a modulation:
Navigate to the page and tab containing the control that you want to modulate.
Make sure that the desired steps are selected.
Click that control.
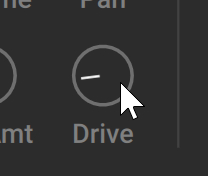
The control appears in the Mod Assign section in the bottom right corner of the instrument.
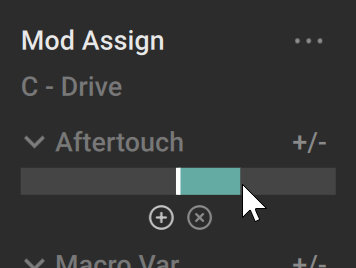
Select a modulation source for this control and adjust its amount, polarity, and combination with the other modulation source (if any).
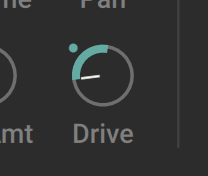
The parameter is now modulated. On the control element, the thicker segment indicates the modulation range, and the little dot indicates the current parameter value..
Tip
When a rotary knob or a slider is modulated, you can use [option]+drag (Mac) or [Alt]+drag (Windows) when adjusting the control to simultaneously compensate both modulation amounts so that the maximum of the modulation range stays unchanged.
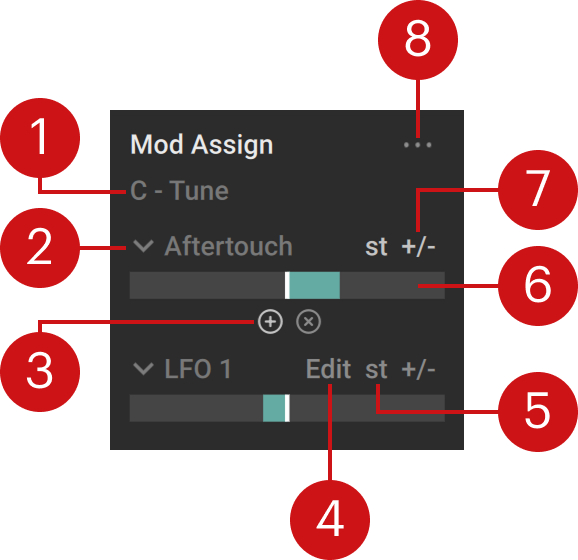
The Mod Assign section provides two sets of controls, one for each modulation source. The section contains the following elements:
 |
Note
The descriptions below equally apply to both modulation sources.
Parameter name: Displays the parameter currently in focus. The modulations will apply to that parameter. You can click another control in the Sequencer, FX, or Mixer page to bring it under focus.
Modulation Source menu: Selects the modulation source. For more information on the various modulation sources, refer to Available modulation sources.
Combination switch: This control is shared between both modulation sources. It defines how the two sources will combine. When “+” is active (Add mode, default setting), the two modulation values will be added to generate the resulting modulation value. When “x” is active (Multiply mode), the two modulation values will be multiplied to generate the resulting value. The Add mode feels more natural for modulation sources that are independent from each other. The Multiply mode can be useful in various situations, notably, it can help you scale a modulation source. For example, you could use it to create a vibrato controlled from the modulation wheel: By assigning both a LFO and the Variation Macro knob (itself assigned by default to the modulation wheel) to the Tune parameter of a sound, and activating the Multiply mode, you can use the modulation wheel to control the extent of the vibrato applied to the sound.
Edit button (LFO 1/2 and Shaper 1/2 sources only): Opens the Modulate panel on the left if it was not visible, so that you can configure the four internal modulators (LFO 1/2 and Shaper 1/2). For more information, refer to Adjusting the internal modulators.
St button (Semitone, only for the Tune control): Reduces the maximum range set by the Amount slider to one semitone, allowing for much finer pitch control and progressions.
Modulation Amount slider: Adjusts how much the modulation source will affect the parameter. This defines the range of the modulation values. With the slider in the center, the modulation source has no influence over the parameter. The further you drag the slider to the left or to the right, the stronger the modulation will be. With the slider on the right side, increasing the modulation value will increase the parameter value (direct ratio). With the slider on the left side, increasing the modulation value will decrease the parameter value (inverse ratio). You can reset the slider and remove the modulation by [command]+clicking (Mac) or [Ctrl]+clicking (Windows) the slider. If you simply click the slider, it gets under focus in the Sound Lane and you can create a sequence controlling the slider value.
Bipolar switch: When this is off, the modulation range extends on one side of the parameter value (the particular side depending on the side of the Amount slider). When the Bipolar switch is on, the modulation range extends on both sides of the parameter value.
Modulation Usage menu (...): Lets you choose a modulation source from the menu and opens a list of all its target parameters in the current layer, or in any effect tab (Grain FX, Sends, and Global).
Note
In the Sequencer page, like the parameters in the Sound panel, the parameters in the Mod Assign section are defined for each step individually, and your changes apply to the selected steps only. If you want to define a modulation that applies to a parameter at any time, you first need to select all steps by clicking the All button in the Sound Lane before setting up your modulation.
Note
In the FX and Mixer pages, the modulation targets are monophonic. For these target parameters, the maximum modulation value among all voices will be taken into account.
Available modulation sources
The following modulation sources are available:
Macro knobs (Variation, Reverb, and Delay): Located in the top left corner of the instrument, these three knobs respectively appear as Macro Var, Macro RV, and Macro DL in the menus.
Aftertouch (polyphonic if available on the keyboard)
MPE Slide (if available on the keyboard)
Shaper 1 and Shaper 2 (internal modulators, refer to Adjusting the internal modulators)
LFO 1 and LFO 2 (internal modulators, refer to Adjusting the internal modulators)
Key Velocity (how hard you hit the keys)
Key Tracking (the pitch of the played keys)
Sequence Velocity (as defined in the Velocity lane, refer to Parameter Lane)
Step Random (a new random value on each step)
Constant: This source shifts the target value by a positive or negative fixed amount. This can be useful, for example, to prevent Step effects from being triggered until you accentuate the pressure on the key.
Adjusting the internal modulators
The four internal modulation sources can be configured in the Modulate panel. This panel is always visible at the bottom of the FX and Mixer pages. In the Sequencer page you can show the Modulate panel by clicking Modulate in the top left corner of the Sound panel, at the bottom of the page:
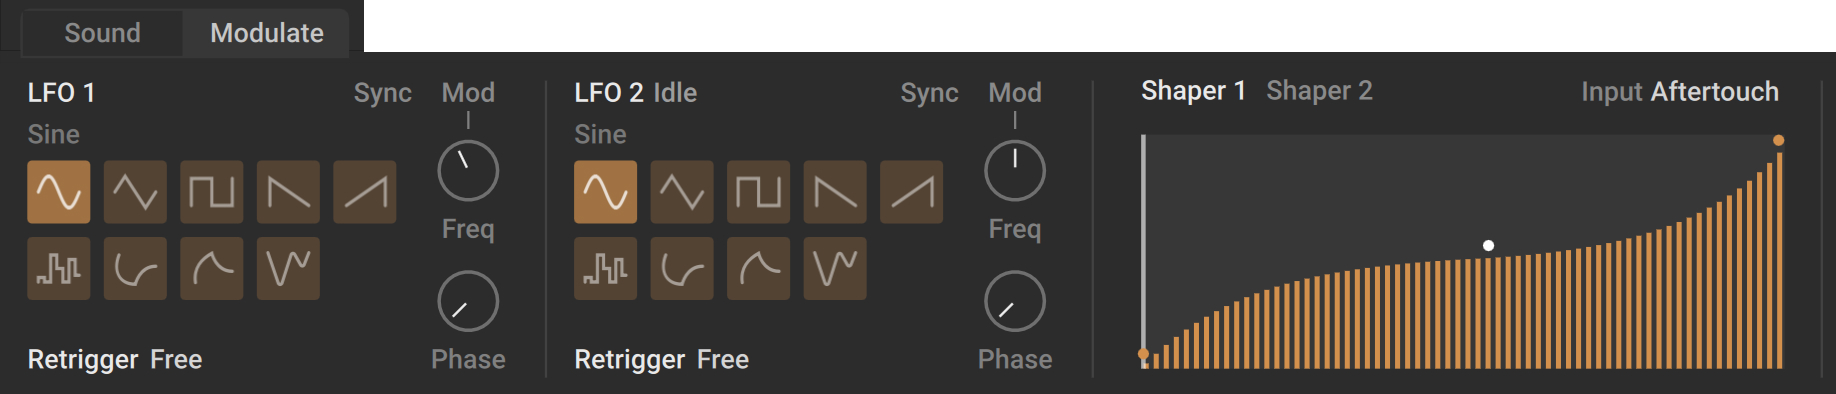
The Modulate panel contains three sections:
The two LFO sections let you configure the two available LFOs.
The Shaper section lets you configure the two available Shapers.
Note
The parameters of the LFOs and Shapers are defined per layer.
LFO sections
Each LFO section contains the following elements:
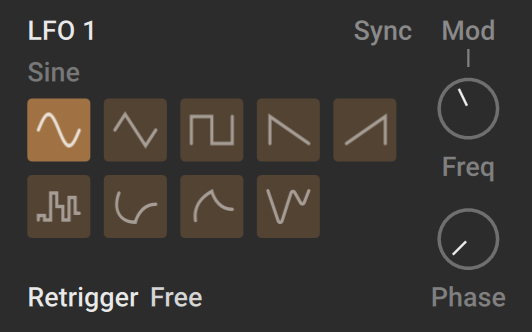 |
Waveform Type: Selects from various waveform types (Sine, Triangle, Square, Ramp down, Ramp up, Random, Seek A, Seek B, Drift). Seek A and Seek B provide smooth, random LFOs.
Retrigger: Selects the retrigger behavior of the LFO. Free mode provides polyphonic modulation with a random start phase. First Key mode restarts the LFO with the first note only. In Every Key mode, the LFO restarts for each key pressed. One Cycle mode triggers only one LFO cycle. 1st 1x triggers one LFO cycle for the first note only. In all modes, excluding Free, the Start phase setting is taken into account.
Phase: Sets the starting point for the LFO in degrees, ranging from 0° to 360°. This setting has no affect when the LFO is in Free mode, or when the Random, Seek A, or Seek B waveform is selected.
Freq: Sets the oscillation frequency of the LFO. This parameter can be synchronized to the global tempo.
Mod: Explicitly set the Freq control under focus in the Mod Assign section, so that you can assign or edit its modulation sources. This is not the case by default, since most of the time one would like the Mod Assign section to keep its current parameter in focus while configuring the LFO modulation source for this parameter.
Sync: Determines if the LFO speed is set in Hertz (button off) or as a note value in relation to the global tempo (button on).
Shaper section
The two Shapers can be used to define a new output value for every input value. For example, by using an LFO as the input of the Shaper and painting in the desired curve, you can generate many different types of waveforms. This allows you to create more interesting and elaborate modulation sources to achieve targeted results.
The Shaper section contains the following elements:
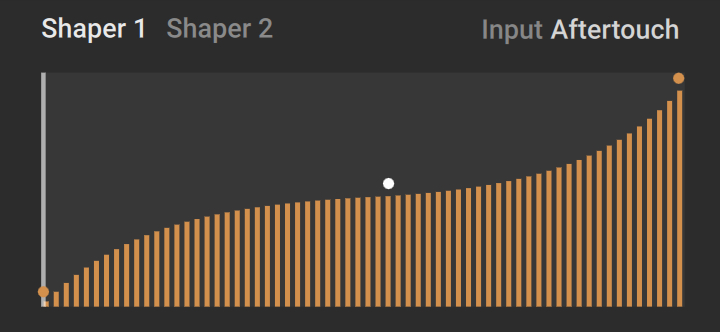 |
Shaper 1 / Shaper 2: Toggles between the two available Shapers.
Input: Selects the modulation source used as input. The usual modulation sources are available (except for the Shaper itself).
Shaper Display: Displays the response curve of the Shaper. The horizontal axis represents its input and the vertical axis its output. You can adjust the response curve directly on the display:
You can create a point by clicking in the display.
You can delete a point by clicking it.
You can move a point by dragging it.
You can modify the curve of a segment by [option]+dragging (Mac) or [Alt]+dragging (Windows) the segment.
You can move two adjacent points vertically by [command]+[option]+dragging (Mac) or [Ctrl]+[Alt]+dragging (Windows) the segment in between.