Working with Patterns and Clips
Arranging songs in Maschine can be done using Patterns or Clips. The following section describes the advantages of both and how to use them effectively for arranging and performing songs.
You can build your song in Maschine MK3 using either Patterns or Clips or a combination of both. Patterns and Clips each have their advantages depending on your preferred workflow and goals.
Clips only exist in the Song view (timeline) and are unique, while Patterns are referenced objects that exist in both the Ideas view and Song view. This means Patterns are great when you want to create single-sourced sequences, and Clips provide flexibility when you need one-off unique sound bites that can be freely positioned on the timeline. Therefore, if you copy a Clip to multiple places and change one of the Clips, only the edited one is changed. On the other hand, if you use a Pattern in multiple places and change one Pattern, all occurrences of this Pattern are changed (unless you use the “make unique” feature or convert it into a Clip beforehand). For added flexibility, Clips can be freely positioned and moved across the timeline. They can be part of a section but can also exist outside a section or span across multiple sections.
To summarize, here’s an overview of Patterns and Clips basics:
They both contain events (also called “notes”) that make up a groove or a musical phrase using the Sounds of the selected Group.
They can both contain modulation data modifying the value of parameters in that Group or any of its Sounds.
They can both be edited in the Pattern Editor. Only the selected Pattern or Clip will appear in the Editor.
Patterns versus Clips
This section provides an overview of the differences between Patterns and Clips.
Patterns have the following features:
Patterns exist in the Ideas view and Song view. They act as the building blocks for developing ideas in Ideas view and can be added to Scenes in Song view to create an arrangement.
You can reference the same Pattern in different Scenes. When you modify a Pattern in the Pattern Editor, all references to this Pattern are updated in the Song view (unless you use the “make unique” feature or convert into a Clip beforehand).
When added to the Song view Patterns maintain a fixed position on the timeline of the arrangement relative to the Scene.
A Pattern can be converted into a Clip. This creates a unique version of the Pattern that can be freely placed on the timeline of the arranger.
Only one Pattern from each Group can be added to a Scene.
A Pattern belongs to a Group and is saved together with the Group. Each Group can have an unlimited number of Patterns.
Clips have the following features:
Clips exist only in Song view. They can be used in addition to Patterns. Clips are great for adding, for example, one-shot sounds, transitions, vocals, etc.
Unlike Patterns, they are unique entities that can be freely positioned and moved across the timeline of the Arranger in the Song view.
If you copy a Clip to multiple places and change one Clip, only the edited one will be changed.
They can be part of a Section but can also exist outside a Section or span across multiple Sections.
Whenever a Clip is placed on top of a Pattern, you will only hear the Clip.
In Song view, Clips appear in a fully saturated color, while Patterns will have a slightly dimmed color state.
Pattern basics
A Pattern contains the events (also called “notes”) that make up a groove or a musical phrase using the Sounds of the selected Group. It also contains the modulation data (if any) modifying the value of parameters in that Group or any of its Sounds. The Pattern belongs to that Group and is saved together with the Group. In each Group you can have an unlimited number of Patterns. Patterns are grouped into Pattern banks containing up to 16 Patterns each.
Pattern Editor overview
The Pattern Editor is the all-in-one Pattern and Clip editing tool of the Maschine software.
Pattern Editor contains the following control elements:
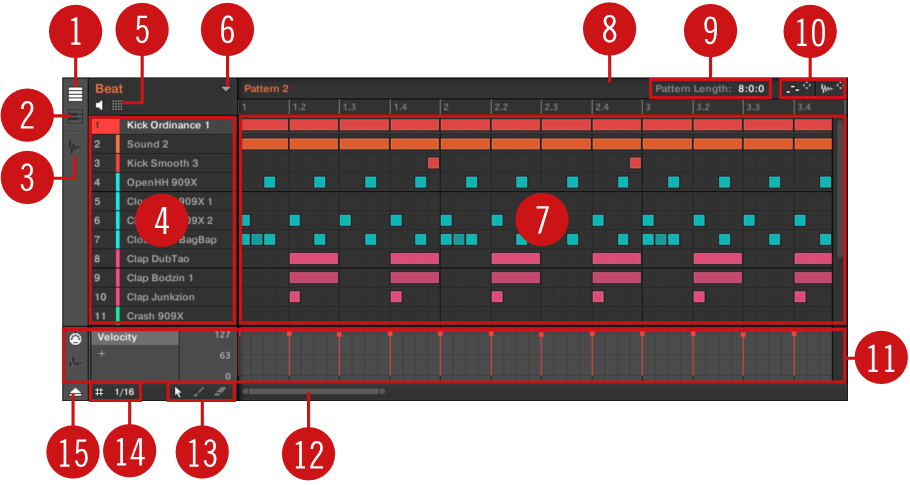
The Pattern Editor (Group view depicted).
Group View button: Click this button to switch to Group view. See section Group view and Keyboard view.
Keyboard View button: Click this button to switch to Keyboard view. See section Group view and Keyboard view.
Sample Editor button: Click this button to switch between the Pattern Editor and the Sample Editor. The Sample Editor is covered in chapter Sampling and sample mapping.
Sound List: Sound slots 1–16 of the selected Group are listed here. In Keyboard view (2), click a Sound slot to display its events in the Event area (7).
Pad View button: Click this button to switch between the Sound List (4) and the Pad view. The Pad view is an alternate representation of your Sound slots that focuses on the pads of your controller. In Pad view you can adjust how the Sounds should be triggered by your pads. For more information, refer to The Pad view.
Pattern Manager button: Opens/closes the Pattern Manager. The Pattern Manager gives you access to various management commands for your Patterns. Notably, it allows you to select the Pattern you want to edit in the Pattern Editor and use it in the current Scene of the Arranger. It also provides various Pattern management commands. For more information, refer to The Pattern Manager and the Pattern mode).
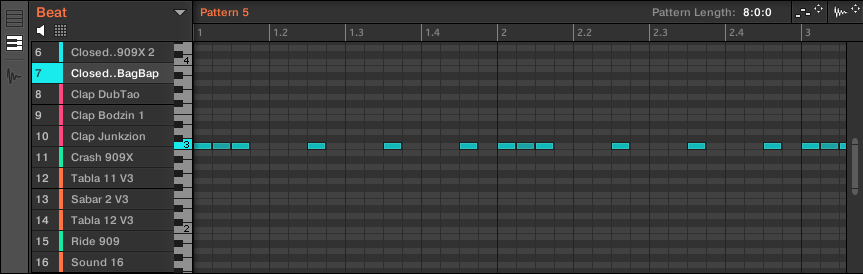
Event area: Displays the content of the selected Pattern. Here you can see your recorded events as rectangular blocks. In Group view (1) these represent the Sounds of your Group. In Keyboard view (2) they represent musical notes of the selected Sound. The length of each rectangular block represents the duration of the event, and its transparency indicates the event velocity (the softer the hit, the more transparent the event). You can edit events using your mouse; you can drag them to a new position, elongate/shorten them, create and delete them using various Edit modes (13). The Event area also displays the Step Grid divisions, a set of regularly spaced vertical lines defining the resolution of your edits. You can make all your edits snap to the desired Step Grid via the Step Grid settings (14).
Pattern timeline: The timeline at the top of the Event area (7) displays musical time units, including bars and beats. Click anywhere in the timeline to move the playhead to that position. For more information, refer to Jumping to another playback position in the Pattern). Drag the white Pattern Length marker horizontally to adjust the Pattern Length (this can also be done via the Pattern Length controls (9). For more information, refer to Adjusting the Arrange Grid and the Pattern Length).
Pattern Length controls: The Pattern Length controls allow you to choose the increment by which the length of the Pattern can be adjusted, and to adjust the length of the displayed Pattern according to that increment. For more information, refer to Adjusting the Arrange Grid and the Pattern Length.
MIDI and Audio Dragger: The MIDI Dragger and the Audio Dragger allow you to conveniently drag and drop MIDI or audio from your Patterns to your desktop or host software, respectively. For more information, refer to Exporting audio from Patterns and Exporting MIDI from Patterns.
Control Lane: The Control Lane provides a visual overview and editing tools for the modulation and the MIDI/host automation of each parameter. For more information, refer to Recording and editing modulation and Using MIDI control and host automation.
Horizontal zooming scroll bar: Click the main part of the scroll bar and drag your mouse horizontally to scroll through the Event area on the time axis, or drag it vertically to zoom in/out on the time axis. You can also click the left or right handle of the scroll bar and drag it horizontally to zoom in/out while keeping the opposite border of the display at a fixed position in the Pattern. Double-click the main part of the bar to reset the zoom and display the entire Pattern. In Keyboard view (2) you will find a vertical zooming scroll bar with similar functionality at the right of the Pattern Editor. For more information, refer to Navigating the Event area.
Edit Mode selector: The Edit Mode selector lets you choose from three different modes when editing the content of the Pattern: Select, Paint, and Erase mode. For more information, refer to Editing events with the mouse.
Step Grid settings: Use the Step Grid button to enable/disable the Step Grid, and the Step Size menu to change the Step Grid resolution. For more information, refer to Adjusting the Step Grid and the Nudge Grid.
Control Lane button: Shows/hides the Control Lane (11).
Patterns on the controller
Your controller provides numerous modes to work on your Patterns:
The Pattern Arrange mode allows you to quickly visualize the content of your Patterns and gives you access to various edit commands (see below).
The Pattern mode allows you to select and manage your Patterns: Managing Patterns.
The Control mode (default mode of your controller) allows you to record Patterns in real-time using various recording modes: Recording Patterns in real-time. It also allows you to record modulation for your Pattern: Recording and editing modulation.
The Step mode allows you to record Patterns (including modulation) in the step sequencer: Recording Patterns with the step sequencer.
The Event Select mode allows you to select the desired events: Selecting events/notes.
The Event Edit mode lets you edit the selected events: Editing the selected events/notes.
The Grid mode lets you adjust the Step Grid: Adjusting the Step Grid and the Nudge Grid.
The Pattern Arrange mode
The Pattern Arrange mode is a powerful tool that allows you to visually control the content of your Patterns while providing important Pattern management features.
To enter Pattern Arrange mode on your controller:
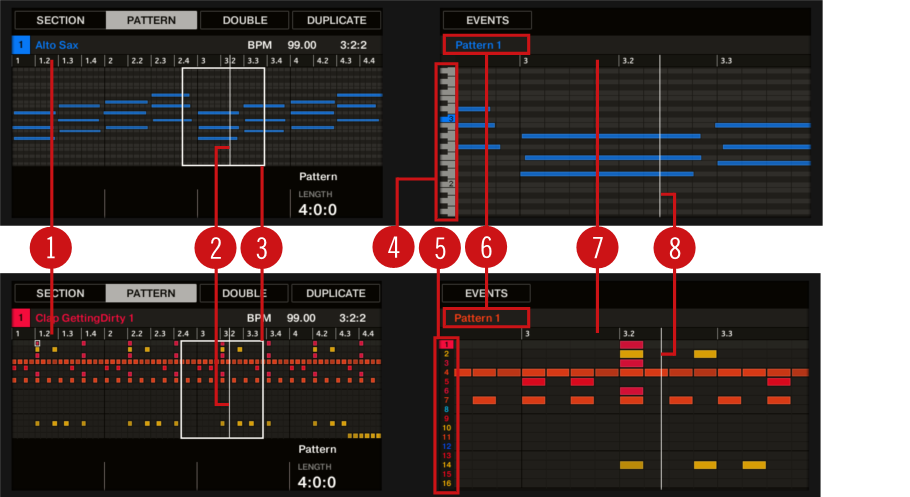
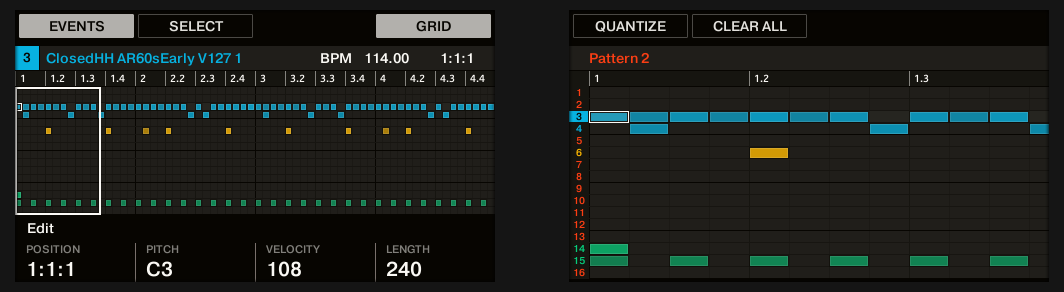
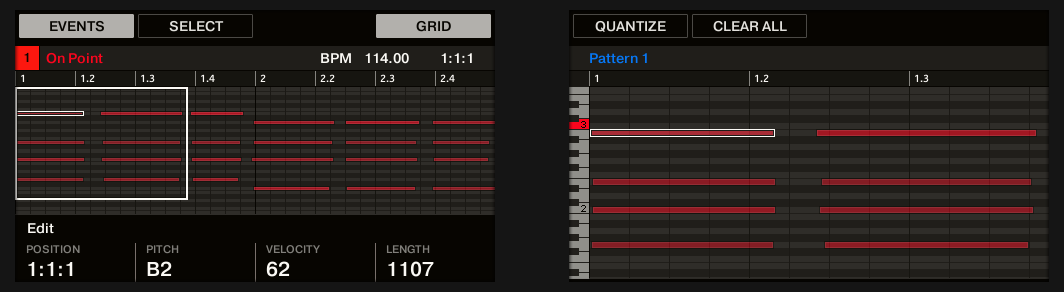
The Pattern Arrange mode in the controller displays: Keyboard view (top) and Group view (bottom).
In Pattern Arrange mode, the displays of your controller show the following:
The left display provides an overview of the whole Pattern:
The display follows the Group or Keyboard view of the Pattern Editor in the software and the mode of your pads: if your pads are in Group mode the display shows all events for all Sounds in the Group; if your pads are in Keyboard mode the display shows all notes at all pitches for the focused Sound. For more information, refer to Group view and Keyboard view.
The velocity of each event/note is indicated by its transparency. Selected events/notes are highlighted. You can also select individual events using the Page buttons (left of the displays).
The overview includes a timeline (1). A white vertical line indicates the current playback position (2). In addition, a frame (3) shows you which part of your arrangement is currently shown in the right display (see below).
Above the arrangement overview, you see the name of the Project, the focused Group, or the focused Sound (depending on which of the MASTER, GROUP , or SOUND tab is selected in the software’s Control area) along with the current tempo and playback position.
The right display provides a detailed view of a portion of your Pattern:
The name of the selected Pattern is indicated at the top of the display (6).
The velocity of each event/note is indicated by its transparency. If visible, selected events/notes are highlighted.
With the pads in Group mode, the right display shows events for all Sounds in the Group. The 16 Sound slots of the Group are represented in the leftmost column by their index number (5). The focused Sound is highlighted.
With the pads in Keyboard mode, the right display shows notes on two octaves for the focused Sound. On the left, a piano roll (4) indicates the pitch of the various events. The piano roll mirrors the various visual indicators available on the piano roll in the software. Turn Knob 8 to scroll on the pitch axis (vertical axis) from events at the lowest pitch up to events at the highest pitch. If all the events are within two octaves, they all appear in the display, and Knob 8 is inactive.
Horizontally, the displayed time interval is variable: Turn Knob 5 and 6 to zoom and scroll horizontally in the right display to your liking, respectively.
As in the left display, you can see a timeline (7) at the top and a vertical playhead indicator (8) across the entire display.
Tip
In Pattern Arrange mode the pads behave as in Control mode. In particular, this allows you to record Patterns while seeing them developing in the displays! For more information, refer to Recording Patterns in real-time.
Finally, the Pattern Arrange mode provides useful commands for the selected Pattern:
Turn Knob 4 (LENGTH) to adjust the Pattern Length (refer to section Adjusting the Arrange Grid and the Pattern Length).
Press Button 3 (DOUBLE) to double the Pattern (refer to section Doubling a Pattern on your controller).
Press Button 4 (DUPLICATE) to duplicate the Pattern (refer to section Duplicating, copying, and pasting Patterns).
Press Button 5 (EVENTS) to access Event Edit mode, which allows you to precisely adjust the selected events (refer to section Editing the selected events/notes).
Navigating the Event area
The Event area in the Pattern Editor can be scrolled and zoomed in or out to fit your current needs.
Navigating the Pattern Editor horizontally (time)
A zooming scroll bar is available at the bottom of the Pattern Editor. This tool allows you to both scroll and zoom in/out horizontally in the Event area and the Control Lane on the time axis:
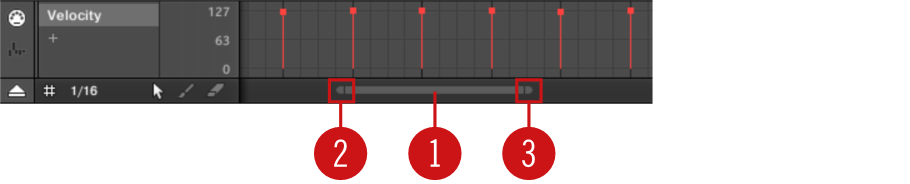
The zooming scroll bar at the bottom of the Pattern Editor.
Use the horizontal zooming scroll bar as follows:
Click the main part (1) of the scroll bar and hold the mouse button, then:
Drag your mouse horizontally to scroll through the Event area on the time axis (common scroll bar behavior).
Drag your mouse vertically to zoom in or out of the Event area on the time axis. The center of the zoom operation will be exactly where you placed your mouse cursor when you clicked.
Click the left handle (2) of the scroll bar, hold the mouse button, and drag your mouse horizontally to zoom in or out of the Event area while keeping the right border of the display at a fixed position in the Pattern.
Similarly, click the right handle (3) of the scroll bar, hold the mouse button, and drag your mouse horizontally to zoom in or out of the Event area while keeping the left border of the display at a fixed position in the Pattern.
Double-click the main part (1) to reset the zoom and display the entire Pattern.
Tip
The Event Area and the Control Lane (if visible) always stay in sync on the time axis. For more information, refer to Creating and editing modulation in the Control Lane.
Navigating the Pattern Editor vertically (Sounds or pitches)
When the Pattern Editor is in Group view, a classic scroll bar is visible right of the Pattern Editor. It allows you to scroll to hidden Sound slots in case all of them don’t fit in the Pattern Editor.
When the Pattern Editor is in Keyboard view, a vertical zooming scroll bar is available on the right of the Pattern Editor allowing you to both scroll and zoom in/out vertically on the pitch axis. It works in the same way as the horizontal bar described above.
Notice
For more information on the Group and Keyboard view, refer to Group view and Keyboard view.
You can also adjust the height of the Pattern Editor in order to display more/fewer Sound slots at once by resizing the Arranger above. For more information, refer to Navigating the Song view.
Following the playback position in the Pattern
To have the Song view of the Arranger and Pattern Editor display the song position and scroll automatically, turn on the Follow button.

Activate the Follow button to follow the playhead.
To follow the playhead position during playback, click the Follow button in the Maschine Header.
The Follow button lights up in the Maschine Header. The Song and Pattern Editor will now display the current position.
Notice
The Follow function is automatically deactivated as soon as you manually scroll in the Arranger or the Pattern area (in the software or from your controller).
The Follow function affects both the Pattern Editor and the Song view of the Arranger simultaneously. For more information, refer to Following the playback position in your Project.
Jumping to another playback position in the Pattern
You can use the timeline above the Event area to set the playback to the desired position. For example, this can be useful to check a particular transition between events in your Pattern or Clip without waiting for the whole Loop Range to be looped.
In the Event area, a white vertical line indicates the current playback position in the Pattern or Clip.

The white vertical line in the Event area shows you the current playback position.
Group view and Keyboard view
The Pattern Editor provides two different views: the Group view and the Keyboard view.
The Group view
The Group view allows you to edit the events for all 16 Sound slots of the selected Group.
Click the Group View button (showing little rows of events) in the top left corner of the Pattern Editor to switch it to Group view:

In Group view each row of the Event area shows the events for a different Sound slot in the Group.
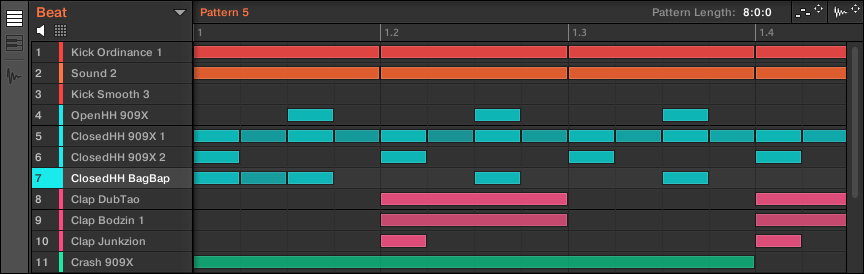
In Group view, the Pattern Editor shows the events for all Sounds in the Group.
This view is well suited for rhythmic instruments (for example, a drum kit) since you can see and edit the events for all Sounds at once, without worrying about the pitch of the events you create or edit.
The Keyboard view
Alternatively, you can switch the Pattern Editor to Keyboard view:
Click the Keyboard View button (showing little keys) in the top left corner of the Pattern Editor to switch it to Keyboard view:

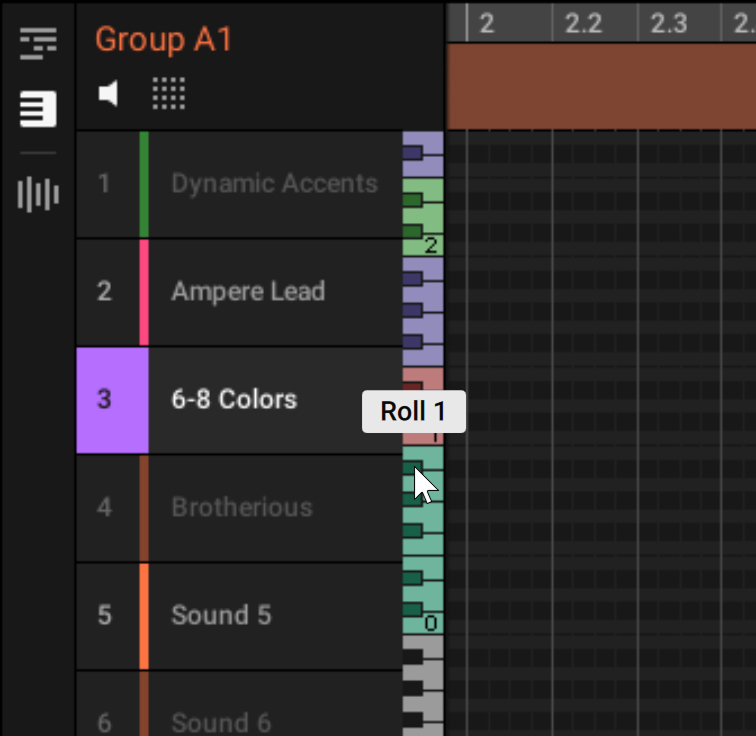
In Keyboard view each row of the Event area shows the notes at a particular pitch for the selected Sound. By adding or editing notes, you can choose their pitch in semitones depending on where you place them on the vertical axis, the lowest note being on the lowest row.
In Keyboard view, the Pattern Editor shows all notes for a particular Sound.
If you select another Sound slot in the Sound List on the left, the Event area will switch to the notes for that Sound.
This view is well suited for melodic instruments (for example, a piano) since you can focus on a particular Sound and create/edit notes at different pitches.
Piano roll
On the left of the Event area in Keyboard view, a vertical piano roll shows the keys corresponding to each row in the Event area.
 |
The piano roll provides a set of useful features:
Octaves are indicated by a number on each C key: For example, the middle C, which is noted C3 in the Maschine convention, will read “3.”
Clicking any key on the piano roll triggers the selected Sound at that particular pitch.
For NKS instruments, the active keys show the key colors from the original instrument, if any. Otherwise the active keys mirror the color of the Sound slot. Inactive keys have no color.
If you select a scale on your Maschine controller or on your Kontrol S-Series keyboard, this scale is indicated by the colored keys. The keys outside the scale have no color, indicating that they cannot be triggered from your controller or from your keyboard.
Hovering over keys displays the note name. If a key is used as a keyswitch in the loaded instrument, the keyswitch label is displayed.
Adjusting the Arrange Grid and the Pattern Length
The Arrange Grid defines regularly spaced-out timings notably used in the following situations:
Adjusting the Pattern length (see below).
Adjusting the Section length.
Adjusting the Arrange Grid in the software
To adjust the Arrange Grid:
To adjust the Arrange Grid resolution, click the value beneath the Groups in the Arrange view and select the desired setting from the menu (see above for the available settings).
The divisions of the Arrange Grid now have the size you have just selected.
The following Arrange Grid resolutions are available:
1 Bar, 1/2 note, …, 1/16th note: Each of these settings lets you adjust the Pattern Length by the specified increment.
Off: The Arrange Grid is deactivated. Notably, you can freely set the Pattern Length to any value or set the playback position to any location.
Quick (default): With this setting, the available lengths for your Pattern are as follows: 1 bar, 2 bars, 4 bars, 8 bars, 12 bars, 16 bars, etc. (+ 4 bars each time starting from 4 bars). This handy mode allows you to quickly select from the most common Pattern Lengths. For other uses of the Arrange Grid (adjusting the playback position and the Loop Range), one-bar divisions are used instead.
Adjusting the Pattern Length in the software
You can adjust the length of your Patterns to fit your needs. The Pattern Length is measured in bars and beats, and Patterns can be up to 256 bars long. When you create a new empty Pattern (refer to Creating Patterns), the Pattern has the default length as defined in the Default page of the Preferences panel (refer to Preferences – General page).
You can adjust the Pattern Length in two ways:
To adjust the Pattern Length, click the Pattern Length: field and drag it up to make the Pattern longer or drag it down to make it shorter. You can also double-click the displayed value, enter a new value with your computer keyboard, and press [Enter] to confirm.

or
To adjust the Pattern Length, drag the end marker of the Pattern (white arrow) in the timeline:

With either method, the available lengths will depend on the current Pattern Grid resolution (see above).
Reducing the length of a Pattern might exclude the last events from the Pattern. However, these events are not deleted: They simply appear darker in the Event area and will be included back into the Pattern next time you extend it.
Events beyond the Pattern’s end can be edited in the software. However, you cannot edit them from the controller. For more information, refer to Editing events.
Adjusting the Step Grid and the Nudge Grid
The Step Grid defines regularly spaced-out timings (the “steps”) at which your events/notes can be created, moved, etc. The Step Grid resolution corresponds to the step size, which directly affects the precision of all Pattern editing actions, including quantization (refer to Quantizing events/notes).
Notice
The Step Grid also affects the step sequencer on your controller: Increasing the Step Grid resolution (i.e. decreasing the step size) will make more steps available in your Pattern for placing events. For more information on the step sequencer, refer to Recording Patterns with the step sequencer.
In the Pattern Editor, the Step Grid is indicated by the gray vertical lines in the Event area:
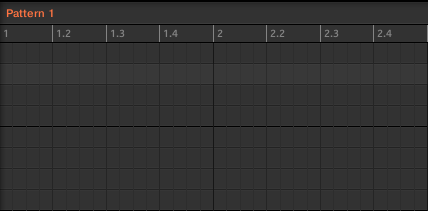
The vertical lines represent the Step Grid in the Event area.
By default the Step Grid is active and the step size is 1/16th. However, you may use another step size or disable the Step Grid completely, as described below.
Tip
Depending on the current zoom factor and Step Grid resolution, if the vertical lines of the Step Grid are too close to each other they will be hidden to avoid convoluting the display. For example, this could be the case if you display 6 or 8 bars and choose a Step Grid resolution of 1/64th.
Notice
Regardless of the current Step Grid resolution, the gray lines on the beats (quarter notes) and the black lines on the bars (notes) are always visible in the Event area.
Enabling or disabling the Step Grid in the software
To enable or disable the Step Grid, click the Step Grid button (showing a little grid icon) in the bottom left corner of the Pattern Editor.

The Step Grid is activated.
Adjusting the Step Grid in the software
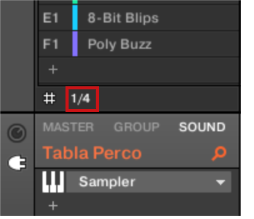
The Step Grid resolution can be adjusted via the Step Size menu, showing a value next to the grid icon at the bottom left of the Pattern Editor:

The Step Size menu lets you adjust the Step Grid resolution.
To select the step size that will apply to all your editing actions, click the value next to the grid icon at the bottom left of the Pattern Editor and choose the desired step size from the drop-down menu. Values range from 1 Bar to 1/128 and also include triplet values. The default value is 1/16th note.
Adjusting the Nudge Grid in the software
In addition to the Step Grid described above, a secondary grid specifically controls the timings at which existing events/notes can be nudged in the Pattern: the Nudge Grid.
Tip
Nudging events means shifting them a small amount ahead or behind their current position. For more information, refer to Editing the selected events/notes.
The Nudge Grid is based on the Step Grid:
The Nudge Grid is active when the Step Grid is active. If the Step Grid is deactivated, nudging events will shift them at the maximum resolution of the sequencer.
By default, the Nudge Grid resolution is half a step, meaning that events will be nudged by half a step at a time.
If you set the Nudge Grid resolution to a full step, the Nudge Grid will mirror the Step Grid and you can nudge events with the same resolution as when creating or quantizing events.
You can also set the Nudge Grid resolution to a smaller fraction of the Step Grid resolution. This allows you to nudge events with even finer increments.
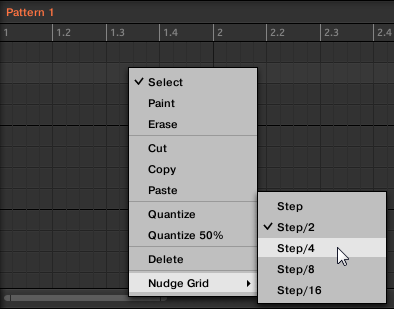
The Nudge Grid resolution can be adjusted in the context menu of the Event area:
To adjust the Nudge Grid, right-click ([Ctrl]-click on macOS) on the background of the Event area, select Nudge Grid in the menu, and choose a resolution from the values available in the submenu: Step, Step/2, Step/4, Step/8, and Step/16:
Notice
The Nudge Grid is not indicated in the Event area of the Pattern Editor.
Enabling/disabling and adjusting the Step Grid on the controller
To change the Step Grid resolution:
Hold SHIFT + FOLLOW (Grid) to enter Grid mode.
Press Button 4 (STEP) to access the Step and Nudge Grid settings. The right display will show you which pad represents a resolution:
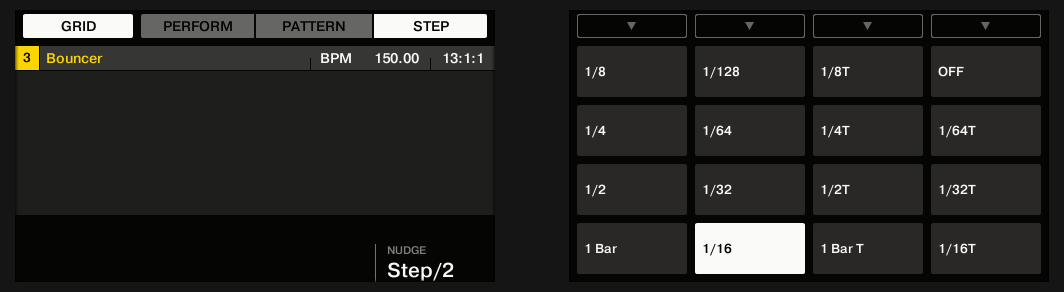
Select a step size by pressing the corresponding pad. Alternatively, you can repeatedly press Button 5–8 to successively select each of the resolutions in the corresponding column.
The selected value is highlighted on the right display and the corresponding pad turns fully lit.
To disable the Step Grid, simply select the OFF value in the top right corner:
To disable the Step Grid, hold SHIFT + FOLLOW (Grid), press Button 4 (STEP), then press pad 16 (OFF).
Tip
You don’t need to explicitly enable the Step Grid on your controller: It is activated as soon as you select a step size other than OFF (pad 16).
Adjusting the Nudge Grid on the controller
To change the Nudge Grid resolution:
Hold SHIFT + FOLLOW (Grid) to enter Grid mode.
Press Button 4 (STEP) to access the Step and Nudge Grid settings.
Turn Knob 4 (NUDGE) to select the desired Nudge Grid resolution.
The new Nudge Grid resolution is directly in use, provided that the Step Grid is activated (see above).
Recording Patterns in real-time
This section describes the various ways, features, and aids available on your controller to record Patterns as you play them in real-time:
The most common method is called overdub recording. Alternatively, you can use replace recording. Both are described in section Recording your Patterns live.
Right before you record a new Pattern, you can quickly enter Record Prepare mode to adjust a few important settings for your Pattern: The Record Prepare mode.
You can also record a Pattern that will automatically grow until you stop recording: Using Auto-Growing Pattern.
You can also start the recording with a count-in: Recording with count-in.
While recording you can let Maschine automatically quantize what you play on the pads: Quantizing while recording.
Note
When recording Patterns in real-time, the metronome can be a useful help. Refer to Using the metronome for more information.
Recording your Patterns live
In Control mode, your controller provides many tools to live record Patterns for the focused Group.
Tip
Take your time to set up the pad sensitivity and velocity scaling to your taste. You will have even more fun playing and recording with your controller! These settings can be found in Preferences > Hardware > Pads. For more information, refer to Preferences – Hardware page.
Overdub mode
Overdub mode is the most usual recording mode. In this mode, all pad hits are added as events/notes, no matter if the Pattern already contains events.
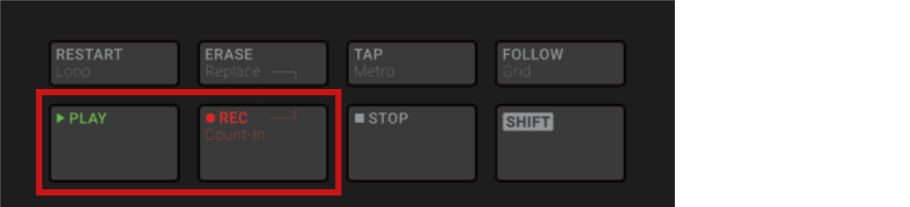
Recording a Pattern: press PLAY, then REC, and hit some pads!
Press PLAY to start the sequencer. The PLAY button lights up.
Press REC to begin recording. The REC button lights up.
Now hit the pads you want to record and listen to what happens. Each hit will create an event in the Pattern Editor. The event length depends on how long you hold the pad. Events continue to be added to the Pattern, even as the Pattern cycles.
When you’re done, press REC again to stop recording the pads.
The REC button turns off. The sequencer keeps playing until you press PLAY again.
Replace mode
When recording in Replace mode the events of the selected Sound(s) are replaced by what you play.
Select the Sound(s) of which you want to replace events: with the pads in Group mode you can select multiple Sounds (refer to Selecting multiple Sounds or Groups), with the pads in Keyboard mode only the focused Sound (the one played by your pads) will have its events replaced.
Press PLAY to start the sequencer. The PLAY button lights up.
Press ERASE + REC to begin recording in Replace mode. The ERASE and REC buttons light up.
Hit the pads you want to record. Each hit will create an event in the Pattern Editor, the event length depends on how long you hold the pad. Existing events for the selected Sound(s) are deleted as they are reached by the playhead.
When you’re done, press REC again to stop recording the pads.
The ERASE and REC buttons turn off. The sequencer keeps playing until you press PLAY again.
In order to prevent you from erasing events accidentally, in the following situations Replace mode is automatically disengaged (ERASE turns off) and the recording continues in Overdub mode:
When the playback loops (whether at the end of the Loop Range or at the end of your Project).
When you stop the sequencer (by pressing the lit PLAY button).
When you jump to another location in the Project. For more information, refer to Jumping to another playback position in the Pattern.
When you switch your controller to another mode (by pressing, e.g., SCENE, PATTERN, etc.).
When you set the focus to another Group.
You can also manually disengage Replace mode and switch to Overdub mode:
While recording in Replace mode, press the lit ERASE button to disengage Replace mode.
The recording goes on in Overdub mode (see description above).
Tip
You can also erase events without engaging record: If you hold ERASE together with a pad while playing (or recording), all events of that pad at the current play position are deleted. For more information, refer to Deleting events/notes.
Where are the events recorded?
When you start recording the pads, the events are recorded as follows:
If a Pattern is already selected (i.e. loaded in the Pattern Editor), the events are recorded in that Pattern. This is also true if the playhead of the Arranger currently is within an automatic repetition of the Pattern.
If no Pattern is selected, engaging record (in Overdub or Replace mode) automatically creates an new empty Pattern with the default Pattern Length. The new Pattern is used at the beginning of the current Scene and repeated throughout the Scene.
Tip
You can adjust the default Pattern Length in the Defaults page of the Preferences panel. For more information, refer to Preferences – Default page.
When you get ready to record, you can also use the Record Prepare mode on your controller to quickly create a new Pattern with the desired length and directly start the recording! For more information, refer to The Record Prepare mode.
The Record Prepare mode
The Record Prepare mode is very useful when you are about to start a new recording. Indeed, it allows you to adjust the Pattern Length and the resolution of the Pattern Grid right before starting a recording. This way you can quickly create a new Pattern with the desired Pattern Length and directly start recording events in it.
Notice
You can also use the Record Prepare mode to adjust the length of an existing Pattern.
The Record Prepare mode on your controller
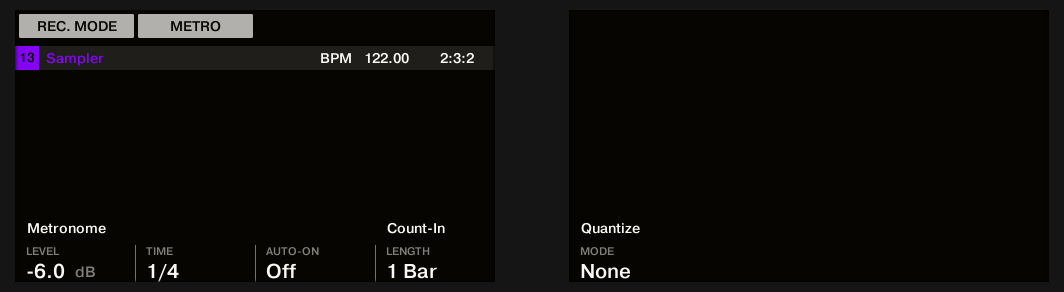
With REC deactivated, press and hold REC to enter Record Prepare mode. After a second, the following displays appear:
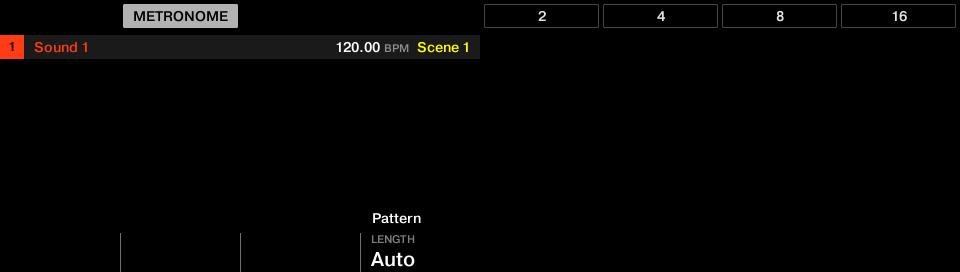
You will notice that Auto is set by default. This means that by default the Pattern will grow automatically as you are recording. However, you can also set a fixed length for the recorded Pattern. For more information refer to Using Auto-Growing Pattern.
While holding REC, turn Knob 4 (LENGTH) to adjust the length of the Pattern you are about to record, or press Button 5–8 to directly select a Pattern Length of 2, 4, 8, or 16 bars.
Release REC.
The Record mode is engaged (REC is lit) and the Pattern has the length you defined. Press PLAY to start the sequencer (if it’s not done already) and play the pads to start recording! For more information, refer to Recording your Patterns live.
Tip
In Record Prepare mode you can also activate or deactivate the metronome via Button 2. For more information, refer to Using the metronome.
Notice
You can also enter Record Prepare mode while starting a recording in Replace mode (refer to Recording your Patterns live): Simply press ERASE + REC and hold REC until your controller switch to Record Prepare mode. This is also true when using the Count-in (refer to Recording with count-in).
Using Auto-Growing Pattern
Auto-Growing Pattern lets you record Patterns of an undefined length. This means that when inspiration strikes, you can quickly capture an idea without having to set a Pattern Length in advance. Simply begin recording and the length of the Pattern will grow until you stop recording, allowing you to maintain your creative flow.
When you have finished recording, any silence at the end of the Pattern will automatically be trimmed to the nearest bar (quantization can be adjusted via Grid settings). You can then define the start of your Pattern and set its length, to pick the take or part of your recording that you liked best.
Setting Auto-Growing Pattern in the Preferences
Auto-Growing Pattern is active by default unless you manually change the Pattern Length before recording. You can change this default behavior in the Preferences panel of the software:
Open the Maschine menu (macOS) or File menu (Windows) of the Application Menu Bar, or open the File submenu of the Maschine menu, and select Preferences….
In the Preferences panel, select the Default page in the left column.
In the Pattern section, click the Grow Pattern while Recording checkbox to activate or deactivate Auto-Growing Pattern by default.
Note
If you manually select a defined Pattern Length, Auto-Growing Pattern is automatically deactivated for the selected Pattern. If you want to use Auto-Growing Pattern again, select another Pattern or press SHIFT + Pad 1 on your controller to undo the Pattern Length selection until you return to Auto.
Recording with count-in
Count-in allows you to start the metronome before the sequencer and recording begin. This is very handy if you want to start recording a Pattern exactly on the downbeat.
When recording starts with a count-in, the following happens:
The playhead jumps to the beginning of the Loop Range.
You hear the metronome alone during the count-in phase (1, 2, or 4 bars).
After the count-in phase, the recording starts in Overdub mode (refer to Recording your Patterns live). The metronome turns off if it was off before the Count-in, otherwise it stays on.
Tip
You can adjust the metronome’s volume, time signature, and downbeat/upbeat sounds. For more information, refer to Using the metronome.
If the current Loop Range does not start at the beginning of a bar (i.e. on a downbeat), the count-in phase will start with a downbeat, count the selected duration (1, 2, or 4 bars), and then add the offset between the beginning of the bar and the actual beginning of the Loop Range:

Count-in when the Loop Range starts at the beginning of a bar…

…and when the Loop Range does not start at the beginning of a bar.
You can also use the count-in to start a recording in Replace mode.
Adjusting the count-in duration in the software
You can choose how long the metronome should be heard before the recording actually starts. In the software, this is done via the Count-in Length setting in the General page of the Preferences panel. Available values are 1 bar, 2 bars, and 4 bars. For more information, refer to Preferences – General page.
Using the count-in on your controller
On your controller:
Press SHIFT + REC to start the count-in and record in Overdub mode.
or
Press SHIFT + ERASE + REC to start the count-in and record in Replace mode (refer to Recording your Patterns live for more information on the Replace mode).
Adjusting the count-in duration on your controller
You can adjust the duration of the count-in in the recording settings:
Press SHIFT + GRID to show the record settings.

Turn Knob 4 (LENGTH) to select a duration for the count-in.
Quantizing while recording
You can choose to have notes automatically quantized as you record. This is called Input Quantization.
Tip
You can also quantize the recorded notes at a later time. For more information, refer to Quantizing events/notes.
Using Input Quantize on Your Controller
Press SHIFT + GRID to show the record settings.
Turn Knob 5 (QUANTIZE MODE) to enable (ON) or disable (OFF) Input Quantization.
With Input Quantization activated, as you are recording the pads your notes will be quantized according to the step size (for instance, Step Grid resolution) selected. If you turn the Step Grid off, no quantization will be applied. For more information, refer to Adjusting the Step Grid and the Nudge Grid.
Recording Patterns with the step sequencer
If you are familiar with classic drum machines you may want to program your Pattern using the step sequencer. On your controller, the step sequencer is available using the Step mode.
Step mode basics
The Step mode allows you to program the steps to be played by the focused Sound in the current Group.
Entering Step mode
Step mode is a submode of Event Edit mode available on the PATTERN page of Arrange mode (refer to Editing the selected events/notes for more information on the Event Edit mode). Hence, it is very similar to the Event Edit mode.
The main difference with the Event Edit mode is that in Step mode each pad of your controller represents one step of a 16-step sequence for the focused Sound. The size of the steps depends on the current Step Grid settings. Lit pads indicate events on the corresponding steps.
Notice
For more information on the Step Grid, refer to Adjusting the Step Grid and the Nudge Grid.
The displays of your controller show the following:
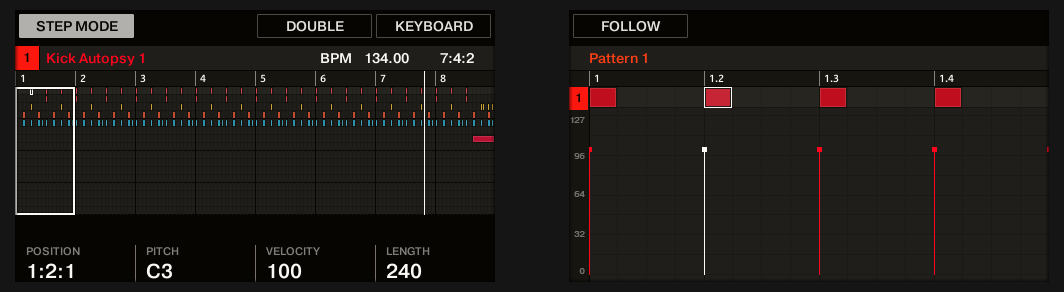
The Step mode on the controller displays: the first bar of an eight-bar Pattern.
The left display shows your entire Pattern, and the right display focuses on the portion of the Pattern corresponding to the steps controlled by your pads. The details shown in the displays depend on the current mode of your pads:
If your pads are in Pad Mode:
The left display shows events for all Sounds in the Group.
The right display shows events for the focused Sound in one row at the top along with their velocities underneath.
If your pads are in Keyboard mode both displays show notes for the focused Sound across the pitch scale. Depending on the pitches of the existing notes, turn Knob 7 to scroll pitches in the right display (in the left display the vertical zoom factor is automatically adjusted so that all notes appear in the display).
Recording a sequence
Set the focus on the Sound you want to record by pushing the 4-D encoder up or down or by holding SELECT and pressing the pad of the desired Sound (refer to Focusing on a Group or a Sound).
Press PLAY. You will see the playback position in the form of a light chasing through the pads, starting from pad 1, going up all four rows from left to right, and ending at pad 16. At any time you can enable/disable PLAY as you see fit (for example, to check how your actions affect the Pattern).
Press an unlit pad to create an event on that step. The pad lights up to indicate that there is an event on that step. The new event is one step long. The next time the playback position reaches that step the new event will be played.
Press a lit pad to remove that step.
The pad turns off and the event on that step is deleted.
When you are done with the sequence of that Sound, repeat the previous steps to create sequences for all desired Sounds.
This way it’s easy to quickly put some drums together.
In Step mode events are created with the following settings:
The event pitch is set to the Sound’s base key (refer to Adjusting the base key.
The event velocity is defined by how hard you hit the pads unless you have activated the Fixed Velocity option (see below).
The event length is set to one step (hence, it depends on the current Step Grid settings).
Obviously, the event position is defined by the pad you hit.
Checking your sequence (right display)
The right display of your controller provides more information on the sequence:
Individual events/notes are represented by rectangular blocks. These always mirror the steps currently represented by your pads. In both Group and Keyboard mode, velocities are indicated by the event transparency: the more transparent the event, the softer the velocity (in Pad Mode velocities are additionally indicated under each event in the display).
The playback position in the Pattern is indicated by a playhead traveling from left to right.
The Step Grid is displayed in the background.
To switch the right display and your pads to another part of the sequence, you have two possibilities:
Press the FOLLOW button or Button 5 (FOLLOW) above the display to enable/disable the Follow function.
When Follow is activated, the right display and your pads automatically switch to the next 16 steps as soon as the playback position reaches the end of the portion currently displayed.
Editing events in Step mode
In Step mode, you can quickly adjust the parameters of events on particular steps.
Recording modulation in Step mode
You can also record modulation in Step mode. This is helpful when you want to set value changes at a specific time in a Pattern.
Notice
For more information on modulation, refer to Recording and editing modulation.
Editing events
Many creation and editing commands on events/notes are available directly via mouse actions in the Event area of the Pattern Editor. They will be applied according to the selected Step Grid resolution (refer to Adjusting the Step Grid and the Nudge Grid). In Group view, the Sound in focus will change according to the row you click in. Selected notes are highlighted.
Events vs. notes
Basically, events and notes are equivalent: a trigger for a Sound with particular velocity, pitch, length, etc. If we might use the word “note” when dealing with melodic instruments, and “event” when dealing with drum kits, keep in mind that both words have the same meaning in the Maschine context.
Editing events with the mouse
In the software, you can choose between five mouse modes for editing your events. Each mode provides different mouse actions in the Event area.
To activate a mouse mode, right-click in the Event area and select the desired mode from the upper part of the context menu. You can also use the keyboard shortcuts listed below.
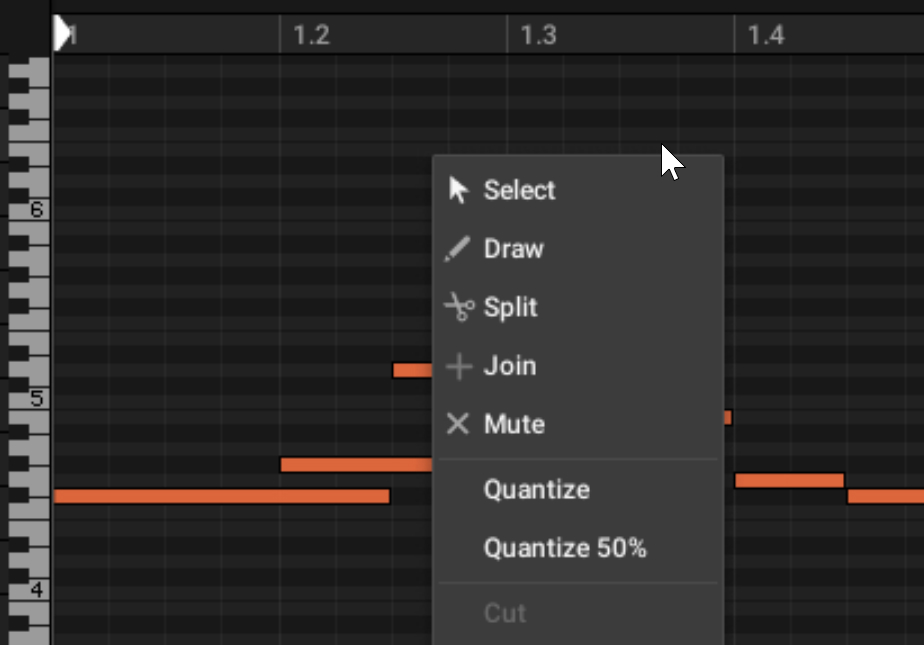
In the Event area, the mouse cursor shows the icon of the active mode.
The following mouse modes are available:
Select mode (arrow icon): This is the default mode. It provides an exhaustive set of actions for creating, selecting, editing, and deleting events/notes with your mouse. Refer to Mouse in Select mode for more information.
Draw mode (pencil icon): Provides quick actions for creating, resizing, and deleting events/notes. Pressing [E] on your computer keyboard will quickly switch between the Draw mode and the default Select mode. Refer to Mouse in Draw mode for more information.
Split mode (scissors icon): Lets you split events/notes. Pressing [X] on your computer keyboard will quickly switch between the Split mode and the default Select mode. Refer to Mouse in Split mode for more information.
Join mode (“+” icon): Lets you join events/notes. Pressing [Y] on your computer keyboard will quickly switch between the Join mode and the default Select mode. Refer to Mouse in Join mode for more information.
Mute mode (“x” icon): Lets you mute events/notes. Pressing [Z] on your computer keyboard will quickly switch between the Mute mode and the default Select mode. Refer to Mouse in Mute mode for more information.
Note
The keyboard shortcuts above are not available when the computer keyboard is used as MIDI keyboard in Maschine. Refer to Using your computer keyboard as a MIDI keyboard for more information.
You can also turn the Draw mode on or off by clicking the dedicated Draw Mode button (pencil icon) at the bottom left of the Pattern Editor:

The Draw Mode button.
Note
The mouse actions work both in Group view and in Keyboard view. Refer to Group view and Keyboard view for more information.
For additional edit commands available from your computer keyboard, as well as more details on quantization behavior, refer to Editing the selected events/notes.
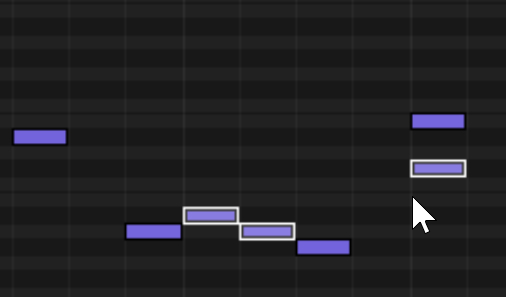
Mouse in Select mode
In Select mode (the default mode) the mouse cursor shows the standard arrow icon.
 |
The following mouse actions are available:
Action | Function |
|---|---|
Creating notes (refer to Creating events/notes for details) | |
Double-click in the Event area’s background | Creates a note. |
Deleting notes (refer to Deleting events/notes for details) | |
Double-click note | Deletes the selected notes. |
Right-click (macOS: [Ctrl]-click) and select Delete from the menu. | Deletes the selected notes. |
Selecting notes (refer to Selecting events/notes for details) | |
Click unselected note | Selects a note. |
[Shift] + click unselected note | Adds note to current selection. |
[Shift] + click selected note | Removes note from the selection. |
Drag in Event area’s background | Multiple selection (selection frame). |
Click in the Event area’s background | Deselects all notes. |
Editing the selected notes* (refer to Editing the selected events/notes for details) | |
Drag note horizontally | Moves the selected notes in time according to the Step Grid. |
[Ctrl] + drag note horizontally (macOS: [Cmd] + drag note) | Freely moves the selected notes in time, overriding the Step Grid quantization. |
[Alt] + drag note | Duplicates the selected notes. When you drag horizontally, the copies are moved in time according to the Step Grid. |
Drag the left/right border of a note | Resizes the selected notes by moving their start/end position according to the Step Grid. |
[Ctrl] + drag the left/right border of a note (macOS: [Cmd] + drag left/right border) | Freely resizes the selected notes by moving their start/end position, overriding the Step Grid quantization. |
Drag note vertically | Group view: Moves selected notes to another Sound of the Group. Keyboard view: Transposes selected notes. |
* If multiple notes are selected, mouse actions performed on any selected note will apply to all the selected notes.
If you edit a note not included in the current selection, the selection is dropped and the note you are editing will be the only note affected by your edit.
Mouse in Draw mode
In Draw mode the mouse cursor shows a pencil icon. You can press [E] to quickly switch between the Draw mode and the default Select mode.
 |
The following mouse actions are available:
Action | Function |
|---|---|
Creating notes (refer to Creating events/notes for details) | |
Click in the Event area’s background | Creates a note. |
Click and drag (with the button pressed) in the Event area’s background | Create series of notes wherever you move the cursor. Notes are created for the selected Sound. |
Deleting notes (refer to Deleting events/notes for details) | |
Click a note | Deletes the note. |
Click a note and drag the mouse( with the button pressed) | Deletes all the notes under the mouse cursor. Only the notes for the selected Sound are deleted. |
Editing the selected notes* (refer to Editing the selected events/notes for details) | |
Drag the left/right border of a note | Resizes the selected notes by moving their start/end position according to the Step Grid. |
[Ctrl] + drag the left/right border of a note (macOS: [Cmd] + drag the left/right border of a note) | Freely resizes the selected notes by moving their start/end position, overriding the Step Grid quantization. |
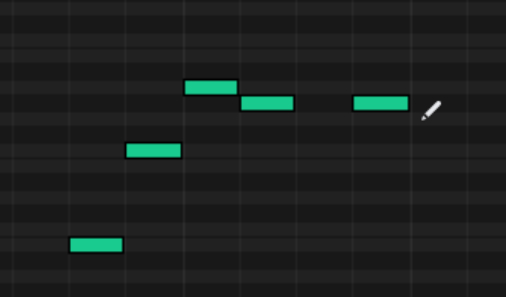
Mouse in Split mode
In Split mode the mouse cursor shows a scissors icon. You can press [X] to quickly switch between the Split mode and the default Select mode.
 |
To split a note, do the following:
Hover with your mouse over the desired note.
A white vertical line shows the position at which the note will be split, according to the Step Grid. Hold [Ctrl] (Windows) or [command] (Mac) while moving the mouse to adjust the split position regardless of the Step Grid.
Click to split the note at the current position.
The underlying note is split into two distinct notes. If there is no note playing at the split position, nothing happens.
If some notes are currently selected, the following will happen:
Clicking an unselected note will split only that note.
Clicking a selected note will split all the selected notes that are playing at the split position.
Mouse in Join mode
In Join mode the mouse cursor shows a plus (+) icon. You can press [Y] to quickly switch between the Join mode and the default Select mode.
 |
Click a note to join it with the next note on the same key.
If some notes are currently selected, the following will happen:
Clicking an unselected note will join it with the next note (selected or not) on the same key.
Clicking a selected note will join it with the next selected note on the same key, if any. Any unselected note in between will stay unaffected. Selected notes on other keys will also be joined with their next selected note, if any.
If the original notes did not overlap, the joined note will fill the gap between the two original notes.
Note
Both in Group view and in Keyboard view, you can only join notes triggering the same key, that is, notes that are on the same row in Keyboard view.
Mouse in Mute mode
In Mute mode the mouse cursor shows a cross (x) icon. You can press [Z] to quickly switch between the Mute mode and the default Select mode.
 |
Click any note to mute or unmute it.
Muted notes are grayed out in the Event area and they will not be triggered.
If some notes are currently selected, the following will happen:
Clicking an unselected note will mute or unmute only that note.
Clicking a selected note will mute or unmute all the selected notes.
Note
Muting notes in the Pattern Editor works independently of muting Sounds or Groups. For more information on muting Sounds and Groups, refer to Mute and Solo.
Creating events/notes
In the software, you can create new events anywhere in the Event area using your mouse in Select mode or Draw mode.
Each event is created at the beginning of the step in which your mouse cursor is located, according to the Step Grid settings. If the Step Grid is deactivated, the event is created at the exact position of your mouse cursor.
In Group view you can create events at the base key for all Sounds in the Group, no matter which Sound is focused. In Keyboard view you can create events at all keys (pitches) for the focused Sound. You need to set the focus to another Sound in order to create events for that Sound.
Mouse in Select mode
To create a new event in Select mode, double-click at the desired location in the background of the Event area.
Mouse in Draw mode
To create a new event in Draw mode, simply click at the desired location. Click and drag your mouse horizontally to quickly create a series of events.
Creating events beyond the Pattern’s end
If you create an event beyond the end of the Pattern in the Event area, the Pattern is automatically extended to the next Arrange Grid division after the new event in order to include this new event.
Notice
For more information on the Pattern Length and the Arrange Grid, refer to section Adjusting the Arrange Grid and the Pattern Length.
Selecting events/notes
Use your mouse in Select mode to select events/notes in your Pattern. This defines which events will be affected by your edits.
Action | Function |
|---|---|
Selecting events | |
Click unselected event | Select event |
[Shift] + click unselected event | Add event to current selection |
[Shift] + click selected event | Remove event from selection |
Click and drag in Event area’s background | Multiple selection (selection frame) |
Click in Event area’s background | Deselect all events |
Selecting all events
You can select all events displayed in the Event area via the usual keyboard shortcut on your operating system:
Click anywhere in the Event area and press [Ctrl] + [A] ([Cmd] + [A] on macOS) on your computer keyboard to select all displayed events.
If the Pattern Editor is in Group view this will select all events for all Sounds in the Pattern. If the Pattern Editor is in Keyboard view this will select all events at all pitches for the focused Sound.
Selecting events/notes on the controller
Using your controller, you can quickly select particular events from the current Pattern and in order to edit them without affecting the other events.
To select events in your Pattern:
Hold EVENTS to enter Event Edit mode, or press EVENTS + Button 1 to pin the Event Edit mode.
Press Button 2 (SELECT) to enter Event Select mode.
The EVENTS button lights up. You can now select notes and events using various tools: the 4-D encoder, the pads, Buttons 5–8, Knobs 1–4, and the Page buttons (left of the displays).
Tip
The Event Select mode complements the Event Edit mode. You can quickly switch between both modes by pressing Button 2 (SELECT).
Depending on the current mode of the pads (Group mode or Keyboard mode, refer to Selecting a pad mode), these tools will select events differently, as described in the following paragraphs.
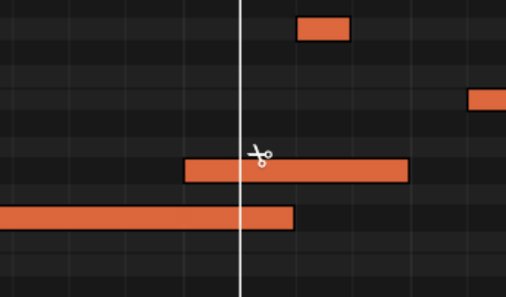
Event Select mode: selecting events (pads in Group mode)
In Group mode (the default mode of the pads), each pad represents a specific Sound of the focused Group.
When your pads are in Group mode the Event Select mode looks as follows:
Selecting events on the controller with the pads in Group mode.
The left display shows an overview of the events in your Pattern for all Sounds in the Group.
The right display shows a detailed view of a portion of your Pattern with events and their velocities for the focused Sound.
You can adjust the right display as follows:
Turn Knob 5 to zoom in/out of events on the right display.
Turn Knob 6 to scroll events on the right display.
Turn Knob 7 to increase/decrease the size of the Sound lane.
You have following selection tools at your disposal:
Selection tool | Description |
|---|---|
Pads | Unlit pads indicate Sounds for which the Pattern has no events. Nothing happens when you press them. Dimmed pads indicate Sounds for which events can be selected: Press any dimmed pad to add all events for that Sound to the selection. The pad turns fully lit to indicate that all its events are selected. You can press any additional dimmed pad to add its events to the selection. Pressing a dimmed pad additionally switches the focus to the corresponding Sound. Fully lit pads indicate Sounds for which all events are selected: Press any lit pad to remove all its events from the selection (the pad turns dim-lit). |
4-D encoder | Select a Sound: Move the 4-D encoder up/down to select a Sound. Select an event: Turn the 4-D encoder to select an event. Nudge: Move the 4-D encoder left/right to nudge the selected event. Press Button 4 (GRID) to move events in relation to the selected Step Grid value. Change event length: Press and turn the 4-D encoder to change the length of the selected event. Press Button 4 (GRID) to resize events in relation to the selected Step Grid value. |
Button 2 (SELECT) | Switch between Event Select mode and Event Edit mode. |
Button 4 (GRID) | Selects/deselects the Step Grid. When the GRID is selected, events can be nudged or resized with the 4-D encoder relative to the value of the Step Grid. Press SHIFT + FOLLOW (Grid) to access the Step Grid. |
Button 5/6 (ALL/NONE) | Selects/deselects all events for all Sounds, i.e. all events in the Pattern. |
Button 7/8 (UP/DOWN) | Switch the focus to the previous/next Sound in order to add or remove some of its events to/from the selection (using Knob 1, 2, and 4, and the Page buttons, refer to below). The name of the selected Sound is indicated under the EVENTS label in the top left corner of the left display. |
Page buttons | Drop the current selection and select the previous/next individual event for the focused Sound. |
Knob 1/2 (START/END) | Define the start and endpoints in the timeline for the selected event of the focused Sound. All events within this time interval are included in the selection. |
Knob 4 (EVENT) | Selects individual events for the focused Sound using the events’ index number (their “order of appearance” in the Pattern). If the selection contains more than one event, the EVENT field indicates (MULTI). |
Knob 5 | Turn Knob 5 to zoom in/out of events on the right display. |
Knob 6 | Turn Knob 6 to scroll events on the right display. |
Knob 7 | Turn Knob 7 to increase/decrease the size of the Sound lane on the right display. |
Page buttons | Drop the current selection and select the previous/next individual event for the focused Sound. |
By combining these tools you can precisely define the selection of events you want to edit.
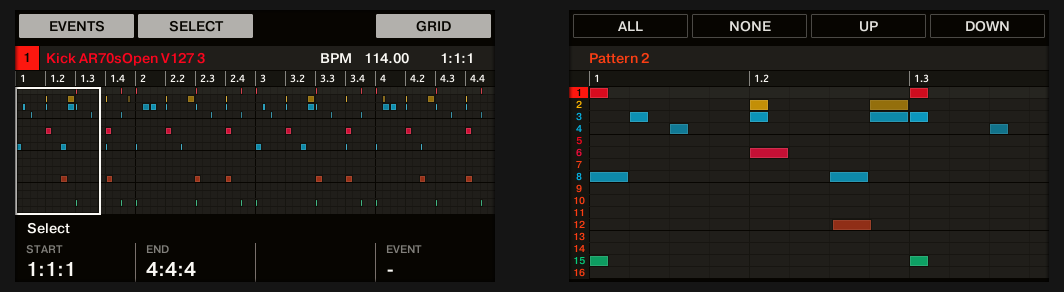
Event Select mode: selecting notes (pads in Keyboard mode)
In Keyboard mode each pad represents a specific pitch of the focused Sound.
When your pads are in Keyboard mode the Event Select mode looks as follows:
Selecting events on the controller with the pads in Keyboard mode.
The left display shows an overview of the events in your Pattern for all pitches of the focused Sound.
The right display shows a detailed view of a portion of your Pattern containing events on two octaves.
You can adjust the right display as follows:
You can adjust the right display as follows:
Turn Knob 5 to zoom in/out of events on the right display.
Turn Knob 6 to scroll events on the right display.
Turn Knob 7 to increase/decrease the size of the Sound lane.
You have the following selection tools at your disposal:
Selection tool | Description |
|---|---|
Pads | Unlit pads indicate pitches at which the Pattern has no notes. Nothing happens when you press them. Dimmed pads indicate pitches at which notes can be selected: Press any dimmed pad to add all notes at that pitch to the selection. The pad turns fully lit to indicate that all its notes are selected. You can press any additional dimmed pad to add its notes to the selection. Fully lit pads indicate pitches at which all notes are selected: Press any lit pad to remove all its notes from the selection (the pad turns dim-lit). |
4-D encoder | Select an event: Turn the 4-D encoder to select an event. Nudge: Move the 4-D encoder left/right to nudge the selected event. Press Button 4 (GRID) to move events relative to the value of the Step Grid. Change pitch: Move the 4-D encoder up/down to change the pitch of the selected event. Change event length: Press and turn the 4-D encoder to change the length of the selected event. Press Button 4 (GRID) to resize events relative to the value of the Step Grid. |
Button 2 (SELECT) | Switch between Event Select mode and Event Edit mode. |
Button 4 (GRID) | Selects/deselects the Step Grid. When the GRID is selected, events can be nudged or resized with the 4-D encoder relative to the value of the Step Grid. Press SHIFT + FOLLOW (Grid) to access the Step Grid. |
Button 5/6 (ALL/NONE) | Selects/deselects all notes for all pitches of the current Sound, in short, all events of that Sound. |
Button 7/8 (UP/DOWN) | Switch the focus to the previous/next Sound in order to add or remove some of its notes to/from the selection. The name of the selected Sound is indicated under the EVENTS label in the top left corner of the left display. |
Knob 1/2 (START/END) | Define the selection’s start and endpoints in the timeline for the focused Sound. All notes within this time interval and within the pitch interval defined by LOW and HIGH (see below) are included in the selection. |
Knob 3/4 (LOW/HIGH) | Define the selection’s lowest and highest pitch for the focused Sound. All notes within this pitch interval and within the time interval defined by START and END (see above) are included in the selection. |
Page buttons | Drop the current selection and select the previous/next individual event for the focused Sound. |
By combining these tools you can precisely define the selection of notes you want to edit.
Editing the selected events/notes
Once you have selected particular events, you can edit them in various ways.
In the software, you can edit the selected events with your mouse using the various mouse modes available. Refer to Editing events with the mouse for more information.
Action | Function |
|---|---|
Editing selected notes | |
Drag note horizontally | Moves the selected notes in time according to the Step Grid (refer to the quantizing rules below). |
[Ctrl] + drag note horizontally (macOS: [Cmd] + drag note) | Freely moves the selected notes in time (overriding the Step Grid quantization). |
[Alt] + drag note | Duplicates the selected notes. When you drag horizontally, the copies are moved in time according to the Step Grid (refer to the quantizing rules below). |
Drag left/right note border | Moves the start/end of the selected notes according to the Step Grid, thereby resizing the notes (refer to the quantizing rules below). |
[Ctrl] + drag left/right note border (macOS: [Cmd] + drag left/right border) | Freely moves the start/end of the selected notes (overriding the Step Grid quantization), thereby resizing the notes. |
Drag note vertically | Group view: Moves the selected notes to another Sound in the Group. |
Double-click note | Deletes the selected notes. |
Right-click (macOS: [Ctrl]-click) | Deletes the selected notes. |
If multiple notes are selected, mouse actions can be performed on any of the selected notes — they will apply to all selected notes.
Quantization when editing a single event/note
By default, all dragging actions on the time axis are quantized according to the Step Grid:
When you drag a note (or its duplicate) horizontally, its original offset with the Step Grid is preserved, unless you drag the note near a grid line, in that case, it will snap to the grid.
When you resize a note by dragging its start/end border, the new start/end border will snap to the Step Grid.
Tip
To override the quantization and freely adjust the note position or size, hold [Ctrl] ([Cmd] on macOS) while dragging.
Quantization when editing multiple events/notes at once
When you drag multiple notes (or their duplicates) on the time axis or resize them according to the Step Grid, the various notes in the selection are affected as follows:
The note you click is moved or resized according to the quantizing rule described above.
All other notes in the selection are moved or resized by the same amount (regardless of their own quantizing rules). When resizing, if the notes have different lengths the length differences are retained as long as no event becomes shorter than one step.
Tip
For example, if you have a drum roll, a flam, or any custom sequence happening right before a beat, this allows you to move the whole sequence to another beat with perfect timing while keeping its feel untouched.
Nudging events/notes
Nudging lets you to shift the selected events according to the Nudge Grid. This can be useful to move your events by smaller amounts. The offsets of the events relative to the Nudge Grid are preserved.
In the software, the Nudge command is not available with your mouse but via a keyboard shortcut:
Press [Alt] + the left/right cursor key on your computer keyboard to nudge the selected notes by one Nudge Grid division. If no event is selected, all events in the Pattern will be affected.
Dragging vs. nudging
Dragging with the mouse is different from the Nudge command on your controller:
Whereas dragging is based on the Step Grid, the Nudge command is based on the Nudge Grid (refer to Adjusting the Step Grid and the Nudge Grid).
Whereas you can drag notes beyond the end of the Pattern, nudged notes reaching the end of the Pattern are automatically sent to the beginning of the Pattern.
If a note is not on a Step Grid division, dragging it with Step Grid activated will alternate between snapping to Step Grid divisions and snapping to positions that preserve its original offset with the Step Grid (refer to quantization rule above).
Editing the selected events/notes on the controller
Your controller provides various features in order to edit the events you have selected.
Editing events/notes using the Event Edit mode on the controller
The Event Edit mode provides you with a few essential editing functions. These functions will be applied to the current selection of events.
Press EVENTS to enter Event Edit mode.
The EVENTS screen appears.
If your pads are in Group mode the Event Edit mode looks as follows:
The Event Edit mode on the controller with pads in Pad Mode.
The left display shows an overview of the events in your Pattern for all Sounds in the Group.
The right display shows a detailed view of a portion of your Pattern with events and their velocities for the focused Sound.
If your pads are in Keyboard mode the Event Edit mode looks as follows:
The Event Edit mode on the controller with pads in Keyboard mode.
The left display shows an overview of the events in your Pattern for all pitches of the focused Sound.
The right display shows a detailed view of a portion of your Pattern containing events on two octaves.
You can adjust the right display as follows:
Turn Knob 5 and 6 to zoom in/out and scroll on the time axis (horizontal axis), respectively.
If your pads are in Keyboard mode, turn Knob 7 to scroll on the pitch axis (vertical axis) from events at the lowest pitch until events at the highest pitch.
Under the left display Knob 1–4 provide the following editing functions:
Editing tool | Description |
|---|---|
Knob 1 (POSITION) | Nudges selected events, i.e. shifts selected events on the timeline according to the Nudge Grid (the events’ offsets relative to the Nudge Grid are preserved). Hold SHIFT while you turn the knob to temporarily override the Nudge Grid quantization and adjust the positions in extremely small increments. For more information, refer to Adjusting the Step Grid and the Nudge Grid. If one event only is selected, its position is shown under POSITION. If several events are selected, the field shows (MULTI). See also the alternate method described below. |
Knob 2 (PITCH) | Transposes the selected events by semitones. If one event only is selected, its pitch is shown under PITCH. If several events are selected, the field shows (MULTI). See also the alternate method described below. |
Knob 3 (VELOCITY) | Adjusts the velocity of the selected events. If the events have different velocities, the velocities differences are retained as long as the limits (0 and 127) are not reached. If one event only is selected, its velocity is shown under VELOCITY. If several events are selected, the field shows (MULTI). |
Knob 4 (LENGTH) | Moves the end of the selected events according to the Step Grid (the offset of each event’s end relative to the Step Grid is preserved). Hold SHIFT while you turn the knob to temporarily override the Step Grid quantization and adjust the lengths in extremely small increments. If the events have different lengths, the length differences are retained as long as no event becomes shorter than one step. If one event only is selected, its length is shown under LENGTH. If several events are selected, the field shows (MULTI). |
Tip
You can also use these editing functions to quickly create variations of your Patterns during a live performance.
The following paragraphs will show you alternate editing functions available using the pads of your controller. These functions also work outside Event Edit mode.
Deleting events/notes
In the software you can delete events in the Event area using your mouse in Select mode or Draw mode.
Mouse in Select mode
To delete events in a Pattern, double-click them, or right-click them (macOS: [Ctrl]-click) and select Delete from the menu. This also works when multiple events are selected.
If some events are selected, you can also press [Del] or [Backspace] on your computer keyboard to delete them. For more information on selecting events, refer to Selecting events/notes.
Mouse in Draw mode
To delete an event, simply click it. Click an event and drag your mouse with the button pressed to quickly delete a series of events.
Deleting events/notes on the controller
Your controller provides you with several tools to delete events from the current Pattern.
Quick deleting events/notes
The quickest and easiest way to delete events is the following:
Press EVENTS + ERASE + the desired pad to delete from the Pattern all events for that Sound (if pads are in Group mode) or all notes at that pitch for the focused Sound (if pads are in Keyboard mode).
Tip
For more information on Group mode and Keyboard mode, refer to Selecting a pad mode.
As soon as you hold EVENTS + ERASE, some pads light up to indicate where there is something to delete:
If your pads are in Group mode, the lit pads show you the Sounds for which the Pattern contains events.
If your pads are in Keyboard mode, the lit pads show you the pitches (of the focused Sound) for which the Pattern contains events.
In other terms, you don’t need to press any unlit pads, since there are no events to delete there. While holding EVENTS + ERASE you can press several pads to delete their events.
Tip
If you accidentally deleted events, press SHIFT + pad 1 (Undo) to undo it.
Deleting the selected events/notes
Once you have selected particular events (refer to Selecting events/notes for more on this), you can delete them from the Pattern:
Press SHIFT + pad 9 (Clear) to erase the selected events. If nothing is selected, all events/notes in the Pattern will be deleted.
Deleting events/notes while playing
If the sequencer is currently playing, you can selectively erase events at the play position:
While the Pattern is playing, hold ERASE + the desired pad to progressively delete the events for that Sound (if pads are in Group mode) or the notes at that pitch for the focused Sound (if pads are in Keyboard mode) as they are reached by the playhead.
As long as you hold the pad, the corresponding events are deleted as the playhead moves on.
You can use this to selectively erase notes at a particular place in the Pattern.
Tip
This might take some time getting used to, especially when the tempo is very fast, but you can always use undo/redo (SHIFT + pad 1 and SHIFT + pad 2) to cancel any unwanted deletion.
Deleting events for the entire Group at playback position
Using your controller you can erase events for all Sounds in the Group at the playback position:
While the Pattern is playing, hold ERASE + the desired Group button A–H to progressively delete events for all Sounds in that Group as they are reached by the playhead.
Cut, copy, and paste events/notes
You can cut, copy and paste the selected events to another location in the same Pattern or to a different Pattern, and for the same Sound or for another Sound (possibly in another Group).
To cut, copy, and paste the selected events/notes in the software, do the following:
To cut or copy the selected events, press [Ctrl] + [X] or [Ctrl] + [C] ([Cmd] + [X] or [Cmd] + [C] on macOS), respectively. You can also right-click ([Ctrl]-click on macOS) in the background of the Event area and select Cut or Copy from the context menu. The selected events are placed in the clipboard, ready to be pasted. If you selected the Cut command, they are additionally removed from their original location.
If you want to paste the events in another Pattern, open the Pattern Manager, double-click the Pattern in which you want to paste the events (refer to The Pattern Manager and the Pattern mode for more information on the Pattern Manager).
Click anywhere in the Event area of the newly selected Pattern.
To paste the events, press [Ctrl] + [V] ([Cmd] + [V] on macOS). You can also right-click ([Ctrl]-click on macOS) the desired location in the background of the Event area and select Paste from the context menu.
The events will be pasted according to the rules described hereinafter. If no event is selected, all displayed events will be affected: in Keyboard view, these are all events of the focused Sound; in Group view these are all events of all Sounds within the Group (refer to Group view and Keyboard view for more information on Group view and Keyboard view).
Notice
If you have copied events from multiple Sounds as the Pattern Editor was in Group view, and then switch to Keyboard view before pasting the events, only the copied events from the Sound previously focused will be pasted in the new focused Sound.
Pasting rules
The location at which the cut or copied events will be pasted depends on the following:
In any case the first pasted event will be quantized to the current Step Grid, and the following pasted events will retain their time offset to this first event.
If you paste the events via the Paste command from the context menu of the Event area’s background:
The first copied event is pasted at the closest step near the mouse cursor on the time axis.
In Group view the events copied from the topmost Sound in the Sound List are pasted onto the focused Sound. In Keyboard view, the events copied from the highest pitch are pasted at the pitch of the row in which the mouse cursor is located.
All copied events retain their position relative to each other, both on the time axis and on the vertical axis (Sound List in Group view, pitches in Keyboard view).
If some of the pasted events go beyond the Pattern’s end, the Pattern is extended to the next Pattern Grid division after the last pasted event.
If you paste the events via the shortcut on your computer keyboard while playback is on:
If you haven’t changed the Sound focus, events are pasted one step after the original events.
If you have changed the Sound focus, events are pasted at the same timings as the original events. In Group view the events copied from the topmost Sound in the Sound List are pasted onto the focused Sound, and the other events will retain their vertical position relative to these topmost events.
If you paste the events via the shortcut on your computer keyboard while playback is off:
If you haven’t changed the Sound focus or the playhead position, events are pasted one step after the original events.
If you haven’t changed the Sound focus but changed the playhead position, events are inserted with the first event starting at the playhead position. All following events will retain their position relative to the first event.
If you have changed the Sound focus without changing the playhead position, events are inserted at the same timings as the original events. In Group view the events copied from the topmost Sound in the Sound List are pasted onto the focused Sound, and the other events will retain their vertical position relative to these topmost events.
If you have changed both the Sound focus and the playhead position (e.g., by clicking in the timeline above the Event area, refer to section Jumping to another playback position in the Pattern), events are inserted with the first event starting at the playhead position. In Group view the events copied from the topmost Sound in the Sound List are pasted onto the focused Sound, and all copied events retain their position relative to each other, both on the time axis and on the vertical axis (Sound List in Group view, pitches in Keyboard view).
Auditioning notes
You can audition single events/notes as you select and edit them in the Event area of the Pattern Editor. This lets you quickly hear how your edits affect the Pattern. To do this:
Click the speaker button above the Sound List (or the Pad view) to activate or deactivate event auditioning in the Event area:
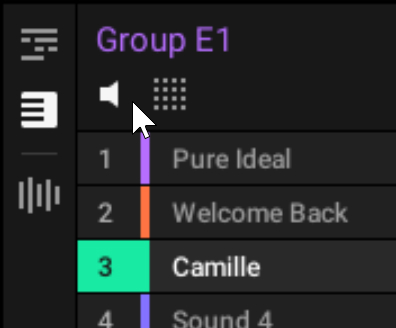
When the speaker icon is active:
With the mouse in Select mode, creating a note (double-click) or selecting an existing note (single click) will trigger it. If you select multiple notes, nothing happens. When dragging a note to a different key (in Keyboard view) or to a different Sound (Group view), every new key or Sound will be triggered.
With the mouse in Draw mode, creating a note (single click) will trigger it.
Every triggered note mutes the previous note to clearly hear the current edit.
Note
For more information on the various mouse modes, refer to Editing events with the mouse. For more information on Keyboard view and Group view, refer to Group view and Keyboard view.
Note
The speaker button also controls the Sound preview in the Sound List. For more information, refer to Auditioning Sounds.
Quantizing events/notes
Quantization is the process of moving events to the closest steps. You can quantize your notes at any time, no matter how you recorded them. They will be quantized according to the step size (i.e. Step Grid resolution) selected. If you turn the Step Grid off, no quantization will be applied. See section Adjusting the Step Grid and the Nudge Grid above for more information on the Step Grid and the step size.
There are two strengths of quantization:
Full quantization: Moves each event directly onto the closest step of the current Step Grid. This allows a perfectly regular rhythm.
Half quantization (50%): Moves each event halfway toward the closest step of the current Step Grid. This allows a tighter rhythm while retaining a human feel.
In addition, if you record notes from a MIDI keyboard or use the pads, and create unwanted double notes where you don’t want them; Maschine automatically detects and removes these double notes while quantizing.
Quantizing events/notes in the software
Quantize and Quantize 50% are available from the context menu in the Event area.
Quantize and Quantize 50% in the Pattern Editor context menu.
To apply full or half quantization using the Maschine software:
In the Event area, select the events that you want to quantize. If nothing is selected, the whole Pattern will be quantized.
To apply full quantization to the selected events, right-click anywhere in the Event area and select Quantize from the context menu.
To apply only a small amount of quantization to keep the groove you created after recording your pattern, right-click anywhere in the Event area and select Quantize 50% from the context menu.
You can undo/redo the quantization by pressing [Ctrl]+[Z] / [Ctrl]+[Y] (Windows) or [command]+[Z] / [command]+[Y] (macOS).
Quantization while playing
Input Quantization allows you to quantize events also as you play them on the pads.
Input Quantization can be set to the following modes:
None: Input Quantization is deactivated. Events you play or record on the pads are not quantized.
Record: Input Quantization is applied only when you record the pads.
Play/Rec: Input Quantization is applied both when you play on the pads and when you record them.
Notice
In Play/Rec mode the quantization applied while playing is slightly different from the quantization applied while recording: When recording, all events are quantized to the closest step — possibly ahead of the event. When playing, on the other hand, events occurring in the first half of the steps are left untouched (since you cannot bring them forward in the timeline!) whereas events occurring in the second half of the steps are quantized to the next step.
Doubling a Pattern on your controller
Your controller provides a useful shortcut to double the length and content of the current Pattern. In the software, you can do this for example by copying all events, putting the Playhead indicator at the end of the Pattern, and pasting the events (the Pattern Length is automatically doubled).
Adding variation to Patterns
Variation provides an abundance of inspiration and even “happy accidents” when applied to your workflow. The variation engine contains two modes:
Variation is available in both Group mode and Keyboard mode and can be applied to a Sound. In Keyboard mode, the Variation in Random mode contains extra parameters that allow you to add variety to melodic content.
Notice
When adding variation to your Patterns, please be aware that Random mode conforms to the selected scale.
Recording and editing modulation
One of the really cool features of Maschine is the ability to modulate nearly all Maschine parameters both on the controller and in the software in a very easy way.
In Maschine, modulation means the automatic change of Maschine parameters from an internal source (for example, manual changes recorded via Auto-write…). Value changes are:
Temporary: The modified value is valid only until the end of the Pattern or Clip: When the Scene is looped or when playback is restarted, the parameter value is reset to its non-modulated value.
Relative (knobs only): For continuous parameters (these parameters are controlled by a rotary knob in the software), the new parameter value is defined as deviation from the actual value. Note that for selectors and buttons, modulation defines instead absolute values.
Modulation vs. automation
Although dealing both with automatic change of Maschine parameters, modulation and automation have to be distinguished. The following table summarizes the main differences:
Modulation | Automation | |
|---|---|---|
Source of control | Internal (for example, changes recorded via Auto-write) | External (for example, an external MIDI sequencer or an automation track in your host) |
Duration of the change | Temporary (until the end of the Pattern/Clip) | Permanent |
Target parameters | At the Sound and Group levels only | At all levels (Sound, Group, and Master) |
Nature of the change (continuous parameters only) | Relative (defines a deviation to the non-modulated value) | Absolute (defines a new value regardless of the non-automated value) |
Notice
This section describes how to use modulation in Maschine. For more information on automation in Maschine, refer to Controlling parameters via MIDI and host automation.
Please note that modulation and automation are not mutually exclusive: You can modulate a parameter in Maschine and automate it (for example, from your host) simultaneously! As a result, the parameter value will deviate (according to the recorded modulation) from its moving value defined by the automation.
Tip
Example: Let’s assume that you have recorded some modulation for the Cutoff parameter of a Filter Plug-in in order to create a filter sweep. Since modulation is defined relative to the non-modulated value, by manually adjusting the Cutoff parameter you can shift the entire sweep across frequencies. By additionally assigning this Cutoff parameter to a MIDI control or an automation ID (refer to Controlling parameters via MIDI and host automation to learn how to do this) you can create a filter sweep that automatically moves across frequencies!
Which parameters can be modulated?
All the modulatable parameters are located in Plug-ins or Channel properties (e.g., you cannot modulate the Pattern Length or the Step Grid resolution). This means that all the modulatable parameters are found on a Parameter page of the Control area (when the software is in Arrange view).
In order to be modulatable, parameters of Plug-ins and Channel properties have to meet the following requirements:
The parameter must be controlled by a knob or a button in the software. Most parameters controlled by selectors (e.g., for selecting an operating mode or a filter type) cannot be modulated, but there are a few exceptions.
The parameter must be at the Group or Sound level. Parameters at the Master level cannot be modulated.
Notice
This second rule is also true for Plug-ins: if a Plug-in is loaded at the Master level its parameters cannot be modulated, but if the same Plug-in is loaded in a Group or a Sound its parameters can be modulated.
Almost all parameters meeting these requirements can be modulated, the only exceptions being:
Plug-ins:
Saturator: in Tube mode, the Bass Overload button (MAIN section) and Bypass button (EQ section).
Percussion (Drum Synth): in Fractal mode, the Tune Hold button in the Main page.
Channel properties:
Sound’s and Group’s Output properties: the Cue button in the Audio page.
Group’s Input properties: the Root Note knob in the MIDI page.
Notice
At the Sound and Group level, the same parameters can be both automated and modulated. For more information on automation, refer Controlling parameters via MIDI and host automation.
Note
Your Macro Controls can me modulated if, and only if, their target parameters can be modulated. For more information on Macro Controls, refer to Creating custom sets of parameters with the Macro Controls.
Recording modulation
In the software, if you take a closer look at the knobs in the Parameter pages of the Control area, you will notice an outer ring whose color changes to light grey when you hover over it with the mouse cursor.

Drag the outer ring of the knobs during playback to record modulation.
To record modulation for a knob, start the playback, click the knob’s outer ring and drag it vertically.
Your movement is recorded into the Pattern and will be recalled as the playback is looped.
As soon as you record modulation for a parameter, the following happens:
On the outer ring of the knob, the colored section, which usually indicates the current parameter value, is replaced by a little colored segment indicating the modulated value. During playback, this little segment follows the movements that you have recorded. The non-modulated value of the parameter is still indicated by the little white segment on the knob itself. Since modulation is defined relative to the original value, you can turn the knob to define the original value from which the recorded modulation will deviate.
A modulation track is created for this parameter in the Modulation pane of the Control Lane (at the bottom of the Pattern Editor) containing the modulation points that you have recorded. You can further edit the modulation track from there. For more information, refer to Creating and editing modulation in the Control Lane.
Removing modulation
You can also use the knob’s outer ring to remove the modulation for the knob:
To remove the entire modulation for a knob, right-click (Windows) or [Ctrl]+click (macOS) the knob’s outer ring.
Notice
You can also create and remove modulation tracks from the Control Lane.
Creating and editing modulation in the Control Lane
You can also create, select, and edit individual modulation points in the Modulation pane of the Control Lane.
Displaying the Modulation pane in the Control Lane
To see and edit the modulation for the parameters of a Sound, click the desired Sound slot in the Sound List left of the Pattern Editor, and click the SOUND tab in the Control area. To see and edit instead the modulation for the parameters of a Group, click the desired Group in the Group List left of the Arranger, and click the GROUP tab in the Control area.
If the Control Lane is not visible at the bottom of the Pattern Editor, click the up-pointing arrow in the bottom left corner of the Pattern Editor to open the Control Lane.

Click the icon showing little bars left of the Control Lane to display the Modulation pane.

The Modulation pane appears.

The Modulation pane showing the modulation track for the Split parameter of the FM Plug-in.
The Modulation pane contains the following elements:
The left part shows the Modulator List with all the parameters that are currently modulated in the focused Sound or Group. Click any entry from the list to display the modulation track for that parameter on the right. Click the “+” symbol at the end of the list to add a modulation track for another parameter (see below). If the list is too small to display all entries at once, a vertical scroll bar appears on the right to navigate the list.
The right and biggest part shows the modulation track for the parameter selected in the Modulator List on the left:
Each modulation track contains a variable number of modulation points connected by curved or straight lines. These points and lines define the new values of the parameter relative to its original value. In the track you can create, edit, and delete modulation points and lines (see below).
The display (zoom factor and scroll position) of the modulation track is always synchronized to the Event area above. Using your mouse wheel, you can [Ctrl]+scroll (Windows) or [command]+scroll (macOS) to zoom horizontally in the modulation track, and [Alt]+scroll (Windows) or [option]+scroll (macOS) to scroll horizontally through the track.
Left of the modulation track, a vertical scale indicates the actual parameter values. The scale is always centered on the current, non-modulated value of the parameter. Since modulation points set new values relative to the non-modulated value, this evolving scale allows you to see at any time the real values set by the modulation curve in the track. The range of possible values for the parameter is indicated by a different background color.
Tip
You can adjust the height of the Control Lane by dragging its upper border with the mouse.
When some modulation is recorded for a parameter in a particular Pattern of the Group, the corresponding Modulator and modulation track appear for all Patterns and Clips in the Group. The track will be empty for Patterns and Clips in which you haven’t recorded any modulation for this parameter yet. Similarly, if you delete a Modulator and its modulation track from a Pattern or a Clip, it will be deleted from all other Patterns and Clips in the Group as well.
Editing modulation points and lines
In the modulation track, you can create, edit, and delete modulation points and adjust the lines between them using your mouse. You can choose between two mouse modes:
The Select mode is the default mode. In this mode the mouse cursor shows the standard arrow icon. The Select mode lets you create points, select single or multiple points, change their position, delete them, and modify the shape of the lines between the points.
The Draw mode lets you quickly create series of modulation points. In this mode the mouse cursor shows a pencil icon. You can press [E] on your computer keyboard to quickly switch between the Draw mode and the default Select mode, or you can click the Draw Mode button (pencil icon) at the bottom left of the Pattern Editor:
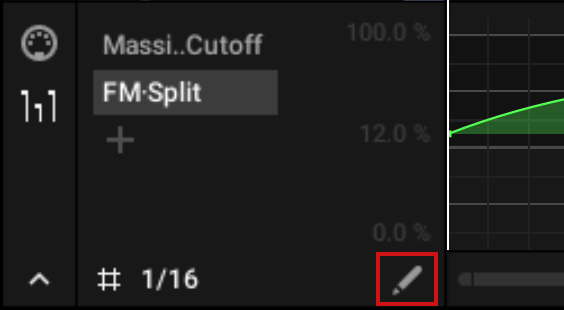
In both mouse modes, your actions are quantized according to the current Step Grid, if active.
For each mouse mode, the following mouse actions are available:
Mouse mode | Available mouse actions in the modulation track |
|---|---|
Select mode (arrow cursor) | To create a modulation point, double-click in the Control Lane. Any existing point on this step will be replaced. To delete a modulation point, double-click it. You can also select it and press [Del] on your computer keyboard. To edit a modulation point, drag it vertically to change the modulation value, or horizontally to change its timing. When hovering the mouse over a modulation point, its modulation value appears. The display is updated as you drag the point vertically. To select a modulation point, click it. Clicking a line segment selects the two points on either end. Multiple selection: To select a group of modulation points, click the background and drag your mouse to draw a selection box around them. You can also hold [Shift] on your computer keyboard and click any unselected point to add it to your selection, or click any selected point to remove it from your selection. Once multiple points are selected, you can click and drag any of them to move the entire group of points at once. In doing so the points will keep their relative offsets until some of them reach the minimum or maximum value. You can also delete the entire group at once by pressing [Del] on your computer keyboard. Creating curves: When you hold [Alt] (Windows) or [option] (macOS) and hover your mouse over a line segment between two points, the mouse cursor changes: While still holding the key, click and drag the line vertically to bend it and modify the shape of the modulation between the two points. You can reset the segment to a straight line by holding [Alt] (Windows) or [option] (macOS) and double-clicking the curved segment. You can switch to Draw mode by pressing [E] on your computer keyboard or by activating the Draw Mode button at the bottom of the Pattern Editor. |
Draw mode (pencil cursor) | Click and drag your mouse to create a continuous series of modulation points wherever you move the cursor. Dragging with the Step Grid inactive lets you create freehand, high-resolution modulation. Dragging with the Step Grid active will create quantized, stepped automation, placing one point on each grid line that you draw across. You can switch back to Select mode by pressing [E] on your computer keyboard or by deactivating the Draw Mode button at the bottom of the Pattern Editor. |
Adding a modulation track
As soon as you record modulation for a new parameter, a new modulation track is created containing your recorded movements in form of modulation points. You can also manually create a new modulation track from scratch in the Control Lane by using the “+” symbol at the end of the Modulator List on the left:
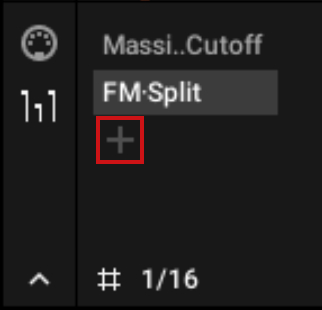 |
Click the “+” symbol to add a new empty modulation track.
To create a new modulation track:
To create a new modulation track for a parameter of a Sound, click the desired Sound in the Sound List (left of the Pattern Editor) and click the SOUND tab in the Control area. To create a new modulation track for a parameter of a Group, click the desired Group in the Group List (left of the Arranger) and click the GROUP tab in the Control area.
In the Modulation pane, click the “+” symbol at the end of the Modulator List to create a new empty modulation track. A new Modulator X entry is appended to the list (X is an ordering number) and it is automatically selected. This modulation track is still empty. You cannot create any modulation point in the track yet, you first need to assign this modulator to a parameter of your choice.
Right-click (Windows) or [Ctrl]-click (macOS) the Modulator X entry to open a structured menu containing all the modulatable parameters in that channel.
Navigate the structure of the menu down to the desired parameter: For a parameter located in Channel properties select Sound/Group > [set of Channel properties] > [Parameter page] > [parameter]. For a parameter located in a Plug-in select [Plug-in name] > [Parameter page] > [parameter].
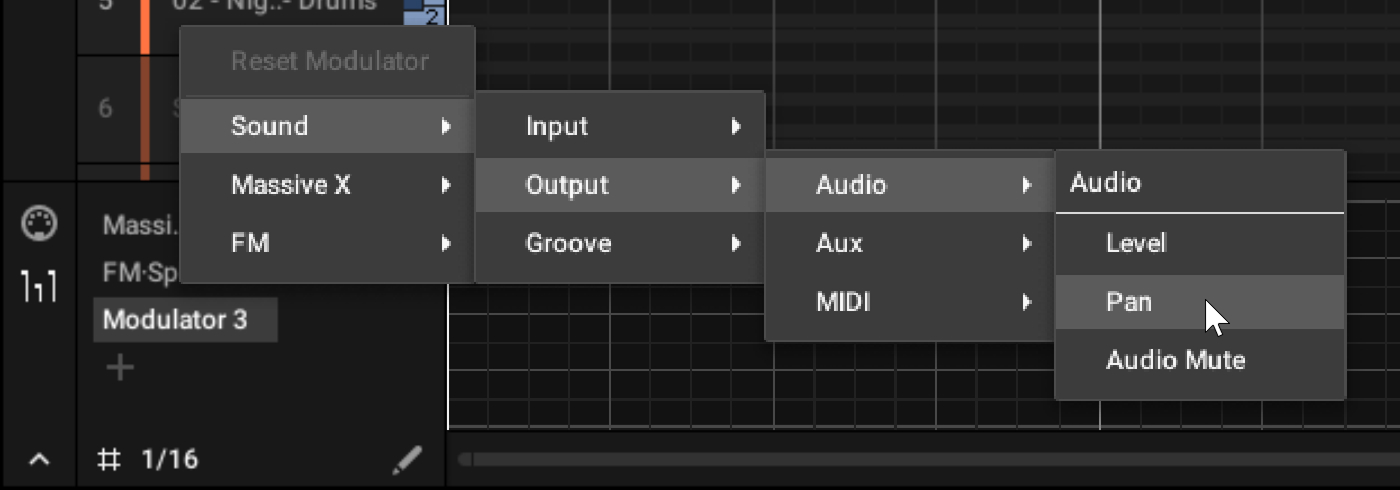
Once you have selected a parameter from the menu, the parameter name appears in place of Modulator X in the Modulator List and you can edit its modulation track on the right.
In the modulation track, you can now add and edit modulation points for the selected parameter as described above. The modulation track is added to all the Patterns in the Group and you can create different modulation points in the different Patterns.
Tip
When you load a Plug-in into a channel (a Sound or a Group), its modulatable parameters show up in the menu listing the available parameters (when this channel is under focus).
Resetting a modulation track
To reset the modulation track of a parameter, right-click (Windows) or [Ctrl]-click (macOS) the parameter name in the Modulator List and select Reset Modulator at the top of the menu.
All the modulation points are deleted from the track for all Patterns in the Group. You can start designing a new modulation for that parameter from scratch.
Re-assigning a modulation track
To re-assign a modulation track to another parameter, right-click (Windows) or [Ctrl]-click (macOS) the current parameter in the Modulator List and select another parameter from the structured menu as described above.
Upon your selection, the track is assigned to the new parameter. The modulation (including all its modulation points and connecting lines) now affects the new parameter. The previous parameter is not modulated anymore.
Removing a modulation track
To remove a modulation track, hover its entry in the Modulator List with the mouse and click the little cross that appears on the right.
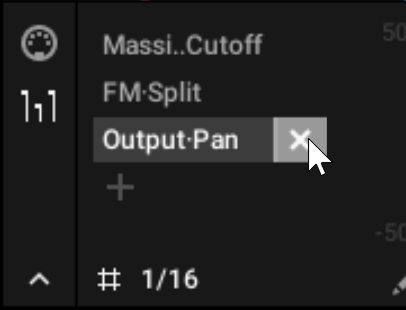
The modulation track and its entry in the Modulator List are removed from the Modulation pane for all Patterns. The parameter is not modulated anymore.
Creating MIDI tracks from scratch in Maschine
Within Maschine you can create MIDI tracks from scratch for any Sound of your Project. Maschine’s MIDI automation tracks can have two purposes:
When playback is on, the content of these tracks is sent in real-time as MIDI data via the MIDI output of the Sound (if activated). Configuring the MIDI output of Sounds is done in the MIDI page of the Sound’s Output properties. For more information, refer to Sending MIDI from Sounds.
When exporting your Pattern as a MIDI file for use in another environment, MIDI automation tracks will be included in the exported MIDI file. For more information, refer to Exporting MIDI from Patterns.
Notice
You cannot create MIDI tracks for Groups nor for the Master.
Creating and editing MIDI tracks is done in the MIDI pane of the Control Lane:

Create MIDI tracks in the MIDI pane of the Control Lane.
Click the desired Sound in the Sound List on the left of the Pattern Editor.
If the Control Lane is not visible at the bottom of the Pattern Editor, click the up-pointing arrow in the bottom left corner of the Pattern Editor to show it.
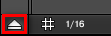
Click the MIDI socket icon left of the Control Lane to display the MIDI pane.
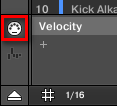
At the end of the list of MIDI controls nearby, click the “+” to add a new MIDI track.
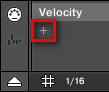
A new entry appears at the end of the list reading Not assigned.
Right-click ([Ctrl]-click on macOS) this Not assigned entry and select the desired MIDI control from the context menu.
Add and modify events in the new MIDI track via the same editing tools as for modulation tracks (refer to Creating and editing modulation in the Control Lane).
You have just created a new MIDI track.
Notice
One MIDI track is always present in the MIDI pane: the Velocity track. This track holds the velocities of all the events/notes for the focused Sound in the Pattern. You cannot delete the Velocity track.
Removing a MIDI track
To remove a MIDI track, hover its entry in the list of MIDI controls on the left with the mouse and click the little cross that appears on its right.
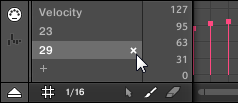
The MIDI track and its entry in the list of MIDI controls are removed from the MIDI pane.
Managing Patterns
This section describes how to organize your Patterns, Pattern slots, and Pattern banks.
The Pattern Manager and the Pattern mode
In the software, all Pattern management operations are done in the Pattern Manager:
To open the Pattern Manager, click the Pattern Manager button (a down-pointing arrow) at the left of the name of the selected Pattern.
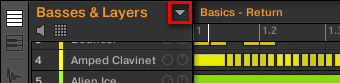
The Pattern Manager appears underneath.
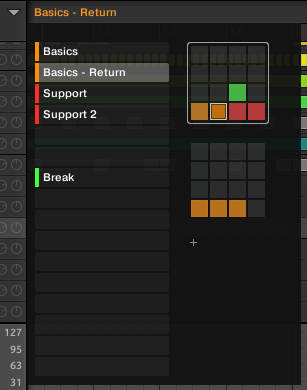
Use the Pattern Manager to manage your Patterns.
On the left, you can see the list of the 16 Pattern slots in the selected Pattern bank. Slots containing a Pattern show a colored bar on the left along with the Pattern name. The other slots contain no Pattern. The selected Pattern is highlighted (the Basics - Return Pattern in the picture above).
On the right, you can see the various Pattern banks in form of pad grids. A pad grid is a square of 4x4 cells representing the pads of your controller. In each Pattern bank the colored cells indicate Pattern slots containing a Pattern, while unlit cells indicate empty Pattern slots. The selected Pattern bank is surrounded by a white border (the first bank in the picture above). If there are too many Pattern banks to fit into the Pattern Manager’s height, use the scroll wheel of your mouse to display the other banks.
The Pattern slots on the left and the cells in the selected pad grid on the right are strictly equivalent: you can use either the slots or the corresponding cells to execute all the management commands described in the next sections.
Closing the Pattern Manager
To close the Pattern Manager, click anywhere outside of it.
The Pattern mode on the controller
The Pattern mode is where you select and manage your Patterns on your controller.
To enter Pattern mode, press and hold PATTERN (you can pin it by pressing Button 1 at the same time).
Your controller switches to Pattern mode. This is indicated by the lit PATTERN button.
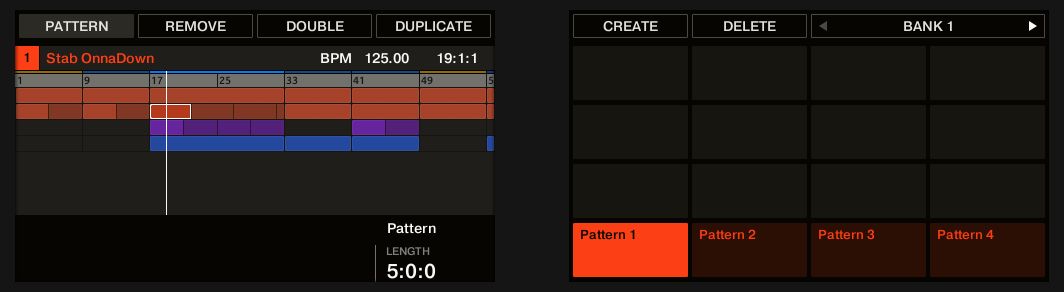
The hardware displays in Pattern mode.
On the right display, you see all available Pattern slots in the selected Pattern bank represented as a square of 4x4 cells:
The highlighted cell indicates the selected Pattern slot.
Cells showing a name represent Pattern slots containing a Pattern.
Empty cells represent empty Pattern slots.
This grid of cells corresponds to the pads on your controller:
The fully lit pad indicates the selected Pattern slot.
Dim lit pads indicate Pattern slots containing a Pattern.
Unlit pads represent empty Pattern slots.
Selecting Patterns and Pattern banks
In the topmost row of the Pattern Editor, you can see on the left the name of the Pattern selected:
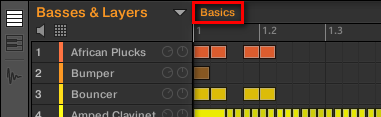
The selected Pattern is named Basics.
To select a Pattern, do the following:
Open the Pattern Manager (refer to The Pattern Manager and the Pattern mode).
If necessary, select the Pattern bank containing the desired Pattern by clicking its pad grid on the right.
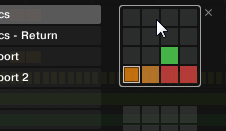
The left part of the Pattern Manager displays the list of Pattern slots in that bank.
Select the desired Pattern by clicking its name from the list or by clicking its cell in the selected pad grid on the right.
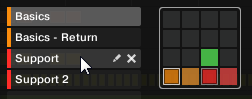
The selected Pattern is loaded in the Pattern Editor and its events appear in the Event area. Furthermore, this Pattern is referenced for the Group in the current Scene in the Arranger, replacing any previous Pattern for the Group in that Scene. For more information, refer to Working with the Arranger.
Creating Patterns
Still, you can manually create a new empty Pattern in the software:
Open the Pattern Manager (refer to The Pattern Manager and the Pattern mode).
If it is not already selected, click the desired pad grid on the right to select the Pattern bank where you want to create a Pattern.
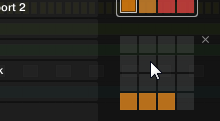
The selected Pattern bank is surrounded by a white border, and the left part of the Pattern Manager displays the Pattern slots in that bank.
Click any empty Pattern slot in the list on the left or click any dark cell in the selected pad grid on the right to create a new empty Pattern there.
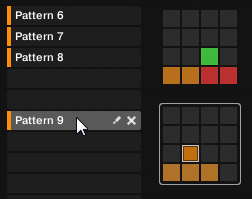
A new empty Pattern is created in the selected Pattern slot. The new Pattern is loaded in the Pattern Editor with an empty Event area. Furthermore, this Pattern is referenced by a Clip for the selected Group in the current Scene in the Arranger. This Clip replaces any previous Clip for the Group in that Scene. For more information, refer to Using the Song view.
Creating a new Pattern on your controller
Upon the creation of the Pattern:
The new Pattern is selected and displayed in the software’s Pattern Editor. You can modify it both from your controller and in the software.
The new Pattern is referenced by a Clip for the selected Group in the current Section. This Clip replaces any previous Clip for the Group in that Section. For more information, refer to Using the Song view.
Inserting a new Pattern after the current Pattern on your controller
You can insert a new Pattern right after a particular Pattern:
Press and hold PATTERN to enter Pattern mode.
Press Button 7 and 8 to select the desired Pattern bank.
Press the pad corresponding to the Pattern after which you want to insert a new Pattern.
Press Button 5 (Create).
A new empty Pattern is inserted right after the selected Pattern. All following Patterns are shifted to the next slot.
Deleting Patterns
Deleting a Pattern in the software
Open the Pattern Manager (refer to The Pattern Manager and the Pattern mode).
If necessary, select the Pattern bank containing the desired Pattern by clicking its pad grid on the right. Its Patterns appear in the list on the left.
Right of the Pattern name, click the little cross icon:
You can also right-click ([Ctrl]-click on macOS) the Pattern slot or the corresponding cell in the pad grid and select Delete from the context menu:
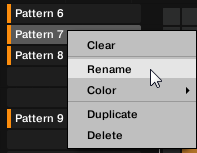
The Pattern is deleted.
Notice
If the Pattern was referenced by Clips in the Arranger, these Clips will be removed as well.
Creating and deleting Pattern banks
You can create and delete Pattern banks in order to organize your Patterns to your liking.
Creating a Pattern bank in the software
If the last Pattern bank contains at least one Pattern (even empty), you can create an additional Pattern bank after that last bank. To do this:
Open the Pattern Manager (refer to The Pattern Manager and the Pattern mode).
Click the “+” symbol under the last pad grid on the right to create another Pattern bank.
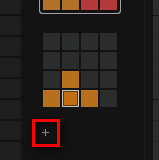
A new empty Pattern bank is created and its pad grid appears in place of the “+” symbol.
Notice
If the last Pattern bank is empty, there is no “+” symbol under its pad grid and you cannot create any new Pattern bank.
Deleting a Pattern bank in the software
Open the Pattern Manager (refer to The Pattern Manager and the Pattern mode).
Hover the pad grid of the desired Pattern bank with your mouse. A little cross appears at the top right of the pad grid.
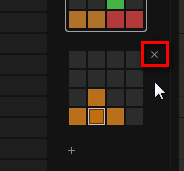
Click the little cross to delete that Pattern bank.
The Pattern bank is deleted including all its Patterns if any. The following banks are shifted up to fill the gap.
Notice
If the Patterns of the deleted Pattern bank were referenced by Clips in the Arranger, these Clips will be removed as well!
Naming Patterns
You can replace the Patterns’ default names with names of your own. This can be done in the Pattern Editor, in the Pattern Manager, and in the Arranger.
Renaming Patterns in the Pattern Editor
To rename the selected Pattern in the Pattern Editor:
Double-click the Pattern name at the top left of the Pattern Editor:
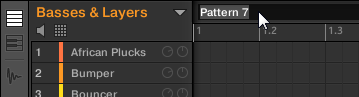
Type a name and press [Enter] on your computer keyboard to confirm (or press [Esc] to exit).
The Pattern is renamed. In the Arranger, all Clips referencing this Pattern in the Arranger will mirror the new Pattern name.
Renaming Patterns in the Pattern Manager
To rename any Pattern, even if it is not selected:
Open the Pattern Manager (refer to The Pattern Manager and the Pattern mode).
If necessary, select the Pattern bank containing the desired Pattern by clicking its pad grid on the right.
On the right of the Pattern slot, click the little pen icon:
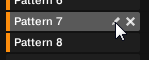
You can also right-click ([Ctrl]-click on macOS) the Pattern slot or the corresponding cell in the pad grid and select Rename from the context menu:

The Pattern name gets highlighted and editable.
Type a name and press [Enter] on your computer keyboard to confirm (or press [Esc] to exit).
The Pattern is renamed. In the Arranger, all Clips referencing this Pattern will mirror the new Pattern name.
Notice
If you use Maschine as a plug-in, some hosts will utilize the [Enter] key, as it is mapped to some function of the host software. In this case, click anywhere else in the Maschine plug-in window to confirm the name you have entered.
Renaming Patterns in the Arranger
You can also rename a Pattern in the Arranger by using any Clip referencing it:
Double-click any Clip referencing the Pattern you want to rename. The Clip turns to a text field and waits for your input.
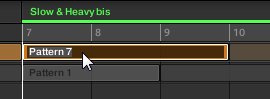
Type a name and press [Enter] on your computer keyboard to confirm.
The Pattern is renamed. All Clips referencing this Pattern will mirror the new Pattern name.
Notice
If you use Maschine as a plug-in, some hosts will utilize the [Enter] key, as it is mapped to some function of the host software. In this case, click anywhere else in the Maschine plug-in window to confirm the name you have entered.
Changing the Pattern color
By default, Patterns inherit the color of the Group they belong to. But you can change the color of each individual Pattern to your liking. To do this:
Open the Pattern Manager (refer to The Pattern Manager and the Pattern mode).
If necessary, select the Pattern bank containing the desired Pattern by clicking its pad grid on the right. The selected Pattern bank is surrounded by a white border and its Patterns are displayed in the list on the left.
Right-click ([Ctrl]-click on macOS) the desired Pattern slot or the corresponding cell in the pad grid, and select Color from the context menu. A Color Palette appears. In the Palette, the current color of the Pattern is highlighted.
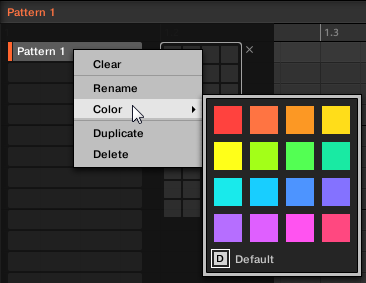
Select the desired color in the Palette. You can also choose to set the Pattern back to its default color by selecting Default at the bottom of the Color Palette.
The Pattern slot takes the new color you select. In the Arranger, all Clips referencing this Pattern will also mirror the selected color.
Duplicating, copying, and pasting Patterns
Maschine provides different ways of copying/pasting Patterns.
Duplicating a Pattern in the software
Open the Pattern Manager (refer to The Pattern Manager and the Pattern mode).
If necessary, select the Pattern bank containing the desired Pattern by clicking its pad grid on the right. The selected Pattern bank is surrounded by a white border and its Patterns appear in the list on the left.
Right-click ([Ctrl]-click on macOS) the Pattern slot or the corresponding cell in the pad grid and select Duplicate from the context menu:

A Pattern copy is inserted right after the original Pattern in the Pattern bank — all following Patterns are shifted to the next slot.
Copying and pasting a Pattern in the software
To cut or copy the content of a Pattern and paste it into another Pattern, do the following:
Click the Event area’s background to deselect any selected events (your mouse must be in Select mode).
Right-click (on macOS: [Ctrl]+click) the Event area’s background and choose Copy from the slot’s context menu:
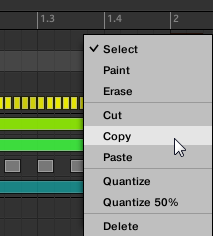
Select the Group in which you want to paste the Pattern’s content.
Open the Pattern Manager, select (or create) an empty Pattern, and close the Pattern Manager again. The selected (or created) Pattern appears in the Pattern Editor.
Right-click (on macOS: [Ctrl]-click) the Event area’s background and choose Paste from the context menu to paste the Pattern.
Tip
If events are selected in the Pattern, the copy/paste operation will apply to these events only. For more information, refer to Cut, copy, and paste events/notes.
Moving Patterns
You can reorder Patterns via drag and drop in the software. It can be helpful to organize your Patterns more conveniently (for example, to bring together variations of the same rhythm).
To move Patterns:
Open the Pattern Manager (refer to The Pattern Manager and the Pattern mode).
If necessary, select the Pattern bank containing the desired Pattern by clicking its pad grid on the right. The selected Pattern bank is surrounded by a white border and its Patterns appear in the list on the left.
Click and hold the Pattern slot or the corresponding cell in the pad grid.
While holding the mouse button, drag your mouse toward the desired location. As the mouse cursor moves, the potential target slots are highlighted or an insertion line appears between slots where you can drop the Pattern slot.
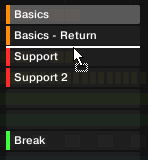
When the desired slot is highlighted or when the insertion line appears at the desired location, release the mouse button.
The Pattern takes its new place. If you drop the Pattern onto a slot containing a Pattern, the moved Pattern will replace it. Scenes referencing the previous Pattern will now reference the replacement Pattern.
Tip
You can also drag a Pattern from the pad grid onto the Pad List, and inversely.
Adjusting the Pattern Length in fine increments on the controller
The Pattern Length can be adjusted in small increments, for example to create irregular pattern lengths, by holding the [Shift] key on your computer keyboard or the SHIFT button on the controller when adjusting the Pattern Length. The size of the small increments are defined by the Step Grid.
Importing/exporting audio and MIDI to/from Patterns
In the Pattern Editor, you can quickly export MIDI and audio from Patterns and import MIDI to Patterns via drag and drop.
Exporting audio from Patterns
The Audio drag-and-drop function allows you to export audio from the selected Pattern onto your desktop or into your DAW by simply dragging it onto the target location or application. This function is only available in the software.
The audio will be exported to a WAV audio file according to the current settings of the Export Audio panel (refer to Exporting audio for more information on these settings) with the following exceptions:
The exported range will be based on the selected Pattern, regardless of the current Loop Range. Note that the Loop Optimize setting will be respected.
The exported audio will only include the focused Group (in Group view) or the focused Sound (in Keyboard view), in other words it will include what you see in the Event area.
The audio file will be named as follows:
Export in Group view: [Group name] - [Pattern name] - [BPM].wav
Export in Keyboard view: [Group name] - [Pattern name] [Sound name] - [BPM].wav
To export Patterns to audio files:
Select the Pattern you want to export audio from (refer to Selecting Patterns and Pattern banks).
If you want to export multiple Sounds of the Group, switch the Pattern Editor to Group view, mute the Sounds you want to exclude from the exported audio file (refer to Mute and Solo), and check that the Group itself is not muted, otherwise the exported audio file will be silent.
If you want to export a single Sound in the Group, you can switch the Pattern Editor to Keyboard view, put the focus on the desired Sound, and check that this Sound is not muted (refer to Mute and Solo), otherwise the exported audio file will be silent. Alternatively, you can let the Pattern Editor in Group view and solo this Sound.
In the top right corner of the Pattern Editor, click and hold the Audio Dragger icon:

While holding the mouse button, drag the icon to start the export. A pop-up message will inform you about the rendering status:
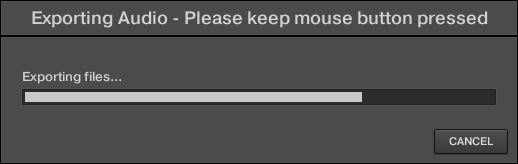
As soon as rendering is finished, the mouse cursor displays the name of the Pattern you are dragging.
You can now drop the exported audio file to your desktop, onto an audio channel in your DAW, or even to another Sound or Group in Maschine.
Tip
If you drop the audio file onto a Group, it will be loaded into the first empty Sound slot of this Group.
Exporting MIDI from Patterns
You can export MIDI files from Patterns. This is useful if you want to use or edit them in another application. This function is only available in the software.
The MIDI file will be exported according to the Channel and Transpose parameters in the MIDI page of the Output properties of each exported Sound. For more information, refer to Sending MIDI from Sounds.
You can export MIDI files using two methods: via drag-and-drop or via the Group/Sound context menu.
Exporting MIDI via drag-and-drop
You can render the selected Pattern to a MIDI file by simply dragging it onto the target location on your operating system or directly into a MIDI channel of your host software:
Select the Pattern you want to export MIDI from (refer to Selecting Patterns and Pattern banks).
If you want to export MIDI from the entire Group, switch the Pattern Editor to Group view. If you want instead to export MIDI from the focused Sound only, switch the Pattern Editor to Keyboard view. For more information, refer to Group view and Keyboard view.
In the top right corner of the Pattern Editor, click and hold the MIDI Dragger icon:

As you start dragging the icon the mouse cursor displays the name of the Pattern you are about to export:
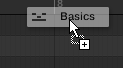
Drag the icon to your desktop or onto a MIDI channel of your host application.
The MIDI file is exported to the selected location.
Tip
You can even drag the MIDI Dragger icon onto another Sound or Group in Maschine! In this case, the MIDI file will be directly imported into a Pattern of the selected Group according to the rules described in section Importing MIDI to Patterns.
Exporting MIDI via the context menu
You can also render the selected Pattern to a MIDI file on your hard disk using the Export MIDI… entry in the context menu of the Sound or Group:
Select the Pattern you want to export MIDI from (refer to Selecting Patterns and Pattern banks).
To export MIDI from the entire Group, switch the Pattern Editor to Group view and right-click ([Ctrl]-click on macOS) the desired Group in the Group List (left of the Arranger) to open its context menu. You can also right-click ([Ctrl]-click on macOS) the Group name above the Sound List. To export MIDI from a particular Sound only, right-click ([Ctrl]-click on macOS) the desired Sound slot in the Sound List (left of the Pattern Editor) to open its context menu.
Select Export MIDI… in the context menu (the picture below shows the context menu for a Sound).
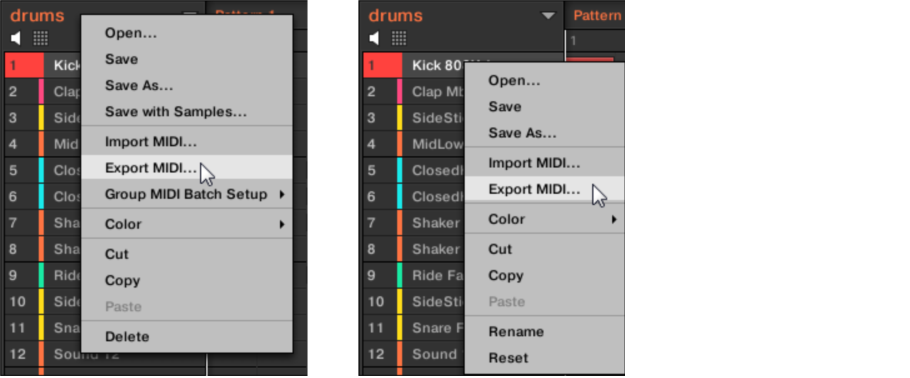
In the Export MIDI dialog that opens, navigate to the desired location on your computer, type a name for the MIDI file and click Save to confirm.
The MIDI file is exported to the selected location.
Sounds that do not contain note events in a Group Pattern are exported as empty MIDI tracks. This way, if you are exporting multiple Patterns and some Sounds in the Group only have notes in some of these Patterns, you will get a consistent assignment of notes to MIDI tracks across all exported Patterns. Also, when you export a Pattern and then re-import it into Maschine, the notes will always be mapped to the correct Sounds.
Importing MIDI to Patterns
You can import MIDI files (extension “.mid”) to Patterns. This allows you to use in Maschine MIDI files prepared with another application. This function is only available in the software.
Notice
Importing MIDI data into a Pattern that already contains data (note, modulation tracks, and MIDI tracks) will replace that data. As always, this can be undone both in the software or from your controller (refer to Undo/redo).
You can import MIDI files into Groups or into individual Sounds. You can do this via three methods: via the context menu of the Group/Sound, via drag-and-drop, or via the FILES pane of the Browser. You can even import multiple MIDI files at once. The following paragraphs describe each of these situations.
Importing a MIDI file to a Group
You can import a MIDI file to a whole Group. In particular, this allows you to import a drumbeat for an entire drum kit. You can do this via the Group’s context menu or via drag-and-drop.
Method 1: via the Group’s context menu
In the Group List (left of the Arranger), click the Group in which you want to import the MIDI file. This sets the focus to that Group and displays its Patterns in the Pattern Editor underneath.
Select the Pattern in which you want to import the MIDI file.
Right-click ([Ctrl]-click on macOS) the Group in the Group List and select Import MIDI… from the context menu.
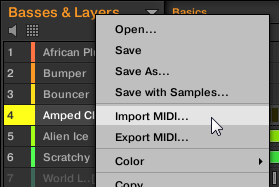
You can alternatively right-click ([Ctrl]-click on macOS) the Group name in the header above the Sound List and select the same entry.
In the Import MIDI dialog that opens, navigate to the desired MIDI file on your computer and click Open to confirm.
The MIDI file will be imported to the selected Pattern of the Group according to the import rules described below.
Method 2: via drag and drop
In the Group List (left of the Arranger), click the Group in which you want to import the MIDI file.
This sets the focus to that Group and displays its Patterns in the Pattern Editor underneath.
Select the Pattern in which you want to import the MIDI file.
Navigate to the desired MIDI file in the Explorer/Finder of your operating system or in the FILES pane of the Maschine Browser.
Drag the MIDI file onto the desired Group in the Group List left of the Arranger.
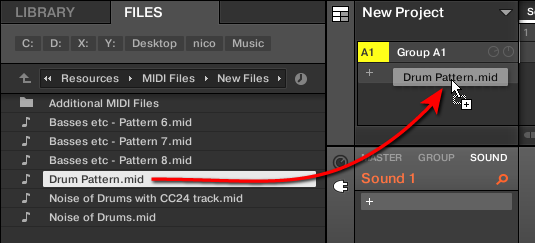
The MIDI file will be imported to the selected Pattern of the Group according to the import rules described below.
Tip
If the Pattern Editor is in Group view, you can also drag the MIDI file directly onto the Event area to import it to the Group!
MIDI to Group rules: When you import a MIDI file into a Group, Maschine assumes that the MIDI file contains data for different instruments (e.g., a drum kit), and the import will be performed accordingly. Your MIDI file will be imported as follows:
The imported MIDI data will replace any existing data (notes, MIDI tracks, and modulation tracks) in the selected Pattern.
If the MIDI file contains data on a single MIDI channel: MIDI notes will be imported to the different Sounds of your Group according to their pitch:
The MIDI note data will be allocated to the various Sounds in your Group according to the Root Note parameter in the MIDI page of the Group’s Input properties, refer to Triggering Sounds via MIDI notes. This parameter defines the lowest note in the Group, which is tied to Sound slot 1.Example: If Root Note is set to C1 (which corresponds to MIDI note number 36 in the Maschine convention), all notes with MIDI note number 36 in the MIDI file will be imported to the first Sound (in Sound slot 1); all notes with MIDI note number 37 will be imported to the second Sound (in Sound slot 2); etc.
For each Sound, MIDI notes will be imported at the default root note C3 — this ensures that the imported MIDI data will correctly trigger all Maschine factory kits.
The MIDI CC data will be copied to all Sounds for which MIDI notes have been imported.
If the MIDI file contains data on multiple MIDI channels, the data from the individual channels will be imported to individual Sounds:
If any channel from the MIDI file corresponds to the MIDI input channel of a particular Sound in your Group, the data on that channel will be imported to that Sound. The MIDI input channel of each Sound is defined by the Channel parameter in the MIDI page of the Sound’s Input properties. For more information, refer to Triggering Sounds via MIDI notes.
For all other channels of the MIDI file (i.e. channels that doesn’t correspond to any MIDI input channel of a Sound in your Group), the data from individual channels will be imported to individual Sounds that have not received any data during the current import yet: the channel with the lowest number will be imported to the Sound with the lowest slot number, and so on. For example: if the MIDI file contains data on channels 2, 3, and 5, and the MIDI input channel isn’t defined in any Sound of your Group, Sound slot 1 will receive the data from channel 2, Sound slot 2 from channel 3, and Sound slot 3 from channel 5.
Importing a MIDI file to a Sound
You can import a MIDI file to a single Sound. For example, this can be useful to import a melodic part for a single instrument. You can do this from the Sound’s context menu, via drag-and-drop, or via the FILES pane of the Browser.
Method 1: via the Sound’s context menu
In the Group List (left of the Arranger), click the Group containing the Sound for which you want to import the MIDI file.
This sets the focus to that Group and displays its Sounds and Patterns in the Pattern Editor underneath.
Select the Pattern in which you want to import the MIDI file.
Right-click ([Ctrl]-click on macOS) the desired Sound in the Sound List and select Import MIDI… from the context menu.
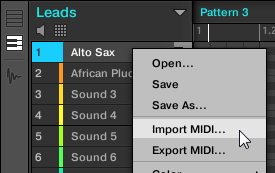
In the Import MIDI dialog that opens, navigate to the desired MIDI file on your computer and click Open to confirm.
The MIDI file will be imported to the selected Pattern for that Sound according to the import rules described below.
Method 2: via drag and drop
In the Group List (left of the Arranger), click the Group containing the Sound for which you want to import the MIDI file.
This sets the focus to that Group and displays its Sounds and Patterns in the Pattern Editor underneath.
Select the Pattern in which you want to import the MIDI file.
Navigate to the desired MIDI file in the Explorer/Finder of your operating system or in the FILES pane of the Maschine Browser.
Drag the MIDI file onto the desired Sound in the Sound List (left of the Pattern Editor).
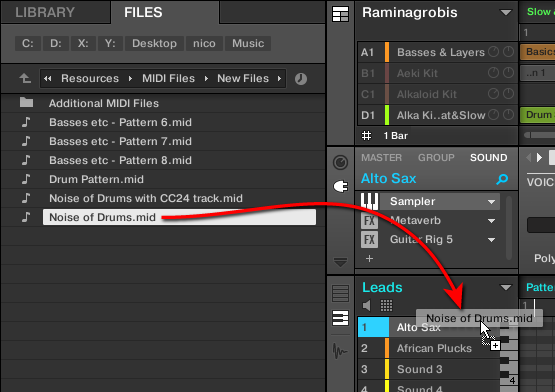
The MIDI file will be imported to the selected Pattern for that Sound according to the import rules described below.
Tip
If the Pattern Editor is in Keyboard view, you can also drag the MIDI file directly onto the Event area to import it into the focused Sound!
Method 3: using the FILES pane of the Browser
In the Group List (left of the Arranger), click the Group containing the Sound for which you want to import the MIDI file.
This sets the focus to that Group and displays its Sounds and Patterns in the Pattern Editor underneath.
Select the Pattern in which you want to import the MIDI file.
Set the focus to the desired Sound by clicking it in the Sound List (left of the Pattern Editor).
Open the FILES pane of the Browser and navigate to the desired MIDI file (refer to Loading and importing files from your file system to learn how to use the FILES pane).
Double-click the MIDI file or click it and press [Enter] on your computer keyboard.
The MIDI file will be imported to the selected Pattern for the focused Sound according to the import rules described below.
MIDI to Sound – import rules: When you import a MIDI file into a Sound via its context menu, Maschine assumes that the MIDI file contains data for one single instrument (e.g., a bass or a lead synthesizer), and the import will be performed accordingly. Your MIDI file will be imported as follows:
The imported MIDI data will replace any existing data (notes, MIDI tracks, and modulation tracks) for that Sound in the selected Pattern. For the other Sounds the Pattern content won’t be affected.
Any channel information in the MIDI file will be disregarded. All notes will appear in the same Pattern for that particular Sound. If the same MIDI note number and MIDI CC number are used in different channels in the MIDI file, the note and automation data will be merged. Conflicts will be resolved as follows:
Note duplicates: only the longest note is kept.
Modifiers (Mod Wheel, Pitch Bend, etc.), Velocity, and MIDI CCs: higher values are kept.
Importing multiple MIDI files to a Sound or a Group
You can even select multiple MIDI files and import them all to a Sound or Group at once!
Contrary to the single-file import described above, importing multiple files doesn’t replace the content of the selected Pattern, instead, for each MIDI file in the selection, a new Pattern will be created.
Tip
As a consequence, when importing multiple MIDI files you don’t need to select any particular Pattern beforehand.
To import multiple MIDI files to a Group:
Select multiple MIDI files in your operating system or in the FILES pane of the Browser.
Drag and drop the multiselection onto the desired Group in the Group List.
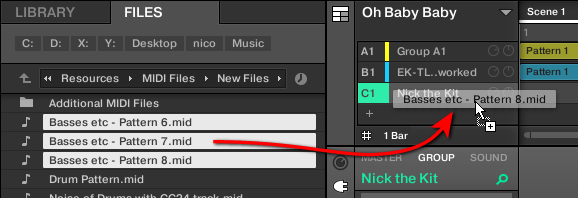
New Patterns will be created for that Group. Each new Pattern receives the data from one of the MIDI files and each MIDI file will be imported as a single MIDI file to that Group. Refer to the section above for a detailed description.
To import multiple MIDI files to a Sound:
Select multiple MIDI files in your operating system or in the FILES pane of the Browser.
Drag and drop the multiselection onto the desired Sound in the Sound List.
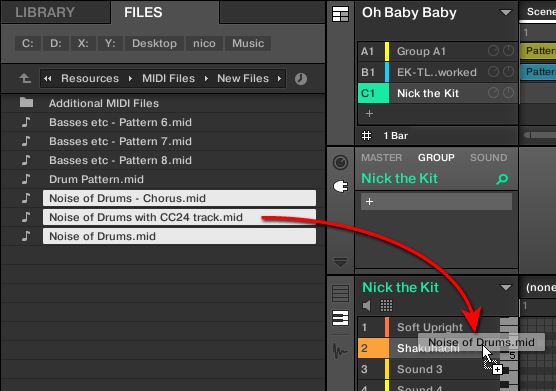
New Patterns will be created for that Sound in the Group, each new Pattern receiving the data from one of the MIDI files. Only this Sound will contain notes in these new Patterns. Apart from this, each MIDI file will be imported as a single MIDI file to that Sound. Refer to the section above for a detailed description.
Tip
Alternatively, if you have selected the MIDI files in the FILES pane of the Browser, simply press [Enter] on your computer keyboard to import the multiselection to the focused Sound!
Working with Clips
This section explains in detail how to work with Clips.
Tip
For an overview of Patterns and Clips, refer to Working with Patterns and Clips.
Creating a Clip
A new Clip can be created anywhere in the Arranger in the Song view.
Note
Clips can also be created directly on top of Patterns. In this instance, you will only hear the Clip during playback.
Converting Patterns into Clips
You can convert Patterns into Clips in various ways:
Convert single Patterns into Clips. For more information, refer to Converting a single Pattern into a Clip.
Convert the Patterns within a Scene into Clips. For more information, refer to Converting a Scene into Clips.
Convert the Patterns within the loop range into Clips. For more information, refer to Converting the loop brace into Clips.
Converting a single Pattern into a Clip
A single pattern can be converted to a Clip using the context menu.
To convert a Pattern into a Clip in the software:
Right-click on the Pattern that you want to convert and select Convert to Clip from the context menu.
Tip
You can also use the keyboard shortcut [Ctrl] + [.] (Windows) or [cmd] + [.] (macOS) to convert the selected Pattern into a Clip.
Converting a Scene into Clips
You can convert all the Patterns within a Scene into Clips.
Converting a Scene into Clips in the software
To convert a Scene into a Clip in the software:
Right-click on the Scene that you want to convert and select Convert to Clips from the context menu.
Tip
You can also use the keyboard shortcut [Ctrl] + [.] (Windows) or [cmd] + [.] (macOS) to convert the selected Scene into Clips.
Converting a Scene into Clips on the controller
To convert the Patterns within a Scene into Clips using the controller:
Press SHIFT + SCENE (Section).
Turn Knob 2 to select the Scene you want to convert.
Press Button 3 (CONVERT).
The Scene is converted into clips and added to the Song view.
Converting the loop brace into Clips
You can convert all the Patterns within the loop brace into Clips at once.
Converting the loop brace into Clips in the software
To convert the Patterns within the loop brace into Clips in the software:
Right-click on the loop brace and select Convert to Clips from the context menu.
Tip
You can also use the keyboard shortcut Ctrl + . (Windows) or cmd + . (macOS) to convert Patterns within the loop brace once it has been selected.
Converting the loop brace into Clips on the controller
To convert Patterns within the loop brace to Clips:
Press and hold SHIFT + RESTART (Loop).
Press Button 3 (CONVERT).
All Patterns within the loop brace are converted into Clips.
Switching the focus between Patterns and Clips
When arranging your song in the Song view you may need to switch focus between editing Patterns or Clips. When you switch focus, the content of the selected Pattern or Clip automatically becomes available in the Editor. Here you can edit your content as required. Additionally, you will notice that Clips can also be freely moved here and placed anywhere on the timeline.
To switch between editing Patterns and Clips in Song view:
Press [C] on your computer keyboard.
The software switches the focus between the Pattern (in the last selected Section) and the last selected Clip.
Inserting Scenes to an arrangement as Clips
Once you are satisfied with a Scene you can insert it directly as Clips into your arrangement in the Song view.
Deleting a Clip
Clips can be deleted from the Arranger and Editor in Song view.
Doubling a Clip
The size of a Clip can be doubled in the Song view.
Duplicating a Clip
Using the duplicate function enables you to make a copy of a Clip.
Clearing a Clip
Clearing a Clip allows you to remove all of its Events, leaving the Clip empty.
Adjusting the Length of a Clip
In the Song view, you can adjust the length of a Clip. When you adjust the length, it snaps to the nearest position on the grid, using the current Arrange Grid value. You can override the grid by holding down SHIFT while dragging the Clip.
Adjusting the Start of a Clip
In Song view, you can adjust the start of a Clip. When you adjust the start point, it snaps to the nearest position on the grid, using the current Arrange Grid value.
Repositioning a Clip
In the Song view, a Clip can be moved to a different position within the same Group. This enables you to place a Clip exactly where you want on the timeline.
Renaming a Clip
Clips can be renamed in Song view to replace the default name with a custom name of your own choice.
Coloring a Clip
By default, Clips take the color of the Group they belong to, but you can adapt the color of each individual Clip to your needs.