Circular overview
Learn the main concepts and interface elements of Circular.
This chapter introduces the main controls and areas of Circular.
When you first open Circular, you see the Play page along with a set of global controls. These global controls are always visible at the top and bottom of the instrument window:
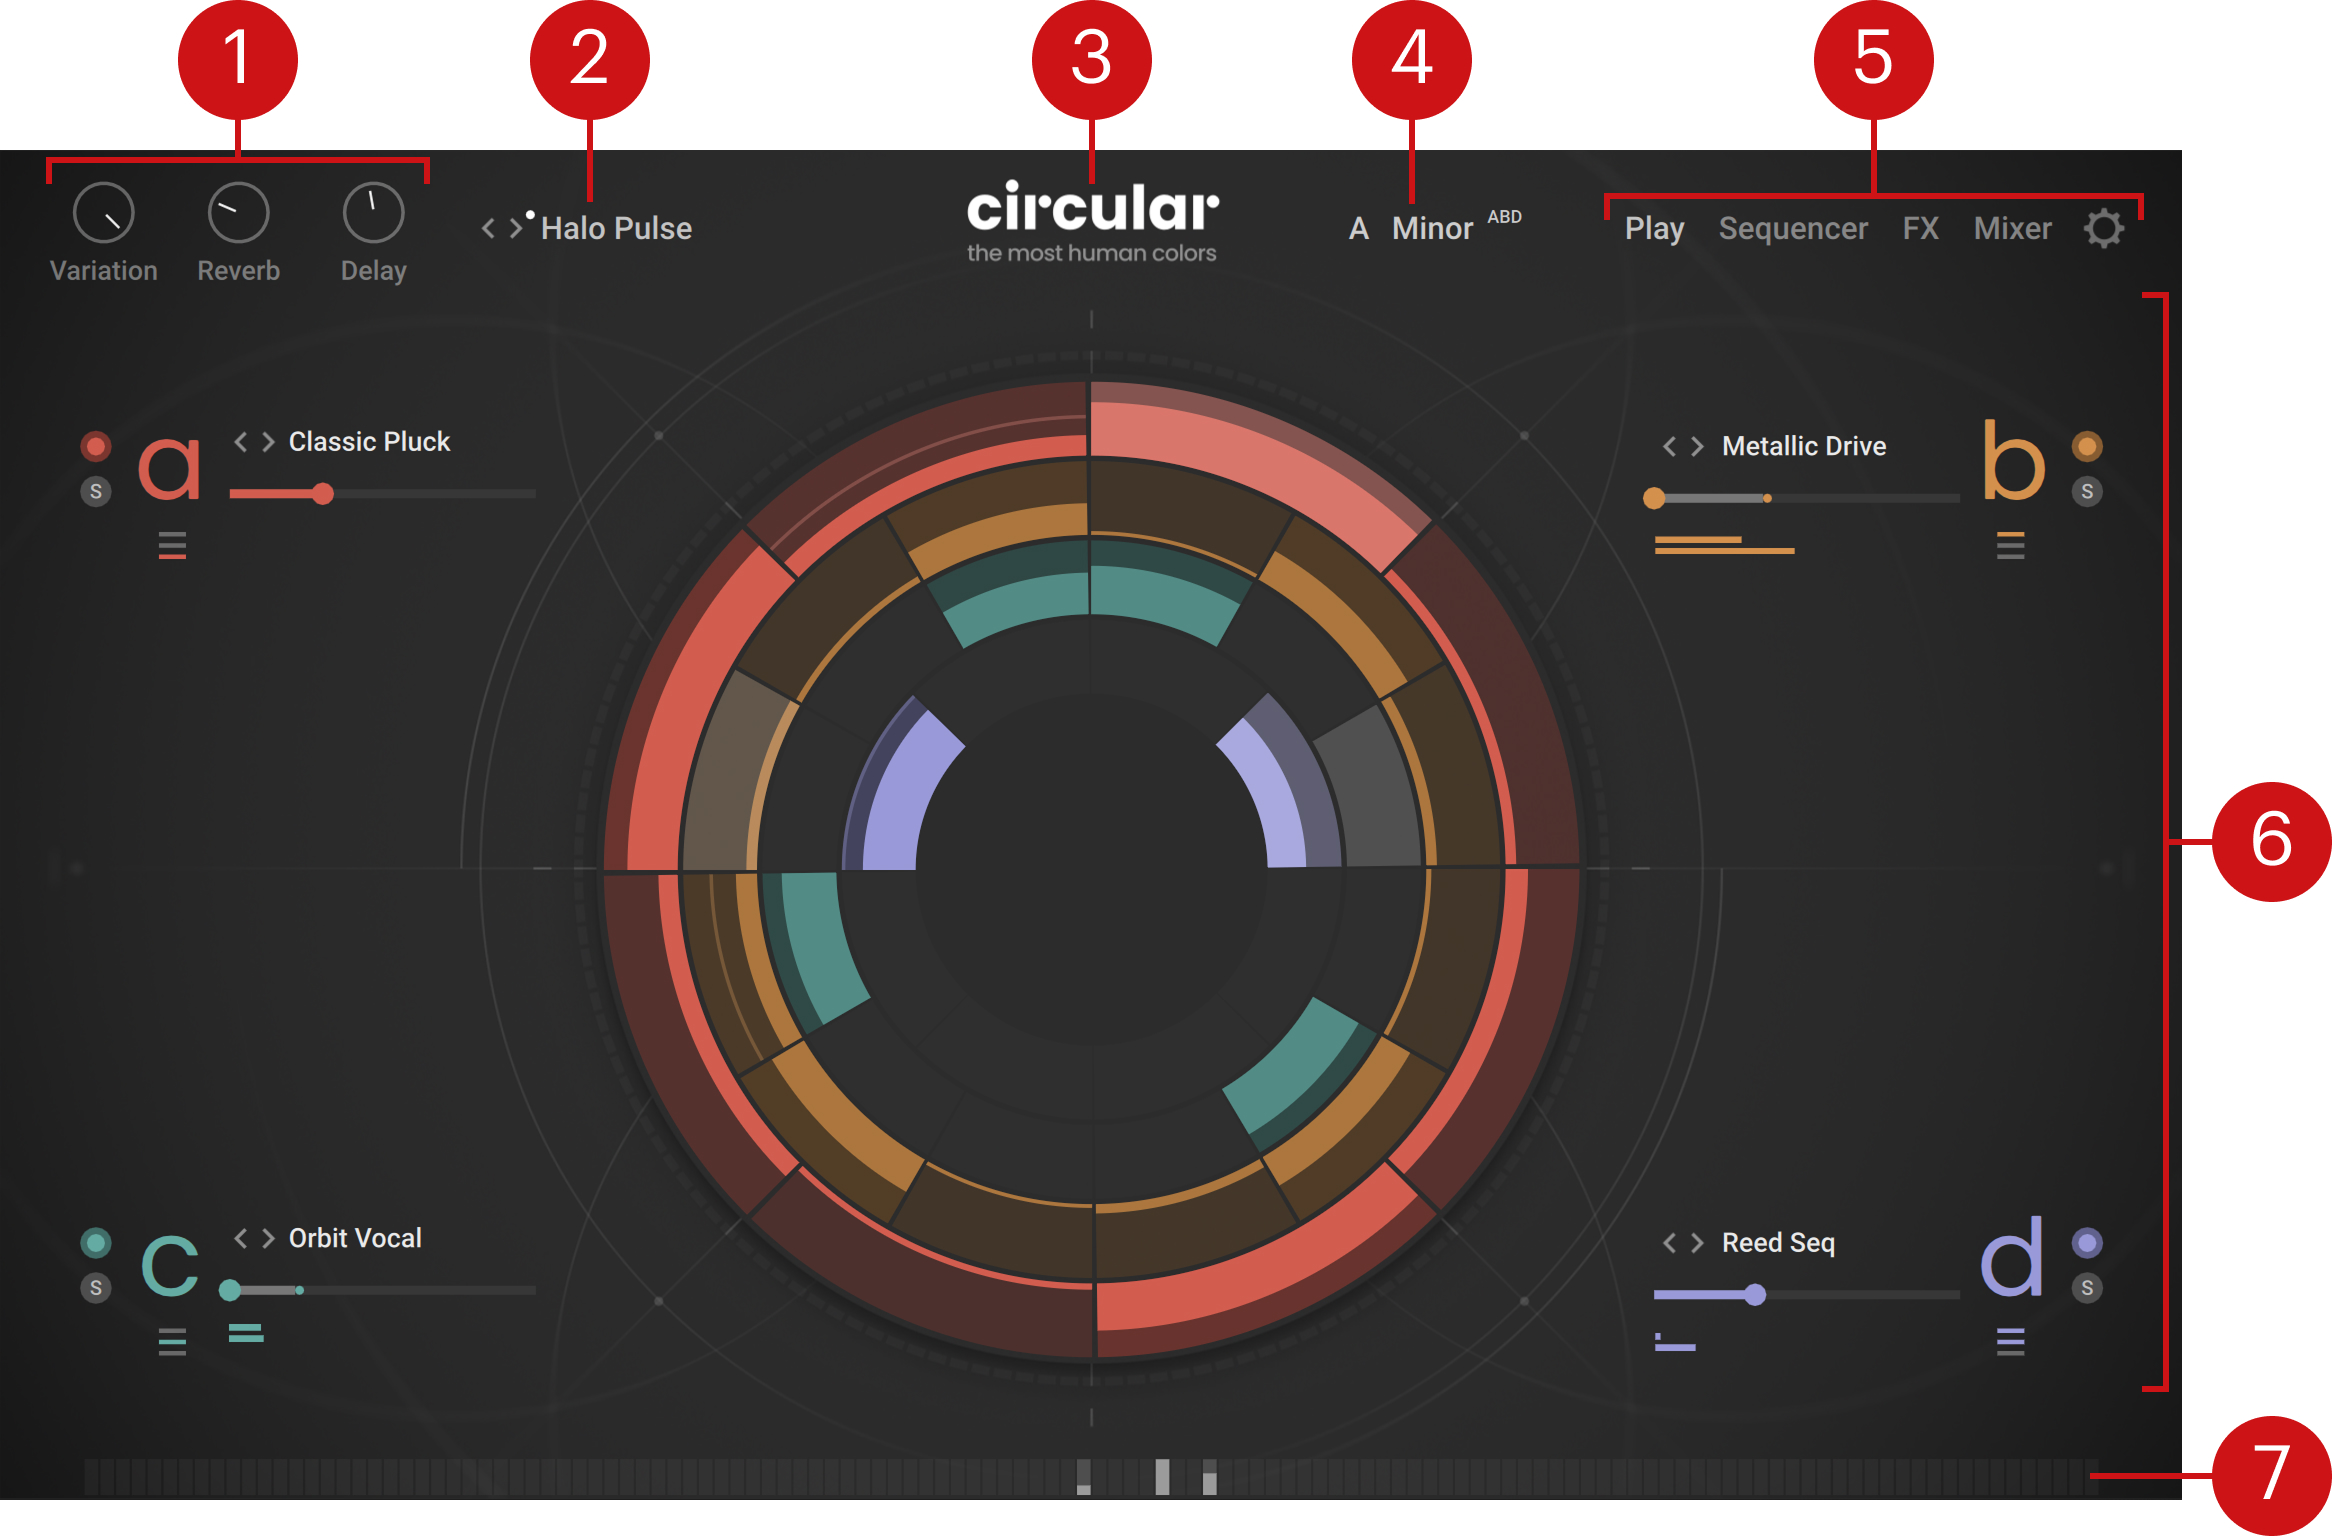
Macro knobs: The three Macro knobs (Variation, Reverb, and Delay) can be freely assigned to any number of parameters in Circular. This lets you modulate whole sets of parameters spread across the instrument using a single knob. Assigning parameters to the Macro knobs is done using the Mod Assign section (refer to Assigning and editing modulations). You can [option]/[Alt] + click either Macro knob to show all its current assignments. By default, the Variation knob is assigned to MIDI CC1 (Modulation Wheel) and CC11 (Expression). You can edit the MIDI assignments of the Macro knobs using the common procedures in Kontakt (refer to the Kontakt user guide for more information).
Note
The labels of the three Macro knobs (Variation, Reverb, and Delay) only refer to their usual assignments in many factory presets. They do not limit by any means the type of parameter that can be assigned to their knob.
Instrument Preset selector: Shows the name of the loaded instrument preset. Instrument presets contain values for all the parameters of the instrument. They correspond to Kontakt Snapshots. You can click the preset name to open the Preset Browser and choose another preset from the factory library, or click the left and right arrows to cycle through the presets in the current Result list of the Preset Browser. A little white dot next to the left/right arrows indicates that some tags are selected in the Browser, that is, the Result list does not currently include all the instrument presets available. For more information on the Preset Browser, refer to Browsers.
About: Clicking the instrument name opens the About screen, which displays the credits for this instrument. You can click the About screen to close it again.
Scale selector: Shows and lets you change the selected scale. The notes that you play will be automatically mapped to the closest notes in that scale. This also applies to the notes generated in specific parts of the sequencer. For more information, refer to Scale selector.
Page buttons: Clicking either button opens the corresponding page of the instrument.
Play: Opens the Play page (the instrument’s default page, depicted above). The Play page contains a set of basic controls for each of the four layers, the real-time visualization of your running sequences, as well as additional panels to quickly generate a regular or a random sequence in either layer, and to export MIDI sequences to your DAW. Refer to Play page.
Sequencer: Opens the Sequencer page, which lets you precisely configure the various sequences used in each layer. Refer to Sequencer page.
FX: Opens the FX page, where you can set up effects or effect chains for each of the four layers A–D, for the additional Grain FX bus, for the Send channels, and for the main output of the instrument. Refer to FX page.
Mixer: Opens the Mixer page, which lets you mix the four layers A–D and the additional effect channels. Refer to Mixer page.
Settings (cog wheel icon): Opens the Settings page, which contains settings for MIDI control and user samples. Refer to Settings page.
Central area: This is the biggest part of the instrument and it shows the various pages and Browsers.
Input Note indicator: At the bottom of the instrument, each little cell in the row represents a key. The cells light up to indicate incoming notes. As you hold notes on your keyboard, the brighter vertical bars in the lit cells indicate by default the notes’ Aftertouch values. You can switch these bars to show instead the MPE Slide values in the Settings page. On the Sequencer, FX, and Mixer pages, the colored cell indicates the key whose modulation value (Aftertouch or Slide) is used in the modulation meters available on the page.
Note
When you hover over specific controls of Circular with your mouse, info texts appear over the Input Note Indicator at the bottom of the instrument, providing useful information like the keyboard modifiers used for the control’s secondary functions. You can deactivate these info texts in the Settings page.
Scale selector
 |
The Scale selector shows and lets you change the selected scale. The notes that you play will be automatically mapped to the closest notes in that scale. In the Parameter Lane of the Sequencer page, this note mapping also applies to the notes generated by the Note sequence and by the Step effects from the following categories: Arp, Ornaments, Grace Notes, and some Grain effects.
You can select another scale by clicking the displayed scale and choosing a root note (left column) and a scale mode (right column) from the menu:
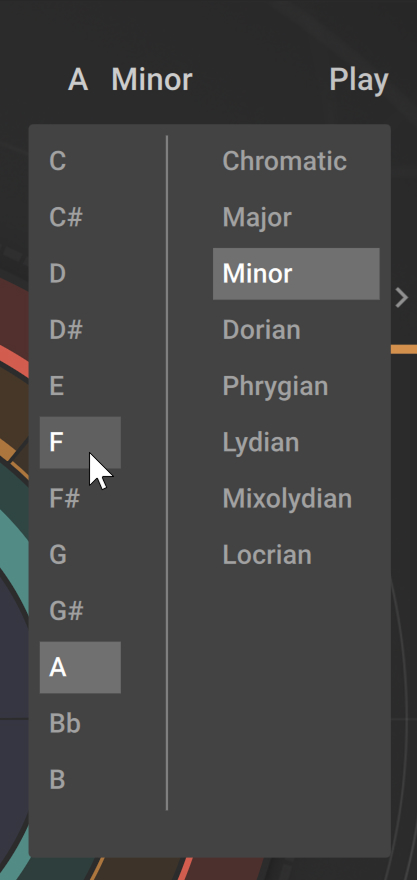 |
You can deactivate the note mapping by selecting Chromatic at the top of the right column: This ensures that the instrument will use all 12 semitones of the chromatic scale.
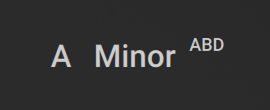
In some instruments presets, particular Note, Tune, or Step effect sequences are scale-dependent, that is, they contain or generate pitches other than octaves. For these presets, the Scale selector shows little A, B, C, and/or D letters to indicate the affected layer(s):
 |
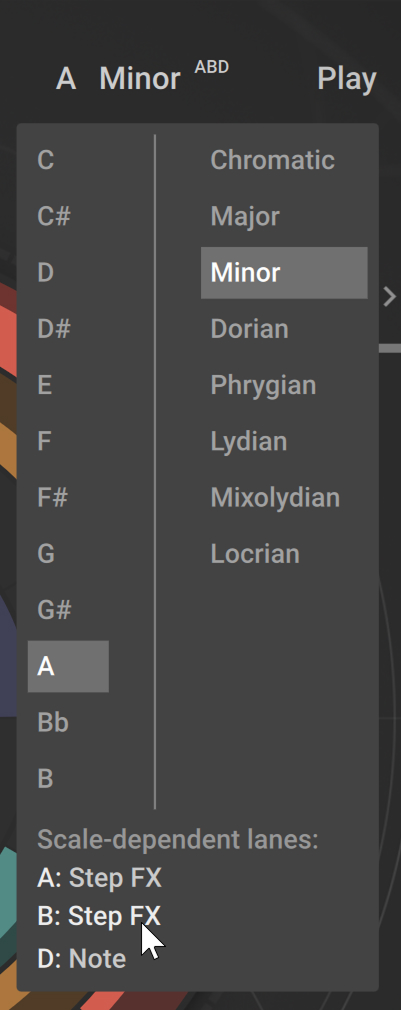
When you click the Scale selector for these presets, the bottom of the menu will list the particular sequences in the affected layers. You can select any entry from the list to jump to the corresponding sequence in the Sequencer page:
 |
For these instrument presets, if Chromatic is selected in the Scale selector, a red exclamation mark will appear next to it:
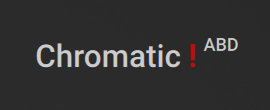 |
This exclamation mark indicates that the scale-dependent sequences used in this preset might generate non-diatonic notes, that is, notes that are conflicting with the harmony of the chord that you are playing. To prevent these possibly unwanted notes, you have the following possibilities:
Play single notes. This removes any conflict with scale-dependent sequences. Some presets are designed to be played monophonically.
Select any other mode than Chromatic in the Scale selector. This will force the played notes and the notes in the scale-dependent sequences to match the selected scale, effectively removing any possible conflict.
Open the Scale selector, click the affected sequences listed at the bottom, and modify these sequences to remove their scale dependency.
Switch to a preset that is not scale-dependent. In the Preset Browser, you can select the Chromatic Compatible tag to quickly narrow the Result list those presets. For more information on the Preset Browser, refer to Browsers.
Note
The Tune setting, which is located in the Sound Preset section of the Sound Panel in the Sequencer page, does not follow the selected scale. For presets with Tune values other than octaves, if you want to force all notes to the selected scale, you can use the Move Tuning to Note Lane command from the Sound Preset Edit menu.
Circular, MPE, and polyphonic aftertouch
Circular, as an instrument supporting MPE (MIDI Polyphonic Expression), structures its MIDI channels by assigning each played note to a separate channel, allowing for independent control of pitch, aftertouch, and slide (MIDI controller 72) per note. Channel 1 acts as the main channel used for global messages, while channels 2–16 handle individual note data.
When Circular receives MIDI data exclusively on channel 1, it behaves like a standard, non-MPE instrument. This setup enables Circular to adapt seamlessly between expressive MPE control and conventional MIDI input.
To ensure Circular’s basic functionality, the default MIDI input channel setting Omni, in the Info view of its Instrument header, must be left unchanged:
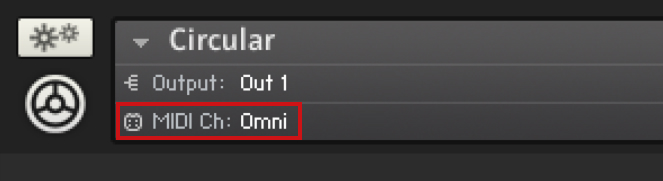 |
This means that Circular cannot be used alongside other instruments in the rack that share the same Kontakt MIDI input port.
The Kontrol S-Series MK3 keyboards have no MPE functionality (distributing pressed notes to different MIDI channels) but do send MIDI polyphonic aftertouch data on channel 1. Polyphonic aftertouch gives you the same outcome as MPE aftertouch in Circular without restrictions. When using a MPE controller or keyboard, you gain pitch and slide modulation per key.