Synth Collection
From vintage gear to sci-fi-ready FM and modular, the synth collection comes with a huge range of electronic sounds.
All the pads, leads, arps, and basses you could ever need, and the additional Soundscapes category for evolving, cinematic textures. From the earliest vintage gear to sci-fi-ready FM and modular rigs, the Synths collection contains a huge range of electronic sounds, along with high-grade effects that let you dial in sweeping filters, echoing delays, roomy reverbs, and more.
Melodic Instruments in the Synth Collection
Instruments in the Synth Collection feature a dedicated set of parameters that enable you to tweak classic synthesizer controls. Some of the Instruments additionally provide an arpeggiator or a sequencer, which can be controlled using dedicated pages. Each Instrument consists of two sound layers A and B, producing a rich sound not easily achieved with a single synthesizer voice.
The Main page consists of the following parameters:
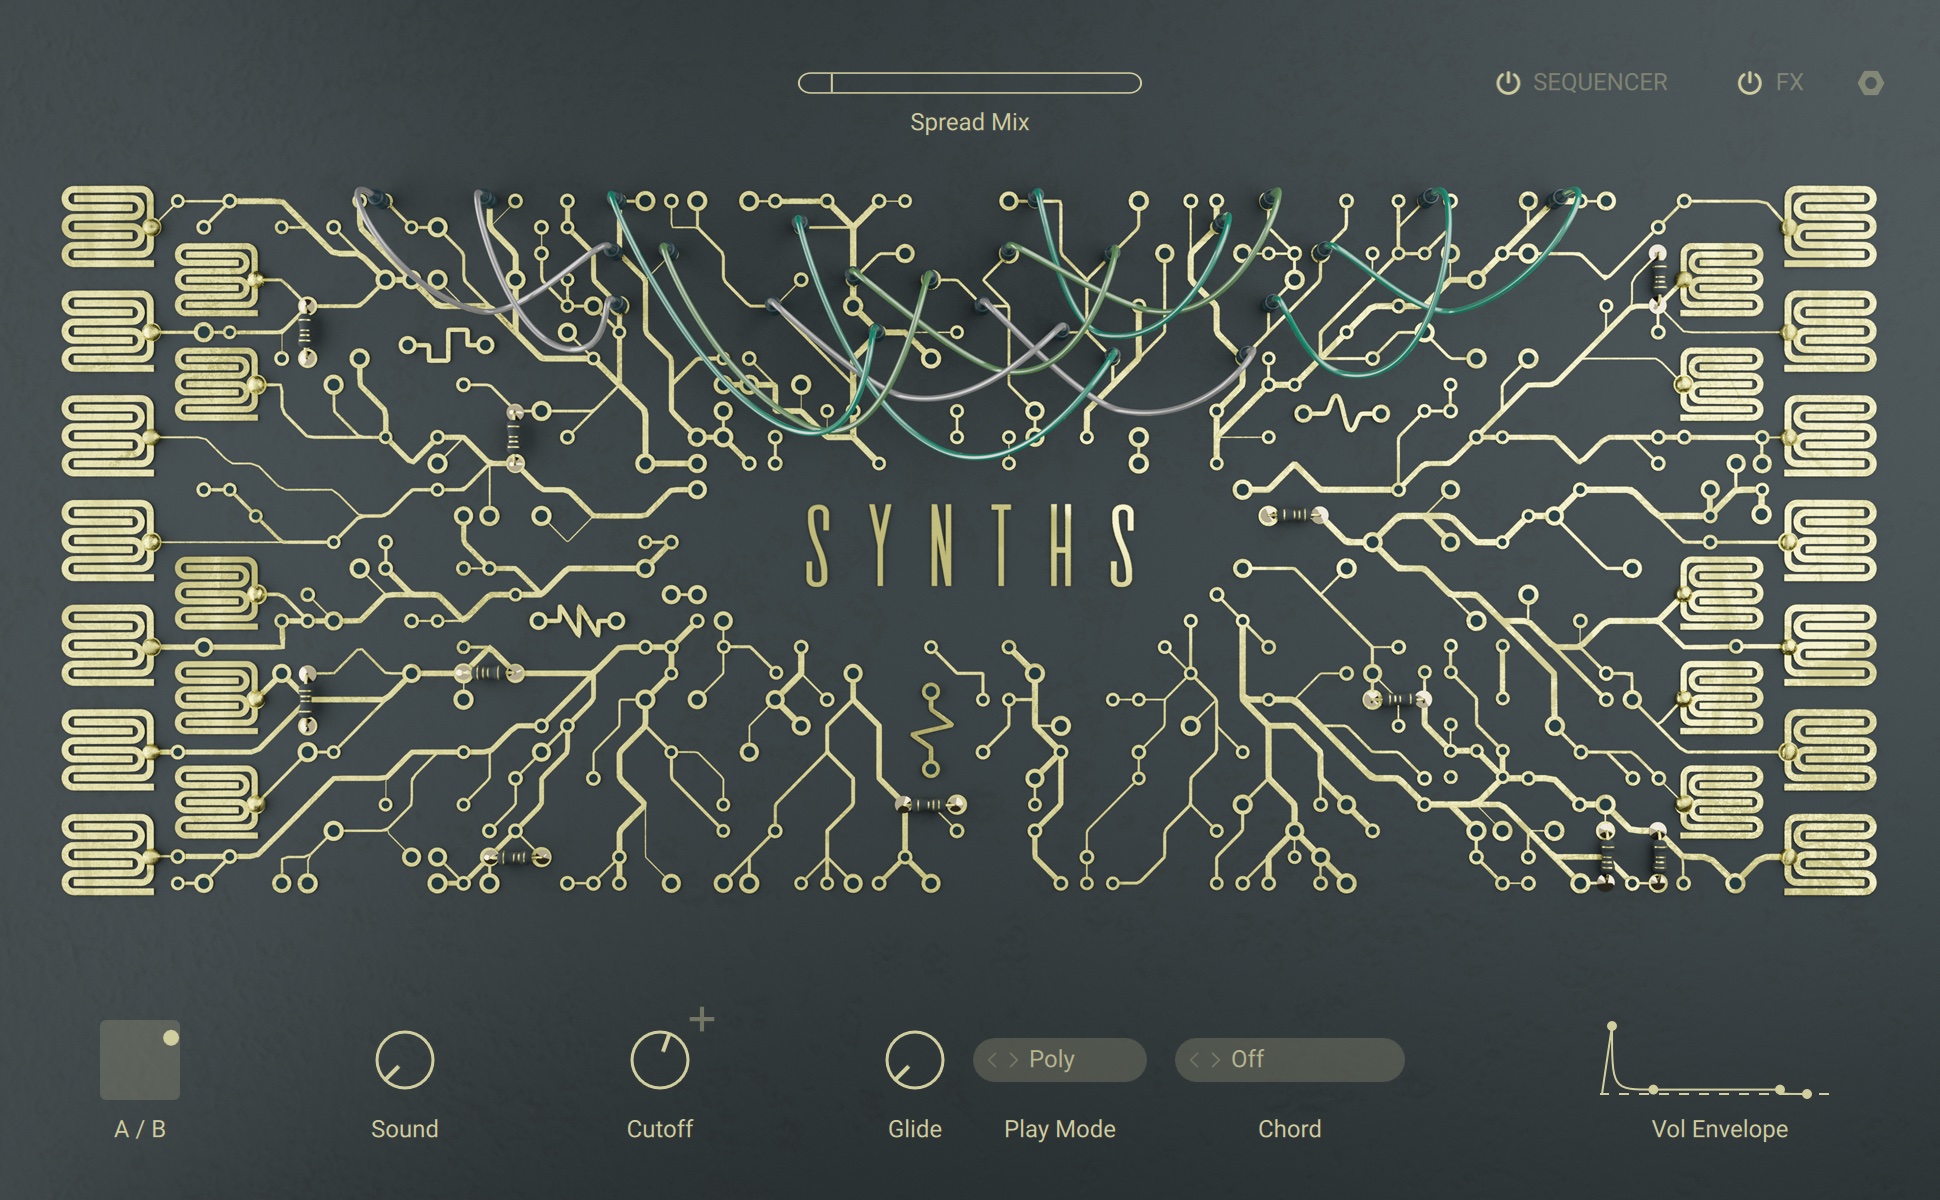
Spread Mix: Adjusts the stereo width by spreading two sample sets between the left and right channel. Additionally, a subtle detuning effect is added in the second half of the control's range. This parameter is controlled by the modulation wheel.
Sequencer/Arp On/Off: Switches the sequencer or arpeggiator on or off.
SEQUENCER/ARP: Shows the Sequencer or Arp (arpeggiator) page if available for the respective Instrument. For more information, refer to Sequencer Page and Arp Page.
A / B: Adjusts the level of the two sound layers A and B. The X-axis controls the level of layer A, while the Y-Axis controls the level of layer B.
Sound: Morphs between different timbre settings. Turning the control fully to the left produces a neutral sound.
Cutoff: Adjusts the cutoff frequency of the filter. Additional filter settings can be accessed using the + button next to the Cutoff control.
+ (Filter Panel): Opens the Filter panel that provides additional filter settings, including the filter type, resonance, and modulation. For more information, refer to Filter Panel.
Glide: Adjusts the duration of the glissando effect, which makes one pitch glide to the next when playing a second MIDI note at the same time. Glide will only take effect if Play Mode is set to Mono or Legato.
Play Mode: Selects one of three modes that determine the Instrument's response to MIDI input. Poly allows multiple notes to be played polyphonically. Mono only allows one monophonic note to be played at the same time. Legato only acquires new pitch information when playing a second MIDI note at the same time without starting a new note event.
Chord: Selects a chord to be played when pressing a single key. When Off is selected, keys trigger individual notes. You can open the drop-down menu by clicking on the name and selecting an entry from the list. Alternatively, you can use the left and right arrow buttons to select the previous or next entry, respectively.
Vol Envelope: Adjusts the Instrument's volume envelope, which consists of attack, decay, sustain, and release stages. You can adjust each envelope stage by clicking and dragging the individual segments in the display.
Filter Panel
The Filter panel provides additional filter settings, including the filter type, resonance, and modulation.
The panel consists of the following menus and parameters:

Filter Type: Selects either the Lowpass or Highpass filter type. When Lowpass is selected, frequency content above the cutoff frequency is attenuated. When Highpass is selected, frequency content below the cutoff frequency is attenuated.
Resonance: Adjusts the resonance amount of the filter. Turning the control to the right makes the frequency content at the cutoff frequency more pronounced.
Vel->Freq: Adjusts the amount of velocity sensitivity for the cutoff frequency. When set to 0, the cutoff frequency does not change depending on note velocity. When turning the control to the right, the cutoff frequency changes according to the note velocity to a variable degree.
Env Amount: Adjusts the amount of modulation applied from the the Filter Envelope to the cutoff frequency.
Filter Envelope: Adjusts the Instrument's filter envelope, which consists of attack, decay, sustain, and release stages. You can adjust each envelope stage by clicking and dragging the individual segments in the display.
Sequencer Page
The Sequencer page provides access to parameters and settings related to the sequencer pattern and its playback.
This page consists of the following menus and parameters:

Rate: Switches between different tempo divisions relative to the host tempo. You can open the drop-down menu by clicking on the name and selecting an entry from the list. Alternatively, you can use the left and right arrow buttons to select the previous or next entry, respectively.
Duration: Adjusts the note length for the pattern playback.
Swing: Adjusts the amount of swing added to the pattern playback.
Steps: Adjusts the length of the pattern in number of steps.
Pattern Display: Shows the position of the playback relative to the pattern.
Arp Page
The Arp (arpeggiator) page provides access to parameters and settings related to the arpeggiator pattern and its playback.
This page consists of the following menus and parameters:
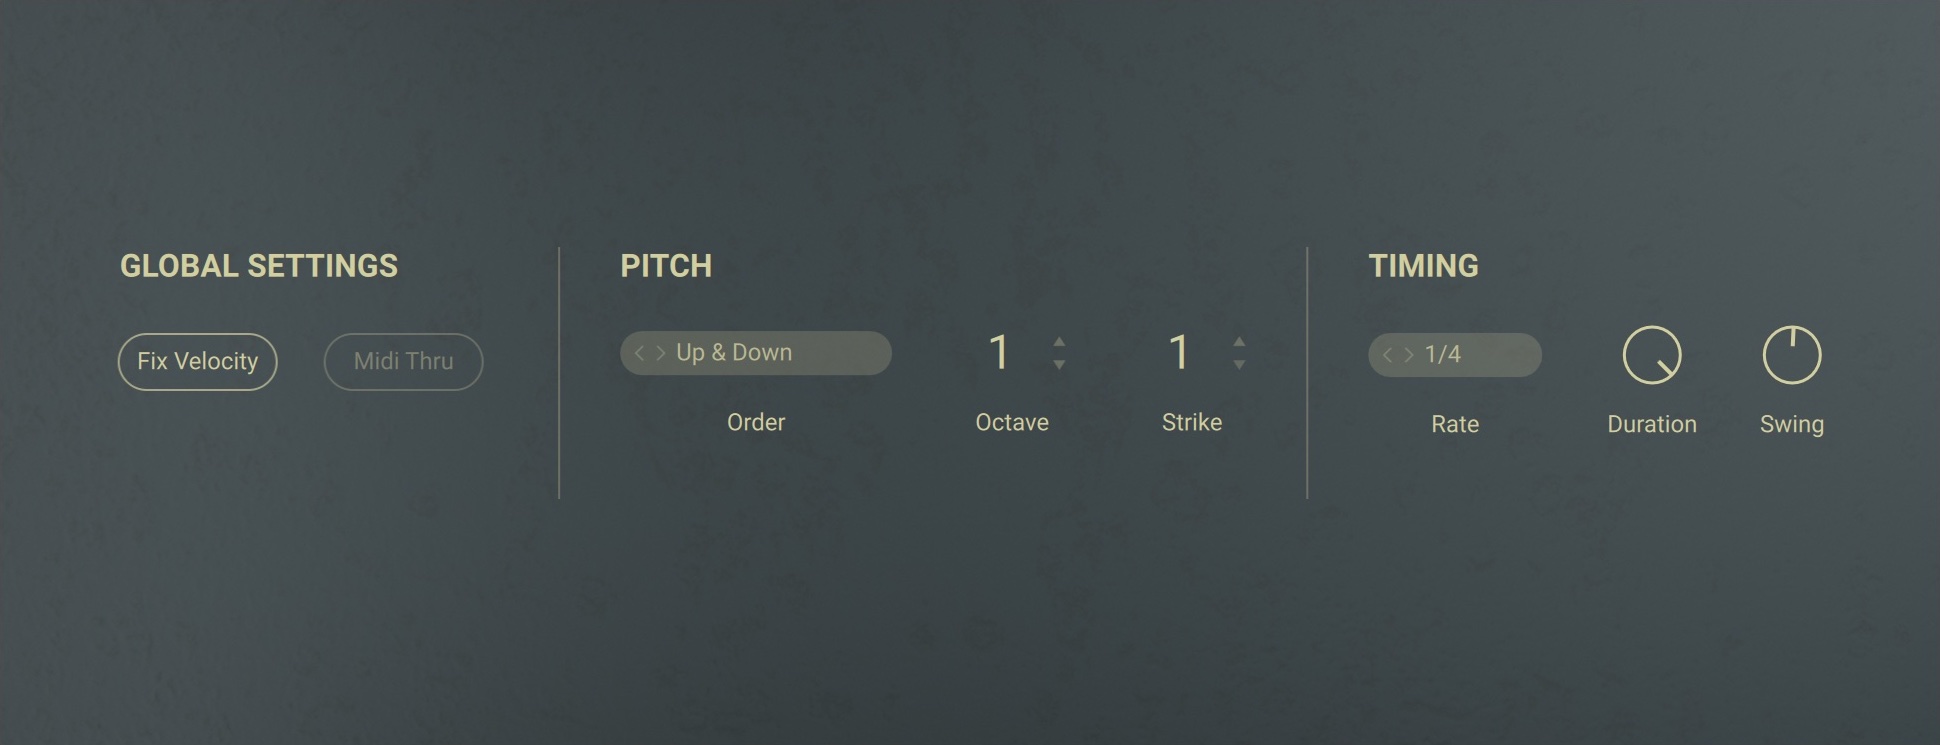
Fix Velocity: Switches fixed velocity mode on or off. When switched on, the arpeggiator pattern will play at full velocity independently of the note input. When switched off, the arpeggiator pattern will play at the velocity according to the note input.
Latch: Switches key latching for the patterns on or off. When switched on, the pattern keeps playing even when the key is released.
Order: Selects the playback order of pitches in the arpeggiator pattern. You can open the drop-down menu by clicking on the name and select an entry from the list. Alternatively, you can use the left and right arrow buttons to select the previous or next entry, respectively.
Octave: Adjusts the number of octaves included in the arpeggiator pattern in the range from -6 to +6 octaves.
Strike: Adjusts the number of note repeats added to the arpeggiator pattern.
Rate: Switches between different tempo divisions relative to the host tempo. You can open the drop-down menu by clicking on the name and selecting an entry from the list. Alternatively, you can use the left and right arrow buttons to select the previous or next entry, respectively.
Duration: Adjusts the note length for the pattern playback.
Swing: Adjusts the amount of swing added to the pattern playback.
Drum and Percussion Instruments in the Synth Collection
Drum Instruments have a dedicated set of parameters that enable you to explore rhythmic variations by selecting different patterns and altering the playback behaviour.
You can play tones in the range from C0 to B0, single drum hits in the range from C1 to B2, and trigger pattern playback in the range from C3 to B3.
Each Instrument contains a kit consisting of a number of different drum pieces. You can edit parameters on both the Main page and the Mixer page for each drum piece individually.
To select a drum piece for editing, activate Select by MIDI and play the respective note, or go to the Mixer page and use the Drum Piece selector.
The Main page consists of the following parameters:
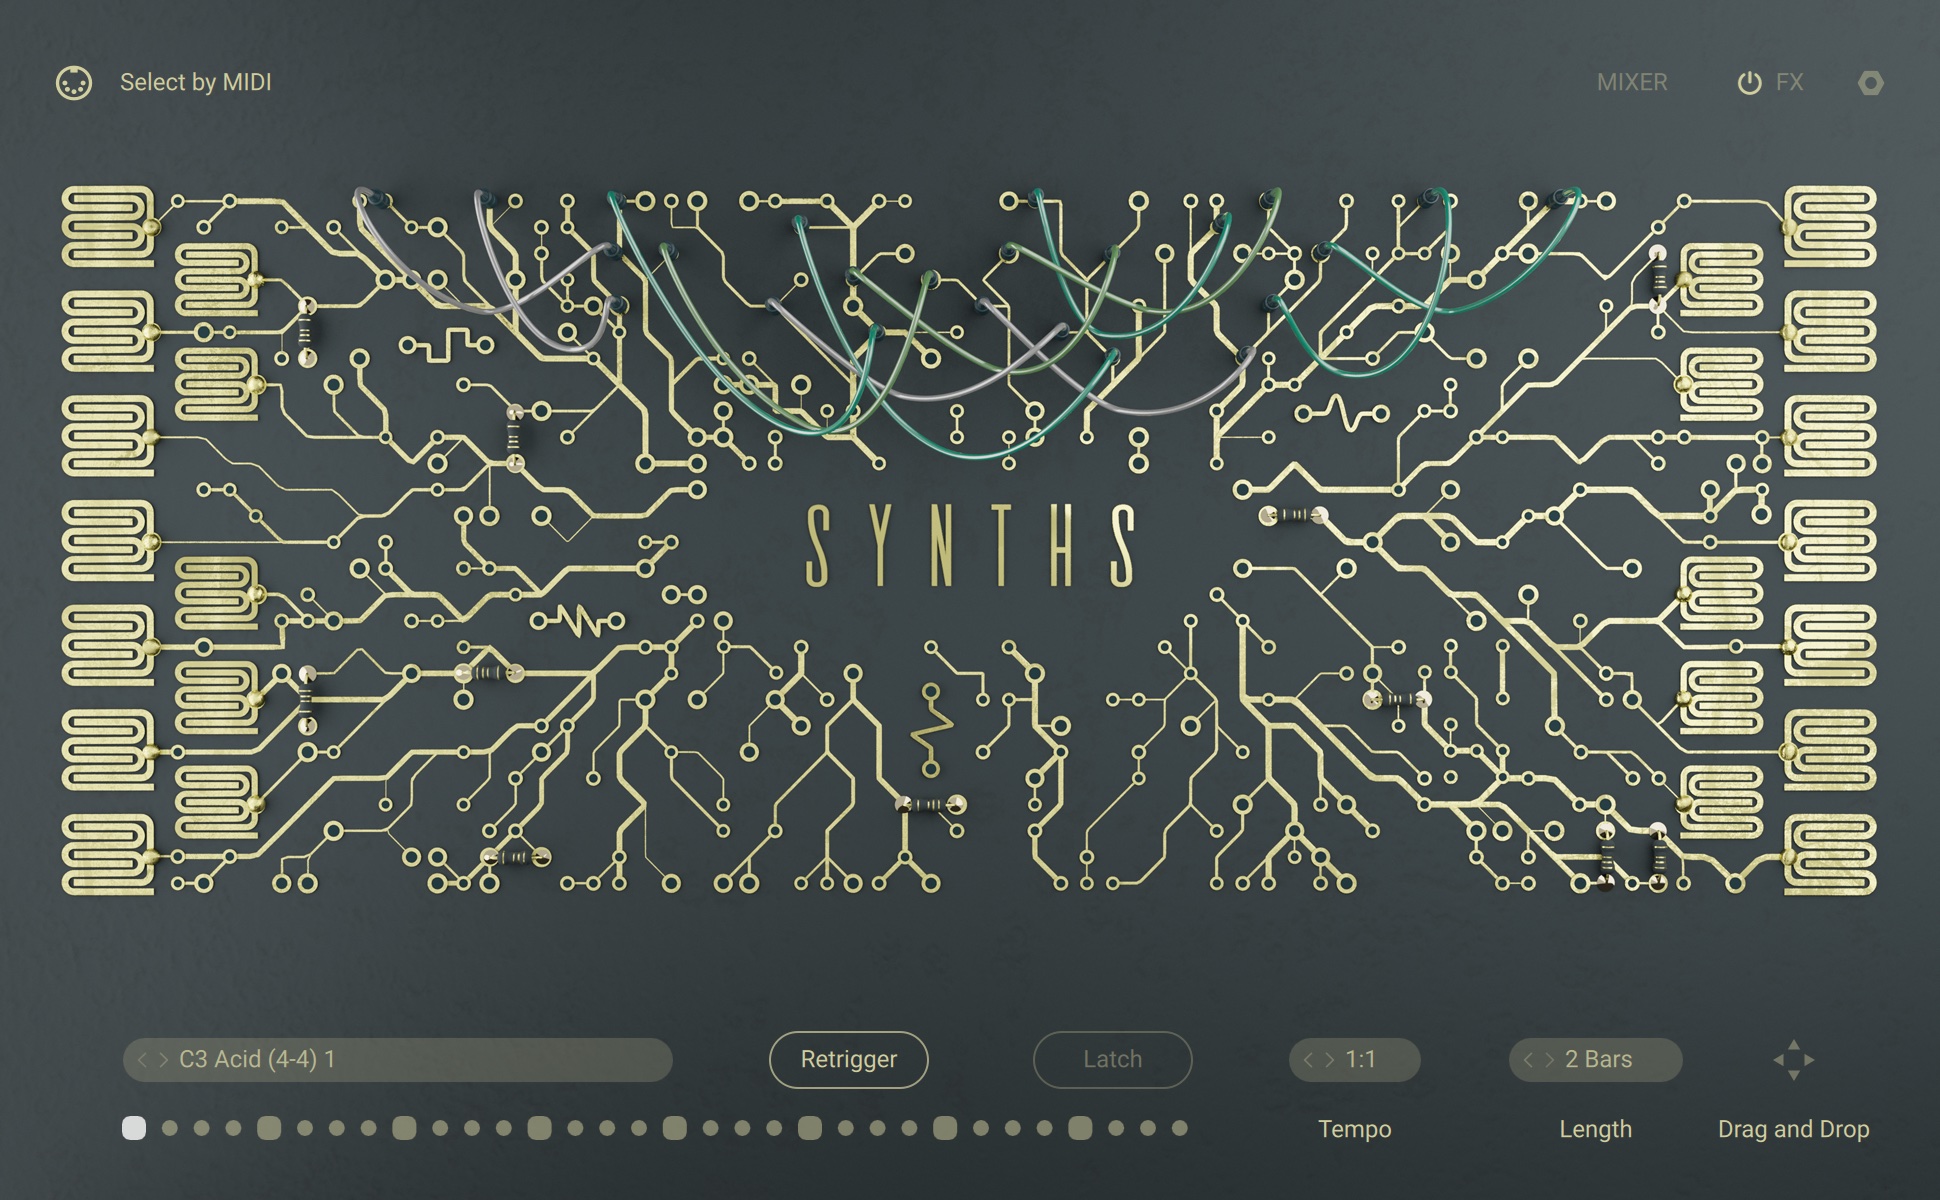
Select by MIDI: Activates selection of a drum piece for editing according to the last played note.
MIXER: Shows the Mixer page with additional sound settings. For more information, refer to Mixer Page.
Pattern Browser: Selects the rhythmic preset used for the selected pattern. You can open the Pattern browser by clicking on the name and select an entry from the list on the right side of the menu. Both the collection and the various categories can be selected on the left side of the menu. The slider in the bottom left corner adjusts preview volume. Clicking on the speaker icon switches preview on or off. To change the pattern you are editing, click on the left and right arrow buttons next to the preset name. Alternatively, you can activate Select by MIDI to change patterns from your MIDI controller.
Pattern Display: Shows the position of the playback relative to the pattern.
Retrigger: Switches pattern retriggering on or off. When switched on, pressing a second key will start playback of the new pattern from the beginning. When switched off, the new pattern will continue playing relative to the current playback position.
Latch: Switches key latching for the patterns on or off. When switched on, the pattern keeps playing even when the key is released.
Tempo: Switches between three different tempo divisions relative to the host tempo. The pattern can be played back at the host tempo (1:1), at half the host tempo (1:2), and at double the host tempo (2x). You can open the drop-down menu by clicking on the name and select an entry from the list. Alternatively, you can use the left and right arrow buttons to select the previous or next entry, respectively.
Length: Switches between two different lengths for the pattern playback, 1 Bar or 2 Bars. You can open the drop-down menu by clicking on the name and select an entry from the list. Alternatively, you can use the left and right arrow buttons to select the previous or next entry, respectively.
Drag and Drop: Exports the pattern as a MIDI file for use in your DAW. You can export the pattern simply by dragging and dropping the arrow icon into a MIDI track in your DAW.