Interaction with the User Interface
This section will describe the conventions of MASSIVE’s graphical user interface (GUI) and explain how to work with its controls. Note that operating MASSIVE on Mac or Windows machines is largely identical, with some slight differences due to the way the two operating systems handle file systems and keyboards. While key commands are given for Windows, they are parallel on the Mac. When the text says “right-click,” use ctrl-click on Macs.
Please note that this section is concerned mainly with the mechanics of using the interface and controls so you can get straight to work with them. It will not provide detailed explanations about what all these controls actually do or how they work; see the Reference chapters for that information.
Section Headers and Popup Menus
Each section of MASSIVE’s interface has a header that describes it; for example, OSC1 is oscillator 1 and so on. There are also Mute Switches for each section. Click the Mute switch with the mouse to deactivate a particular section; click again to return to the active state.
It can often be useful to turn off a particular section of the signal chain when you are creating sounds in MASSIVE. For instance, imagine a filtered sound where you want to check the raw oscillator signal - simply click the Mutes for both of the filters to turn off the filters. This preserves all the settings of the filters while temporarily making their effect inaudible. Note that turning a module off will also save CPU power on your system, so keep this in mind if you are running into CPU overload issues!


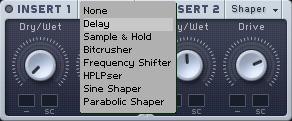
Many of these sections also have a drop-down menu to the right of the section header. These are used to select from a range of different choices for that section, such as wavetables and oscillator modes, filter types and effects. These popup menus are easy to use. Clicking one of them brings up a list of choices you can scroll through; clicking again on one of these entries selects it and automatically closes the list.
Note that the oscillator modules also feature Previous and Next buttons in the header (see image above), which will load the wavetables one after another in the order of their menu listing. This is a great way to scroll through and find the appropriate wavetable for your own sound quickly and conveniently. (For more on wavetables and how they form the basis of your sound in MASSIVE, see section Wavetable oscillators.)
Faders and Knobs
Faders and knobs are used to control most of MASSIVE’s major functions. In general these work the same way as faders and knobs you may be used to in other audio software: simply click a knob with the mouse and drag up and down (while holding down the mouse button) to alter the knob’s value.
Please note that in most cases the numerical value of the knob’s parameter is not displayed: a strictly analog approach. We hope that you will trust your ears while working with MASSIVE, in the same way as the pioneers of electronic music, who had no digital readouts to assist them!
A number of control conventions have been implemented throughout MASSIVE for quick and accurate editing of its various parameters:
Click with the right mouse button to open a context menu providing a list of commands concerned with MIDI and modulation. The latter point will be explained in section Modulation Controls below, while MIDI is covered in section Macro Controls Automation and MIDI.
Hold the keyboard’s shift key while changing the knob’s value with the left mouse button to make finer adjustments to a control.
You can also use the mouse wheel to change the value of a control; if you hold down the shift key while using the mouse wheel, the value will change in coarser steps.
Double-click with the left mouse button to reset the knob to its default position.
There are also a couple significant general points about the knobs and faders that you should be aware of.
For one thing, all of the controls in MASSIVE have been made to function as much as possible like their physical counterparts in an analog hardware synthesizer. In some cases this significantly affects the sound that is produced. For example, if you turn up the Amp knob on one of the oscillators, this will increase the output level of the oscillator into the filter busses, just as you would expect. However, it may also change the quality of the sound coming out of the filter as well, as you drive the filter input hotter, just as with real analog circuitry!
The other important point to understand about the knobs and faders in MASSIVE is how they are used to map modulation destinations and ranges; this is described further in the next section.
The Center Window
One of the main ideas behind MASSIVE is to keep your workflow as simple and fast as possible. MASSIVE basically contains only one main editing page for the oscillators, filters and effects, so most of the basic parameters generating your sound are always kept visible.
The Center Window serves as a display for editing a variety of other parameters that do not need to be accessed so frequently, as well as in-depth editing of your modulation sources.
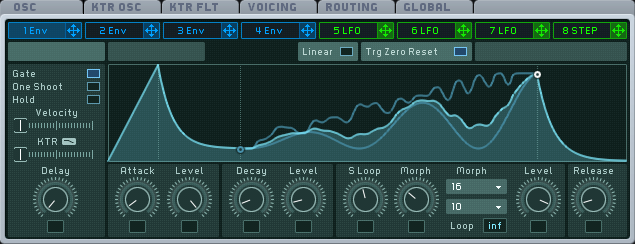
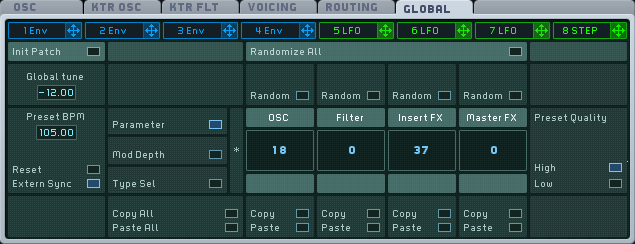
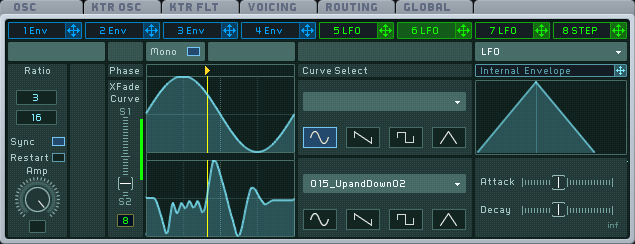
The Center Window display can be switched between eight modulation sources and six pages of general settings. You can choose which page of controls to access by clicking one of the two rows of labeled tabs across the top of the Center Window. Please note that these tabs are not hierarchical in any way, i.e. all of the tabs for both the modulation sources and the general settings are visible at all times regardless of which tab is active in the upper row.
The eight modulation sources are grouped into envelopes (slots 1-4) and assignable pages (slots 5-8) that allow you to choose between the LFO, Performer, and Stepper modulation sources. If you have chosen one of these assignable slots, you can choose one of these types by using the popup menu in the upper-right corner of the modulation source page.
Note the Modulation Handles that appear in this image, just to the right of the name of each of these sources. As noted above, you must click on one of these handles with the mouse, then drag the cursor to a modulation slot and release the mouse button in order to make a modulation assignment.
Check the Modulation Pages sections below for more in-depth information about the functioning of each of these modulation sources.
Modulation Controls
One of the most important innovations in the design of MASSIVE is the way we have made use of Range Knobs to map and control modulation effects. Colored rings around each knob are used to indicate which modulation targets are routed to this parameter. Many of the parameters in MASSIVE can be controlled with this technique.

It is important to understand how to assign modulation sources in MASSIVE, as this is one of the main sound design techniques you have available. Here’s how it works:
The available modulation sources are listed across the top of the Center Window. These include four independent ADSR envelopes as well as four more sources that can be switched between LFO, Performer, and Stepper modes (more on these modulation sources below in section Modulation Pages).
To assign a modulation source to a destination, first simply click on the Modulation Handle: the small cross following the name of the Modulation Source you want to use. You will then see the source’s number attached to the mouse as it moves. Then move the mouse towards the destination you want to modulate and click again on one of the Modulation Slots, the small black boxes near each knob or fader available for modulation.
As you make the assignment, you will see the small colored numeral appear in the Modulation Slot. Obviously, the numeral indicates which modulation source (1-8) has been assigned to the slot, while the color indicates the type of modulation source: blue indicates an envelope, green indicates an LFO or step sequencer, and orange indicates a Macro Control assignment.
Now you can adjust the modulation amount by clicking on the assigned modulator slot and dragging up or down. As you do so, you will see a colored ring appear around the knob to indicate the active range of the modulator. A small break at the limit of the modulation range serves as a clipping indicator to show if the limit of a modulation range is higher or lower than the knob or fader’s minimum/maximum value.
Note that you can also access and change modulation settings in a context menu that appears when you right-click one of the modulation slots (see image). Through this menu you can mute, unmute, delete (use the OFF menu choice), or create new modulation assignments with any of the modulation sources in MASSIVE. (See section Modulation Pages for more information on the modulation sources.)
Also, the additional editing options available for the main controls (such as making finer adjustments by using the Shift key and dragging) are also available for modulation amount changes.
Sidechain modulation
If you look closely at the three modulation slots under one of the Wavetable Position knobs in the Oscillator Section (for example), you will notice that there are two standard modulation slots (marked with a hyphen beneath them) as well as a third slot marked “SC.”

This third slot can be used to set up sidechain modulation. This is a type of modulation in which a modulation source can be assigned which will affect the value of other assigned modulation sources. Here’s how this works:
Normally, unless you activate the sidechain modulation, all three of these modulation slots will allow you to assign modulation sources to change the value of the control, and the range of the modulation will be set by the Range Knobs as described above. If you assign more than one modulation source to a single control by using more than one of these slots, their values will be added together to calculate the total amount of modulation.
However, if you click the small “SC” under the third slot, the sidechain modulation will be activated and the modulation will work somewhat differently. In this case, the third slot will act as a sidechain modulation slot and its value will be used as a multiplier changing the value of the other modulation sources. In this case there is no modulation range set for the sidechain modulator; rather, the value of the sidechain modulation source will be read as a multiplier between 0% and 100%, changing the range of effect of the other modulators.
Sidechain modulation allows you to set up quite dramatic effects with the other available modulation slots, and then vary those effects by a percentage of effect, somewhat similar to using a wet/dry control to vary the amount of an insert effect.
Try assigning a Macro Control to the sidechain modulation destination to enable the use of an external MIDI control as a wet/dry control, you can set this up like this:
First, set up a modulation routing between one of MASSIVE’s LFOs and the Wavetable Position knob (for example), as described earlier in this section.
Then click the tiny “SC” label under the third Modulation Slot under the Wavetable Position knob to activate sidechain modulation. You also need to click the small line below the modulation slot you want to influence; it then becomes a small arrow.
Moving our attention to the lower-right corner of the screen, click on the modulation handle of Macro Control 1; then drag the mouse back to the upper-left corner of the screen and release it over the sidechain modulation slot under the Wavetable Position knob.
Set up like this, the LFO is causing the Wavetable Position knob to sweep back and forth, while moving Macro Control 1 will change the amount of influence the LFO has over the position of the knob, from 0 to 100% of effect. If Macro Control 1 is turned all the way to the left (minimum), then the LFO will not move the knob at all. Conversely, if Macro Control 1 is turned all the way to the right, the LFO will cause the knob to sweep back and forth over the entire range you have assigned.
To add an external MIDI controller to control this, simply right-click on Macro Control 1; you will see a small MIDI Learn dialog box pop up. Now move a control on your external MIDI controller and the assignment is made. (For more on how to use the Macro Controls, see below and also in section Macro Control Section.)
You can also use one of MASSIVE’s other modulation sources as a way to vary the amount of active modulation instead of using a Macro Control. Still following the example above, try using the Stepper instead of a Macro Control to modulate the amount of effect the LFO has over the Wavetable Position knob:
Click the modulation handle next to the Stepper modulation source in the Center Window, then drag the cursor to the same sidechain modulation source under the Wavetable Position Knob, where you had previously assigned Macro Control 1.
The small orange numeral 1 representing the Macro Control, replaced by a small green numeral representing the Stepper.
Now the control signals from the Stepper will determine how wide an effect the LFO will have over the Wavetable Position knob.
Presuming that the Stepper modulator is in tab 8 of the Center Window (this is the default, although it can be changed if you select a different modulation source in tab 8), your assignments will now look something like this:

Again, don’t worry too much yet about what all this means or how it will sound as we are just learning how the controls function here. For more detailed information about how to use the various modulation sources in MASSIVE in particular, see section Modulation Pages.
Faders in MASSIVE are assigned in the same way as knobs. Some of the fader controls (such as the Input Fader on the filter bus, labeled “Ser>Par” on the interface) can accept modulation sources in the same fashion as knobs, and have the same small black boxes near them to serve as modulation slots. After making assignments and dragging up or down to set the modulation range, you will see colored lines along the side of the fader indicating the range you have set, as in this image:

Note that just as with knobs, some faders in MASSIVE have sidechain modulation slots as well, with similar functionality.
Bipolar Modulation
Please note the positive/negative polarity of the modulation source. LFOs are bipolar, i.e., they oscillate between positive and negative values. For example, if you assign an LFO to an oscillator’s pitch and set the modulation depth to one semitone (a strong vibrato effect), the pitch will actually oscillate between +1 and –1 semitones. On the other hand, if you assign an envelope to the pitch and apply the same amount of modulation (one semitone), the envelope will cause the pitch to rise from 0 to +1, then falling back to 0.
This bi-polarity is of importance when you use high modulation amounts around an extreme general setting. For instance, let’s say you have the Intensity control at about 90% to the right. Assign an envelope to it and cause it to modulate the control by about -25%. Thus, with high envelope signals the Intensity is lowered to about 65%:

If you now replace the envelope with an LFO (simply take an LFO’s modulation handle and drop it into the Intensity knob’s modulation slot that is currently holding the envelope), the Intensity will not only be modulated “to the left”, but also “to the right”. As the adjusted modulation depth is larger than the available range at this “side”, (25% added to a base Intensity value of 90% sums up to 110%), the modulation signal will be clipped. This does not cause any problems; but the clipping might not be the effect you desired when setting up the modulation, so you should be aware of how this works.

Note that this bi-polarity is also true for voice spreading. If you adjust the Wavetable Position Spreading control to nearly 100% (as shown in this image) and set the actual Wavetable Position Control in the Oscillator Section to the middle of its range, the voices will spread over the complete range. If you now turn the Wavetable Position Control to the left, those voices already using a very low wavetable position due to the spreading will not be able to follow this move. They will stay at their position. When the control is turned completely to the left, the actual spreading will only be half as much, as the left half of the controller’s possible motion is clipped and set to the minimum value. (Have a look at section General Pages for more information about voice spreading.)
Macro Controls Automation and MIDI
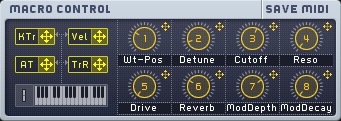
The Macro Controls are found in the lower right corner of MASSIVE’s panel when you are in the Synth View. They help unify your interaction with all of the other controls in MASSIVE, particularly when you are trying to make music instead of just creating and programming new sounds. Like the modulation sources of the Center Window (the envelopes, LFOs, Stepper and Performer), each Macro Control knob provides a Modulation Handle. With this handle the Macro Controls can be assigned to any parameter of MASSIVE as a modulation source, i.e. any changes to the value of the Macro Control are then mapped onto the modulated parameter.
Setting up assignments this way can be a very powerful technique, especially in two particular situations.
In the first place, when designing sounds in MASSIVE you may often find that two or more parameters are interconnected in creating interesting sonic effects although they are not directly connected in the Signal Flow. For instance, you might want to decrease the Amplitude Control of the first oscillator whenever the second oscillator’s Amplitude Control is increased, in order to keep the sound’s overall volume relatively the same. Normally, you would need to tweak two parameters independently at the same time in order to accomplish this. Using the Macro Controls, you can assign one knob to control both parameters and modulate them in opposite directions. Now, when you change the Macro Control’s value, both modulation targets are changed simultaneously.
In addition, the Macro Controls enable you to unify your access to your preferred controls in a given sound, a functionality that will come in handy in live performance situations particularly. For example, you can change the frequency spectrum of the sound by altering the filter’s cutoff frequency; however, you can also modify the frequency spectrum by changing the Wavetable Position Control to change the basic waveform(s) used to generate the sound. You can use the Macro Controls to unify access to these most important parameters, putting them all in one place where you can easily work with them.
Note that most of the sounds in the preset library included with MASSIVE follow a standard assignment scheme for the Macro Controls. This control scheme specifies that, for example, the first two Macro Controls always deal with frequencies and the sound’s spectrum; Macro Control 5 is always used as the effects’ dry/wet balance; and so on. This scheme is optional for your own sounds. However, you may find it is easier to remember these assignments and work with sounds if you always follow a similar control setup. Refer to section Macro Control Section for more about this scheme.
Because of their central functionality in interacting with the sonic parameters of MASSIVE, the Macro Controls are also the most prominent interface for to use for automation. In this case, automation means that a specific parameter of MASSIVE – for example a filter’s cutoff or the amount of feedback, or the vibrato depth – is controlled from outside of MASSIVE. This can be done in two ways:
You can assign any of the Macro Controls to MIDI continuous controllers. Simply right-click the Macro Control to open a context menu, click the entry “MIDI Learn” and then move a knob or fader on your external MIDI controller to establish the connection.
You can also control the Macro Controls from a host application (e.g. a sequencer) if MASSIVE is used as a plug-in within that host. MASSIVE will provide a list of automatable parameters to the host, and the Macro Controls will always be at the beginning of the list for easy access. (Please consult the documentation for your host sequencer for more detailed information on how to setup automation assignments if you are not sure how to do this.)
Please note that neither MIDI nor automation is bound to the Macro Controls. The Macro Controls are not the only parameters reported to the host program to be automatable –- nearly all of the controls in MASSIVE’s user interface can be subject to host automation. Also, by using the context menus that appear when you right-click a control in MASSIVE, you can assign any of its parameters directly to a MIDI controller without using the Macro Controls.
You can even save your MIDI assignments to a MIDI setup -- see section The Standalone Menus for more information on how to do this. You can store the complete MIDI assignment layer (e.g., Cutoff assigned to MIDI CC 1, the first oscillator’s Wavetable Position Control to MIDI CC 12, and the third Macro Control to MIDI CC 64) into a separate MIDI configuration file without any information about the underlying sound. The Save MIDI button in the top right corner of the Macro Control window stores all configured MIDI assignments to the currently active MIDI setup. Consequently, the sounds that are loaded by MASSIVE don’t contain MIDI CC information either. We have set it up this way for two main reasons:
You might want to use different MIDI devices with MASSIVE in different situations. For instance, imagine that you work with a small keyboard for live situations with four tiny knobs, but in the studio you use a full-featured master control keyboard. If you were to set up your sound’s MIDI assignments with the studio keyboard, you would probably run into problems when using your small live keyboard as the assignments will be different. Since MASSIVE separates the sound settings and the MIDI assignments into separate files, you will not have these problems, as you can easily switch the MIDI setup files depending on the situation.
Also, sounds created by somebody else using a different MIDI controller might be useless for you. This is, however, no problem in MASSIVE as the MIDI configuration is stored in the independent MIDI Setup file.
Coming finally back to the Macro Controls in MASSIVE’s graphical user interface, beside the eight knobs there are also four small additional Modulation Handles labeled KTr, Vel, AT and TrR. They can be used to assign MIDI data like a note’s velocity or aftertouch to a parameter. You can find more information on this and the Macro Controls in general in section Macro Control Section.