The Browser and Attributes Views
The Attributes Concept and the Sound
MASSIVE provides a new and more intuitive way to save, browse and load its preset sounds. We have left behind the old paradigm of individual sounds contained within separate sound banks, with all its organizational problems. Instead, the settings for each sound are saved into single files that can then easily be ported between platforms or projects.
To handle all these Sound files you need a powerful way to browse them. Therefore, each Sound file also contains information about the sound in musical terms, called the sound’s attributes The Attributes View of MASSIVE provides a list of about 170 different attributes.
By combining these descriptive terms, each of the synthesizer’s sounds can be described according to its origin or source, its Type, SubType and Mode. You can also enter additional Meta Information such as the name of the sound’s author and so on.
All Sound files placed in MASSIVE’s user and factory library folders are automatically integrated into a database of sounds. The Browser view of MASSIVE is your interface to this database. Within the Browser you can select a combination of attributes to find a sound that fits your needs. For example, try selecting attributes Bass, Digital Bass, and Monophonic to find exactly that – a digitally cold yet propulsive bassline sound. Different bank files at various locations on your disk won’t be an issue anymore. You’ll be able to find the sounds you need for your music quickly and easily.
The following sections will explain how to use MASSIVE’s attributes to browse your sounds and load them, and how you can save your own sounds using the attributes.
Searching and Loading Sounds with the Browser
The Browser View is the place where you search and load your MASSIVE sounds, and where you organize them into programs.
The Browser can be used in two alternative view modes that are toggled by clicking the Sounds button in the View’s upper-left corner. When this is deactivated, you will see the File Tree View; when activated, you can browse your Sounds in the Database View. Both views share the same structure: at the left you specify which sounds you want to see (i.e. a folder in File Tree View or a set of attributes in Database View), and on the right you load one of the Sounds from the Searh Results by double-clicking it. When activating the Programs button in either view a program list is added. All views feature the Browser Control Bar at the top, containing the Sounds button, the Programs button and further controls.
Database View
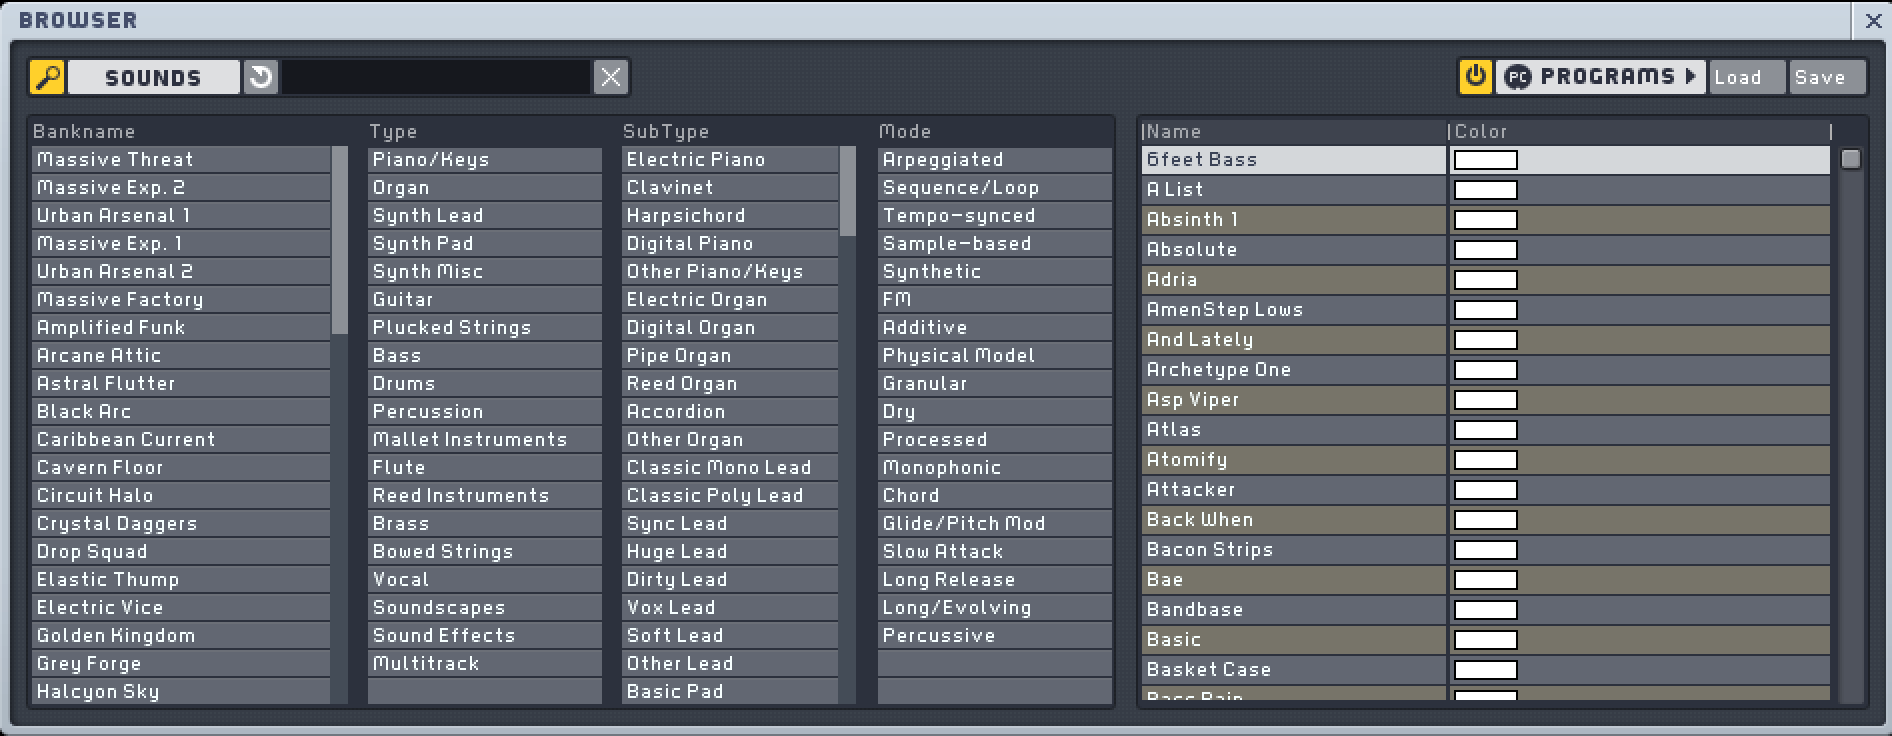
The Database View is visible when the Sounds button is activated by clicking with the mouse. It consists of the table of attributes itself as well as the Sound Type switch, the Clear button and the Search Term text field, these three placed within the Control Bar at the top.
The attributes are grouped into columns, the categories. Bankname, Type, SubType, and Mode are used.
Type specifies the general type of instrument, for example Synth, Bass, or Soundscape.
SubType refines what was selected in Type, for example SynthLead could be refined by selecting ClassicMonoLead, ClassicPolyLead, etc.
Mode describes the sound’s articulation and timbre, Arpeggiated, Tempo-synced, Additive, Granular are examples.
Each of these categories contains a list of attributes describing possible characteristics a given Sound might have.
To search for a sound within the database, simply select or deselect single attributes by clicking them with the mouse. Any number of attributes can be combined to narrow your search, except that you can only use one attribute of the Type category. The Clear button deselects all currently activated attributes. Each additional attribute that you select reduces the total number of matching Sounds in the list at right. The remaining Sounds are displayed in the Search Results.
Instead of browsing the database by using the attributes you can also search for sounds by entering a search term into the Search Term text field. When you enter a term here and press Enter, the MASSIVE Browser will search through all Sound file names as well as all the text fields of Meta Information. By using this feature you can, for example, search for all sounds sharing the same word in their names, all sounds created by a particular author, or you can find those sounds containing specific terms in their Comment fields. Note that this flexible textual search cannot be combined with the attribute search, however; entering a search term here automatically clears the current attribute selection. It is also independent from any Sound Type switch setting.
Please note, finally, that the database represents the contents of the library folders (and their sub-folders) on your hard-drive. Those folders are not checked for new Sound files each time MASSIVE is started, as this would significantly slow down the start-up time. Thus, if you manually place Sound files within your library folders by using your operating system, MASSIVE will not integrate these files into the database search until the library folders are re-scanned. Again, you can trigger the database rebuild manually within the Options dialog, described in section The Standalone Menus. The database is then scanned in a background process while you can continue working with MASSIVE.
File Tree View
The File Tree View is visible when the Sounds button is deactivated by clicking with the mouse. In this view, some of the elements within the Control Bar will fade, and in place of the columns of attributes a common file tree is displayed, showing all the folders and drives on your computer.
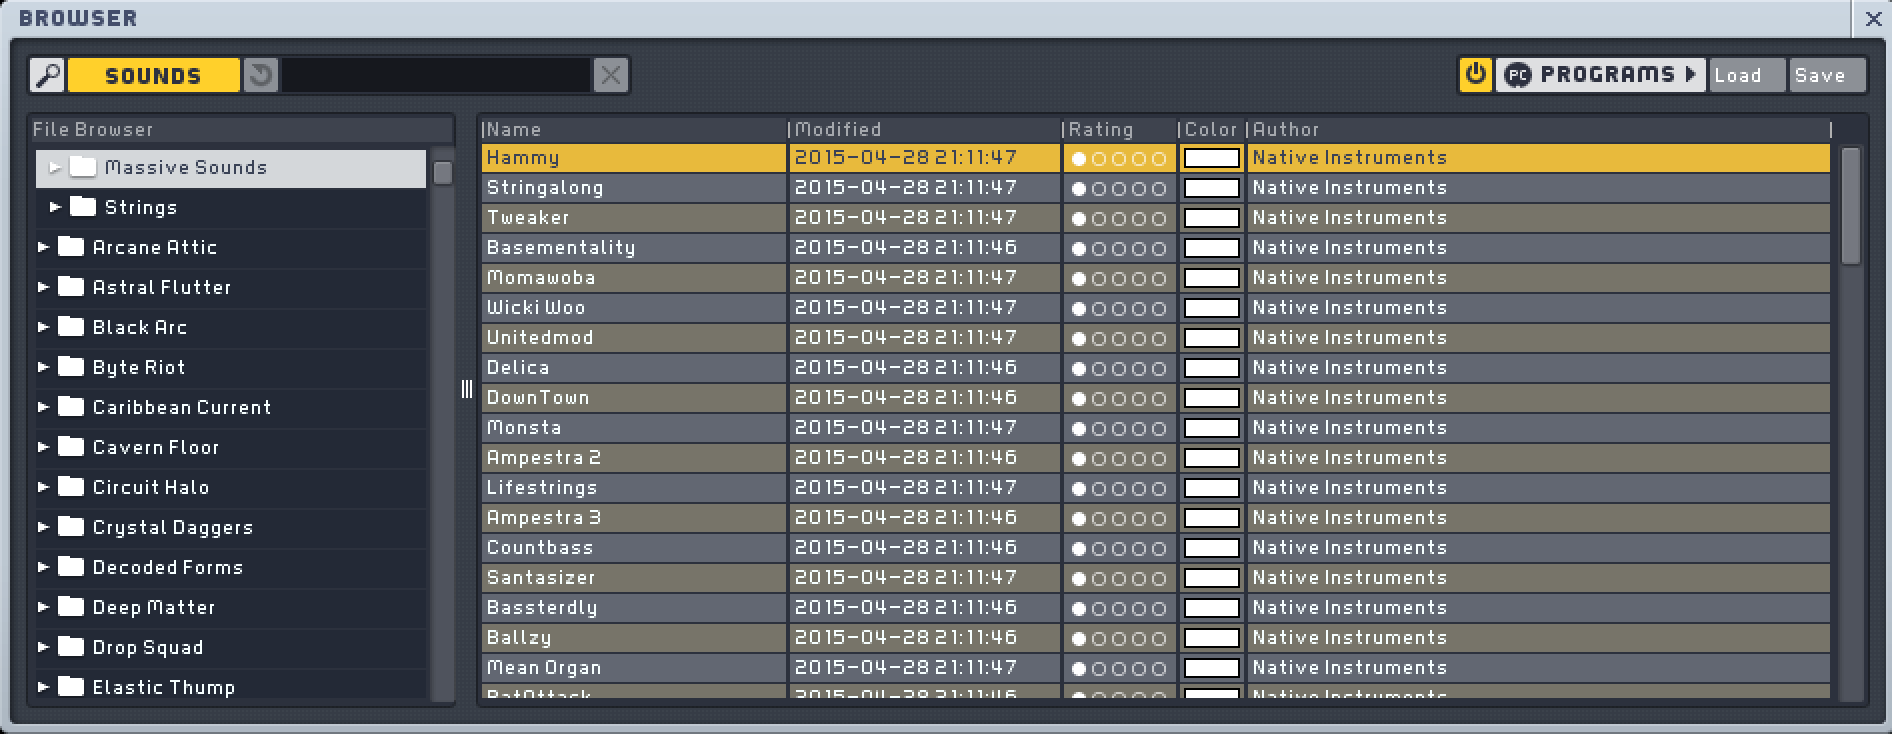
Working in File Tree View’s is straightforward, as it is similar to the way you work with files in the operating system itself. You can select a folder by clicking its name; any Sound files contained within it are immediately displayed within the Search Results. If a folder contains sub-folders, you can make them visible by clicking on the folder icon in front of the folder’s name. The list of sub-folders is closed again by clicking the folder icon once more.
When all folders are closed there are three main entries here:
Topmost is the Explorer entry. It contains your operating system’s folder structure as sub-levels. This is particularly useful if you want to open a Sound file that is not within your library folders.
In the middle is the My Favorites entry. It does not contain Sounds itself; instead it contains links to Sound files elsewhere on your computer.
Finally, there is the My Massive entry, which links to the user content folder on your hard drive. (Read more about this below.) It reflects that directory’s sub-folder structure; its handling is similar to that of the Explorer entry. The My Massive entry contains all the original sounds that you have saved from previous sessions with MASSIVE.
Note that you cannot delete, rename, copy or move Sounds within the File Tree View as this might create inconsistencies with the database. If you need to delete or rename a Sound, you can do this in your operating system as you would with any other files. You’ll find your sounds where they were saved by MASSIVE (see section Defining Attributes and Saving Sounds below). By default, MASSIVE uses the following file locations to save your sounds depending on your operating system:
“My Documents/Native Instruments/Shared Content/Sounds/Massive” on Windows.
“[User]/Documents/Native Insruments/Shared Content/Sounds/Massive” on Mac OSX.
These are the default locations for the user content folder. You can add further locations within the Browser tab of the Options Dialog. There you can also trigger a rebuild of the database. This is necessary after deleting or renaming a Sound to inform the database of the changes.
The My Favorites entry is a powerful way to quickly access the Sounds you use most often. You can add any Sound from the Search Results by right-clicking it and selecting Add to My Favorites from the context menu. Alternatively, you can drag it from the Search Results into the My Favorites folder or one of its sub-folders. Note that you can also create sub-folders within the My Favorites folder to sort your favorite sounds hierarchically: right-click on the My Favorites entry and choose New Favorite Folder from the context menu. A dialog will come up asking you for the new folder’s name. Empty Favorites folders can also be removed by using this context menu.
You can also easily step through the Sounds in any folder by using the Navigation Bar. See section The Navigation Bar for details.
Search Results
No matter which Browser View you work in, the Sounds that match the search criteria - folder selection or attribute combination - you have chosen are displayed as a table within the search results.
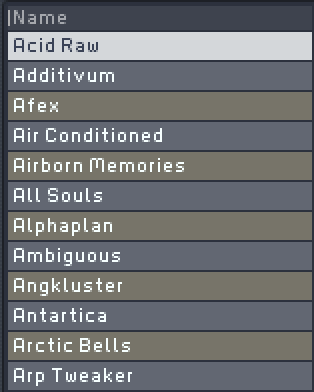
Each row of the table holds one Sound. Information about the Sound is displayed in several columns. You can change the table’s layout by clicking on the headers at the top:
Clicking onto a column’s header sorts the Search Results alphabetically, according to that column’s entries. Clicking it again reverses the order.
Right-clicking provides a context menu of possible columns to be displayed. Clicking a column label here that is already displayed (e.g. Name) removes it from the display. Vice versa, clicking the label of a column that is currently not displayed inserts the column into the table.
You can now easily load a MASSIVE Sound by double-clicking it within the Search Results.
Note that you can also load your Search Results one after another by using the Navigation Bar . See section The Navigation Bar for details.
Programs
Within the Browser Control Bar you will find the Programs button. Clicking it removes the Database View (the File Tree View remains in this case, as it is smaller) and brings up a second list beside the current Search Results. You can drag any Sound to this list from the Search Results. You can also change the list’s order by dragging the Sounds within the list up and down. You can also load a Sound directly from this list by double-clicking it.
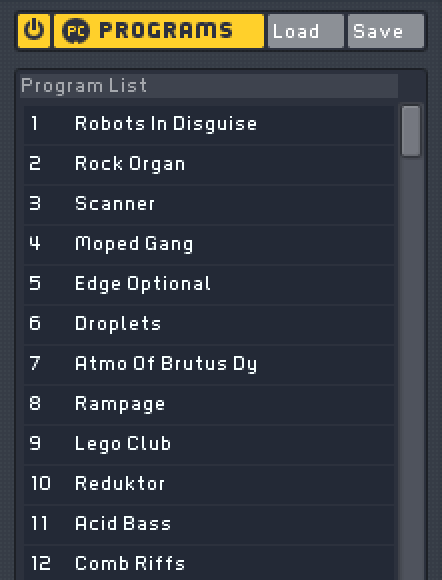
After you press the On button (beside the Programs button if this one is activated) this list of Sounds becomes your default list of presets, and these presets become selectable by MIDI Program Change messages and host automation from a sequencer.
In order to switch between the list’s Sounds quickly, all of its sounds are loaded into your computer’s memory upon startup. Because of this, however, a long Program List may noticeably delay the startup procedure of MASSIVE. You may want to deactivate this if you don’t intend to use the Program List, in order to speed up MASSIVE’s loading time.
Obviously, only one program list can be active at a time. You can, however, save the list to a file and create another one. All exported lists can be opened again for future use. Note that those program lists link to the actual Sounds, similar to the Favorites. If, by any circumstance, one of the Sounds on the list has been lost or renamed, the program list will not be able to recall it.
Note that you can also load your program list’s entries one after another by using the Navigation Bar. See section The Navigation Bar for details.
Defining Attributes and Saving Sounds
Assuming now that you are familiar with searching for a sound in the Browser’s Database View (as described in the previous section), the following explanations should be easy to follow.
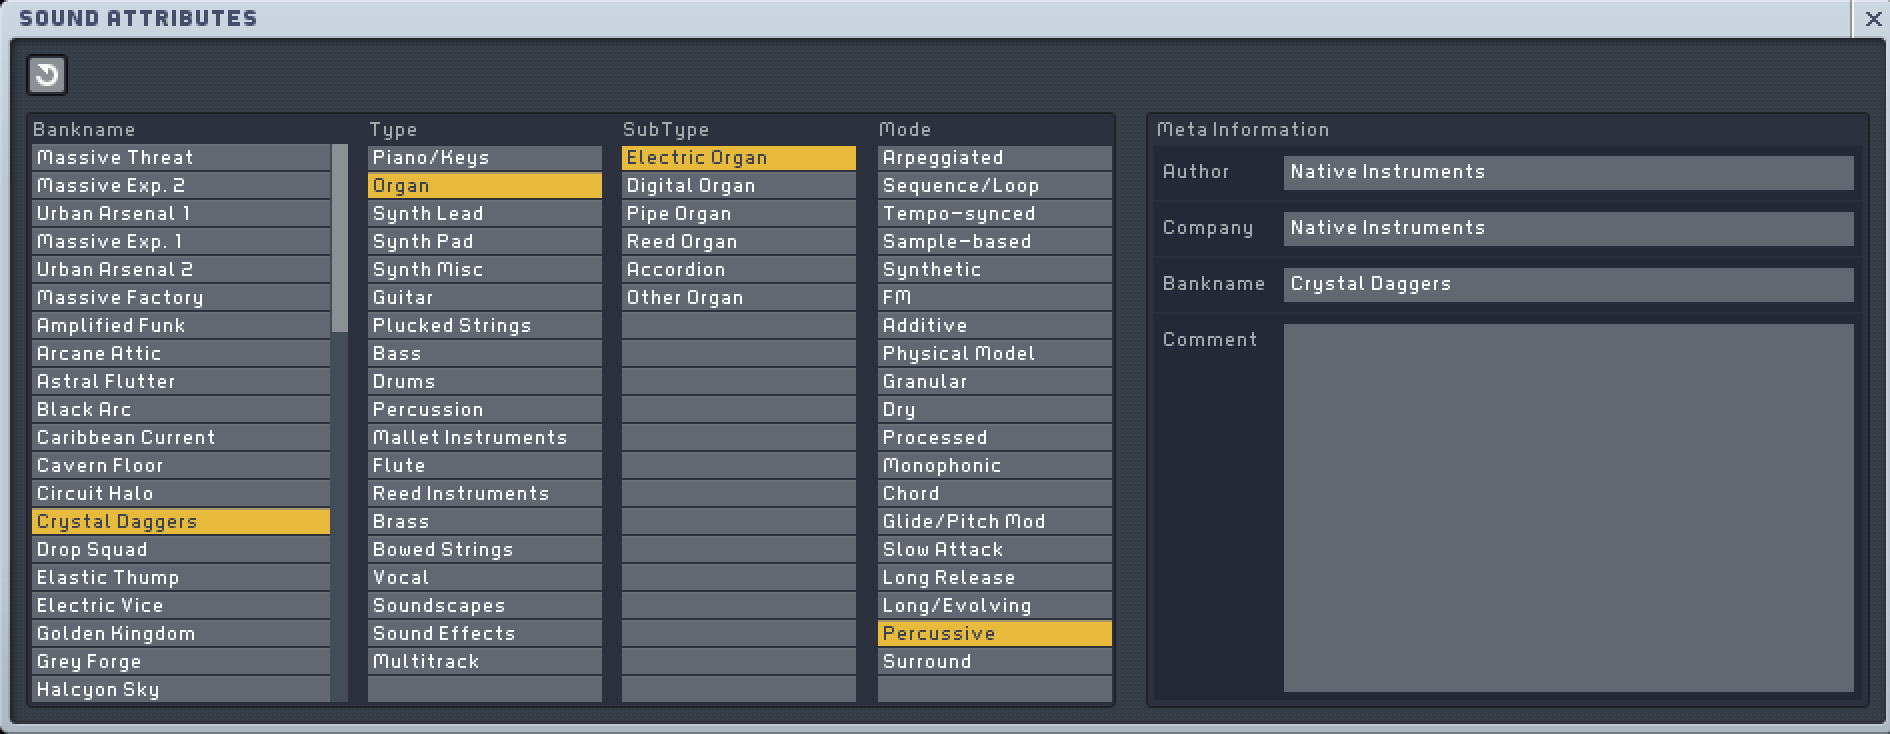
You access the Attributes View by clicking the Attributes button in the Navigation Bar. Its layout is similar to the Browser’s Database View, but while you load Sounds from the Browser View within the Attributes View you save them. Therefore, the Search Results are not needed and are replaced by the Meta Information.
Meta Information provides additional text fields to enter information about the sound to be saved:
Author: the Author of a Sound. Fill in your name for your own Sounds. This field is automatically filled with a default author name, if one has been entered in the Options Dialog.
Company: the commercial vendor of the Sound, if there is one.
Bankname: the bank the sound is derived from.
Comment: this field can hold any information you want. Often it is used to describe a Sound in terms of its possible usage, and also to note any special interactive features of the Sound, e.g. “MIDI modulation wheel controls master cutoff.”
Please note the format of the Meta Information has been unified among a number of different software instruments by Native Instruments such as MASSIVE, ABSYNTH 5, and FM8 in order to provide a common environment for your work. Some of the displayed values may, however, not be active within all of these instruments.
You can search through all of the entries of the Meta Information with the Search Term field of the Browser. For instance, you can enter the name of the project you created your sound for in the first place into the Comment field. By using the database you can access it easily in all future projects, and if you need all sounds used in a particular project, you can find them by entering the project’s name into the Search Term field.
All sounds you save are automatically integrated into the database. While this is very comfortable for browsing – you don’t have to worry about where the Sound files are actually stored – you should take a moment while saving a new Sound to set its attributes. If you don’t do this, your database will soon become less useful, as you won’t be able to find your own sounds easily. After you enter the Meta Information and set the attributes according to your sound, you can save it by clicking the Save button within the Navigation Bar. This button will bring up a Save As dialog asking you for the new Sound file’s name and the location to save it. If you saved the sound previously, this may overwrite the old file unless you rename it at this point; if so, MASSIVE will ask you whether or not you really want to overwrite it. By default, the dialog box will suggest to save the sound into the user content folder or one of its sub-folders. The user content folder is created during installation and can be found in “My Documents/Native Instruments/Shared Content/Sounds/Massive” in Windows XP “[User]/Documents/Native Insruments/Shared Content/Sounds/Massive” on Mac OSX. Note that you can access this folder within the Browse's File Tree View by selecting the My Massive entry. As explained above, you can use your operating system to delete or rename files within these folders; please refer to section Searching and Loading Sounds with the Browser for details.