Mixer page
The Mixer page in Circular lets you mix and balance the four sound layers as well as the effect channels.
The Mixer page lets you mix the four layers a–d and the additional effect channels.
To open the Mixer page, click the MIXER button in the top right corner of the instrument.
The Mixer page shows seven channels, each channel containing the mix controls for a particular layer or effect channel. The Mixer page contains the following areas:
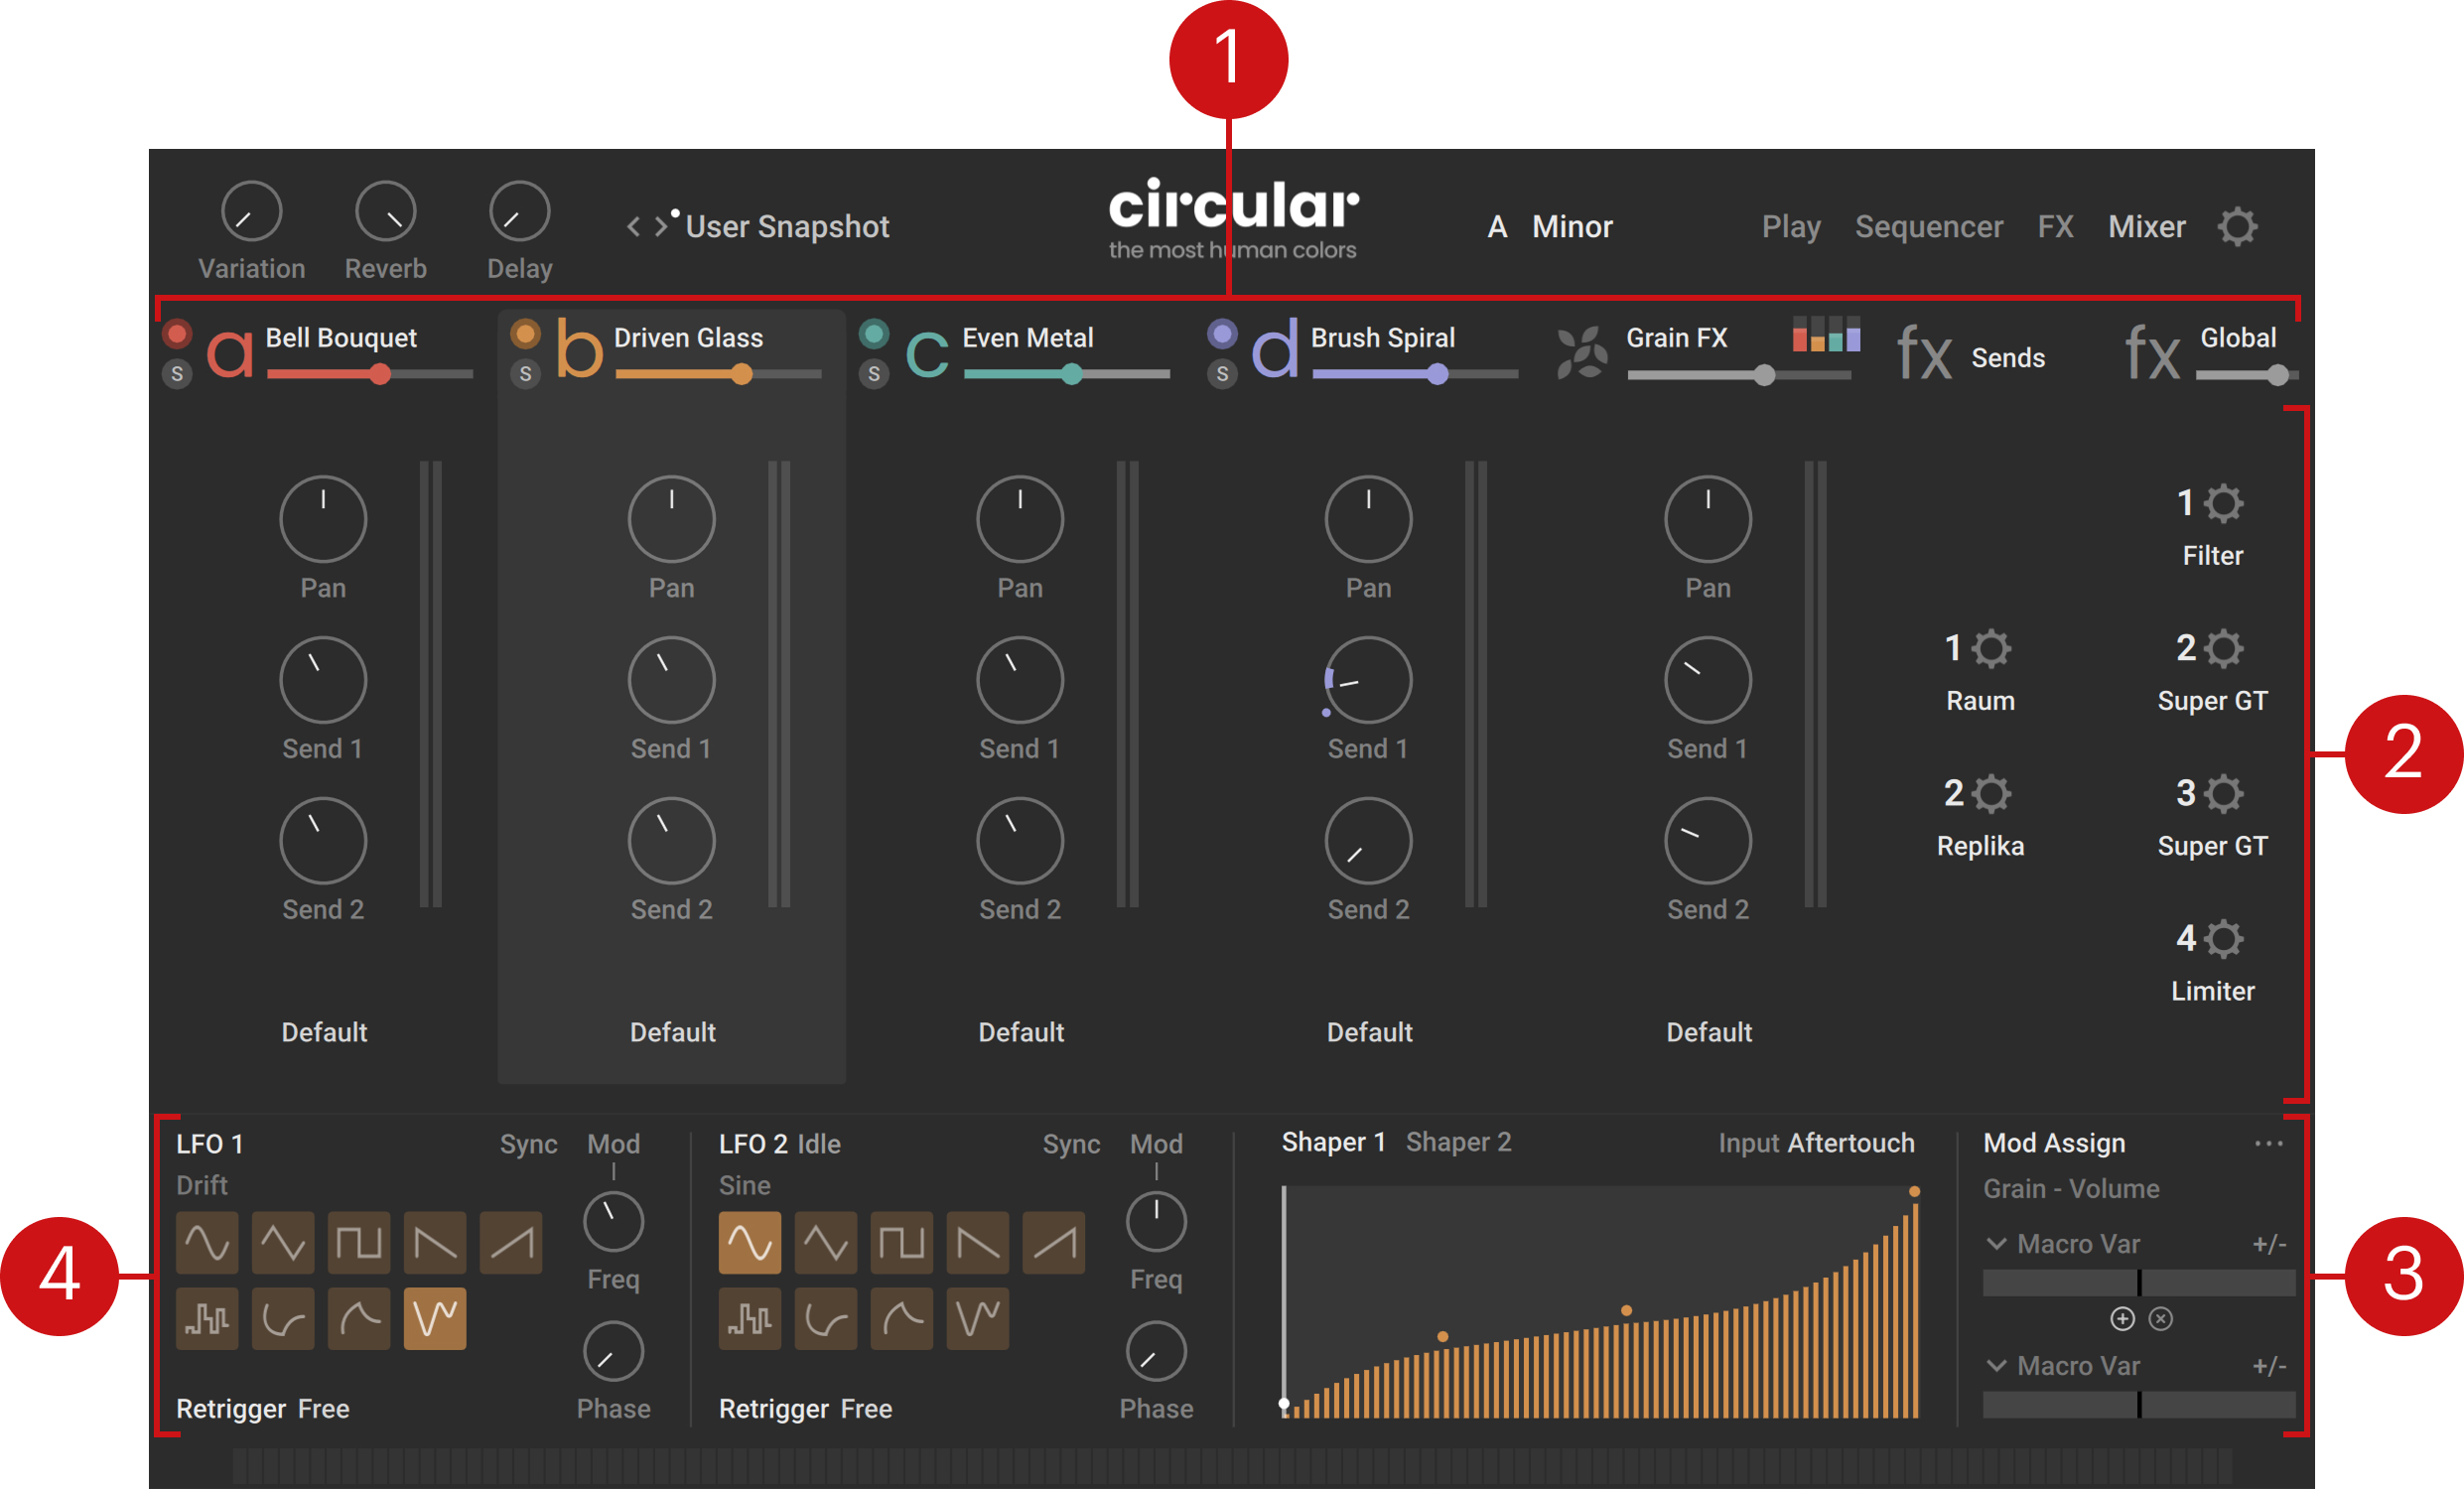
Channel headers: Each header contains a few basic controls for one particular layer or effect channel. Refer to Channel headers.
Channel controls: Each channel provides mix controls depending on the type of channel. Refer to Channel controls.
Mod Assign section: Lets you choose and configure up to two modulation sources for most controls in this page. The Mod Assign section is available in the Sequencer, FX, and Mixer pages. Refer to Assigning and editing modulations.
Modulate panel: Lets you configure the internal modulators available in Circular. For more information, refer to Adjusting the internal modulators.
Channel headers
At the top of the Mixer page, the channel headers provide a set of basic controls:

The four channel headers on the left are for the four layers a–d, and the three remaining channel headers are for the Grain FX, Sends, and Global channels.
For the layer channels, the headers contain the following controls:
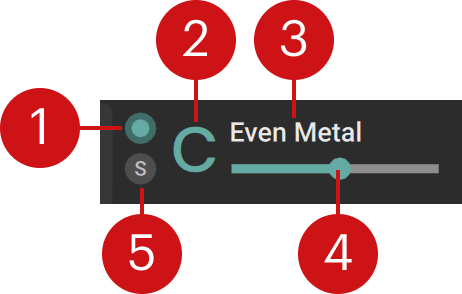 |
Layer on/off: Activates or deactivates the layer. If you deactivate the layer, it will not trigger any new notes, but the previous notes that are still sounding will stay audible. The on/off switch also lets you copy and paste the layer: You can [option]+click (Mac) or [Alt]+click (Windows) the on/off switch to copy the layer, then [option]+[shift]+click (Mac) or [Alt]+[Shift]+click (Windows) the on/off switch of the target layer to paste this layer there.
Layer letter a–d: Switches the Modulate panel at the bottom to the internal modulators for that particular layer.
Layer Preset selector: Shows the name of the loaded layer preset. Layer presets contain values for all the parameters of a layer. You can click the preset name to open the Layer Browser and choose another preset from the factory library. You can also use [option]+click (Mac) or [Alt]+click (Windows) to pre-select the tags of the current layer preset, which narrows down the Result list to similar-sounding presets, or [Shift]+click to clear any selected tags and extend the Result list to the entire preset library. For more information on the Layer Browser and the Result list, refer to Browsers.
Layer Level slider: Adjusts the volume level of the layer.
Solo (S): Deactivates all the other layers. Soloing a layer can be useful to focus on that layer when designing your sound, or as a performance tool when playing live.
For the Grain FX channel, the header contains the following controls:
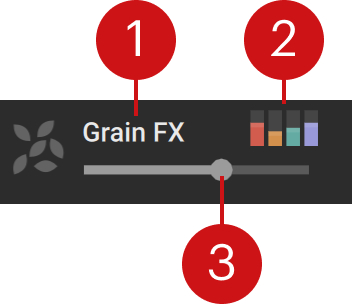 |
Label and logo: Clicking the label or the logo switches the Modulate panel at the bottom to the internal modulators shared between the Grain FX, Sends, and Global channels.
Grain Levels: Each colored bar shows the level at which the output of the granular Step effects is sent from the corresponding layer to this bus. The colored bars are equivalent to the Grain FX controls located in the Sequencer settings of the Sequencer page for the respective layer. You can click and drag each bar vertically to adjust the corresponding level.
Level slider: Adjusts the volume level of this effect channel.
For the Sends channel, the header only contains the label and the logo. You can click either of them to switch the Modulate panel at the bottom to the internal modulators shared between the Grain FX, Sends, and Global channels.
 |
For the Global channel, the header only contains the label and logo, which you can click to switch the Modulate panel to the internal modulators shared between the Grain FX, Sends, and Global channels, and the Level slider, which adjusts the volume level of that channel:
 |
Channel controls
The four layers a–d and the Grain FX channel provide the following channel controls:
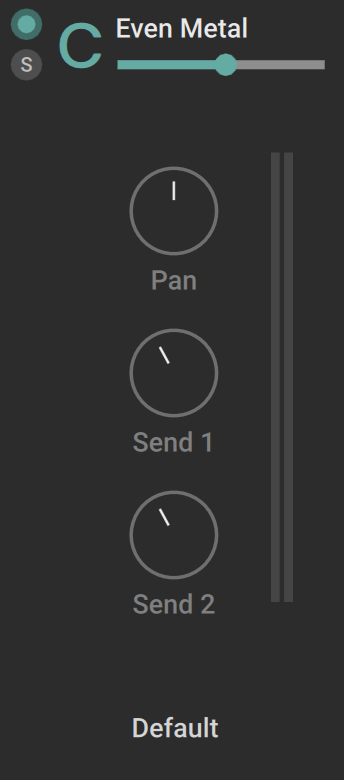 |
Pan: Adjusts the panoramic position of the channel in the stereo field.
Send 1: Adjusts the level at which this channel is sent to the effect in the first slot of the Sends tab in the FX page.
Send 2: Adjusts the level at which this channel is sent to the effect in the second slot of the Sends tab in the FX page.
Output menu: Selects the output of the channel. The Default entry (selected by default) corresponds to the instrument output, as specified in the Instrument Header in Kontakt. The Bypass Global FX entry corresponds to the same instrument output but without going through the effects of the Global tab in the FX page. The remaining entries correspond to the outputs configured in the Outputs section of Kontakt. For more information on the Instrument Header and on the Outputs section, refer to the Kontakt manual or Kontakt Player manual.
Level meters: The vertical bars on the right show you the current levels of the stereo signal on that channel.
The Sends and Global channels on the right show the effects currently loaded on either channel:
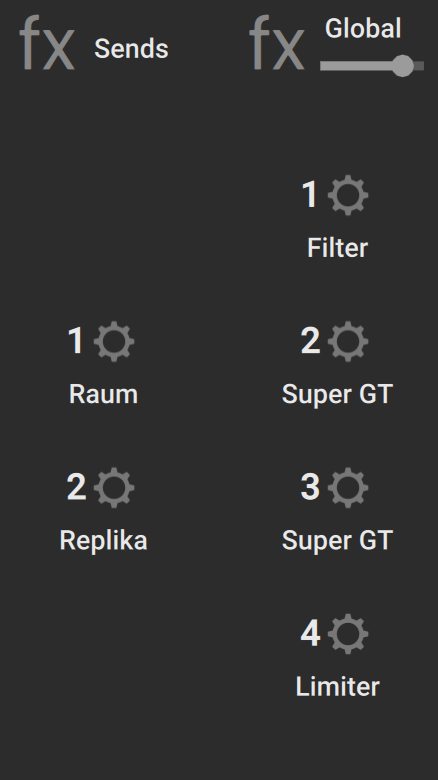 |
On these channels you can click the desired cog wheel to jump to the advanced view of the corresponding effect in the FX page.