Using Effects
Maschine allows for both send an insert effects. Learn how to work with effects on the Sound, Group, and Master level.
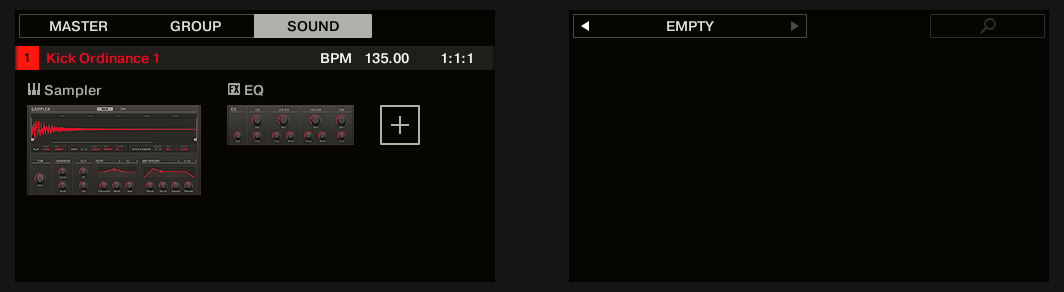
At each Project level (Sound, Group, and Master) it is possible to add effects in the form of Plug-ins. Each Sound, each Group, and the Master can have an unlimited number of insert effects loaded in their Plug-ins slots. In each Plug-in slot, you can load an Internal or Native Instruments plug-ins.
The processing order is always from top to bottom, both in the Plug-in List of the Control area (in Ideas view and Song view) and in the channel strip of the Mixer (in Mix view). In the Plug-in Strip of the Mix view, the processing order is from left to right.
Tip
For Sounds, the first Plug-in slot is often hosting an Instrument Plug-in (Sampler, Drum Synth, Native Instruments, or External Plug-in), this allows the Sound to generate its own audio. If instead, you plug an effect to the first Plug-in slot of a Sound, this Sound will act as a bussing point for other Sounds and Groups, and you will find this Sound in the various Dest. selectors in the Output properties of other Sounds and Groups. For more information, refer to section Applying Effects at the Sound, Group, or Master Level.
Most of the features used in the procedures mentioned in this chapter have been already described in chapter Working with Plug-ins. In Maschine+, effects are just a certain type of Plug-ins. Nevertheless, we illustrate them here with various effect-oriented examples. Furthermore, from time to time we will use the Mix view instead of the default Arrange view — indeed, the intuitive routing facilities of the Mixer make it particularly well suited for quickly setting up advanced effect routings.
Effects List
Maschine+ provides a healthy selection of more than 20 different Effect Plug-ins that can be quickly applied to Sounds, Groups, and the Master, all as insert effects. By using Maschine’s powerful routing system, it is also easy to setup send effects, build complex effect chains or apply an effect to an external source, such as an instrument, vocals, or turntable. We recommend you load a Project from the factory library to get to know how effects can be used.
Available Effects
Many types of effects are available and nearly all applications are represented. You will, of course, find traditional effects such as delays, reverbs, and distortions, as well as engineering tools such as EQs, dynamics, and filters. But we have also provided you with a series of unique and unusual effects such as Reflex, Ice, and Resochord.
Effects are organized into the following categories:
Dynamics: Compressor, Gate, Transient Master, Limiter, and Maximizer.
Filtering effects: EQ, Filter, and Cabinet.
Modulation effects: Chorus, Flanger, FM, Freq Shifter, and Phaser.
Spatial and Reverb effects: Ice, Metaverb, Reflex, Reverb (Legacy), and Reverb.
Delays: Beat Delay, Grain Delay, Grain Stretch, and Resochord.
Distortion effects: Distortion, Lofi, and Saturation.
Performance FX: Designed for spontaneous, tactile control in recording or live performance, these complex multi-effects alter motion, space, dynamics, and more for added expression.
Note
This section provides only a list of the available effects. For detailed information on each effect and its parameters, please refer to the Maschine Software Manual, available from the Native Instruments website.
Applying Effects at the Sound, Group, or Master Level
The procedures for applying an effect at the Sound, Group or Master level are very similar.
Adding an Effect
An effect plug-in can be added using the Plug-in view.
To add an effect:
Press the PLUG-IN button to enter Control mode and display the Plug-in slots.
To apply the effect to the Master (to process the audio of the whole Project), press Button 1 to select the MASTER tab.
To apply the effect to a Group (to process the audio of the whole Group), press Button 2 to select the GROUP tab and press the Group button A–H corresponding to the desired Group. If the desired Group is in another bank, before you select the Group you first need to press SHIFT + the corresponding Group button A–H to select the Group bank.
To apply the effect to a Sound, press Button 3 to select the SOUND tab, select the Group containing that Sound (see the previous step), and press SELECT + the pad of that Sound (or simply hit its pad if pads are in Pad Mode).
Move the 4-D encoder right to navigate to the Plug-in slot where you want to load the effect (the name of the Plug-in currently loaded in the selected slot appears between the arrows under Button 5 and 6 as well as on the left display). If you want to add the effect in addition to the existing Plug-ins, press Button 6 repeatedly to select EMPTY.
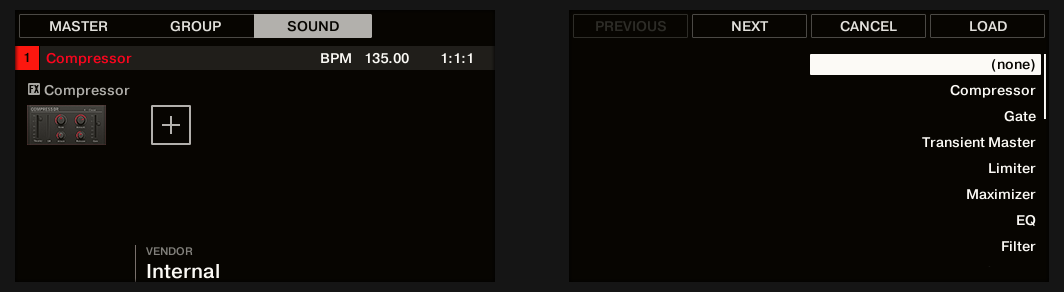
Press the 4-D encoder or SHIFT + BROWSER (Plug-in) to open the Plug-in Browser and browse the available Plug-ins.
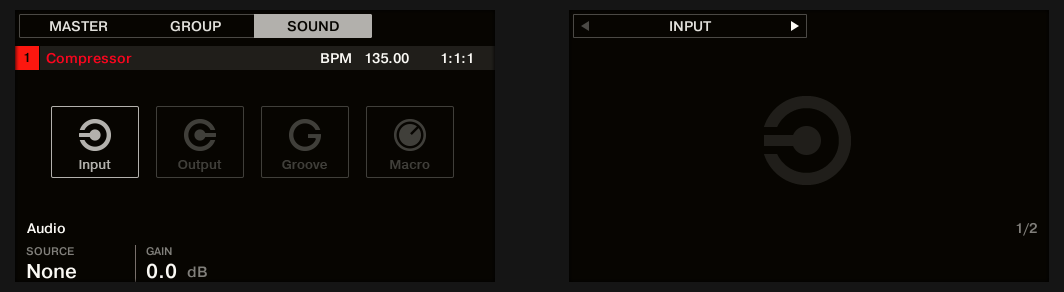
On the left display, turn Knob 1 to select the TYPE from Instrument or Effect. The Instrument option only appears when applying effects to Sounds. The right display shows the list of available instruments or effect Plug-ins.
Turn Knob 2 to select the VENDOR from INTERNAL, or the name of the vendor, for example, Native Instruments. If you have selected any other Plug-in slot the TYPE field is not available. Only Effect Plug-ins will be listed on the right display.
Turn the 4-D encoder or Knob 8 to browse the available Plug-ins.
When you have found the Plug-in you want to use, press the 4-D encoder or Button 8 (LOAD) to load it. You can also use Buttons 5 and 6 to step through the list and load each effect directly.
Leave the Plug-in Browser and switch back to Control mode by pressing the 4-D encoder or PLUG-IN.
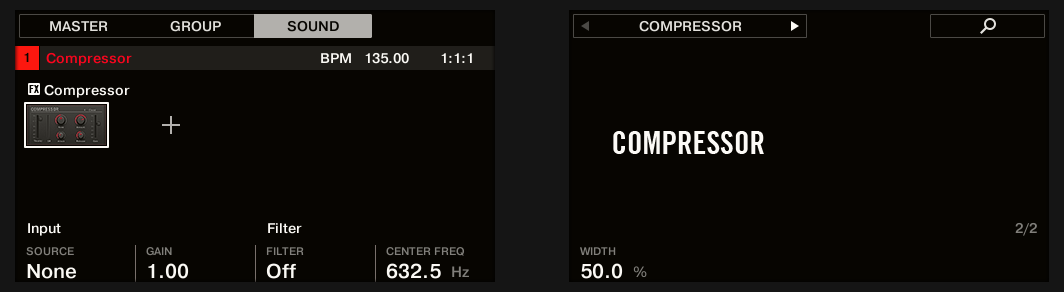
The effect is loaded in the selected Plug-in slot and it is visible on the displays. Now you can edit the effect parameters using Knobs 1–8 and the Page buttons.
Notes and Hints on Loading Effects
If you have selected a Plug-in slot already containing a Plug-in, this Plug-in will be replaced with the new Effect Plug-in. If you have instead selected the EMPTY entry, the new Effect Plug-in will be appended to the list of loaded Plug-ins.
Instead of using the Plug-in Browser, you can also press BROWSER and use the global Browser to load a particular preset for an Effect Plug-in.
Instead of loading the effect into the selected Plug-in slot (possibly replacing the Plug-in currently loaded), you can also insert the effect directly after the selected slot (a new Plug-in slot will be automatically created): After you have selected the desired Plug-in slot in Control mode, press SHIFT + Button 3 (INSERT) and choose an effect preset in the Browser that automatically opened. Upon loading, Maschine+ automatically leaves the Browser and switches back to Control mode.
Note
For detailed overviews and parameters descriptions of the Maschine+ effects, please refer to the Maschine Software Manual
Other Operations on Effects
You can manipulate effects like any other Plug-in loaded in a Plug-in slot. This notably includes adjusting the effect parameters, removing effects, moving effects to other Plug-in slots, saving and recalling effect presets, etc.
Using the Side-Chain Input
For certain Plug-ins, Maschine+ allows you to use a side-chain input to control how the effects process the audio.
What Is a Side-Chain Input?
If we consider an effect unit that processes the signal incoming at its main input, side-chaining means using a secondary signal (the “side-chain signal”) fed to a secondary input of the unit (the “side-chain input”) to control the behavior of the processing. Usually, the amplitude of the side-chain signal will determine how much the main signal will be processed by the unit.
In music production, the side-chain signal is most of the time another audio track of the project. A common example is the use of the kick drum track as a side-chain for the compression of the bass track: on each kick the compressor will compress the bass more, resulting in a typical pumping effect between kick and bass that can be heard in various styles of dance music.
The Side-Chain Parameter Page
The following Internal, Native Instruments, and External Plug-ins support side-chaining:
Internal Plug-ins: Compressor, Maximizer, Limiter, Gate, Filter.
AU plug-ins (Native Instruments and External): Any AU plug-in with side-chain input.
VST plug-ins (Native Instruments and External): Any VST plug-in with multiple inputs.
When you load any of these Plug-ins in a Sound or a Group, a Side-Chain Input Parameter page appears at the end of the page list.
Notice
Side-chaining is not possible at the Master level (i.e. if the Plug-in is loaded in a Plug-in slot of the Master).
The Side-Chain Input page of the Compressor Plug-in in the Control area.
The SIDE-CHAIN INPUT page of the Compressor Plug-in
Parameter | Description |
|---|---|
INPUT Section | |
Source | Selects the audio signal you want to use as side-chain signal to control the Plug-in. Available options are None (side-chain deactivated, default setting), the outputs of all (other) Sounds, and the outputs of all (other) Groups. In the menu these outputs are labeled as follows: For Groups: [Group name] (e.g., Drums) For Sounds: [Group name]: [Sound name] (e.g., Drums: Kick) In the selector display these outputs are labeled as follows: For Groups: [Group name] (e.g., Drums) For Sounds: [Group letter+number]:S[Sound number] (e.g., A1:S4 for the Sound 4 of Group A1) |
Gain | Adjusts the input level of the side-chain signal fed into the Plug-in. |
FILTER Section | |
Filter | Activates a filter on the side-chain input. This filter can be useful to select only a specific frequency range of the side-chain signal to control the Plug-in. |
Center Freq | Adjusts the center frequency of the filter. |
Width | Adjusts the bandwidth of the filter. |
Tip
Note that the settings of the Side-Chain Input page stay in place when you switch to another Plug-in supporting side-chain. This notably allows you to try different compressors or different compression presets without losing the side-chain setup.
Applying Effects to External Audio
The flexible routing of Maschine+ enables you to apply effects to external audio as well. This external audio can come from the inputs of Maschine+ or an audio interface attached to Maschine+.
To do this, we will choose a Sound and make use of the Audio page in its Input properties.
Step 1: Configure Maschine+ Audio Inputs
To begin, you must configure Maschine+ to receive audio at the inputs by making sure they are active.
Notice
If you are using Maschine+ in Controller mode as a plug-in in a host application, Maschine can receive audio from your host on any of its eight mono virtual inputs. To know how to route audio in your host to the virtual inputs of the Maschine plug-in, please refer to your host documentation and the Maschine Software Manual. When this is done, go directly to section Step 2: Set up a Sound to Receive the External Input.
Configuring Audio Inputs
Please make sure that you have connected an external audio signal source to Maschine+ or to the external audio interface connected to Maschine+ and that the inputs of the audio interface are activated. To do this:
Select the SETTINGS.
Select Audio using the 4-D encoder.
Select Page 1 (Interface) using the Page buttons.
Turn Knob 1 to select the Interface you want to use: Internal or External.
Select Page 2 (Input Routings) using the Page buttons.
Turn the Knobs to activate the inputs you want to use.
Audio signals coming from external sources plugged in the inputs selected here will now be routed to the Maschine+ inputs as selected.
Tip
Configuration of audio input can be done in the Audio Settings page, refer to Audio Settings.
Step 2: Set up a Sound to Receive the External Input
Now the external audio is routed to your Sound! You can adjust the level of the incoming signal via the Gain knob.
Notice
You will find a detailed reference of the Audio page of the Sounds’ Input properties in section Sending External Audio to Sounds
There are two ways to access the Input signal controls:
Method 1: Using the Channel Page
First, select the Sound you want to configure:
Press the CHANNEL button to enter Control mode and display the Channel properties.
Press Button 3 to select the SOUND tab.
Press the Group button A–H of the Group containing the empty Sound you want to use. If the Group in question is in another bank, before you select the Group you first need to press SHIFT + the corresponding Group button A–H to select its Group bank.
Press SELECT + the unlit pad of the empty Sound you want to use (or simply hit its unlit pad if pads are in Pad Mode). You can then select the desired input. You can do this via two methods: using the Master section, or using the Input properties on the displays.
Turn Knob 1 to set the SOURCE to Ext. 1.

Now the external audio is routed to your Sound! You can adjust the level of the incoming signal by turning Knob 2 (GAIN).
Method 2: Using the Navigate Page
Press Button 5 repeatedly until the Input properties are selected (you should see INPUT at the top left of the right display, under Button 5/6).
Press SHIFT + NAVIGATE + pad 1 to select the Audio Parameter page. You can also press the Page Left button until it turns off since the Audio page is the first page of the Input properties.
You will now see two parameters at the bottom of the left display: SOURCE (which selects the source) and GAIN (which adjusts the level of the input).
Turn Knob 1 to set the SOURCE to Ext. 1.
Now the external audio is routed to your Sound! You can adjust the level of the incoming signal by turning Knob 2 (GAIN).
Step 3: Load an Effect to Process an Input
You can now insert an Effect Plug-in into this Sound so that it processes the incoming audio.
To load an Effect to process an input:
Press the PLUG-IN button to show the Plug-in slots of the selected Sound. Since we have selected an empty Sound, you see EMPTY on the left of the left display as well as under Button 5/6 on the right display (i.e. there are no Plug-ins to navigate yet).
Press SHIFT + BROWSER (Plug-in) to open the Plug-in Browser and browse the available Plug-ins.
On the left display, turn Knob 1 to select the TYPE to Effect.
The right display shows the list of available instruments or effect Plug-ins.
If you have selected the first Plug-in slot of a Sound, turn Knob 2 to select the VENDOR, INTERNAL, or Native Instruments.
The right display shows only Effect Plug-ins of the type you have selected.
Turn the 4-D encoder or Knob 8 to browse the effects Plug-ins corresponding to your selection.
When you have found the Plug-in you want to use, press the 4-D encoder or Button 8 (LOAD) to load it. You can also use Buttons 5 and 6 to step through the list and load each effect directly.
The selected effect is loaded in a new Plug-in slot and directly starts to process your external audio. By pressing PLUG-IN or SHIFT + BROWSE again you can switch back to Control mode and adjust the effect.
Creating a Send Effect
Sometimes you might want to have a classic send effect, for example, a reverb which can be shared by multiple sound sources. To make use of a send effect, you need to:
Step 1: Set up a Sound or Group as send effect. This is done by loading an effect into its first Plug-in slot: Step 1: Set Up a Sound or Group as Send Effect.
Step 2: Route a portion of the desired audio signals from their original Sounds and Groups to that send effect. This is done via the Output properties of the corresponding Sounds and Groups: Step 2: Route Audio to the Send Effect.
Step 1: Set Up a Sound or Group as Send Effect
The procedure to set up a Sound or Group as a send effect is straightforward: You just need to load an effect into its first Plug-in slot — Maschine will take care of the rest and make it available as a destination for other channels of your Project.
Set Up a Sound as Send Effect
Press the PLUG-IN button to enter Control mode and show the Plug-in slots.
Press Button 3 to select the SOUND tab
Press the Group button A–H of the Group containing the empty Sound you want to use. If the Group in question is in another bank, before you select the Group you first need to press SHIFT + the corresponding Group button A–H to select its Group bank.
Press SELECT + the unlit pad of the empty Sound you want to use (or simply hit its unlit pad if pads are in Pad Mode). Since we have selected an empty Sound, you see (NONE) under Button 7/8 and these buttons are inactive (i.e. there are no Plug-ins to navigate yet).
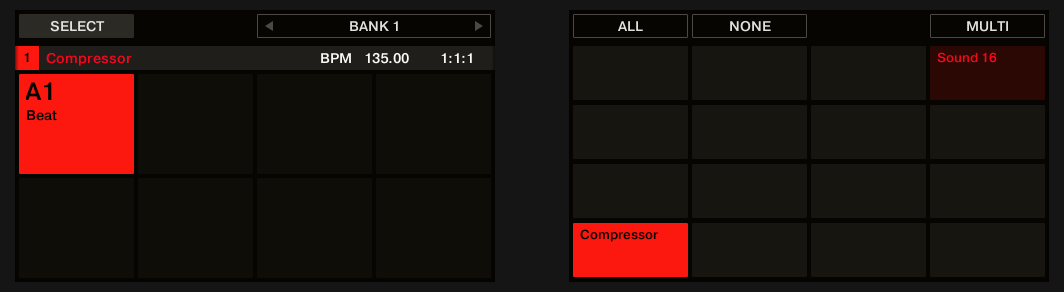
Press SHIFT + BROWSE to open the Plug-in Browser and browse the available Instrument and Effect Plug-ins.
On the left display, turn Knob 1 to select the TYPE to Effect.
The right display shows the list of available instruments or effect Plug-ins.
If you have selected the first Plug-in slot of a Sound, turn Knob 2 to select the VENDOR from INTERNAL, or the name of a vendor, for example, Native Instruments.
The right display shows only Effect Plug-ins of the type you have selected.

Turn the 4-D encoder or Knob 8 to browse the effects Plug-ins corresponding to your selection.
When you have found the effect you want to use (for example, the Maschine Compressor), press the 4-D encoder or Button 8 to load it. You can also use Button 5/6 to step through the list and load each effect directly.
Switch back to Control mode by pressing PLUG-IN (or by pressing SHIFT + BROWSE again).
Now you can edit the effect parameters using Knobs 1–8 and the Page buttons as usual (see Navigating Channel Properties, Plug-ins, and Parameter Pages. When you load an effect into the first Plug-in slot of a Sound, Maschine+ automatically configures the Sound’s input to receive any signal(s) coming from other Sounds and Groups in your Project and sends them through its own Plug-in slots, in other terms, you now have a send effect.
Now that the effect is loaded, we suggest that you rename the Sound slot to the Plug-in name: this will be of great help when routing other signals to that send effect (refer to Step 2: Route Audio to the Send Effect below).
Notice
For more information on renaming Sound slots, refer to section Renaming Sound Slots.
Step 2: Route Audio to the Send Effect
Once you have configured a Sound or Group as send effect (see Step 1: Set Up a Sound or Group as Send Effect ), you can send the output of any other Sounds and Groups to that Sound or Group. For this purpose, each Sound and each Group is equipped with an additional two auxiliary outputs available in its Output properties.
You can repeat the process to route more Sounds/Groups to the same send effect, or route the same Sound/Group to an additional send effect send using AUX 2.
Routing Audio to the Send Effect
Press the CHANNEL button to enter Control mode and display the Channel properties.
If you want to route a Group’s output to the send effect, press Button 2 to select the GROUP tab, if necessary press SHIFT + the Group button A–H corresponding to the bank containing the Group, and press the Group button A–H corresponding to the desired Group.
If you want to route a Sound’s output to the send effect, press Button 3 to select the SOUND tab, select the Group containing that Sound as described in the previous step, and press SELECT + the pad of that Sound (or simply press its pad if pads are in Pad Mode).
Press Button 5/6 to select OUTPUT. The Output properties are shown in the displays (in the example underneath we show the Output properties of a Sound).

Press the right Page button to select the Aux page of parameters.
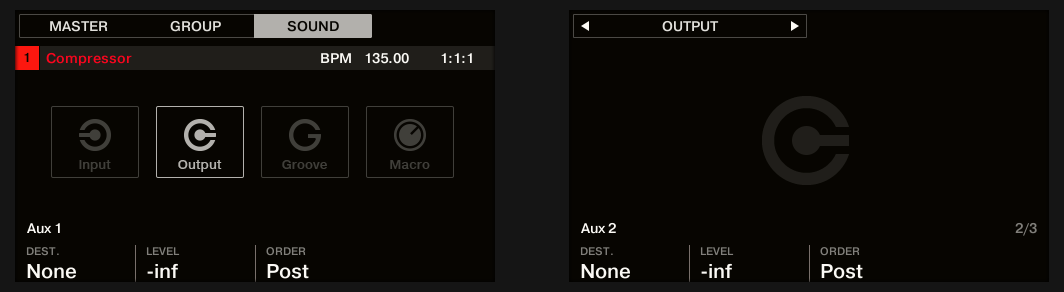
Turn Knob 1 (Aux 1 DEST.) to assign the first auxiliary output to the desired send effect. In addition to the usual entries available in both fields, you will find all the Sounds and Groups with an Effect Plug-in loaded in their first Plug-in slot — see Step 1: Set Up a Sound or Group as Send Effect For each Sound, the entry shows the Group letter and number followed by the Sound number (in the example underneath we selected the entry A1:S1-1 for the Aux 1 output).
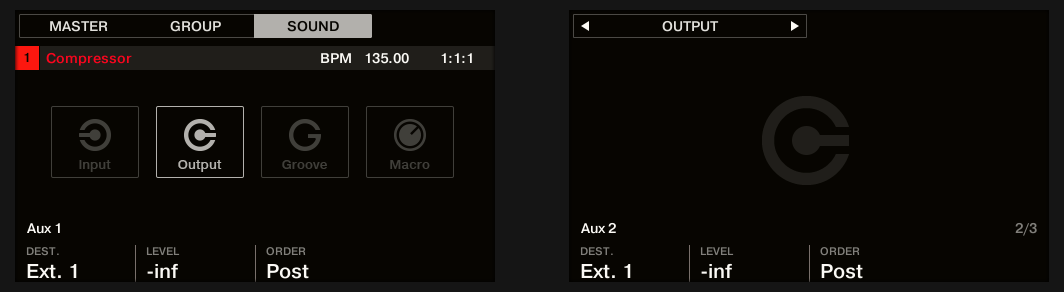
Use Knob 2 (Aux 1 LEVEL) to adjust the level of the signal sent to that auxiliary output.
Tip
The signal of each auxiliary output is taken by default after the main output level control has been applied. This can be changed via Knob 3 (Aux 1 ORDER). For more information, refer to Setting Up Auxiliary Outputs for Sounds and Groups.
You can repeat the process to route more Sounds/Groups to the same send effect, or route the same Sound/Group to another send effect send using Aux 2.
Creating Multi-Effects
Creating a multi-effect unit is basically the same thing as creating a series of Sounds as send effects within a Group and arrange them as you see fit. Following the procedure described in the previous section Creating a Send Effect in every Sound of the Group, you can set up a send effect containing any number of effects, the only limit being the processing power of your computer! You can route Sounds within the Group to your liking: You can chain them all, keep them as separate effects to be used in parallel, build any combination of both, etc.
Organizing Your Effects into Several Sounds
If you plan to build multi-effects containing more than a few Effect Plug-ins in series, you have many ways at your disposal. Since you can have any number of Effect Plug-ins in each Sound, you can set up the whole sequence of effects in series into one single Sound. However, it might be judicious to split your sequence of effects across several Sounds whose outputs are sent into the inputs of the next Sound (thereby re-building an equivalent sequence of effects). Doing this can have several advantages, for example:
The Sound List lets you keep a better overview of your effect sequence than the tiny Plug-in List in a single Sound.
You can rename and colorize each Sound individually according to the effect(s) it contains.
You have better control over your whole effect sequence.
You can easily re-arrange your effect sequence by changing the routing between your Sounds.
To use several Sounds plugged in series, use the procedure described in the previous section Creating a Send Effect to send the output of each Sound to the input of the next one in the sequence.
Which of the Main, Aux 1, and Aux 2 Output To Use?
Each Sound provides three distinct outputs: Main, Aux 1, and Aux 2. If you want to build a series of effects split across several Sounds, for each Sound in the series you have to send one of these outputs to the input of the next Sound. For this we recommend you to use the main output of the Sound rather than any of its auxiliary outputs because it provides a few useful additional features not available on the auxiliary outputs:
Cue switch: You can send the Main output of any Sound to the Cue bus and pre-listen the channel on a distinct Maschine+ output (typically your headphones). Note that enabling the Cue switch automatically mutes both Aux 1 and Aux 2 outputs as well, but it doesn’t send them to the Cue bus!
Hardware control: Your controller provides various shortcuts allowing a quicker and easier control of your Sounds’ Main output.
These can be of great help when building complex multi-effects!
Saving Your Multi-Effects
You can then save the whole multi-effect Group for later use. This can be useful if you like a certain combination of effects for your live setup or in the studio. Although this is overkill, you can later still add more effects on the multi-effect Group itself, imagine for example distinct send effects in different Sounds, but all of them being further processed by the same set of effects at the Group level.
However, take time to name every Sound in this multi-effect Group after the effect(s) inserted and to give it a name that allows you to recognize it as an effect; remember that you will be choosing this effect from a potentially large list in your user library. In the Maschine Library, there are already a number of multi-effect Groups tagged Multi FX.
For information on saving Groups, refer to Saving a Group.