Advanced Usage Tutorials
This section guides you through advanced workflows of Traktor such as using FX Units, creating Remix Sets, working with Cue Points and managing your Track Collection.
This section guides you through advanced workflows of Traktor such as using FX Units, creating Remix Sets, working with Cue Points and managing your Track Collection.
Working with Cue Points
In this section you learn how to work with Cue Points. At first you learn what exactly a Cue Point is and about the different available types. Then you will learn where in Traktor you can store and manage your Cue Points.
About Cue Points
Starting from a particular point in a track (for mixing in, triggering, etc.) is called “cueing.” Traktor lets you mark points for cueing and for directly jumping to particular positions: These are called Cue Points. Cue Points can be stored for each track which allows you to re-use them at a later stage or in a later session. With the eight Hotcue buttons on the CUE page in the Advanced Panel, you can store your most important Cue Points and Loops and trigger them at any time with a click. Besides jumping to particular positions of a track, for example, beginning vocals, instrumentals or breaks, Cue Points can also be used for creative techniques such as remixing parts of a track or beat-juggling performances.
Cue Point Types
Traktor provides several Cue Point types for several purposes. This section gives a detailed description of the different Cue Point Types available in the Cue Type drop-down menu, featured on the CUE page in the Advanced panel:
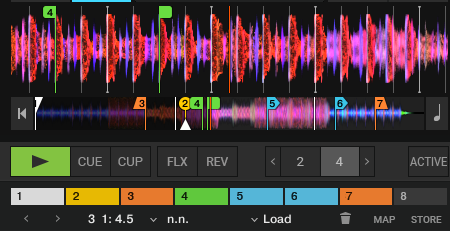
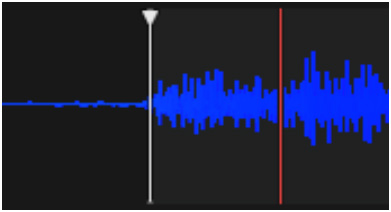
Cue Point types in the Waveform and Stripe.
Floating Cue Point: The Floating Cue Point is always your starting point for working with cue points and for storing loops. The Floating Cue Point is displayed in white.
Cue Point: The regular Cue Points used to jump to particular positions in the track. Cue Points are displayed in blue.
Note
When enabling the option
Load: A track with a Load Cue Point will automatically jump to this point when loaded. Load Cue Points are displayed in yellow.
Notice
If you want to make use of Load Cue Points, you need to enable the Initially cue to Load Marker option in the Preferences > Loading > Loading.
Fade Out and Fade In: The Fade Out and Fade In Cue Points are used for the automated Cue/Play of tracks. For this to work, you have to set a Fade Out Cue Point in one track and a Fade In Cue Point in another track. Fade In and Fade Out Cue Points are displayed in orange. For more information, refer to Setting Fade Out and Fade In Cue Points in Tracks for Automated Mixing.
Loop (Loop In point ): When selecting Loop from the menu, this changes the selected Cue Point into a Loop In marker. Loop markers are displayed in green. For more information, refer to Working with Loops.
Accessing the CUE Page in the Advanced Panel
To manage your Cue Points in a track, you need to open the CUE page in the Advanced Panel:
Click on the Advanced Panel button to display the Advanced Panels of Deck A and B, and Deck C and D, respectively.
In the Advanced Panel select CUE to the show CUE page.
Setting Cue Points
Setting Cue Points is straight forward. On a paused Deck:
Scroll to the position in the track where you want to set a Cue Point.
Click the CUE button in the Transport Controls to set the Cue Point at the current position.
When you now playback the track and you click the CUE button in the transport controls, the playhead jumps directly to the Cue Point.
Storing Cue Points
Cue Points can be stored to the CUE List.
Scroll to the position in the track where you want to set a Cue Point.
Click the CUE button in the Transport Controls to set the Cue Point at the current position.
Click the STORE button on the CUE page in the Advanced Panel to store the Cue Point.
The Cue Point is stored in the Cue List.
Nudging Cue Points
Cue Points can be nudged from the Cue Page in the Advanced Panel.
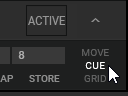
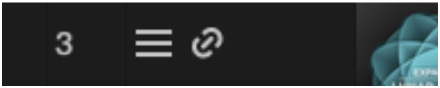
Click on the Number Button of the Cue Point you want to nudge.
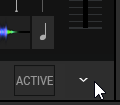
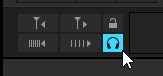
Nudge the Cue Point by pressing the Move Cue BWD or Move Cue FWD buttons found on the bottom left of the Cue Page.
The Nudge buttons can be mapped to your midi controller via the Controller Manager.
Jumping to Cue Points
When you have stored a number of Cue Points in the CUE list you can select them individually to jump to the respective position in the track.
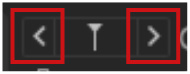
Skipping to the Next/Previous Stored Cue Point
Use the Next/Previous Cue Point buttons to skip from one Stored Cue Point to the next.
The playhead jumps to the respective position in the Waveform and in the Stripe. The Cue Position display shows the position of the stored Cue Point within the track.
Selecting Cue Points from the CUE List
You can jump to Cue Point positions in the track by selecting the Cue Point directly from the CUE list:
Click on the arrow button to open the CUE list.
Click one of the entries to select the stored Cue Point.
The playhead jumps to the respective position in the Waveform and in the Stripe. The Cue Position display shows the position of the stored Cue Point within the track.
Renaming Cue Points
You can rename any stored Cue Point in a track:
Select the stored Cue Point you want to rename.
Click in the Cue Name display to enable editing.
Enter the name.
Changing the Cue Point Type
You can change the Cue Point Type using the Cue Type menu, which is featured on the CUE page in the Advanced Panel.
The following Cue Point Types are available in the Cue Type drop-down menu:
Cue (Cue Point).
Fade-In (Fade In Cue Point)
Fade-Out (Fade Out Cue Point)
Load (Load Cue Point)
Loop (Loop In Point)
Procedure
Select the stored Cue Point for which you want to change the Cue Type.
Click on the Cue Type menu button to open the menu.
Select the Cue Type to which you want to change the Cue Point.
The Cue Point Type and the color of the Cue Point marker in the Waveform display and the Stripe view are changed accordingly.
Deleting Cue Points
If you want to delete a stored Cue Point permanently, perform the following:
Select the stored Cue Point you want to delete.
Click on the Bin icon to delete the Cue Point.
The Cue Point is permanently deleted.
Setting Fade Out and Fade In Cue Points in Tracks for Automated Mixing
This section explains how you set Fade Out Points and Fade In Cue Points for tracks to be mixed automatically. For this to work, you have to set a Fade Out Cue Point in one track and a Fade In Cue Point in the other track. While a Fade Out Cue Point always triggers the playback of the next track, a Fade In Cue Point triggers no action. Fade In and Fade Out Cue Points also work when using Cruise mode.
Notice
You have to enable the Activate Fade In & Fade Out Markers option in the Preferences > Loading > Loading.
Defining the Fade Out Point in the First Track in Deck A
On a Track Deck open the Advanced Panel and select the CUE page.
Load a track into Deck A.
Scroll to the position where you want the track to fade out for the transition.
Click CUE to set the Cue Point to this position.
Click STORE to convert the Cue Point into a stored Cue Point.
Open the Cue Type drop-down menu and and select Fade-Out.
An orange Fade Out Cue Point appears in the Waveform and in the Stripe.
Defining the Fade In Point in the Second Track in Deck B
Load a track into Deck B.
Scroll to the position where you want the track to fade for the transition.
Click CUE to set the Cue Point to this position.
Click STORE to convert the Cue Point into a stored Cue Point.
Open the Cue Type drop-down menu and and select Fade-In.
An orange Fade In Cue Point appears in the Waveform and in the Stripe.
When you start the playback of the track in Deck A and the playhead crosses the Fade Out Cue Point, the track in Deck B will automatically begin playing from its Fade In Cue Point.
Working with Loops
In this section you will learn how to work with Loops using Traktor’s dedicated Loop controls.
About Looping
A Loop is a snippet of audio that repeats (loops). Loops are used as tools for remixing parts of tracks and as a way to extend track transitions. The length or size of Loops differ but are always beat-accurate. This means Loops always stick to the beat.
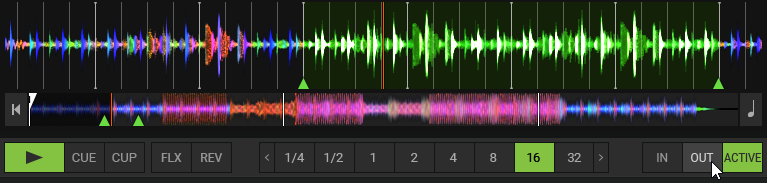
Available Auto-Loop Sizes
In Traktor you can trigger a loop using one of the following predefined loop sizes automatically:
1/32 of a beat
1/16 of a beat
1/8 of a beat
1/4 of a beat
1/2 of a beat
1 beat
2 beats
4 beats
8 beats
16 beats
32 beats
You can also define the loop start and loop end manually with the help of dedicated Loop IN and OUT buttons.
Enable Looping with a Predefined Loopsize
To enable looping on a playing track:
Click one of the Auto Loop buttons with the predefined size on the Deck.

This automatically enables Looping at the current playback position in the track. The Loop is marked in green in the Waveform display. Also, the ACTIVE button lights up in green.
By pressing the ACTIVE button when no Loop is activated, this will enable the next Loop stored in the track.
Enable Looping with a Customized Loop Size
You can also enable Looping with a customized Loop size:
On a playing Deck:
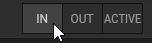
Click the IN button to set the Loop In Point at the current position in the Waveform display.
Wait as long as you want the loop size to be.
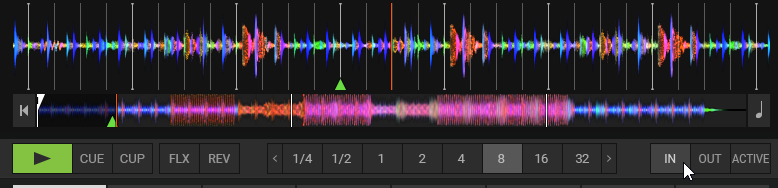
Click the OUT button to set the Loop Out Point.
Looping is activated using a customized Loop size.
Disable Looping
Click the ACTIVE button.
Looping stops and playback continues as normal. The Loop In and Out markers remain at their positions in the Waveform dsplay. The ACTIVE button is unlit.
Storing Loops
As with Cue Points you can also store Loops and return to them at a later point. Loops are stored on the CUE page in the Advanced Panel.
To store the active Loop:
Open the Advanced Panel.
Select the CUE page.
Click an empty Hotcue button to store the current Loop.
The Loop is stored on the Hotcue button. The Hotcue button lights up green. You can return to the Loop by pressing the same Hotcue button again.
Besides using the Hotcue buttons you can alternatively use the STORE button in the CUE page to store loops in the CUE list.
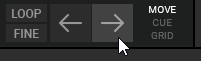
Moving the Loop
You can also quickly move the current Loop across your track by using the MOVE tab in the Advanced Panel:
Open the MOVE tab in the Advanced Panel.
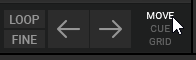
Select Loop from the drop-down menu.

Select a Move Size from the MOVE Size Control bar.

Move the Loop forward or backward by clicking the Loop Move buttons (arrow buttons).
Moving Loop In Points and Loop Out Points
The Loop In and Loop Out modes allow you to move the Loop In Point and the Loop Out Point of the activated Loop. This will change the Loop size making it smaller or larger by a set amount when the Cue Move BWD/FWD buttons are used.
Tip
Moving only Loop In or Loop Out point can be used for tension-building drum roll effects with the active loop.
Procedure
Select Loop In from the Move Mode menu.
Choose a move size in the Move Size Control bar.
Use the Cue Move BWD/FWD buttons to move the Loop In Point by the chosen amount.
To move the Loop Out Point, repeat the aforementioned steps with selecting the Loop Out entry from the Move Mode menu.
By using the LOOP Mode button, you select a move size that is based on the current Loop size for the movement.
By using FINE Mode button, you select a fine step size for the movement. The MOVE Size Control bar automatically switches to FINE. Use xFNE to make even finer changes.
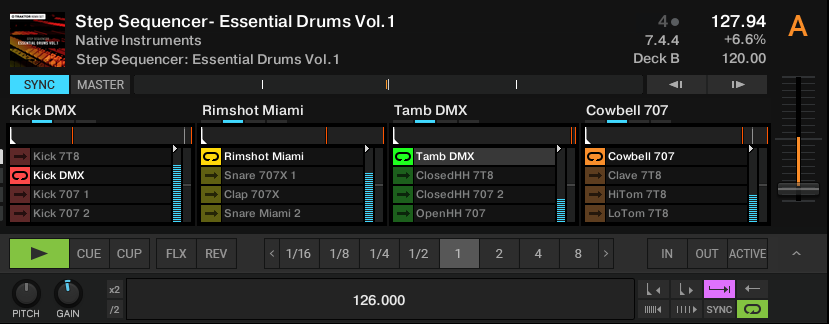
Working with FX Units
In this section you will learn how to assign FX Units to Mixer channels and how to control individual Effect parameters in the FX Units. The FX units can be operated in different modes and are freely configurable. In addition to Single and Group FX, you have access to the Pattern Player module which can be loaded into any of the four FX slots.
Assigning FX Units to Mixer Channels
Assigning FX Units to Mixer channels is straight forward. In order to assign an FX Unit to a Mixer channel:
Click the FX Unit On button for the corresponding FX Unit in the Mixer channel.
The FX Unit is assigned and the FX Unit On button lights up orange.
Tip
Any FX Unit can be assigned to all Mixer channels simultaneously.
Switching between FX Unit Modes
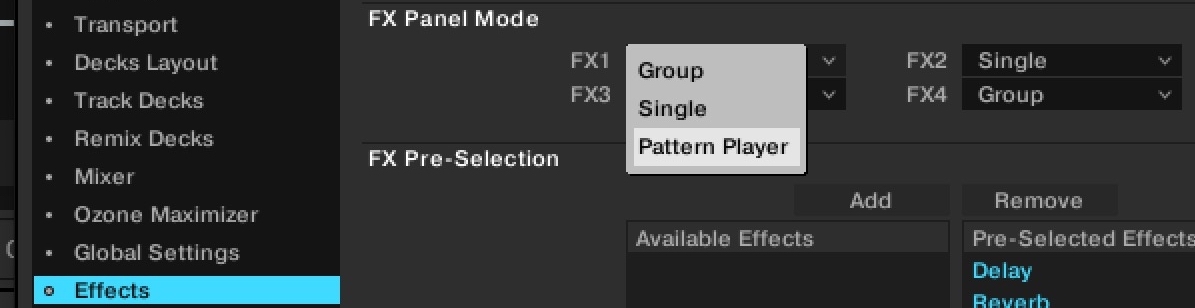
FX Units can operate in one of three different modes, Single, Group, and Pattern Player. You can switch between Single and Group directly in the respective FX Unit, while Pattern Player needs to be selected in the Effects Preferences.
To select Single FX mode or Group FX mode for an FX Unit:
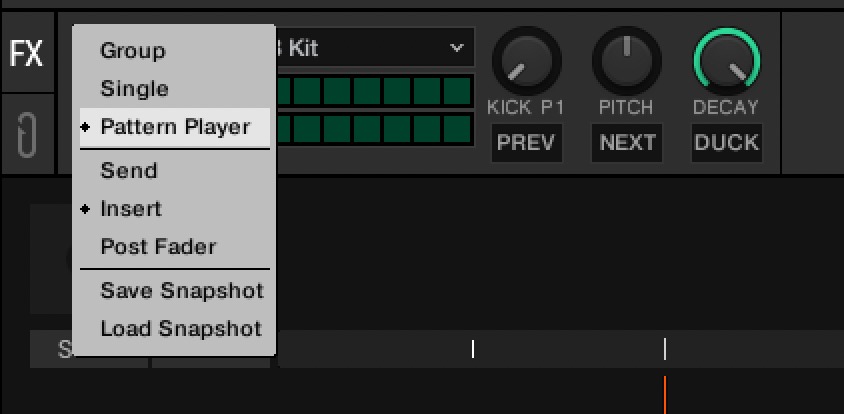
Click the FX Unit number to open the context menu.

Select Group or Single.

The FX Unit switched to the selected FX mode.
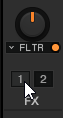
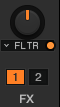
An FX Unit in Single FX mode can be recognized on the single dot next to the FX Unit number. An FX Unit in Group FX mode shows three dots.
To select Pattern Player mode:
Go into Traktor's Preferences and select the Effects Preference page.
In the FX Panel Mode section choose Pattern Player to load a Pattern Player into any of the four slots.
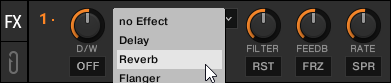
Using the FX Unit in Single FX Mode
In Single FX mode you have full control over all the parameters of one effect.
Note
For detailed information about each effect control, refer to FX Units.
Selecting an Effect
Select an effect in the Effect selector.
Modulate the Effect Behavior
Modulate the behavior of the selected effect with the Effect Parameter knobs and Effect buttons.
Control the Mix between the Effect Signal and the Original Signal
Turn the D/W knob to control the direct-to-processed signal mix.
Switch the effect on and off by clicking the Effect On button.
Resetting the Parameter Settings
Click the RST button to reset all the effect settings inside the panel to the default value.
Using the FX Units in Group FX Mode
In Group FX mode you can use and control up to three effects in one FX Unit.
Note
For detailed information about each effect control, refer to FX Units.
Selecting Effects
Select the effects you want to use in the Effect selectors.
Switching Effects On and Off
Switch on and off every effect in the effect chain with the three FX On buttons.
Controlling the Effect Amounts
Control the effect amounts with the Effect Amount knobs.
Controlling the Mix of the Effect Signal and the Original Signal
Turn the D/W knob to control the direct-to-processed signal mix for the entire effect chain.
Resetting the Effect Settings
Double-click an effect knob to reset the individual setting to the default value.
Using the FX Unit in Pattern Player Mode
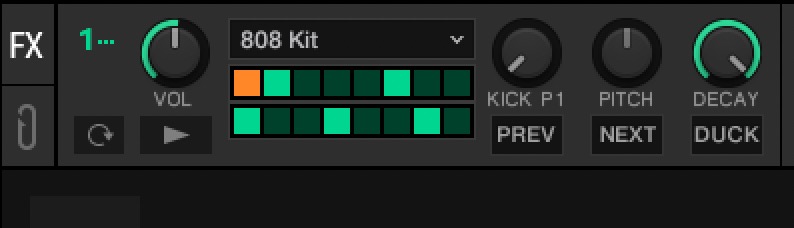
The Pattern Player is a performance tool that allows you to add rhythmic samples on top of your tracks to bring in more variations. This tool has been designed to be great for performance and create tons of possibilities to enrich your mix.
Note
For generic information on using FX units, refer to FX Units.
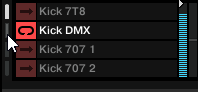
Basic Operation of the Pattern Player
The Pattern Player can be used to play rhythmical patterns within Traktor.
To start a pattern:
Press play on any Pattern Player unit. You will see the sequence running in sync with your Master clock.
Furthermore, you can interact with the Pattern Player in the following ways:
Pattern Player(s) can be assigned to any deck like you would with an effect unit.
The volume knob can be adjusted to set the volume of the sample.
Like any effect unit, you can use the Pattern Player in insert, post fader or send mode.
The different controls can be adjusted to add dynamic patterns in your mix.
Once you have found the default configuration you like the most, it can be saved as a snapshot like with any other effect.
Advanced Operation of the Pattern Player
The Pattern Player can be used in a number of advanced ways to add a pattern element to your Traktor performances.
Pattern Players Applied to a Deck
The Pattern Player has been designed to allow it to interact with the sound from a specific deck via the ducking effect. This effect can be used with every type of sample serving different purposes.
The most obvious use case is enabling ducking with kick samples to make a track more dancefloor-friendly when low frequencies are weak, but other configurations are possible.
Pattern Player as a Single Deck
To assign the Pattern Player to an empty deck:
Click on the FX unit Mode Selection dropdown.
Choose Pattern Player.
 |
By using the Pattern Player this way you can have full independent control of the sample by using EQ and Filters.
For further creative options, apply other effects to this deck.
Note
Effects are chained according to the order : 1 > 2 > 3 > 4. This means that any effect you apply on this deck would affect the Pattern Player which opens up a lot of possibilities as Traktor contains a number of effects.
Pattern Player in Send, Insert, and Post Fader Modes
The Pattern Player can be used in send, insert or post fader modes.
In post fader mode, the Pattern Player volume is independent of the deck volume, filter and EQ. This allows you to keep the signal from the Pattern Player intact during transitions.
In insert mode, the Pattern Player sound is processed in the deck that it’s applied to. This means that you can use the EQ to add even more variations with the Mixer effects filters.
In send mode, your Pattern Player can be treated as a fifth deck. This mode is only available in external mixing mode. You can also inject your external signal into the input FX (send) from your mixer and use the ducking function of the Pattern Player before sending back the result via the output FX return.
Note
Note that you can send several Pattern Player units, creating a whole drum machine that you can then treat externally and add to the rest of your mix via a live input deck or in an external hardware mixer.
Pattern Editing
The steps of each pattern can be enabled and disabled to create edits of the preconfigured factory patterns.
To edit a pattern:
Click on the squares in the pattern grid to add or remove steps in the pattern.
 |
Pattern Player Edits Retention
Edits that you make to patterns are recalled when turning the Pattern Selection control back and forth.
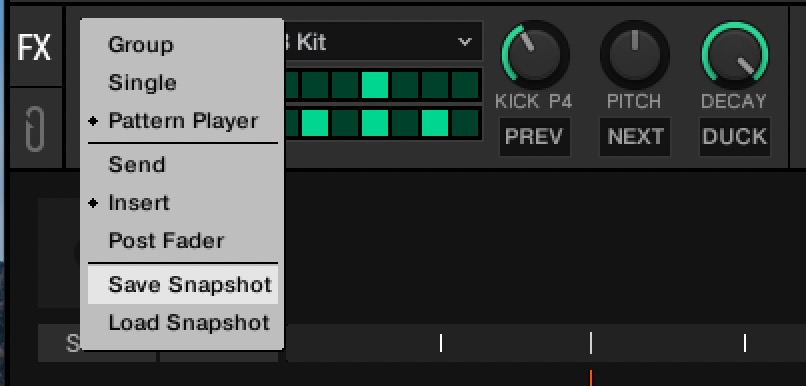
The Pattern Player control configuration can be stored using the Snapshot function in the Mode Selection drop down. This way each Kit will be loaded in its preferred configuration .
To store a snapshot:
Click the Mode Selection dropdown on the FX unit and select Save Snapshot
 |
Saving a Snapshot of FX Parameter Settings
You can save the current parameter settings in the FX unit in a snapshot:
Click the FX Unit number to open the context menu.
While holding the left mouse button, select Save Snapshot and release.
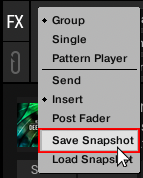
The parameter settings are saved. The next time you select the Effect in an FX Unit, this will recall the saved settings.
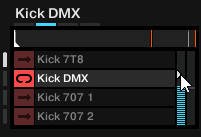
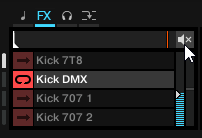
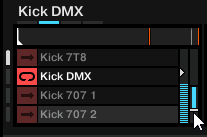
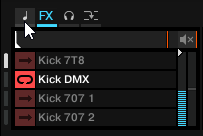
Using the Cue Channel for Mixing
Any Mixer channel provides the Cue button to send the audio signal to the Headphones Cue channel. This way you can prepare the transition to the next track, preview tracks, or preview effect behavior in a live situation. In order to use the Headphone Cue channel, you ideally use a Traktor Kontrol DJ controller providing the dedicated Headphone Cue channel. However, you can also use an external audio interface with a monitor output channel and configure it in the Preferences. For more information on, refer to Configuring Traktor to Use with an External Audio Interface.
To cue the next track in the Headphones Cue channel:
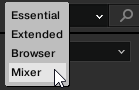
Switch the Traktor Layout to Mixer by selecting it from the Layout drop-down menu in the header.
The Headphone Cue controls and the Cue buttons on the Mixer channels are now displayed.
Click the Cue button on the Mixer channel with the audio signal you want to mix next.
The button lights up, indicating that the audio signal of the Mixer channel is sent to the Headphone Cue channel which you will hear in your headphones.
Turn the VOL knob to adjust the volume of the Headphones Cue channel to a moderate listening level.
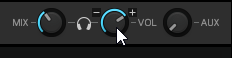
Turn the MIX knob to adjust the balance between the cued track and the main mix in your headphones. Turn it counter-clockwise when you want to concentrate on the cued track and turn it clockwise when you want to hear more of the main mix.
Working with Stems
In this section you learn how to load and play back Stem files in the Stem Decks, and how to adjust volumes and apply Filter FX on individual Stems.
Stem files allow you to interact with four different musical elements of a track independently while DJing. The four Stems in a Stem file can be modified individually to create spontaneous instrumentals, remixes, or mashups. You can create transitions between elements Stem by Stem, or apply effects and EQ to just to a specific Stem instead of the entire track. To get really creative, you could mix musical elements across multiple Stem Decks, for example, by taking the vocals from one track and mixing it with the beat from another.
About Stem Files
A Stem file is a track in a custom format with the file extension “.stem.mp4” that contains four audio tracks (the Stems). Each Stem represents one of the key elements of the track, for example, drums, bass, synths, and vocals. By default, when a Stem file is played back in Traktor all Stems are audible and summarize to the entire track.
Stem files can be of two sorts:
Generated Stem files: Traktor can separate your tracks into three instrumental Stems and one vocal Stem: drums and percussion, bass, other, and vocals. The third Stem (“other”) is the instrumental remainder after removing drums and bass, and can vary from track to track. You can generate Stem files from all tracks that you own. Generated Stem files are linked to their original tracks in your Track Collection and are stored locally on your computer or external hard drive. For more information on how to generate Stem files, refer to Generating and deleting Stem files.
Studio Stem files: You can purchase ready-made, studio-quality Stem files. A Studio Stem file can include Stems specific to that track, for example, “drums,” “808,” “chords,” and “pads.”
Studio Stem files have to be analyzed before they can be loaded
Due to the large amount of data that must be read from a Stem file, Studio Stem files must be analyzed before loading them into a Stem Deck. You cannot load nor play Stem files before they have been analyzed.
For more information on how to analyze tracks and Studio Stem files, refer to Analyzing Tracks Manually.
Stem files in the Track Collection
In your Track Collection, all Stem files are indicated by a Stem symbol showing three little layers in the icon column:
 |
In addition, generating a Stem file from a track does not create any new entry in your Track Collection: Instead, the resulting Stem file is linked to its original track and both share the same entry in the list. The availability of a Stem version for a track is indicated by the Stem Link symbol in the icon column:
 |
Note
When loading a track with an available Stem file, you can choose whether to load the Stem version into a Stem Deck or the original track into a Track Deck. For more information, refer to Loading a Stem file.
If the Stem version of a track has been generated but is missing or unavailable (for example, if it is stored on an external drive currently disconnected from your computer), the Stem Link symbol turns red:
 |
In that case the Stem file cannot be loaded, only the original track.
Generating and deleting Stem files
To generate a Stem version of a track, do the following:
Right-click (Windows) or [ctrl]-click (Mac) the desired track in the Track Collection and select Generate Stems from the context menu.
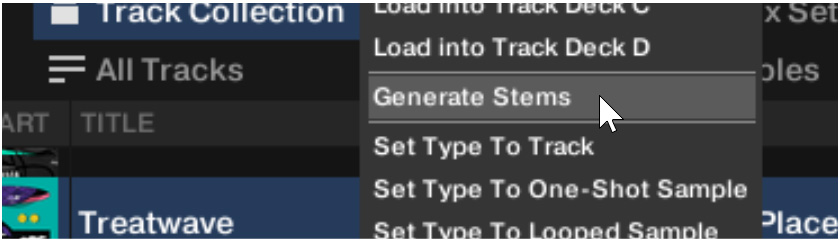
The status bar at the bottom of the Browser shows the progress of the ongoing Stem separation. After completion, the Stem Link symbol appears in the icon column to indicate that a Stem version is available.
Note
Depending on your CPU, the separation into Stems takes between one and two thirds of the track’s playing time.
At any time you can cancel an ongoing Stem separation by right-clicking (Windows) or [ctrl]-clicking (Mac) the status bar and selecting Remove analysis/download/stem separation jobs….
You can trigger the Stem separation even while the track is playing. You can also map the Generate Stems command to a keyboard shortcut or a controller button by opening the Controller Manager page of the Preferences and selecting Add In… > Browser > List > Generate Stems.
Deleting a Stem version
To delete the Stem version of a track, do the following:
Right-click (Windows) or [ctrl]-click (Mac) the desired track in the Track Collection and select Delete Associated Stems from the context menu.
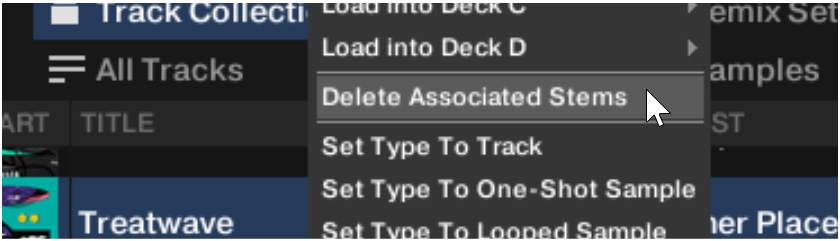
The Stem file for that track is deleted. The Stem (three-layer) and Stem Link symbols disappear from the icon column.
Note
If the associated Stem file cannot be found (for example, if it is stored on an external hard drive currently disconnected from your computer), it cannot be removed from your disk. In this case only the link between the original track and its Stem version is removed.
Loading a Stem file
Loading a Generated Stem file
In the Track List, Generated Stem files share their entry with their original track. You have the choice between loading the original track and its Stem version.
By default, you can load the Stem version of a track using a simple drag-and-drop:
Click the desired track from the Track Collection. You can recognize tracks with a Stem version by looking at the icon column in the Track List: All tracks with an available Stem version show both a three-layer symbol and a Stem Link symbol. If the desired track has no Stem version available, you can generate it now.
Drag and drop the track onto the desired Deck, or press the Load button on your Traktor controller.
By default, the Deck Type automatically switches to Stem Deck and the Stem version of the track is loaded. The Multi-Track Waveform shows the four waveforms of the individual Stems. The Stripe view shows the global waveform of the entire track.
Alternatively, you can load the original track instead of its Stem version by holding [Shift] on your computer keyboard while dragging and dropping the track, or by double-pressing the Load button on your Traktor controller.
Note
You can switch these default and alternative loading behaviors by opening the Loading page of the Preferences and adjusting the Load as Stem / Load as Track settings in the Loading to Deck section.
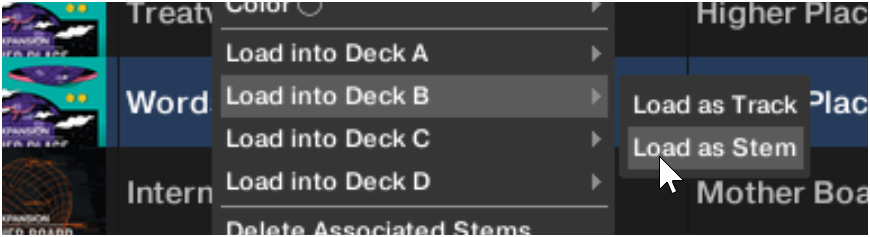
Independently of the behavior set as default, you can always specify which version to load by right-clicking (Windows) or [ctrl]-clicking (Mac) the track from the Track List and selecting the Load as Track or Load as Stem command for the desired Deck.
 |
The Controller Manager provides assignable controls, both for the default/alternative loading and for the specified track/stem loading described above. You can assign them by opening the Controller Manager page of the Preferences , clicking Add in… > Deck Common > Load Selected, and selecting the corresponding controls: Load Selected (loading default), Load Selected (loading alternative), Load Selected (load as track), and Load Selected (load as stems).
Note
If you have created loading assignments with Traktor Pro 3, these will be imported as Load Selected (loading default). This way, your imported mappings give you instant access to Stem loading.
Loading a Studio Stem file
To load a Studio Stem file:
Click the desired Studio Stem file from the Track Collection. You can recognize Studio Stem files by looking at the icon column in the Track List: While all Stem files show a three-layer symbol, Studio Stem files do not show the additional Stem Link symbol next to it.
Drag and drop the Studio Stem file onto the desired Deck (or press the Load button on your Traktor controller).
The Deck Type automatically switches to Stem Deck. The Multi-Track Waveform shows the four waveforms of the individual Stems. The Stripe view shows the global waveform of the entire Stem file.
Playing back the Stem file
In order to play back a Stem file:
Click on the Play button on the Stem Deck.
The Stem Deck plays back the Stem file similar to a track. The individual waveforms start moving.
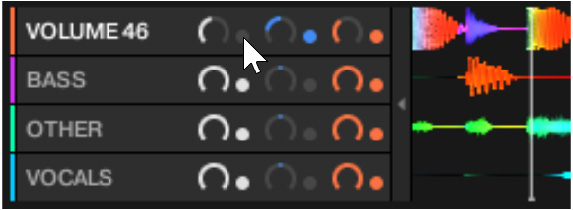
Adjusting the Stem volumes
You can adjust the volume of each Stem individually and use its dedicated Mute function.
To adjust the volume of any individual Stem, drag its white Volume knob up or down.
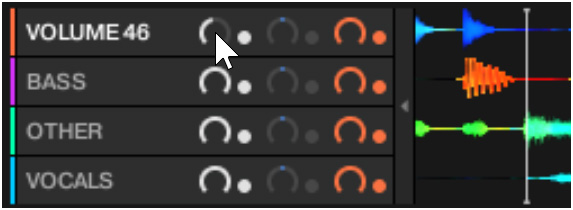
The volume of the musical element in that particular Stem decreases or increases accordingly.
You can also use the Mute button next to the Volume knob to remove the Stem from the mix or bring it back into the mix instantly:
To mute or unmute an individual Stem, click the little dot next to its Volume knob.
As you click the white little dot, the dot turns off and the Stem is muted. As you click the dot again, it turns back on white and the Stem is back in the mix at its previous volume level.
Resetting the Stem volumes
To reset the volume of a Stem, double-click its white Volume knob.
The volume of the Stem is set back to its default maximum value.
Note
These controls can be mapped to your hardware controller using the Controller Manager.
Applying a Filter effect to the Stems
You can apply a Filter effect to each Stem individually.
To activate the Filter effect for any individual Stem, click its unlit Filter button (gray dot).
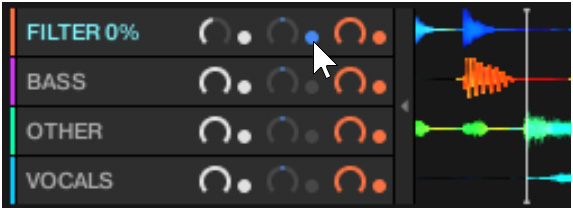
The dot turns on blue.
Drag the blue Filter knob up or down to adjust the Filter effect amount.
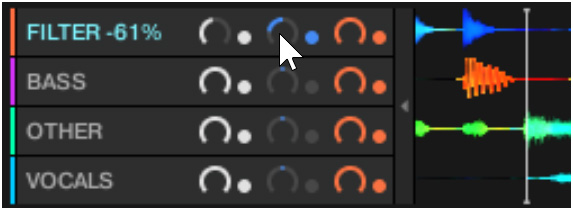
You hear a high-pass or a low-pass filter applied to that Stem.
Resetting the Stem’s Filter effect
To reset the Filter effect applied to a Stem, double-click its blue Filter knob.
The knob is set back to its neutral middle position (no filtering).
Note
These controls can be mapped to your hardware controller using the Controller Manager.
Sending Stems to FX Units
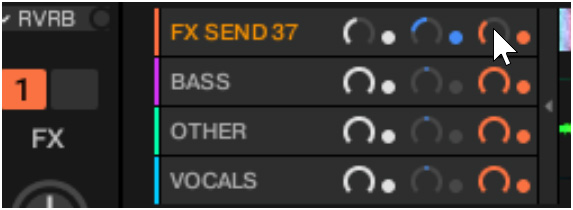
By default, all Stems are fully sent to the FX Units assigned to the Deck’s Mixer channel, as it would be for a track on a Track Deck. However, on a Stem Deck you can adjust how much of each Stem is sent to the FX Units. For example, you could use this to apply a delay flanger effect to the vocals while keeping dry, unprocessed drums.
To activate the FX Units for any individual Stem, click its unlit FX Send button (gray dot).
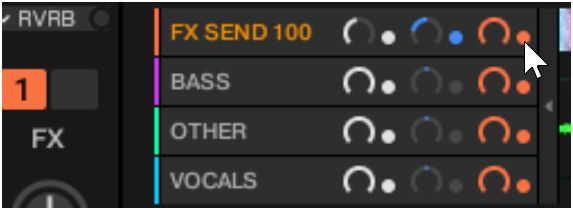
The dot turns on orange and the Stem sound is sent to the FX Units.
Drag the orange FX Send knob up or down to adjust how much of that Stem is sent to the FX Units.
You hear the assigned FX Unit(s) applied to that Stem.
Resetting the send amounts for Stems
To reset the send amount for a Stem, double-click its orange FX Send knob.
The knob is set back to its default maximum position.
Note
These controls can be mapped to your hardware controller using the Controller Manager.
Working with Remix Decks
With Remix Decks you can load collections of Samples (Remix Sets) and trigger the individual Samples to add them to your mix. As with Track Decks and Stem Decks, Remix Decks can be synchronized to the Tempo Master ensuring the Samples always play in sync with other tracks.
You can also create your own Remix Sets by directly capturing Samples from tracks in Track Decks or from the LOOP RECORDER, and saving them in your Track Collection. For more information on creating new Remix Sets, refer to Creating Remix Sets.
About Remix Sets
A Remix set is a collection of Samples to be loaded into a Remix Deck at once. A Remix Set can contain up to 64 Samples organized in the Sample Grid. The Sample Grid consists of four Columns containing 16 Sample Cells each. When a Remix Set is loaded into a Remix Deck, the first 16 Samples are visible in the four Sample Slots, with four Samples per Sample Slot.
Loading Remix Sets
To load a Remix Set from your Track Collection:
Select the folder All Remix Sets in the Browser Tree to display all Remix Sets in the Track List.
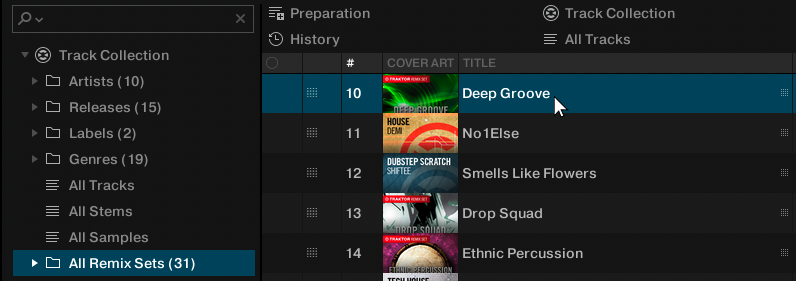
Drag the Remix Set to your liking and drop it in any Deck.
The Deck loads the Remix Set and switches the Deck Type to Remix Deck.
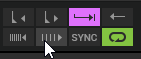
Enabling and Adjusting the Remix Deck's Quantize Mode
The Remix Deck provides an internal Quantize mode in order to let the Samples trigger at the right beat in the internal timeline. The Quantize value can be determined in the Deck Tempo display in the Deck Header:
To enable Quantize mode for the Remix Deck:
Click gray dot to enable Quantize mode for the Remix Deck.
The dot lights up blue, indicating Quantize mode is activated for the Remix Deck.
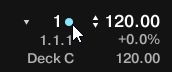
Click on the triangle next to the blue dot to open the Quantize value menu.
Select the Quantize value at which you want the Samples to trigger, i.e. 1 (one beat).
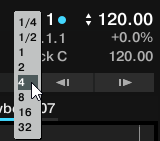
The Quantize mode is activated and the Quantize value is set for the Remix Deck. The Samples will now trigger always to the downbeat.
Triggering Samples
In order to trigger Samples in Sample Cells, proceed as follows:
Click the Play button on the Remix Deck.
The Remix Deck starts playing and is ready for triggering Samples. The Beat counter starts counting the beats according the internal timeline of the Remix Deck.
Click the Sample Trigger buttons in the Sample Cells in each Sample Slot one by one.
The Sample Trigger buttons flash until the next down beat (Quantize value set to 1 beat) of their internal timeline is reached, and then start playing. The playheads move in the Slot Players.
Anytime, trigger other Samples in the Sample Slots, by clicking their Sample Trigger buttons in the Sample Cells.
The Sample Trigger buttons flash until the next down beat is reached, and then start playing. The former Samples stop playback immediately.
Stopping Samples
To stop the Samples and reset the playheads to start positions:
Hold [Shift] + click the individual Sample Trigger button.
The Sample stops playback according to the setting of the Quantize value.
Switching Sample Grid Pages
The Sample Grid can contain up to 64 Samples over four pages with 16 Samples each.
To scroll through the Sample Grid pages:
Click the Page Selector to switch to the individual page on the Sample Grid.
Adjusting the Volume and Muting Sample Slots
The volume level of any Sample Slot can be adjusted and the Sample Slot itself can be muted:
Adjusting Sample Slot Volume
Drag the Volume fader up or down.
Resetting Sample Slot Volume
Double-click the Volume fader.
Muting Sample Slots
Hover the mouse over the Slot Player to display additional controls.
Click the mute button to mute the Sample Slot.
Applying Filter Effects the Sample Slots
Any Sample Slot contains a Filter control for applying a high-pass or low-pass filter immediately:
Drag the Filter control up or down to apply a high-pass or low-pass Filter Effect to the Sample Slot.
Resetting the Filter
To reset the Filter:
Double-click the Filter control.
Locking Key for Sample Slots
When adjusting the Remix Deck's tempo or syncing the Remix Deck to the Tempo Master, you can prevent the Sample changing its pitch by locking the key for the individual Sample Slots:
Hover the mouse over the Slot Player.
Additional Slot parameters appear.
Click on the Slot Key Lock control to enable keylock for the Sample Slot.
When you now change the Remix Deck's tempo, the pitch of the Samples in the Sample Slot remains.
Sending Sample Slots to FX Units
Using the FX Unit(s) assigned to the Remix Deck's Mixer channel has no effect by default. In order to use the FX Units the Sample Slots need to be send to the FX Units individually.
Hover the mouse over the Slot Player.
Additional Slot parameters appear.
Click on the Slot FX Enable control to send the Sample slot to the FX Unit(s) assigned to the Mixer channel.

When now adjusting the parameters in the FX Unit(s), the sound of the Sample Slot gets modulated accordingly.
Routing Sample Slots into the Headphones Cue Channel
To route individual Sample Slots into the Headphone Cue channel:
Hover the mouse over the Slot Player.
Additional Slot parameters appear.
Click on the Slot Monitor control to route the Sample Slot to the Headphone Cue channel.
Enabling Punch Mode for the Sample Slot
When triggering another Sample in the Sample Slot, the new Sample starts playback from its start position, independently from the playhead position of the previous Sample. When Punch mode is activated for the Sample Slot, the triggered Sample will start the playback from the playhead position of the previous Sample.
To enable Slot Punch Mode:
Hover the mouse over the Slot Player.
Additional Slot parameters appear.
Click on the Slot Punch Mode button to enable Slot Punch mode for the Sample Slot.
When now triggering another Sample in the Sample Slot, the triggered Sample will start the playback from the playhead position of the previous Sample.
Creating Remix Sets
In this section you learn to create Remix Sets using the Remix Deck. You learn to capture Samples from different sources and to make further refinements and adjustments for the Samples. When your edits are final, you save the Remix Set into your Track Collection.
Importing Samples to the Track Collection
When importing tracks into the Track Collection Traktor recognizes tracks shorter than 10 seconds and categorizes them as Samples. You can find the Samples in the All Samples subfolder in the Track Collection.
Creating an empty Remix Set
Before you can load Samples into a Remix Deck, you need to create an empty Remix Set. This is done by assigning a Deck to a Remix Deck:
Click on the Deck Focus to open the context menu.
Select Remix Deck.
The Deck is switched to the Deck Flavor Remix Deck. The Remix Deck is empty. You can now load or capture Samples into the Sample Cells.
Loading Samples into Samples Cells
You can load Samples into Sample Cells directly from Traktor’s Track Collection:
In the Browser Tree select the folder All Samples to display all Samples in your Track Collection.
Drag a Sample from the Track list and drop it into any Sample Cell in the Sample Slot.
The Sample is now loaded and ready to play.
To load more Samples to Sample Cells, repeat the aforementioned steps.
When a Sample Cell already contains a Sample, loading another Sample to the Sample Cell replaces the Sample.
Capturing Samples from Tracks
You can capture Samples directly from Track Decks on the fly:
Activate SNAP mode in the Master Control panel.
Load and play back a track in a Track Deck.
Activate a Loop with the desired size at the playback position to your liking.
Drag the track title in the Track Deck Header and drop into a Sample Cell in the Remix Deck.
The Loop is copied as a Sample in the Sample Cell.
If the Track Deck you captured from was not playing a Loop, the Remix Deck will still capture a Sample from it, but it will instead take it from the current playback position. The Sample will automatically be cut to the length of the selected Loop size in the Loop control bar in the Track Deck.
Changing Sample Colors
When loading or capturing Samples, Traktor randomly assigns a color to the Samples. However, you can change the color of Samples in Sample Cells to your liking:
Right-click the Sample Trigger button to display the 16 color palette.
Select the desired color.
The Sample color is changed.
Adjusting Sample Parameter Settings
This section introduces you to the several parameter settings for adjusting your Samples in your Remix Set.
Defining the Playback Behavior of a Sample Cell
The following options let you define how the Sample plays back when it is triggered:
Click the Sample Play Type button to define the Sample to be played back as a Loop or One-shot.
Click the Reverse mode button, if you want the Sample to be played back reversely.
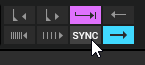
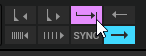
Click the Sample Sync mode button to let the Sample be played back in sync to the Remix Deck.
Click the Sample Trigger Type button to let the Sample play back until its end or for only as long as you keep the Sample Trigger button clicked.
When activated (Latch mode), a Sample will continue to play after you release the mouse button, either until the end of the Sample is reached (for One-shot Samples) or until it is stopped by some other method (like triggering a new Sample in the same Slot). Latch mode is activated by default.
When deactivated (Gate mode), a Sample will play only when the mouse button is held. Upon releasing the mouse button, the Sample will stop playing immediately.
Adjusting Sample Gain and Pitch
As recorded or captured Samples can have different recording levels, it can be mandatory to adjust the gain level for individual Samples in the Remix Set.
Click the name of the Sample you want to edit.
Drag the Sample GAIN knob to adjust the gain level to your liking.
As recorded or captured Samples can have different pitches that might not be suited to other Samples in the Remix Set, it can be mandatory to adjust the pitch for individual Samples:
Click the name of the Sample you want to edit.
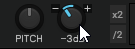
Drag the Sample Pitch knob to adjust the pitch to your liking.

Adjusting Sample Base Tempo
As recorded or captured Samples can have different base tempos, it can be mandatory to adjust the base tempo for individual Samples in the Remix Set.
Click the name of the Sample you want to edit.
Click in the Sample Tempo display and enter the desired tempo in BPM.

You can halve or double the current tempo using the x2 or /2 buttons to adjust the base tempo accordingly.
Correcting Sample Beatgrid
As the Beatgrid of recorded or captured Samples might not be calculated correctly, it can be mandatory to correct the Beatgrid for individual Samples in the Remix Set.
Click the name of the Sample you want to edit.
Use the Move Grid Left and Move Grid Right buttons to moves the Sample's Beatgrid to the left or to the right.
Use the BPM Decrease and BPM Increase buttons to make minor corrections to the base tempo.
As a result the Beatgrid gets expanded or compressed.
Saving a Remix Set
Double-click the current title New Remix Set in the Deck Header to enable renaming.
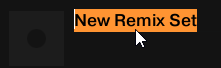
Type in a new name for the Remix Set.
In the Browser Tree select the folder All Remix Sets to display all Remix Sets in the Track List.
Click and hold the Remix Set title in the Deck Header and drag it down into the Track List.
The Remix Set is saved and stored in the Track Collection. Additionally, all contained Samples are stored as individual Samples in the All Samples folder.
Exporting Remix Sets
To export Remix Sets:
Expand the Track Collection folder in the Browser Tree.
Select the All Remix Sets folder to display its Remix Sets in the Track List.
Right-click the Remix Set you want to export to open the context menu.
Select Export Remix Set.
In the dialog navigate to the destination you want to export to.
Confirm.
Traktor now exports the Remix Set.
Adjusting Beatgrids
When Traktor calculates the track tempo it also creates the Beatgrid for the track. However, when a track contains a complex rhythm, an untight beat (for example from a band’s live recording) or any sort of changing tempo, it can be necessary to adjust the Beatgrid manually.

Incorrect Beatgrid.
Traktor lets you create flexible Beatgrids that allow tempo-based features at any position of the track: auto-looping, quantized loop and beat jumps, quantized Stripe navigation, synchronized tempo effects and Pattern Player, beat matching from Deck to Deck, and synchronization to / setting the Master tempo and phase.
Note
Tracks with changing tempo can be the tempo master without straightening their dynamic tempo structure. This said, you should enable Key Lock on the synced Decks to avoid audible pitch shifting artifacts when playing from one tempo zone to the next one.
To adjust Beatgrids, Traktor provides you with multiple tools available in the GRID page of the Deck’s Advanced panel.
Opening the GRID page
Load the track with the Beatgrid that you want to adjust into a Deck.
On the Deck click the Advanced Panel button to open the Advanced Panel.
Click GRID in the bottom right corner to select the GRID page.
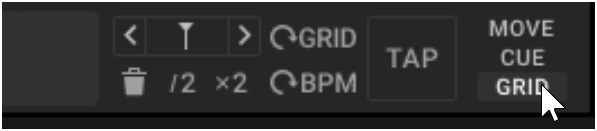
You can now adjust the Beatgrid by adding, removing, selecting, and adjusting Grid Markers in your track, and by stretching the Beatgrid between them. Each of your actions will affect the Beatgrid in the current tempo zone, that is, the Beatgrid portion starting from the previous Grid Marker.
Note
When the GRID page is open in the Deck’s Advanced Panel, Cue Points are visually minimized in the Stripe (their flags are hidden). Similarly, when the MOVE or CUE page is open, the Grid Markers are hidden in the Stripe.
Optional: enabling the beat tick
Click the Beat Tick button to enable the beat tick for the Deck.
When the Deck is playing, you now hear a tick on every beat of the Beatgrid. If the Beatgrid is not sitting perfectly on the beats, you notice the beat tick is off the track's beat. This can help you detect the locations where the Beatgrid needs to be adjusted, and verify your adjustments in real time.
Adjusting the Beatgrid for tracks with a few constant tempo zones
If your track contains a few clearly defined tempo changes, do as follows to adjust the Beatgrid:
Delete all Grid Markers from the track by clicking the trash bin button (if needed, repeatedly).

Set a Grid Marker on the first downbeat and at each position of a tempo change by using the Set Grid Marker button. Each Grid Marker defines a new tempo zone after it.
Select each Grid Marker you have just set by using the arrow buttons.
Make sure that the play head is at the same position or to the right of a Grid Marker before moving it.
Zoom into the waveform and precisely align each Grid Marker to the attack of the beat by using the Move Grid Marker BWD and FWD buttons.

Zoom out again, re-select each of the Grid Markers using the arrow buttons.
Align the Beatgrid in each of the tempo zones using the BPM Increase/Decrease buttons.
The Beatgrid segments between two subsequent Grid Markers are equally distributed. Each click on the BPM Increase/Decrease buttons adds or removes one beat line.
Once the Beatgrid is perfect, you should lock it by activating the Lock button to prevent any unwanted change:

Note
Half-beats and in-between BPM values leading to phase skips are not allowed.
Adjusting the Beatgrid for tracks played live
If your track is based on one constant tempo but was recorded live and contains beat irregularities, do as follows to adjust the Beatgrid:
Delete all Grid Markers from the track by clicking the trash bin button (if needed, repeatedly).
Set a Grid Marker on the first downbeat by using the Set Grid Marker button.
Roughly align the Beatgrid to the right of the Grid Marker to match the beats of the song by using the BPM Increase/Decrease buttons.
Play the track from the beginning and during playback set a Grid Marker every 16 beats by using the Set Grid Marker button.
Select each Grid Marker you have just set by using the arrow buttons.
Make sure that the play head is at the same position or to the right of a Grid Marker before moving it.
Zoom into the waveform and precisely align each Grid Marker to the attack of the beat by using the Move Grid Marker BWD and FWD buttons.
If the tempo still fluctuates too much between two Grid Markers, you may have to set a Grid Marker every 4 beats instead of 16.
Once the Beatgrid is perfect, you should lock it by activating the Lock button to prevent any unwanted change:
Tip
The process of setting Grid Markers can be massively supported by mapping the functions to shortcuts on your computer keyboard or hardware controller.