Working with Playlists
In this section you learn about Playlists in Traktor and how work with them.
In this section you learn about Playlists and how work with them. Playlists are effective tools of organizing your tracks for different purposes. Generally, a Playlist is a collection of tracks to be used for preparing for DJ sets.
One track can be contained in multiple Playlists.
A Playlist can be re-ordered or reset to the original state rapidly.
Additional functions are saving, loading and exporting Playlists.
Creating Playlists
To create a new Playlist you either do it in the Browser Tree or directly of selected tracks:
Creating a New Playlist in the Browser Tree
Right-click the Playlists folder in the Browser Tree.
Select Create Playlist from the context menu.
Type a name for your new Playlist in the dialog.
Click OK to confirm.
Your new Playlist appears under the Playlists folder.
Creating a New Playlist from Selected Tracks
Select one or more tracks in the Track List.
Drag these tracks onto the Playlists folder in the Browser Tree.
Type a name for your Playlist in the dialog.
Click OK to confirm.
Your new Playlist appears under the Playlists folder.
Adding Tracks to Playlists
Click and hold the track(s) in the Track List.
Drag the selection onto any Playlist in the Browser Tree.
The tracks are added to the Playlist. New tracks will be added at the last position in the Playlist.
Additionally, you can directly add the tracks at the desired position inside the Playlist by moving the mouse over to the Track List and dropping it at the position to your liking. The orange line indicates where the track(s) will be inserted when releasing the mouse button.
Smartlists
Smartlists or smart playlists are a great way to effortlessly organise your Traktor collection. Using different filters you can create dynamic playlists of tracks linked by a theme or characteristic which update automatically when new relevant tracks are added to your collection. You can find your Smartlists in the browser pane along with your other playlists and sources of music.
Creating Smartlists
Smartlists can be created directly in the Playlists folder by using the Smartlist window.
To create a new Smartlist:
Right-click on the Playlists folder.
Select Create Smartlist from the context menu.
The Smartlist window opens.
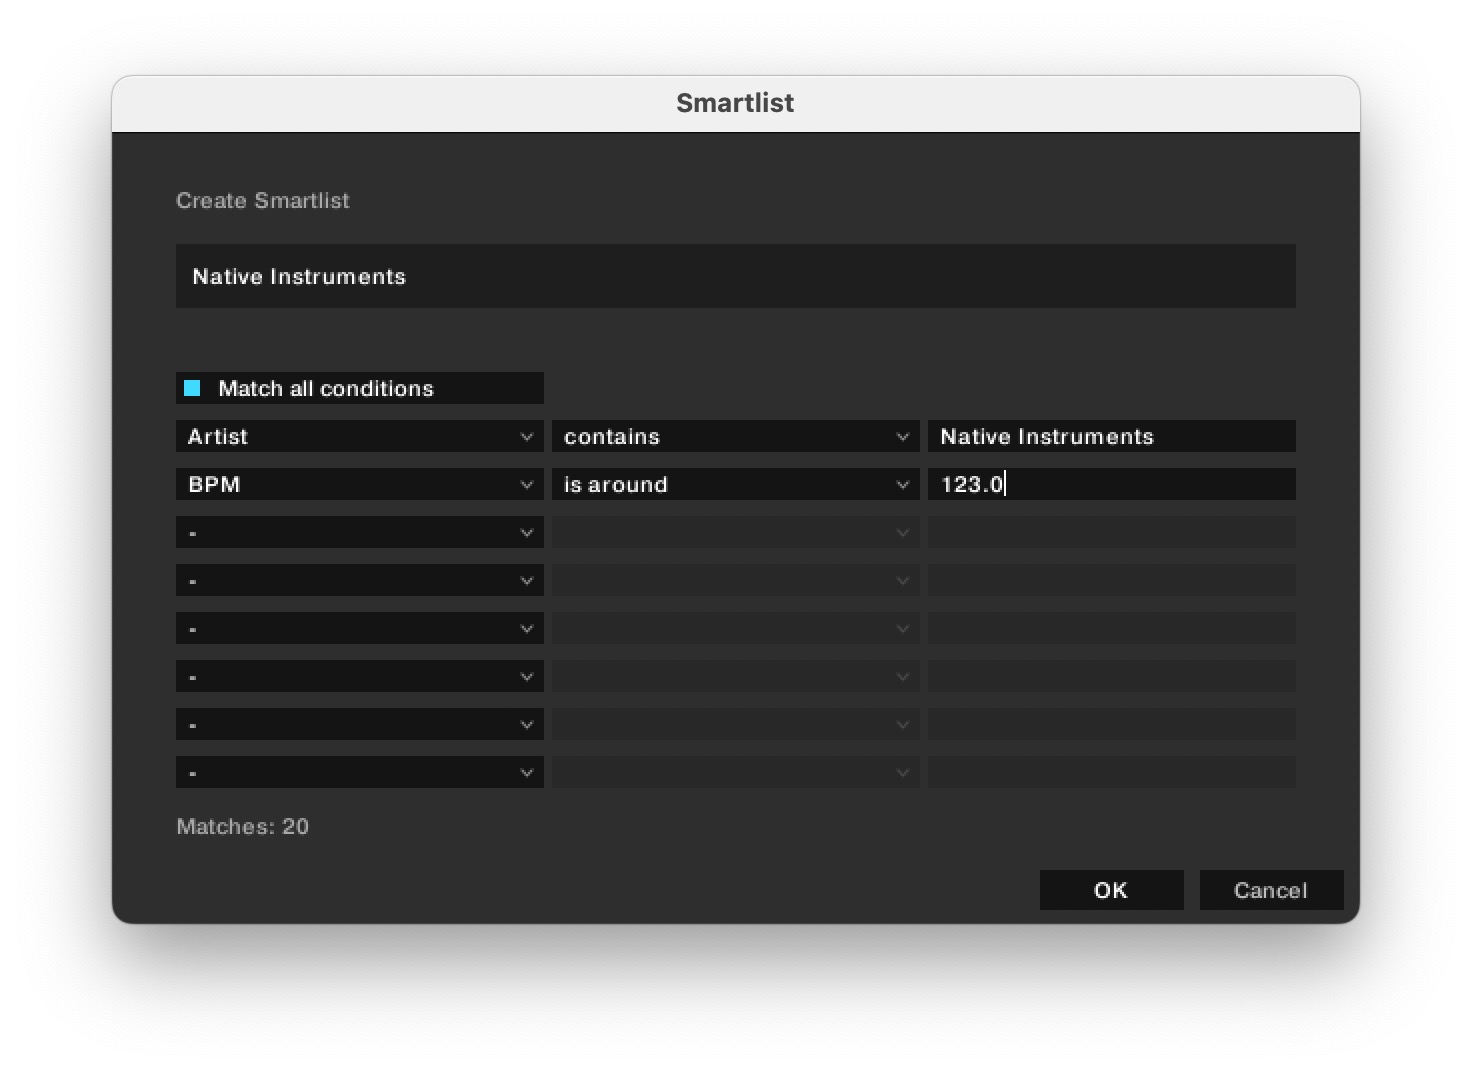
You can then choose from the following filters to define which tracks to include in your Smartlist:
Analysis Lock
Analyzed status
Artist
BPM
Bitrate
Catalog No.
Color
Comment
Comment2
Content Type
File Availability
File Name
File Path
Genre
Import Date
Key
Key Text
Label
Last Played Date
Lyrics
Media Source
Mix
Play Count
Played This Session
Producer
Rating
Release
Release Date
Remixer
Time
Title
Using Smartlists
Smartlists can be used in almost exactly the same way as normal playlists, however they cannot be manually ordered. If you wish to manually order a Smartlist you must first save it as a regular Playlist.
Right-click on the name of the Smartlist.
Select Save As Playlist from the context menu.
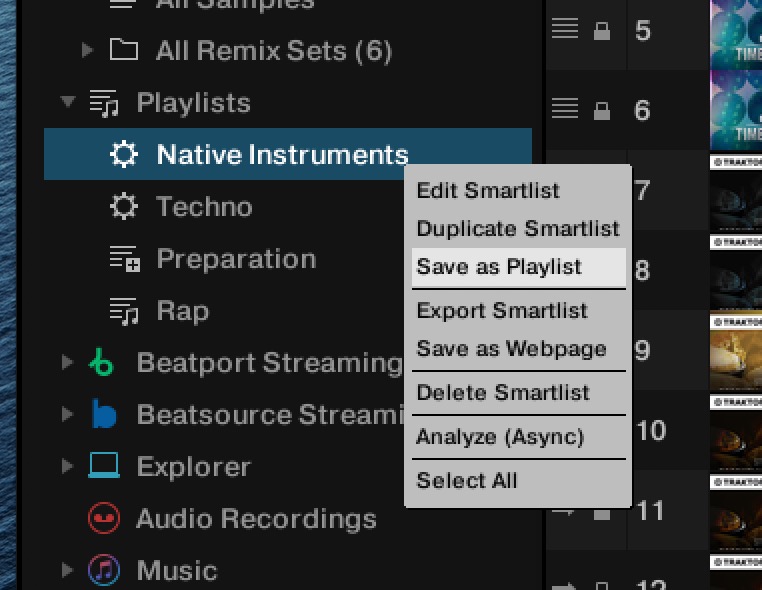
The Smartlist is saved as a Playlist which you can manually order.
Editing Smartlists
Smartlists can be edited using the context menu.
To open the context menu, right-click on the name of the Smartlist.
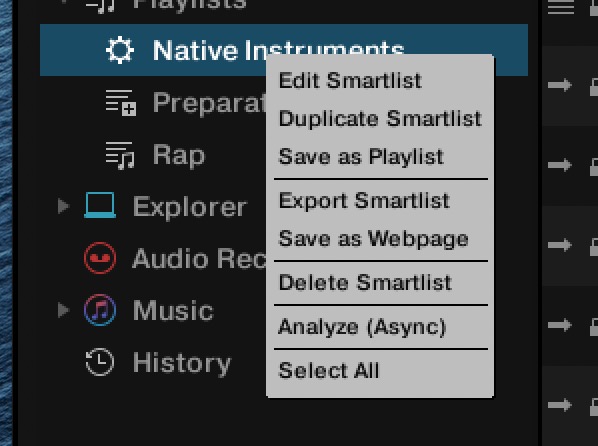
The following commands are available:
Edit Smartlist: Opens the Smartlist window.
Duplicate Smartlist: Creates a new, identical Smartlist.
Save as Playlist: Saves the Smartlist as a regular Playlist. For more information, refer to Using Smartlists
Export Smartlist: Exports the Smartlist in M3U or NML format.
Save as Webpage: Exports the Smartlist in HTML format.
Delete Smartlist: Deletes the Smartlist permanently.
Analyze (Async): Analyzes all tracks contained in the Smartlist.
Select All: Selects all tracks contained in the Smartlist.
Sorting Tracks in Playlists
There are several ways to sort tracks in Playlists:
Sorting Tracks by Original Order
Click on the header of the #-column to sort the Playlist by original track order.
Sorting Tracks by Category
Click on the name of the column header to sort the Playlist by this category. A second click inverts the sorting order.
After restarting Traktor all Playlists will reset to their original track order.
Consolidating a Categorized Track Sorting
To make a categorized track sorting permanent:
Right-click the Playlist in the Browser Tree to open the context menu.
Select the option Consolidate.
Changing the Original Track Sorting Order
This is only possible when the tracks are sorted in original order:
Click on the header of the #-column to sort the Playlist by original track order.
Select one or more track(s) and drag them up or down in the Playlist. The orange line indicates where the selection will drop when releasing the mouse button.
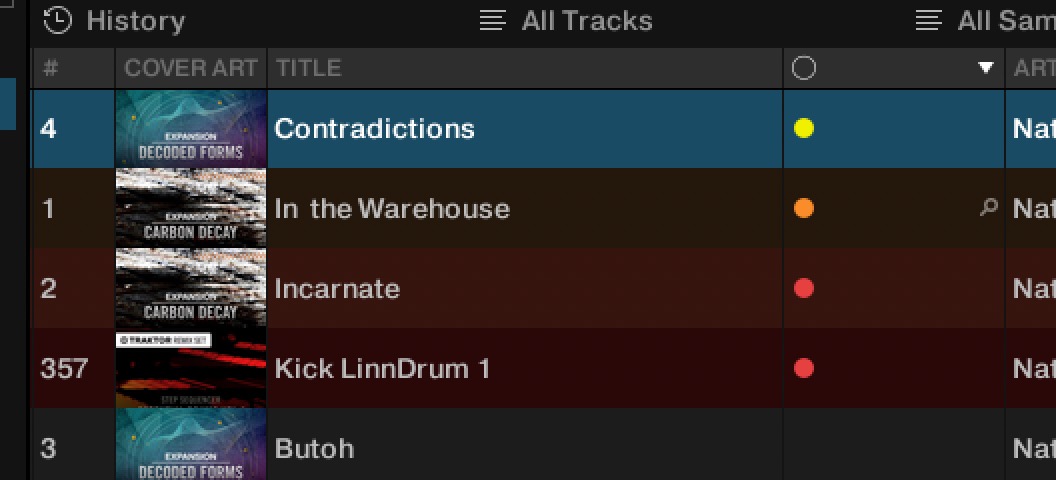
Using the Color Picker
You can assign colors to tracks using the Color Picker.
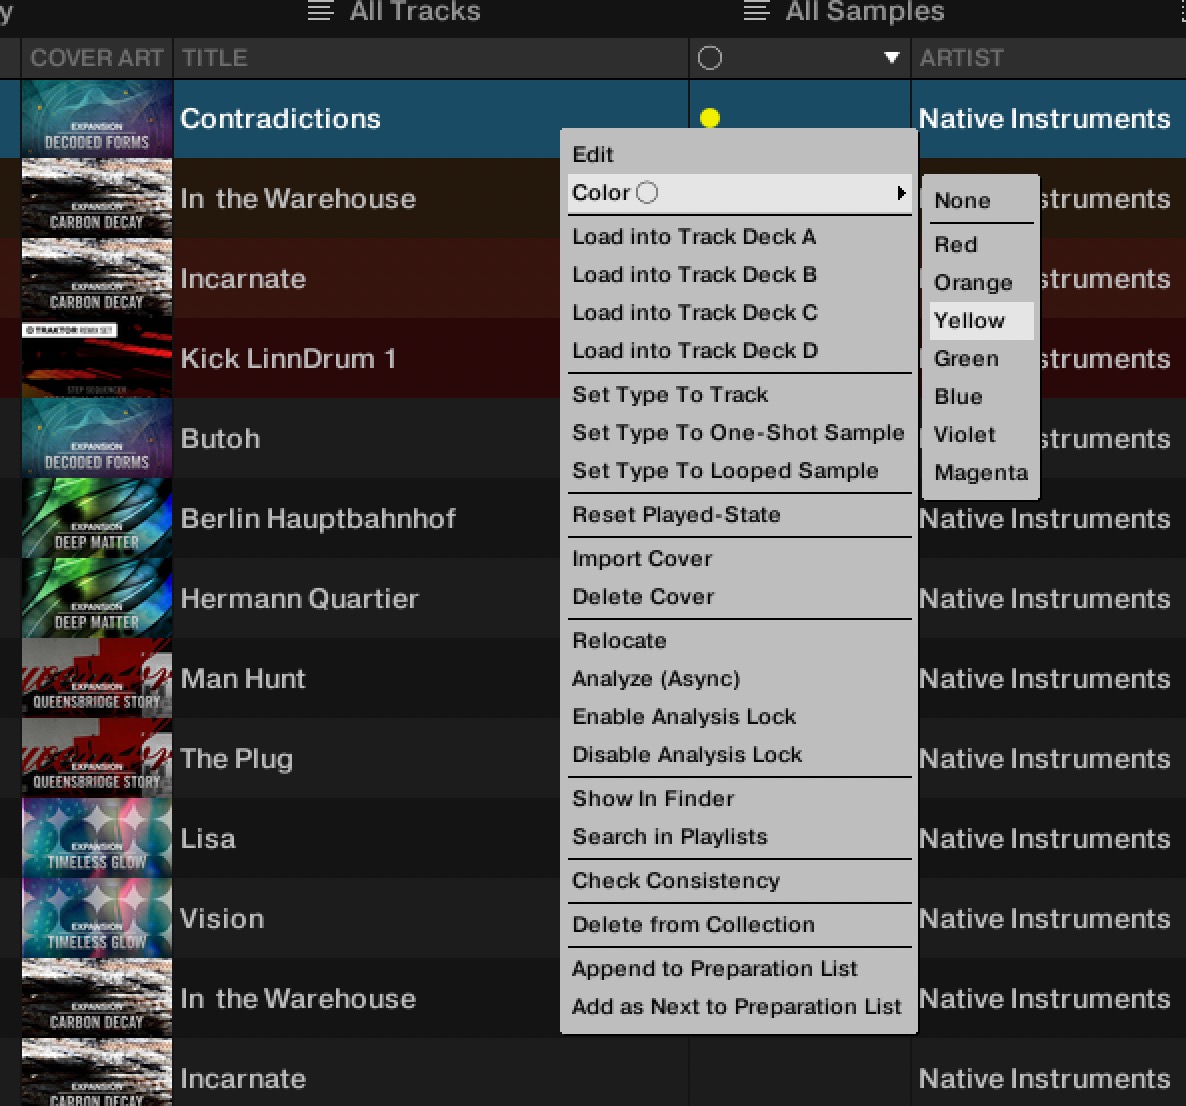 |
Right or option-click on any track in a playlist.
From the popup menu, choose the Color option and then select a color to assign to the track.
To remove a color assignment, use the None option from the popup menu.
Sorting a Track List by Color
To sort a Track List by color, click on the Color column header in the track list.
 |
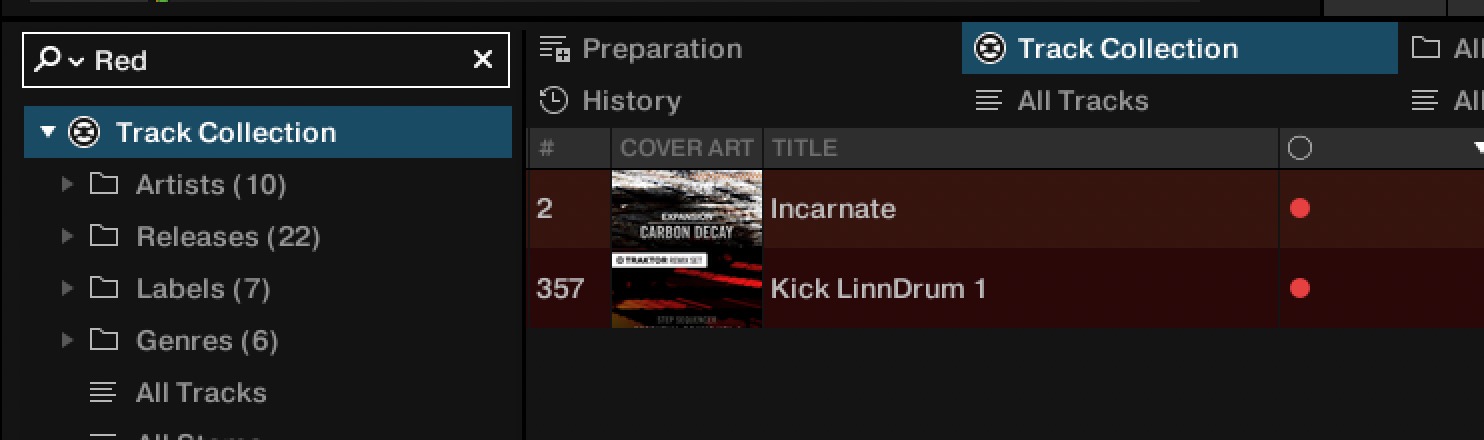
Searching using Color tags
To search your library by Color tag, click on the magnifying glass icon that appears when you mouse over a track's color assignment in the Color column. This will then automatically switch the Browser's search field to display only tracks that match the same Color tag. You can also use the small magnifying glass icon that appears when you mouse over a color column to find all tracks tagged with the same color.
 |
Organizing Playlists in Folders
You have the option to further organize your Playlists by creating Playlist folders:
Right-click the Playlist folder in the Browser Tree to open the context menu.
Select Create Folder.
Type in the name for the Playlist folder in the dialog.
Click OK to confirm.
Your new Playlist folder will appear under the Playlist folder. You can now add Playlists to this folder via drag-and-drop.
Exporting Playlists
You can export your Playlists including the tracks to import and playing them on other computers with Traktor. Exporting a Playlist creates a folder containing the tracks in the Playlist as well as the Playlist file.
To export a Playlist:
Right-click the Playlist in the Browser Tree to open the context menu.
Select Export Playlist.
Enter a name for the Playlist to be exported in the dialog.
Enter a destination path.
Click OK to confirm.
Traktor now exports the Playlist including the tracks to the destination on your computer.
Importing Playlists
Importing Playlists including tracks of another computer with Traktor can be done in several ways. You can use the context menu or drag and drop.
Importing Playlists using the Context Menu
Right-click on the Playlists folder or a Playlist sub-folder in the Browser Tree to open the context menu.
Select Import Playlist.
The Playlist and all contained tracks will be added to your Track Collection.
Importing Playlists using Drag and Drop
Locate the Playlist file (*.nml) on your computer.
Drag-and-drop the Playlist file onto the Playlists folder in the Browser Tree or onto a Playlist folder you have created.
The Playlist and all contained tracks will be added to your Track Collection.
Importing iTunes Playlists
You can directly import iTunes Playlists into your Traktor Playlists folder:
Double-click the iTunes folder in the Browser Tree to display the iTunes Playlists.
Right-click a Playlist to open the context menu.
Select Import to Playlists.
In the dialog enter the name for the new Playlist.
Click OK to confirm.
Using Preparation Playlist
The Preparation Playlist is used to prepare your next mix. When adding tracks to the Preparation Playlist, they show a diamond icon in the first column in the Track List. Any existing Playlist can be used as the Preparation Playlist.
Selecting a Playlist as the Preparation Playlist
Right-click a Playlist in the Browser Tree to open the context menu.
Select Select as Preparation List.
The Playlist icon changes to the Preparation Playlist icon.
Appending Tracks to the Preparation Playlist
Right-click any track(s) in the Track List to open the context menu.
Select Append to Preparation Playlist to add the selection to the Preparation Playlist.
Alternatively, select Add as Next to Preparation Playlist to insert the selection after the last loaded track into the Preparation Playlist.
Each track is displayed with a diamond icon indicating it appends to the Preparation Playlist.
History Playlists
It can be useful to have a record of which tracks were played in a specific session. Traktor automatically lists the tracks you have played in the History Playlist which will be stored in a History Playlist file when Traktor gets closed. When opening Traktor again the History Playlist in the Browser Tree is cleared.
You can then find all History Playlists labeled with date and time in the Explorer > Archive folder in the Browser Tree.
History Playlist Storage Location on your Computer
You can find the History Playlists labeled with date and time also in the following location on your computer:
Windows:
My Documents\Native Instruments\Traktor\HistorymacOS:
Users/~/Native Instruments/Traktor/History
Track Status Icons in the Track List
When loading and playing tracks, Traktor records the status of the individual tracks in the icon column in the Track List:
Deck Letters A, B, C and D: Identify the tracks currently loaded into the Decks.
Check mark: Identifies tracks that have already been played.
Exclamation mark: Identifies tracks which are not found at the file’s previous location. Some possible reasons for this could be that a storage medium is unavailable (external hard drive for example), the location of the track has been changed or the track has been renamed.
Lock icon: Identifies tracks with a locked Beatgrid.
Triangle (only available in the History and Archive folders): Identifies tracks that have already been played. Tracks that have been previewed will not be marked.
Sorting the Track List by Track Status
When sorting the Track List by Track Status, the tracks are listed by the following order:
Already played tracks on top.
Currently playing tracks in the center.
Unplayed tracks below.
Missing tracks at the bottom.
Playlist Maintenance
To maintain you Playlists Traktor provides you with several functions and commands to do so.
Renaming a Playlist
To rename a Playlist:
Right-click the Playlist in the Browser Tree to open the context menu.
Select Rename.
Enter the new name for the Playlist.
Removing Tracks from Playlists
To remove tracks from a Playlist:
Right-click the track(s) in the Playlist to open the context menu.
Select Delete.
The track is removed.
Restore Auto GAIN Value
If you changed the gain values for tracks in the Playlist you can restore them to the Auto Gain values:
Right-click the track(s) in the Track List of the Playlist to open the context menu.
Select Restore AutoGain.
The gain value is restored to original.
Resetting Played State of Tracks
To reset the status of played tracks in your Playlist:
Right-click the track in the Playlist to open the context menu.
Select Reset Played State.
The play count and the status are reset.
Deleting Playlists
To delete a Playlist from the Browser Tree:
Right-click the Playlist in the Browser Tree to open the context menu.
Select Delete Playlist.
The Playlist is deleted.
Removing Duplicates from Playlists
To remove tracks which are more than one time in your Playlist:
Right-click the Playlist in the Browser Tree to open the context menu.
Select Remove Duplicates.
All double entries in the Playlist are removed.
Saving Playlists as Webpage File
You can save a Playlist to a webpage file (HTML file) which allows you to create an overview of the running order of tracks.
Right-click the Playlist in the Browser Tree to open the context menu.
Select Save as Webpage.
Enter a name for the Playlist.
Enter a destination for the exported file.
From the List Options select the columns you want to add to the Playlist file.
Click OK to confirm.
The Playlist is saved as HTML file.
Search Tracks in Playlists
To find out if tracks are already added to a Playlist:
Right-click the track(s) in the Track List to open the context menu.
Select Search in Playlists.
Traktor now searches for the selected track(s) and returns with a report showing all Playlists containing the selected track(s).
Clearing Playlists
To clear a Playlist from all tracks:
Right-click the Playlist in the Browser Tree to open the context menu.
Select Clear Playlist.
All tracks are removed from the selected Playlist.