Grain Page
The Grain page contains controls for the playback of the grain source. Controls include Grains, Cursor, Range, Tune, Amp, Envelope, and Randomize.
The Grain page provides unique ways to play and manipulate the source sample using granular synthesis. The result is lush, organic timbres that can defy time and pitch, whilst retaining the character and quality of the original sounds. Granular synthesis uses an audio sample as a basic sound source and divides it into small segments, called grains. The duration, or size, of a single grain is typically around a tenth of a second and below (< 100 ms). In ASHLIGHT, you can set grain sizes ranging from 10 ms to 1000 ms. If all grains are played consecutively, the result approximates the original sample. The power of granular synthesis lies in the flexibility to change the playback order and speed of the grains, and the ability to apply processing to each grain (duration, fades, level and pitch) for dramatic effects. Using the tempo-synced Grain Cursor you can also create perfectly timed transitions, sweeps, and risers.
Grain Page Overview
The Grain page contains the following elements and controls:
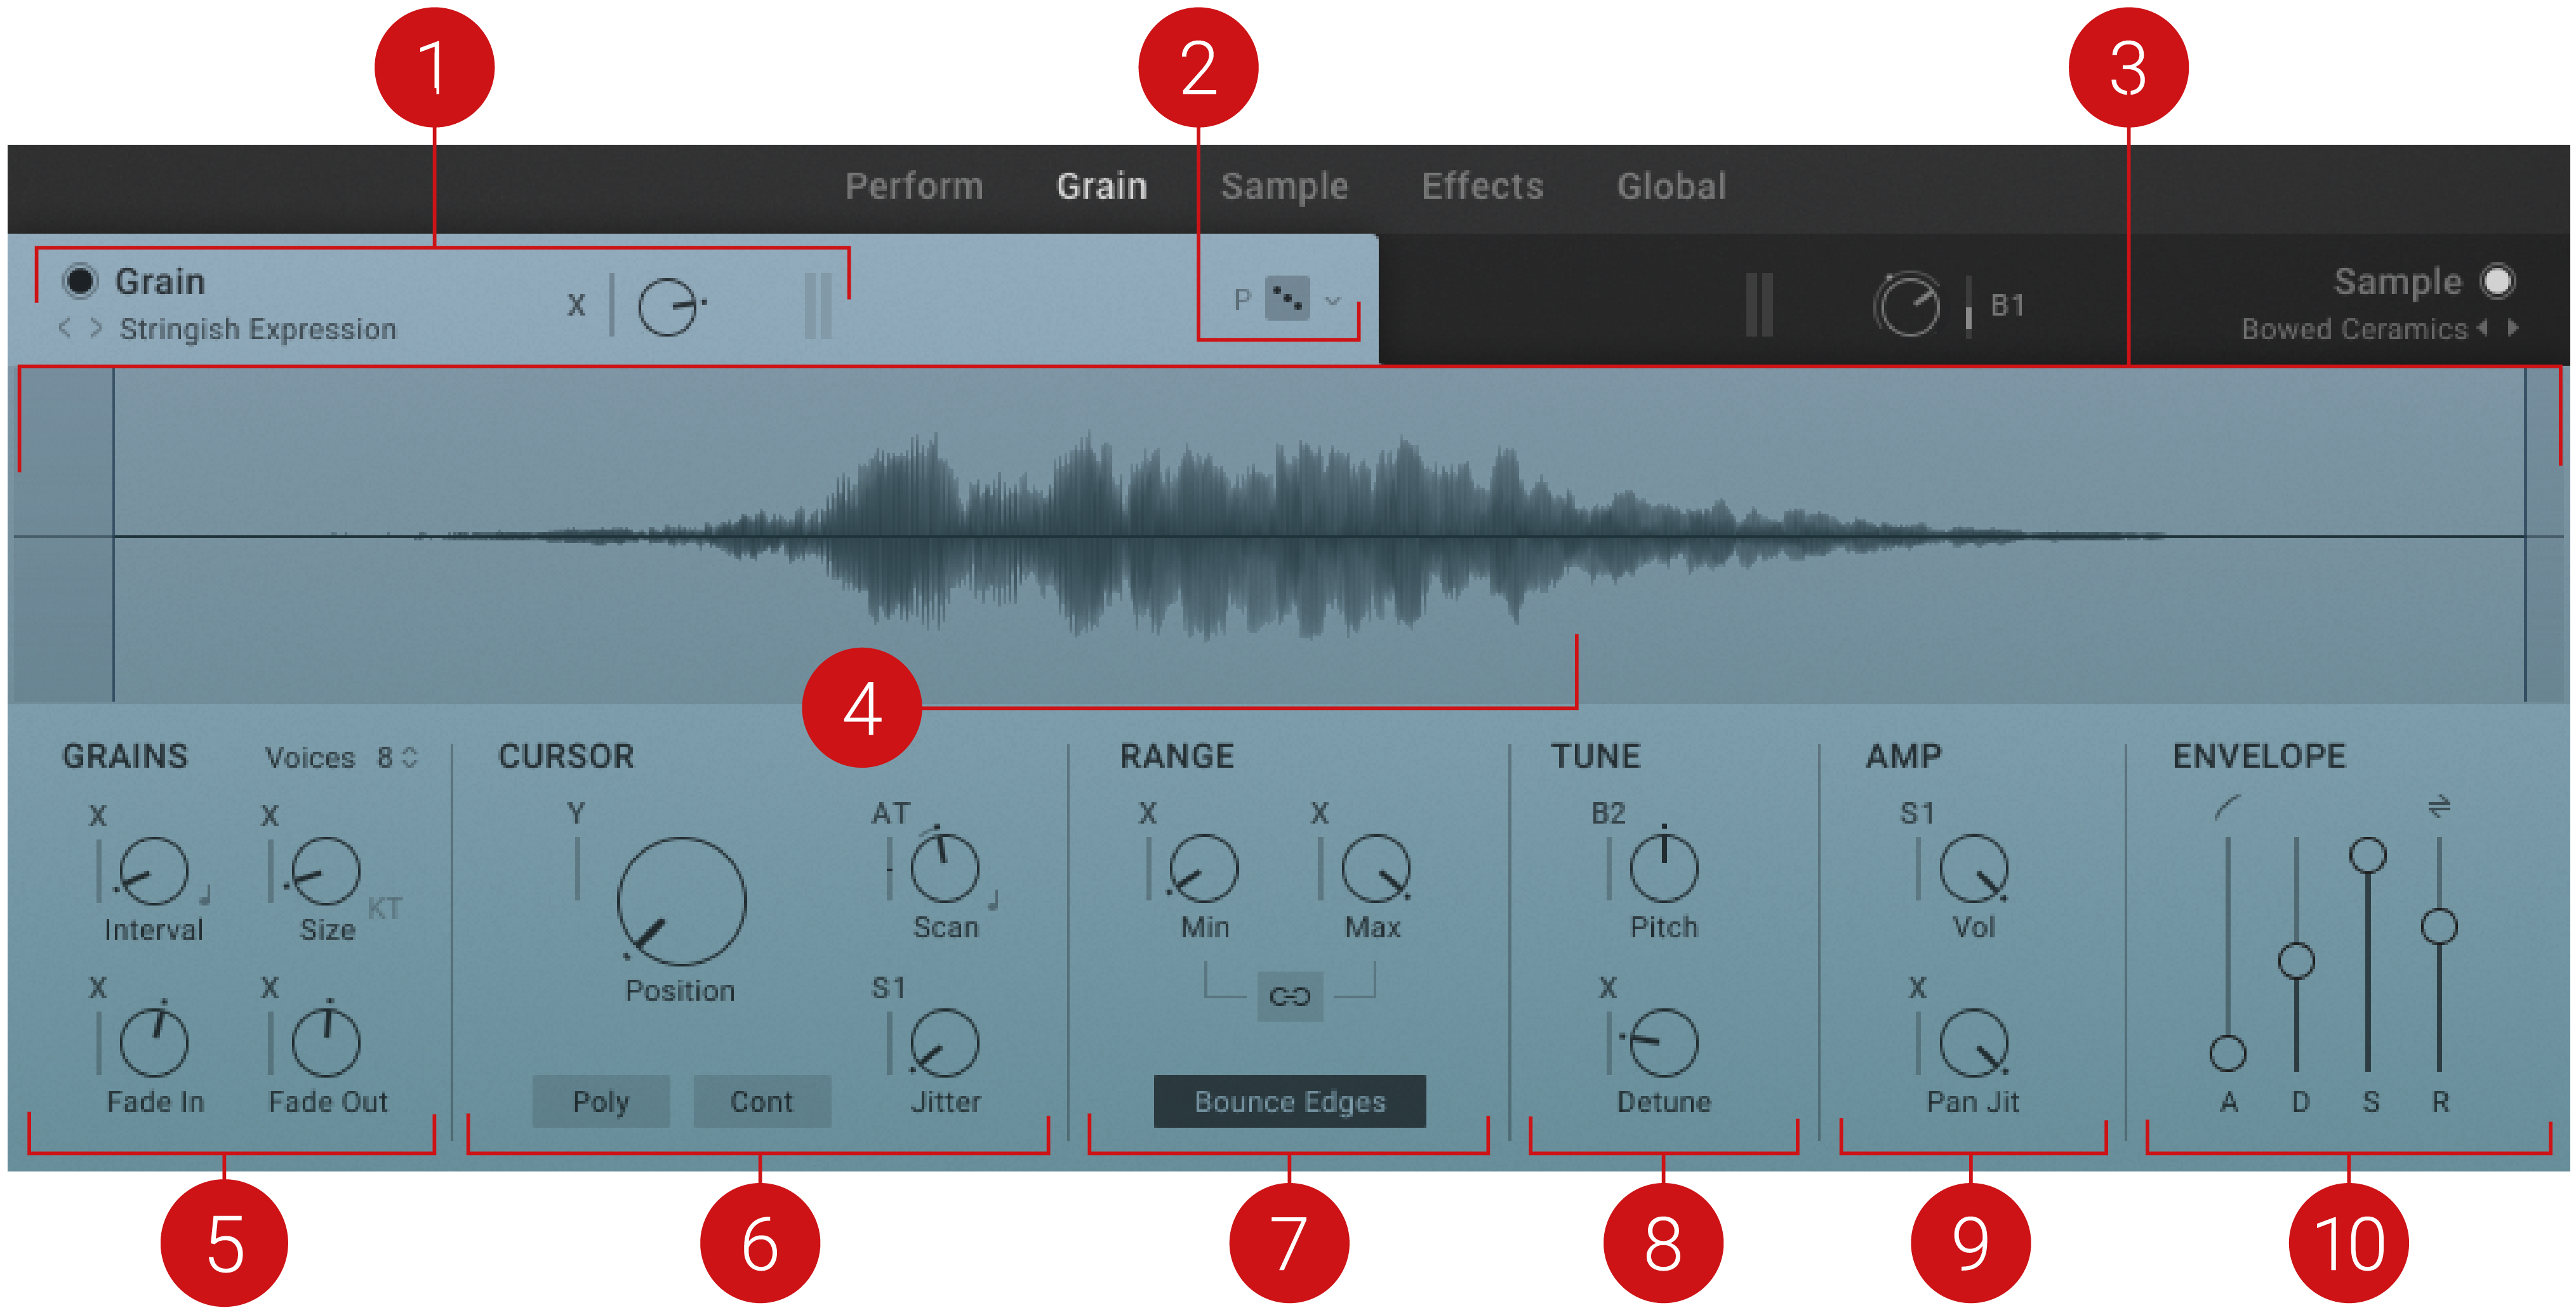
Grain page.
Grain Header: Contains global functions including the selection of the source sample, access to the Grain Source browser, and overall volume level control for the Grain layer. For more information, refer to Grain Header.
Grain Randomize: Clicking the dice button applies random values to all parameters in the Grain page. The drop-down menu next to the Grain Randomize button offers two options for assigning randomization. P Parameter only applies random values only to the parameters of the Grain layer. S Include Source randomizes the Grain Source and parameters. The randomization of the Source sample is limited by the tags selected in the browser.
Grain Waveform display: Displays the source sample's waveform and visualizes the Cursor position for up to ten notes simultaneously. You can adjust the Cursor Range by clicking and dragging the left and right boundaries in the waveform. For more information about the Cursor Range, refer to Range. In Scan Sync mode, the display additionally shows the sync anchor (4). You can import your own sample by dropping your sound onto the waveform. For more information on adding samples, refer to Importing Your Own Samples.
Sync Anchor: Sets the Cursor's synchronization point in Scan Sync mode. In this mode, the Scan control in the CURSOR section adjusts the time it takes the Cursor to move from the Start position to the sync anchor. Note that the Sync Anchor can be positioned outside of the cursor range. For more information, refer to Cursor.
GRAINS: Contains controls related to the basic generation of the individual grains and their shape. For more information, refer to Grains.
CURSOR: Contains controls related to the Cursor and how it moves through the Source Sample. The Cursor represents the read-out position of the grains. For more information, refer to Cursor.
RANGE: Contains controls related to the Cursor Range, which sets boundaries for the read-out position of the grain in the source sample. For more information, refer to Range.
TUNE: Contains controls related to the Pitch of the individual grains. For more information, refer to Tune.
AMP: Contains controls related to the Volume level of the individual grains. For more information, refer to Amp.
ENVELOPE: Contains controls related to the Grain Layer's Volume Envelope. For more information, refer to Envelope.
Grains
This section contains controls related to the basic generation of the individual grains and their shape. This way you can define the basic character of your sound. Interval and Size are fundamental to the way the sound transforms the source sample. High Interval values can be used for more consistent and slowly evolving sounds, while low values can create lively or erratic results that change at a high rate. Use high values for Size to allow more of the character of the source sample to shine through the sound, or dive fully into abstract micro sound with low values. Fade In and Fade Out can be used to make the sound smoother at high values, or more textured and angular at low values.
The Grains section contains the following parameters:
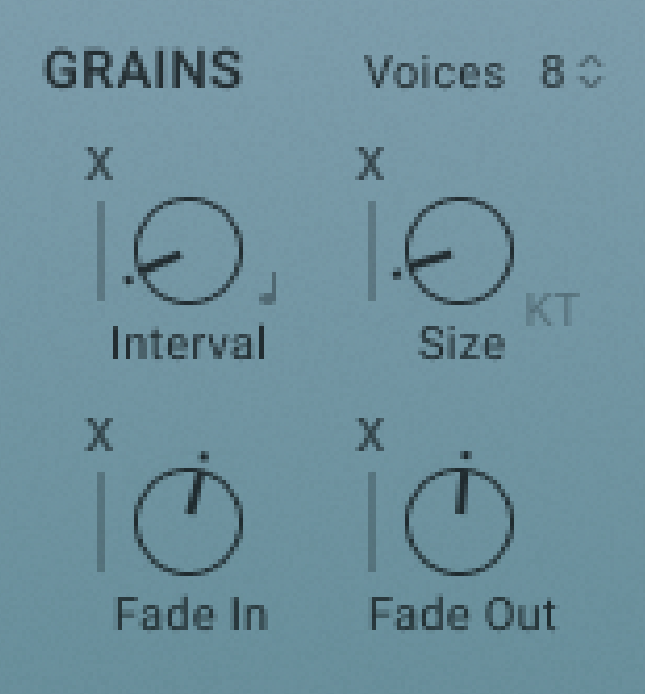 |
Grain page – Grains.
Voices: Sets the maximum number of voices the Grain layer can play at the same time.
Interval: Adjusts the time between the generation of individual grains from the source sample.
Grain Interval Mode: Allows you to set the grain interval in relation to the host tempo and/or if the grains are triggered freely or in sync with the first key, indicated by the two note icon. Longer intervals are mandatory for recognizing the trigger mode difference.
Size: Adjusts the duration of each individual grain until it is faded out.
KT: Enables key tracking mode for the Size parameter. When activated, the grain duration is compensated according to the pitch of the MIDI note: high pitches result in short-grain durations, while low pitches result in long-grain durations.
Fade In: Adjusts the fade applied at the beginning of each grain. You can use this to soften the edges of the grains.
Fade Out: Adjusts the fade applied at the end of each grain. You can use this to smoothen the release of the grains.
Cursor
This section contains controls related to the Cursor and how it moves through the source sample. The Cursor represents the read-out position of the grains. By changing the Start position, you can explore the source sample for new sonic material to build your sound. Scan and Jitter determine the movement of the Cursor during note events. Therefore, they strongly contribute to the character of the sound and how the original sample is transformed. The additional Poly and Free modes make it possible to adjust the Cursor's behavior in relation to how the instrument is played via MIDI.
The Cursor contains the following parameters:
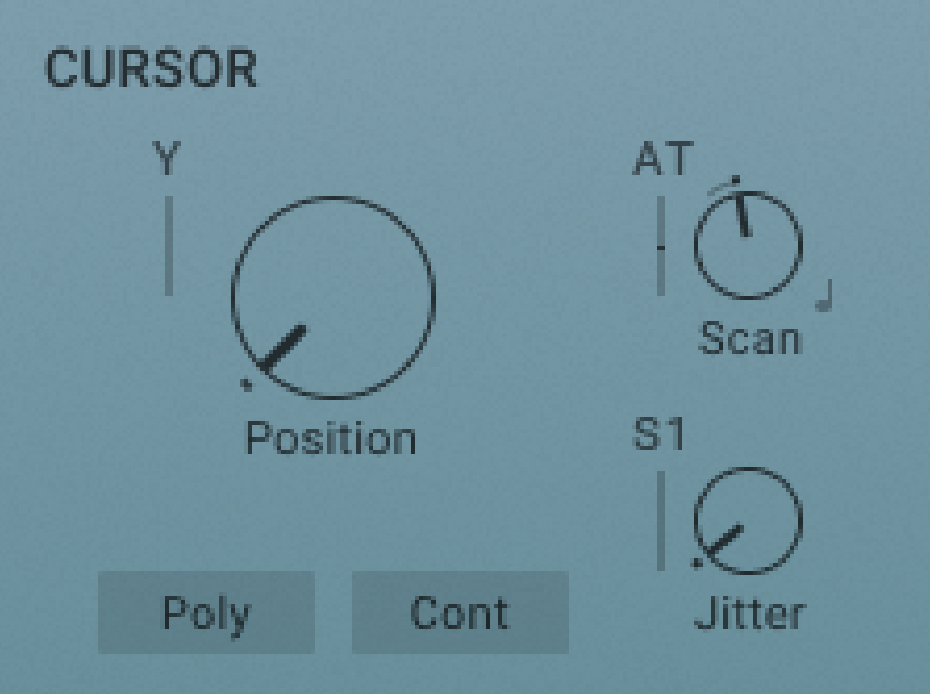 |
Grain page – Cursor.
Start: Adjusts the position of the Cursor in the source sample. The Cursor represents the read-out position of the grains. The position is set as percentage of the range between the left and right boundaries of the Cursor Range. For more information about the Cursor Range, refer to Range.
Poly: Activates Poly mode. When activated, each incoming MIDI note has its own dedicated Cursor. Therefore, each note can play grains from different read-out positions. When deactivated, all MIDI notes coming in are locked to the Cursor position of the first played note.
Free: Activates Free mode. When activated, the Cursor position moves freely within the Cursor boundaries and according to the Scan parameter once a note event has started. In this case, modulation applied to the Cursor boundaries or the Start do not change the Cursor position. When deactivated, modulation applied to related parameters during a note event change the Cursor position accordingly.
Scan: Adjusts the Cursor's speed and direction as it moves across the source sample during a note event. Negative values let it move backwards, positive values let it move forwards. Note that related parameters including Bounce Edges, Release direction (option above the envelope's R stage), Free mode and the Cursor Range boundaries interact with Scan.
Scan Sync: Activates Scan Sync mode, which synchronizes the scan speed to the host clock. When activated, Scan is set in musical note divisions relative to the host clock. The note duration is the time it takes the Cursor to move from the Start position to the sync anchor as set in the waveform display.
Jitter: Adjusts the range of random position changes applied to the Cursor position. The maximum value corresponds to 40% of the Cursor Range.
Range
This section contains controls related to the Cursor Range, which sets boundaries for the read-out position of the grain in the source sample. By setting the range you can generate grains only from a specific part of the source sample, or you can apply modulation to the controls to access different parts of the source sample dynamically. Since the source samples contain evolving and dynamic tone colors, you can use this to morph your sound in interesting ways.
The Range contains the following parameters:
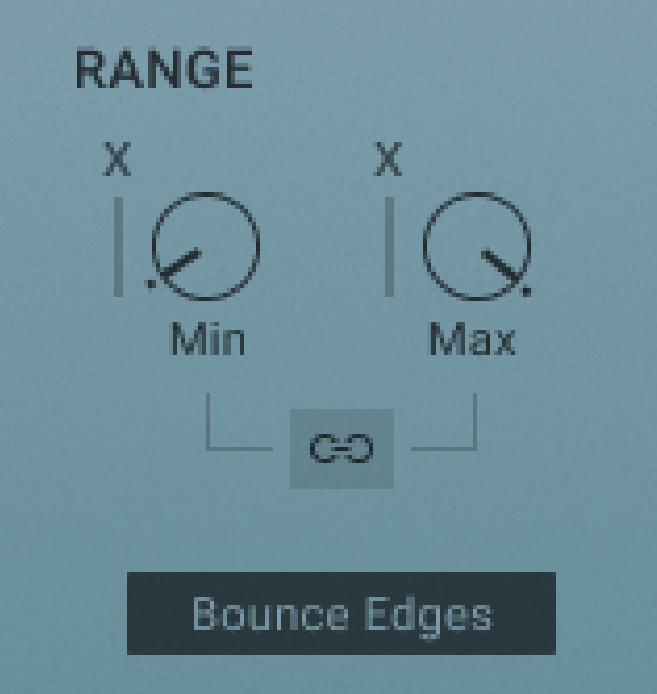 |
Grain page – Range.
Min: Adjusts the position of the Cursor Range's left boundary in the source sample.
Length/Max: Adjusts the position of the Cursor Range's right boundary in the source sample. When Grain Range Link is activated, the Length control adjusts the size of the Cursor Range. This way you can move the Cursor Range through the source sample at a fixed length using the Min control. When Grain Range Link is deactivated, the Max control adjusts the absolute position of the right boundary.
Grain Range Link: Sets the behavior of the Length/Max control. When activated, the control is switched to Length. When deactivated, the control is switched to Max (see Length/Max for more information).
Bounce Edges: Sets the Cursor's behavior when hitting the Cursor Range's boundaries. When activated, the Cursor rebounds from the position of the boundaries and continues to move in the opposite direction.
Note
When Free is activated in the CURSOR section, the Cursor can move past the boundary's position and bounces back into the Cursor range in a spring-like movement. When Free is deactivated, the Cursor cannot move past the boundary's position.
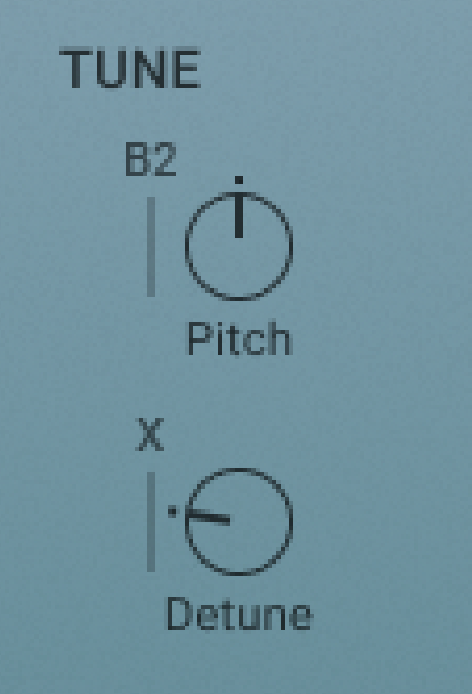
Tune
This section contains controls related to the pitch of the individual grains. By using the Pitch control, you can transpose grains in the range of four octaves. This way you can subtly detune the source sample or completely change its character. Applying modulation creates interesting vibrato effects. The Detune control randomizes the pitch of individual grains and can turn any sample source into an otherworldly sound effect.
The Tune section contains the following parameters:
 |
Grain page – Tune.
Pitch: Transposes the grains in cents from -2400 cents (-24 semitones, or -2 octaves) to +2400 cent (+24 semitones, or +2 octaves).
Detune: Adjusts the range of random pitch deviations added to each grain in one cent intervals from 0 to 50 cents.
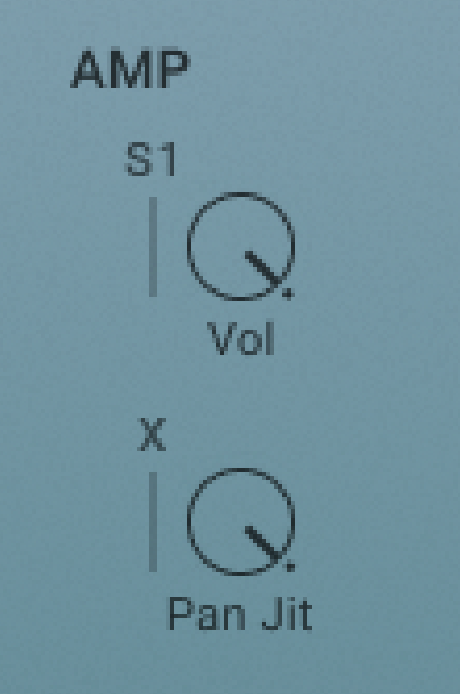
Amp
This section contains controls related to the volume level of the individual grains. Using Vol you can set a suitable level for the output signal going into the Grain Effects, or apply modulation for tremolo effects. Pan Jit randomizes the stereo position of grains and can be used to create a wide and lively stereo image.
The Amp contains the following parameters:
 |
Grain page – Amp.
Vol: Adjusts the volume level of the grains.
Pan Jit: Adjusts the amount of random panning introduced to each individual grain.
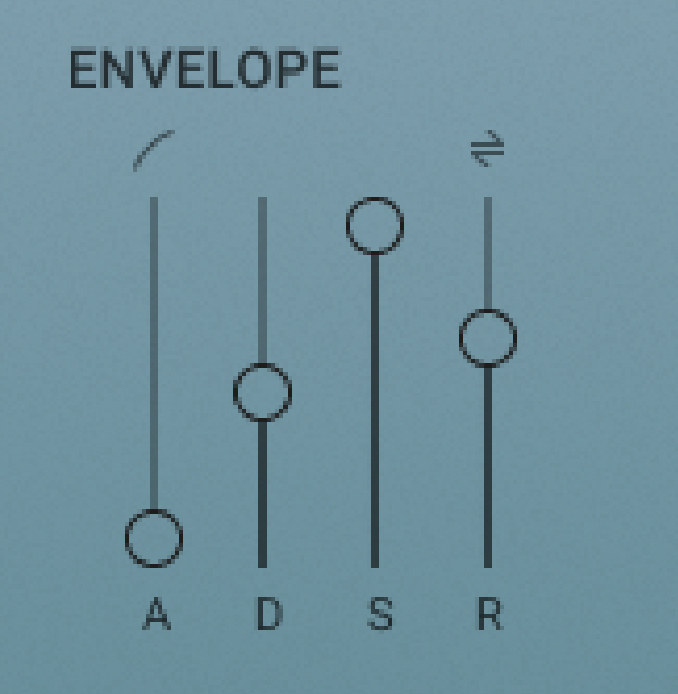
Envelope
This section contains controls related to the Grain layer's volume envelope. It is triggered by incoming MIDI notes and used to dynamically control the amplitude of the Grain layer's output signal. By adjusting the envelope stages, you can define the overall character of the sound from plucked and percussive to bowed and sustained. The additional Release Direction setting is used to define the behavior of the Cursor once a note is released, allowing you to fine-tune the release behavior of the sound.
The Envelope contains the following parameters:
 |
Grain page – Envelope.
Attack Curve: Adjusts the shape of the envelope’s attack stage from an exponential response with a slow onset (-100%) to a logarithmic response with a fast onset (100%). At center position (0%), the response is linear, making the attack stage rise evenly for its entire duration.
Release Direction: Sets the direction of the Cursor's movement during the release stage. When set to Continue, the Cursor maintains its direction. When set to Force Cursor Left, the Cursor moves to the left once the MIDI note is released. When set to Force Cursor Right, the Cursor moves to the right.
Attack (A): Adjusts the duration of the envelope’s attack stage, which is the time the envelope takes to rise from zero to peak level.
Decay (D): Adjusts the duration of the envelope’s decay stage, which is the time the envelope takes to fall from peak to sustain level.
Sustain (S): Adjusts the level of the envelope’s sustain stage, at which the envelope stays as long as a note is held.
Release (R): Adjusts the duration of the envelope's release stage, which is the time the envelope takes to fall from the sustain level to zero.